As Oracle continues its journey toward being the most inter-operable cloud platform out there, we recently released support for accessing your Amazon Web Services (AWS) resources (such as S3 object storage) from Autonomous Database on Shared Infrastructure (ADB-S) using AWS IAM policies and roles, instead of dealing with security credentials containing secret access keys. This makes security simpler and better, allowing you to limit access to AWS resources by roles granted to a database, rather than individual user credentials, as well as taking away any risk of exposing secret access keys in a script.
Below I walk through a start-to-finish example and explanation of how you may set up such a role Amazon Resource Name (ARN) based credential for your ADB instance. Contrast this with my previous post showing how you may access the AWS S3 object storage from ADB-S using a secret access key; This method has a few additional steps, however, these are initial, one-time steps that can then used across several different databases and database users. Follow the linked URLs, in this post, to the relevant documentation if you would like to learn more about each topic.
Note: If you already have an AWS role containing a policy to grant access to your AWS resources, you may skip Steps 1 and 2 and jump directly to Step 3.
I assume below that you have an Autonomous Database instance provisioned. If not, and you are starting from scratch, follow this ADB Quickstart lab to help you get provisioned and familiar with the database console.
Step 1: Create an AWS Policy to allow access to the required AWS Resources
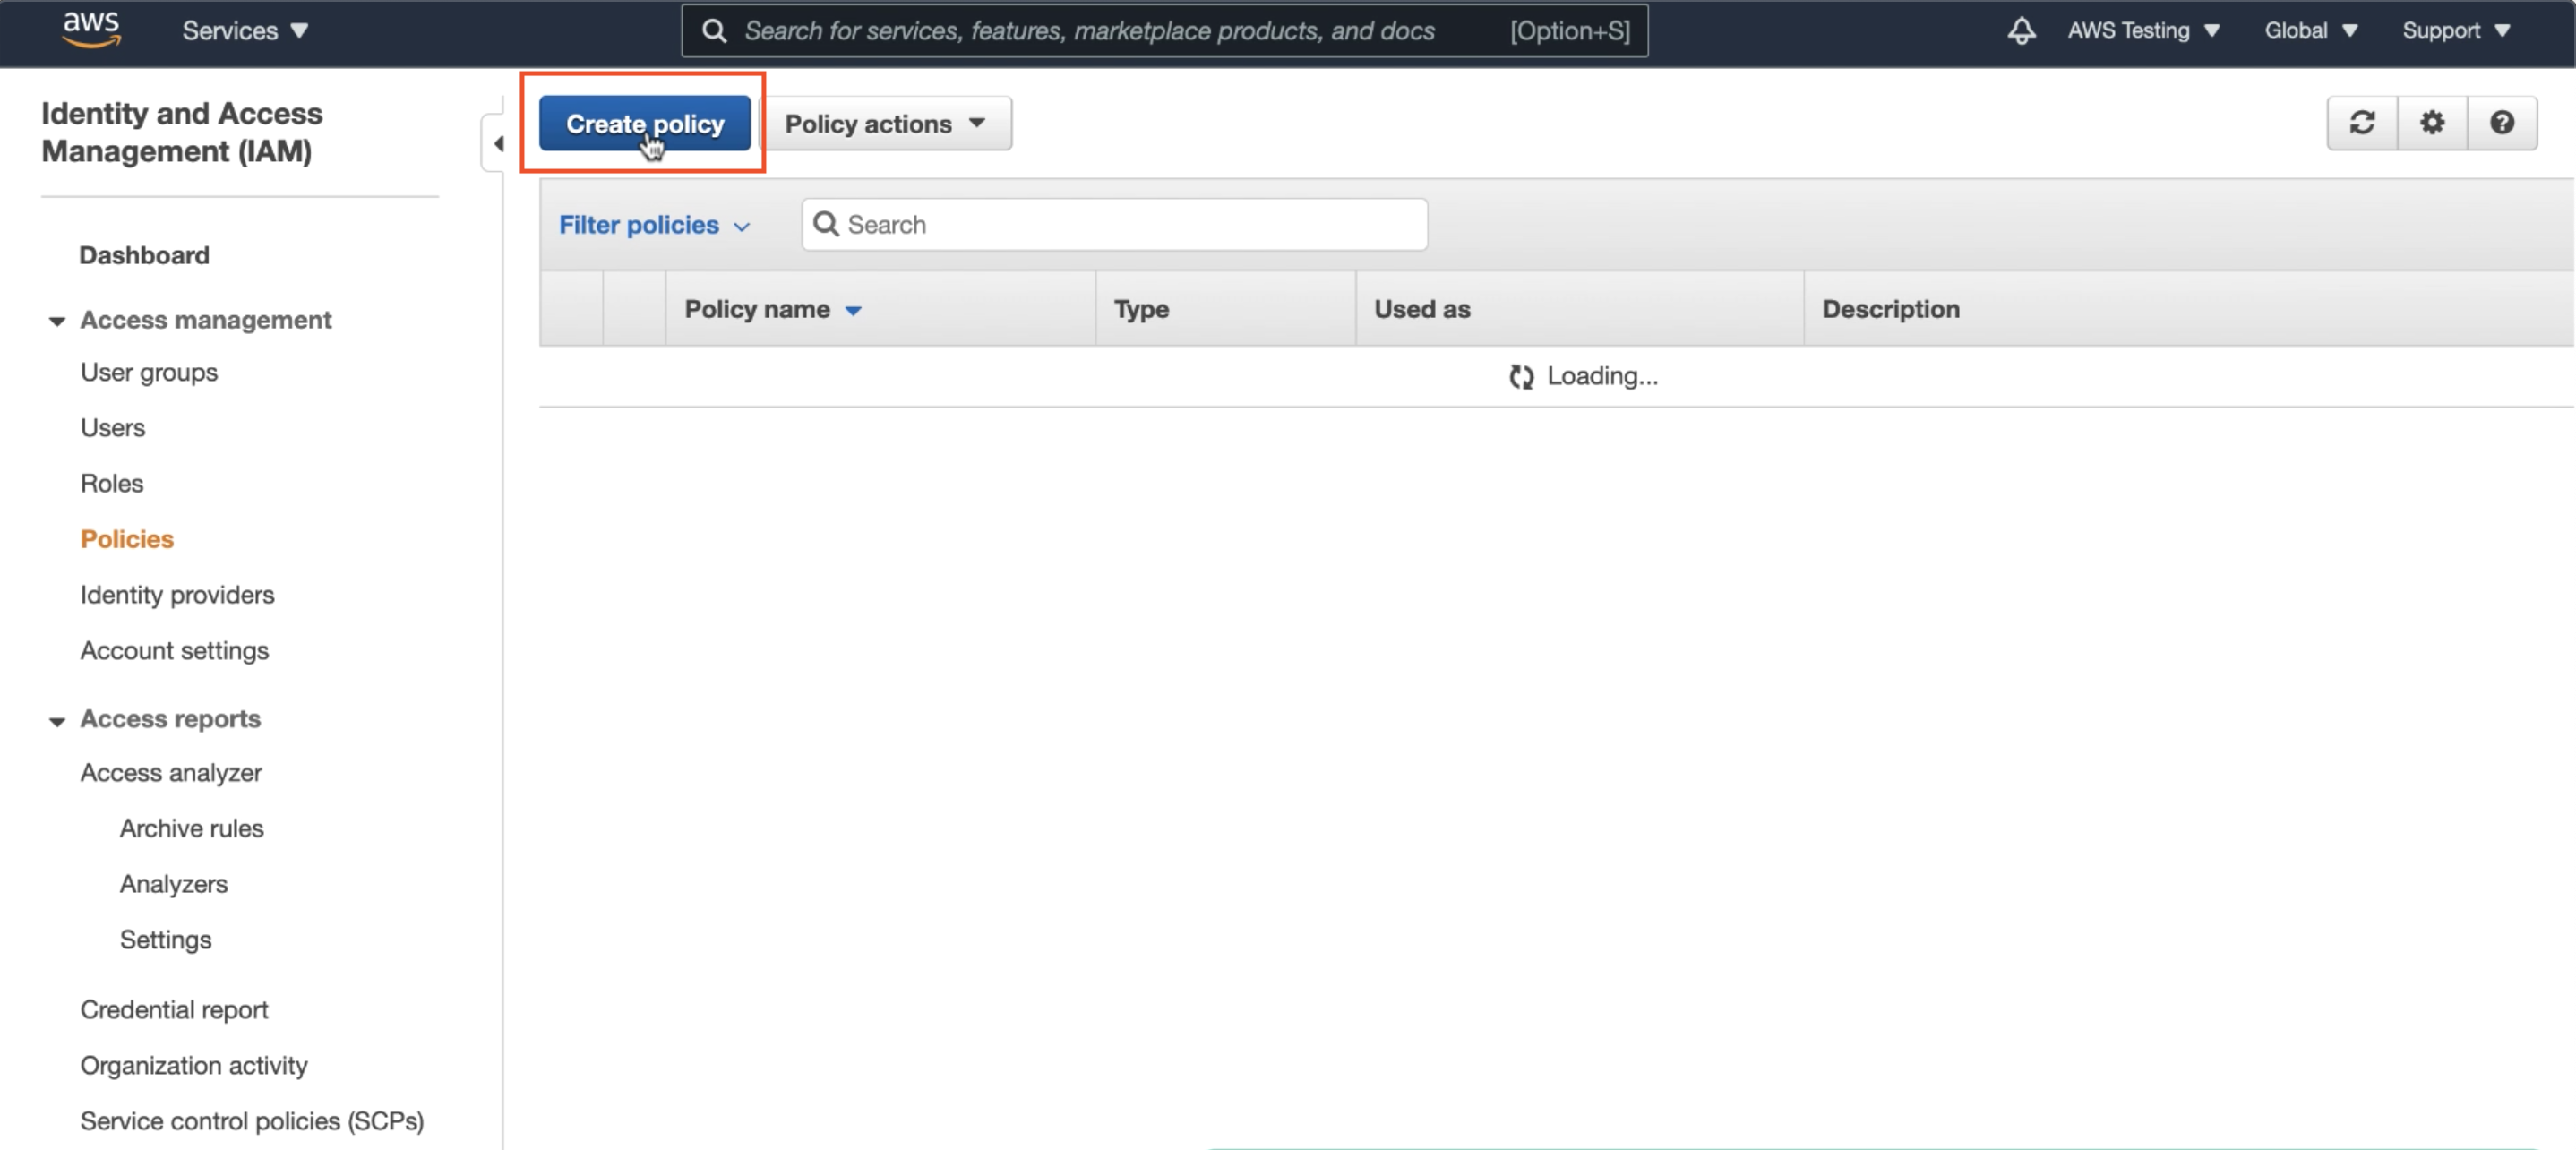
In your AWS console, your account administrator must define a policy that allows access to AWS resources (such as an S3 bucket). Navigate to Identity and Access Management (IAM) and hit Create Policy.
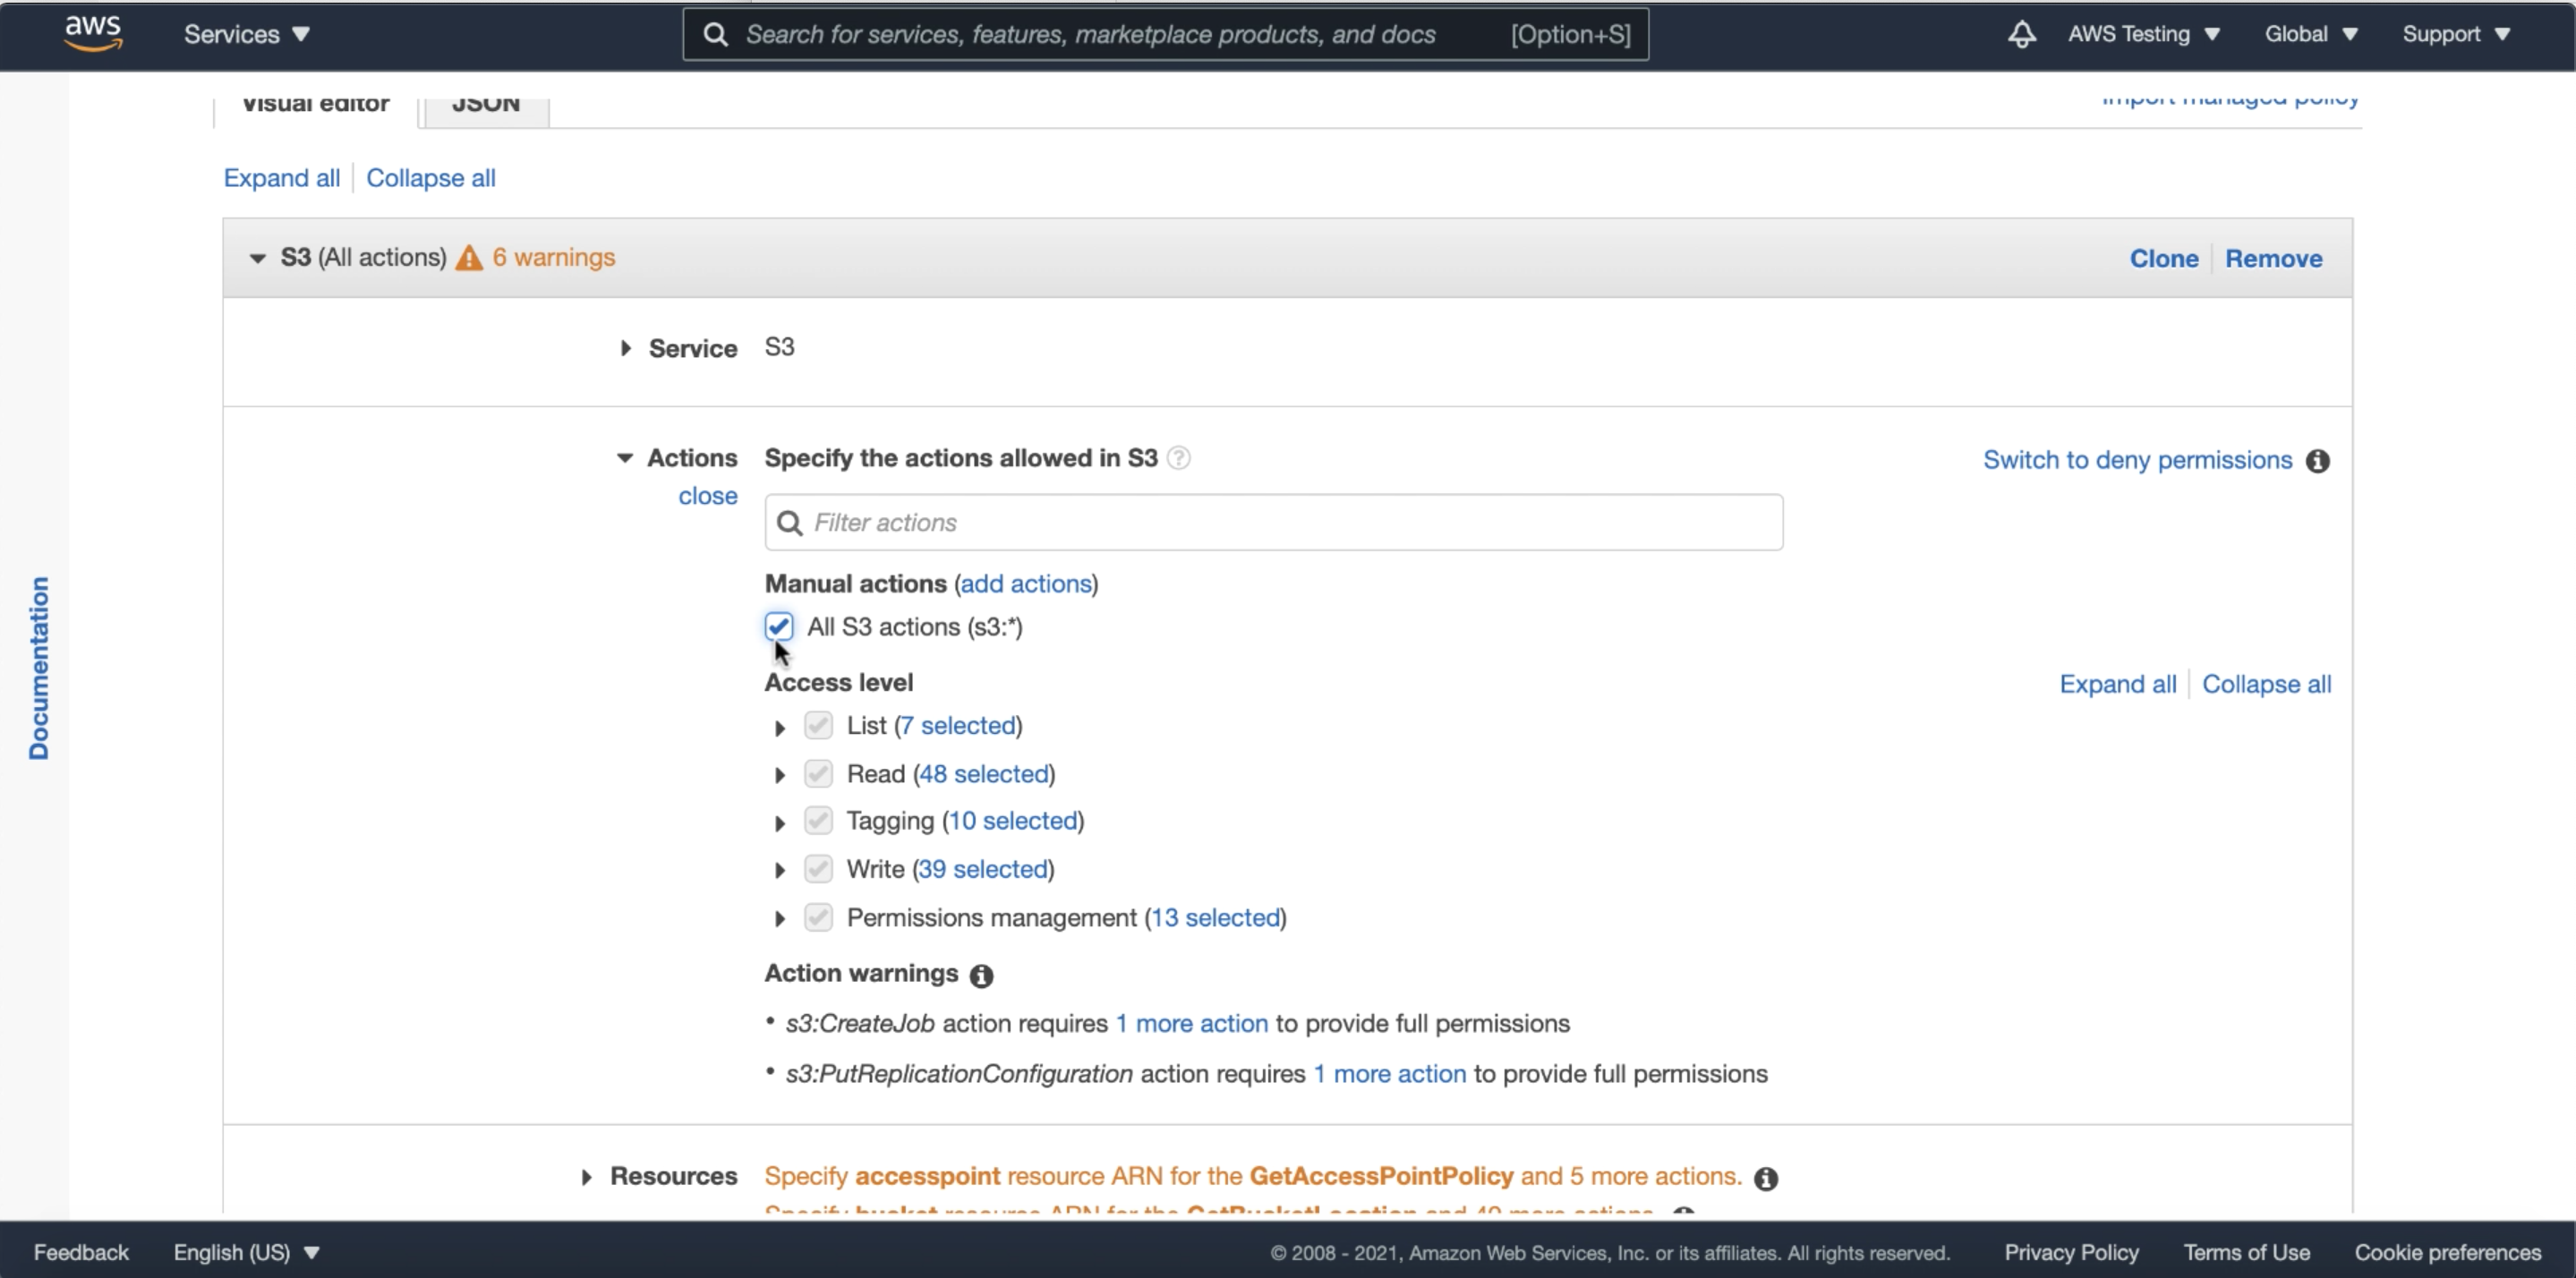
Select the AWS resources to be granted access to as well as the access level. In this example, I am granting All Access to the S3 object storage in the policy.
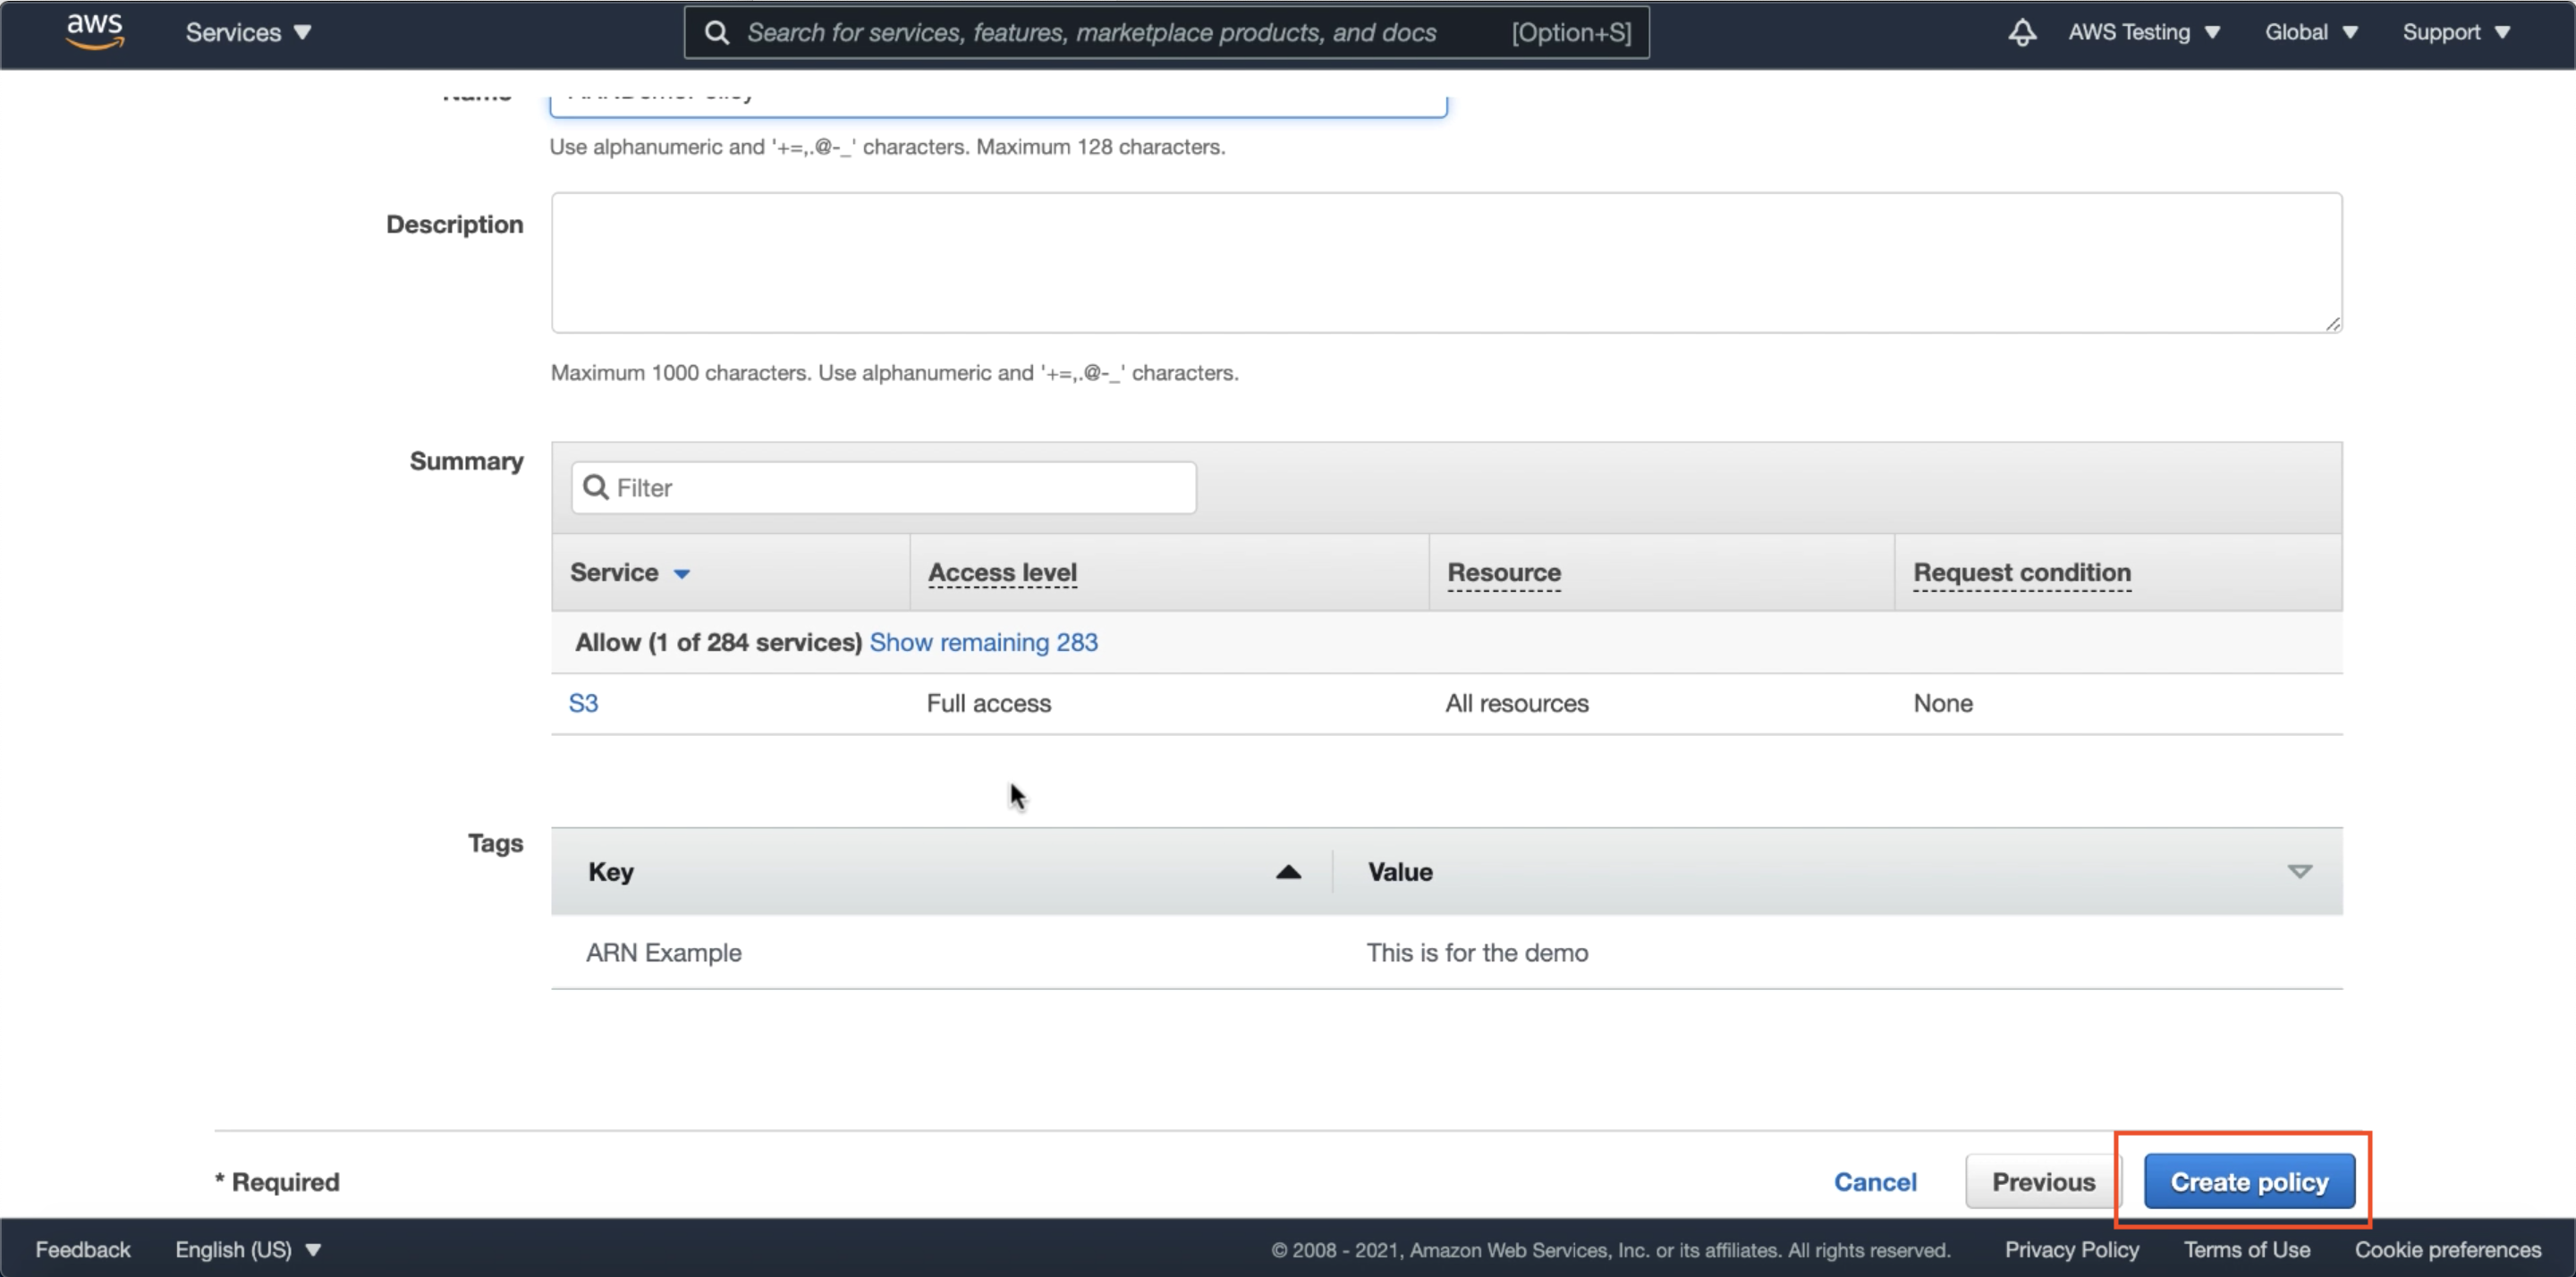
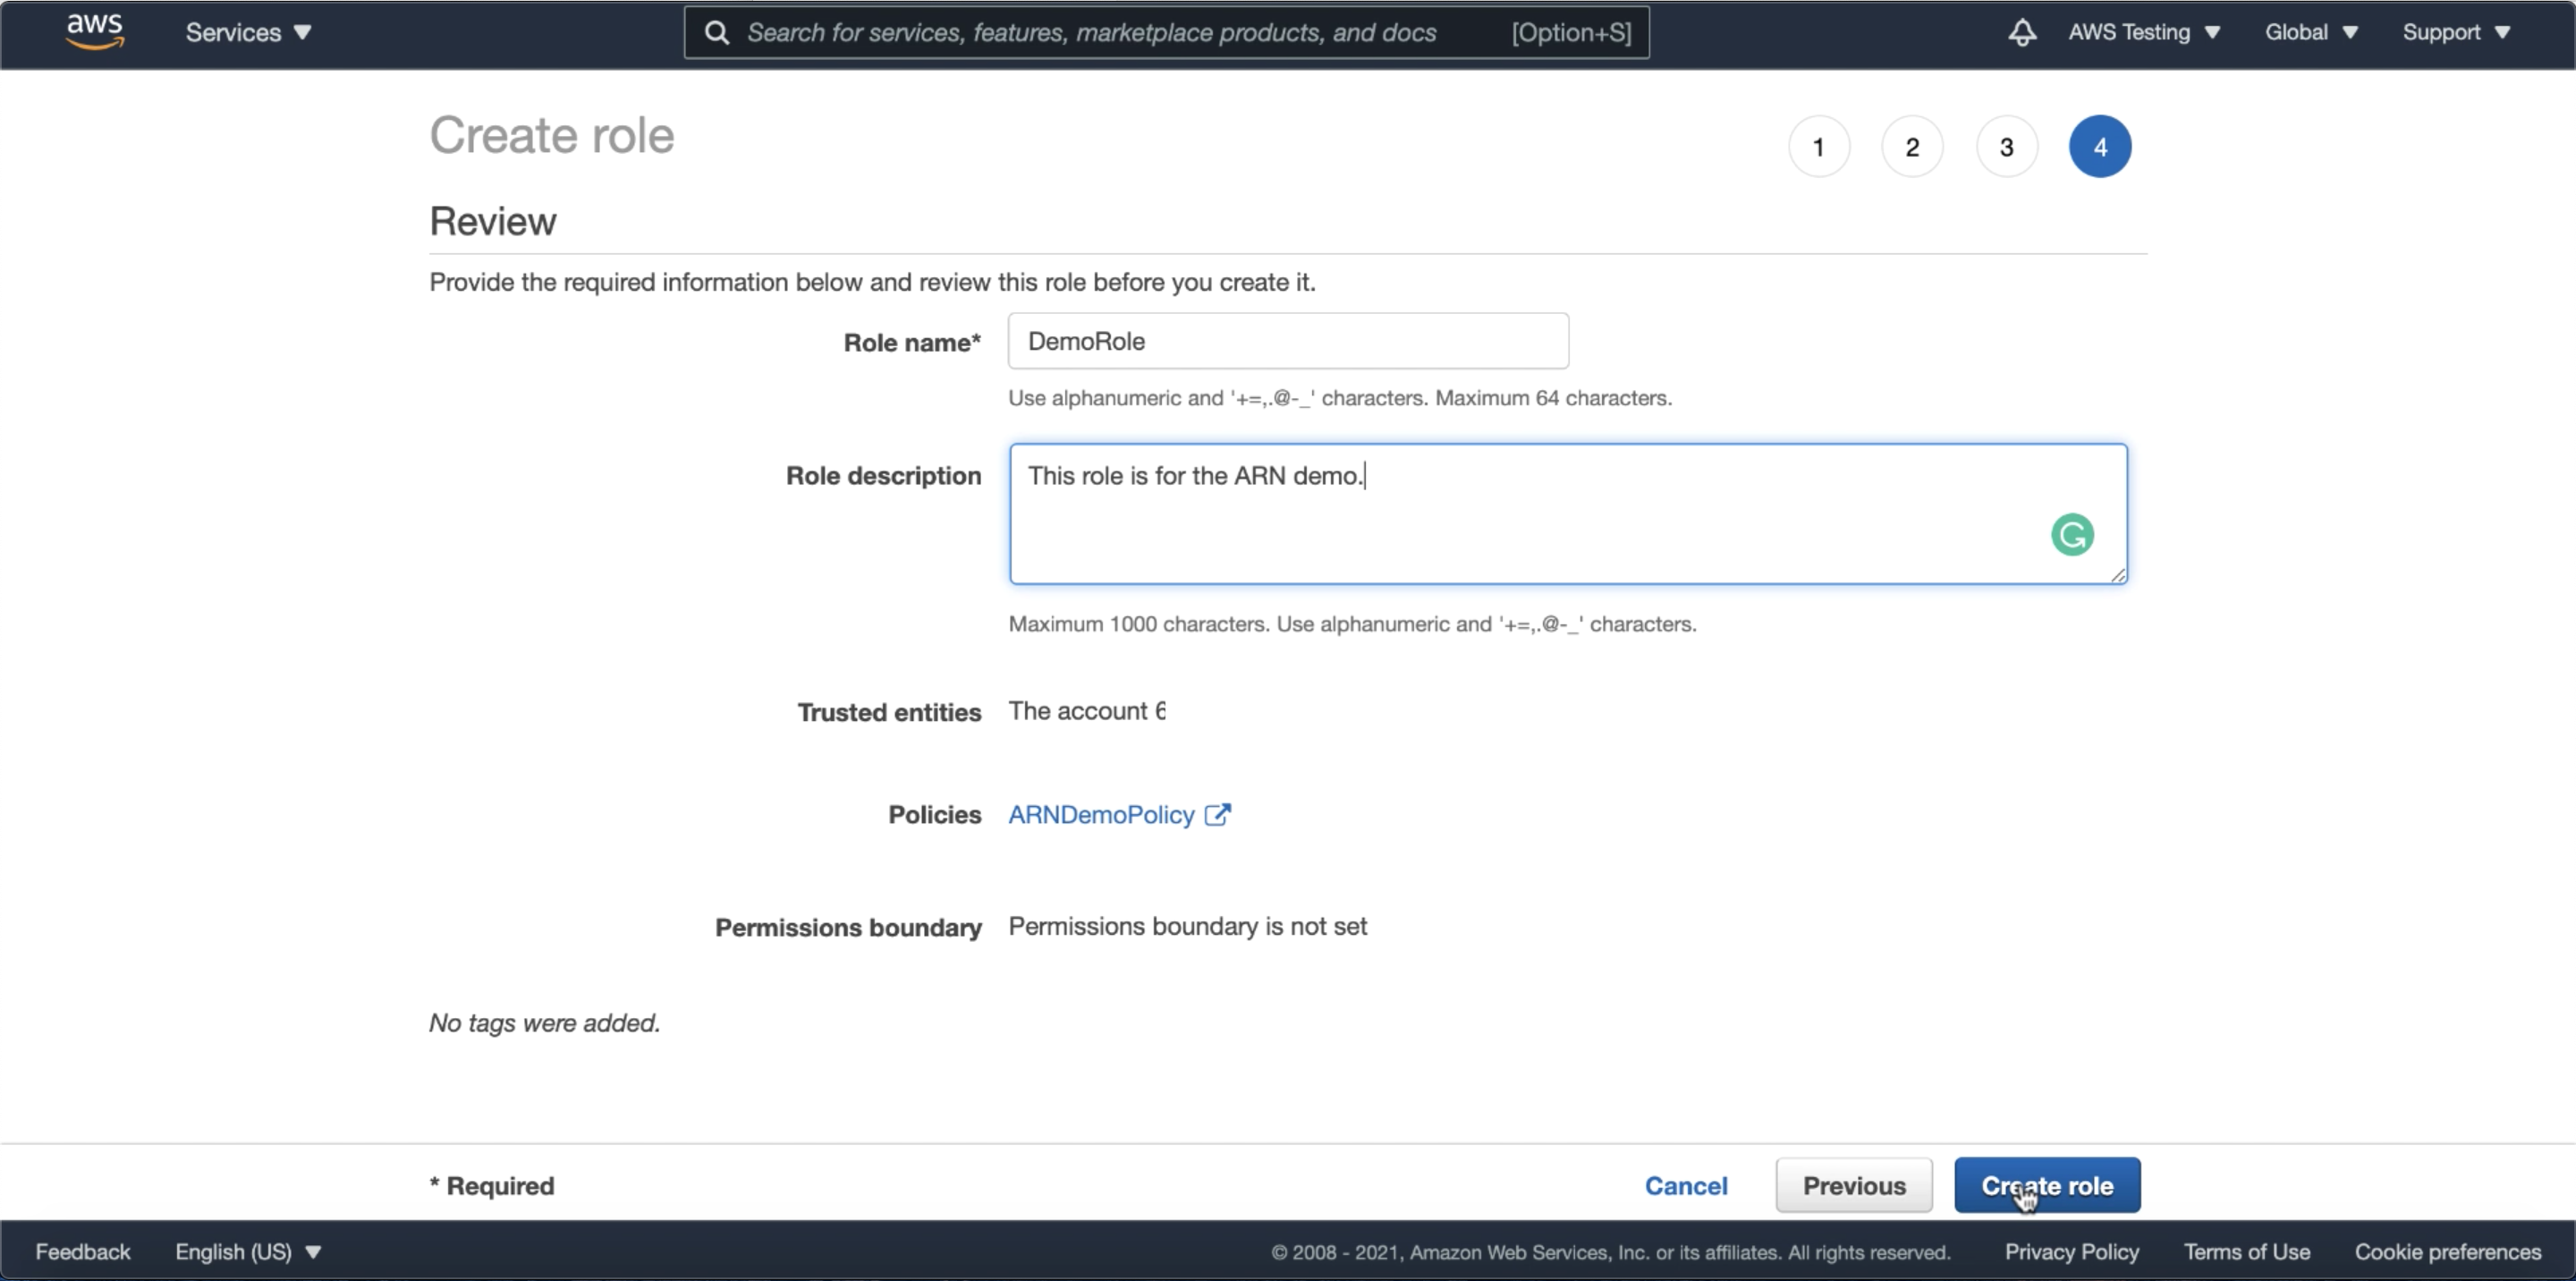
Follow the wizard and finish up with a name and description of your policy. In my example, I’ve named the policy ARNDemoPolicy. Note that this policy can be granted to several different roles, if required.
Step 2: Create an AWS Role containing the policy
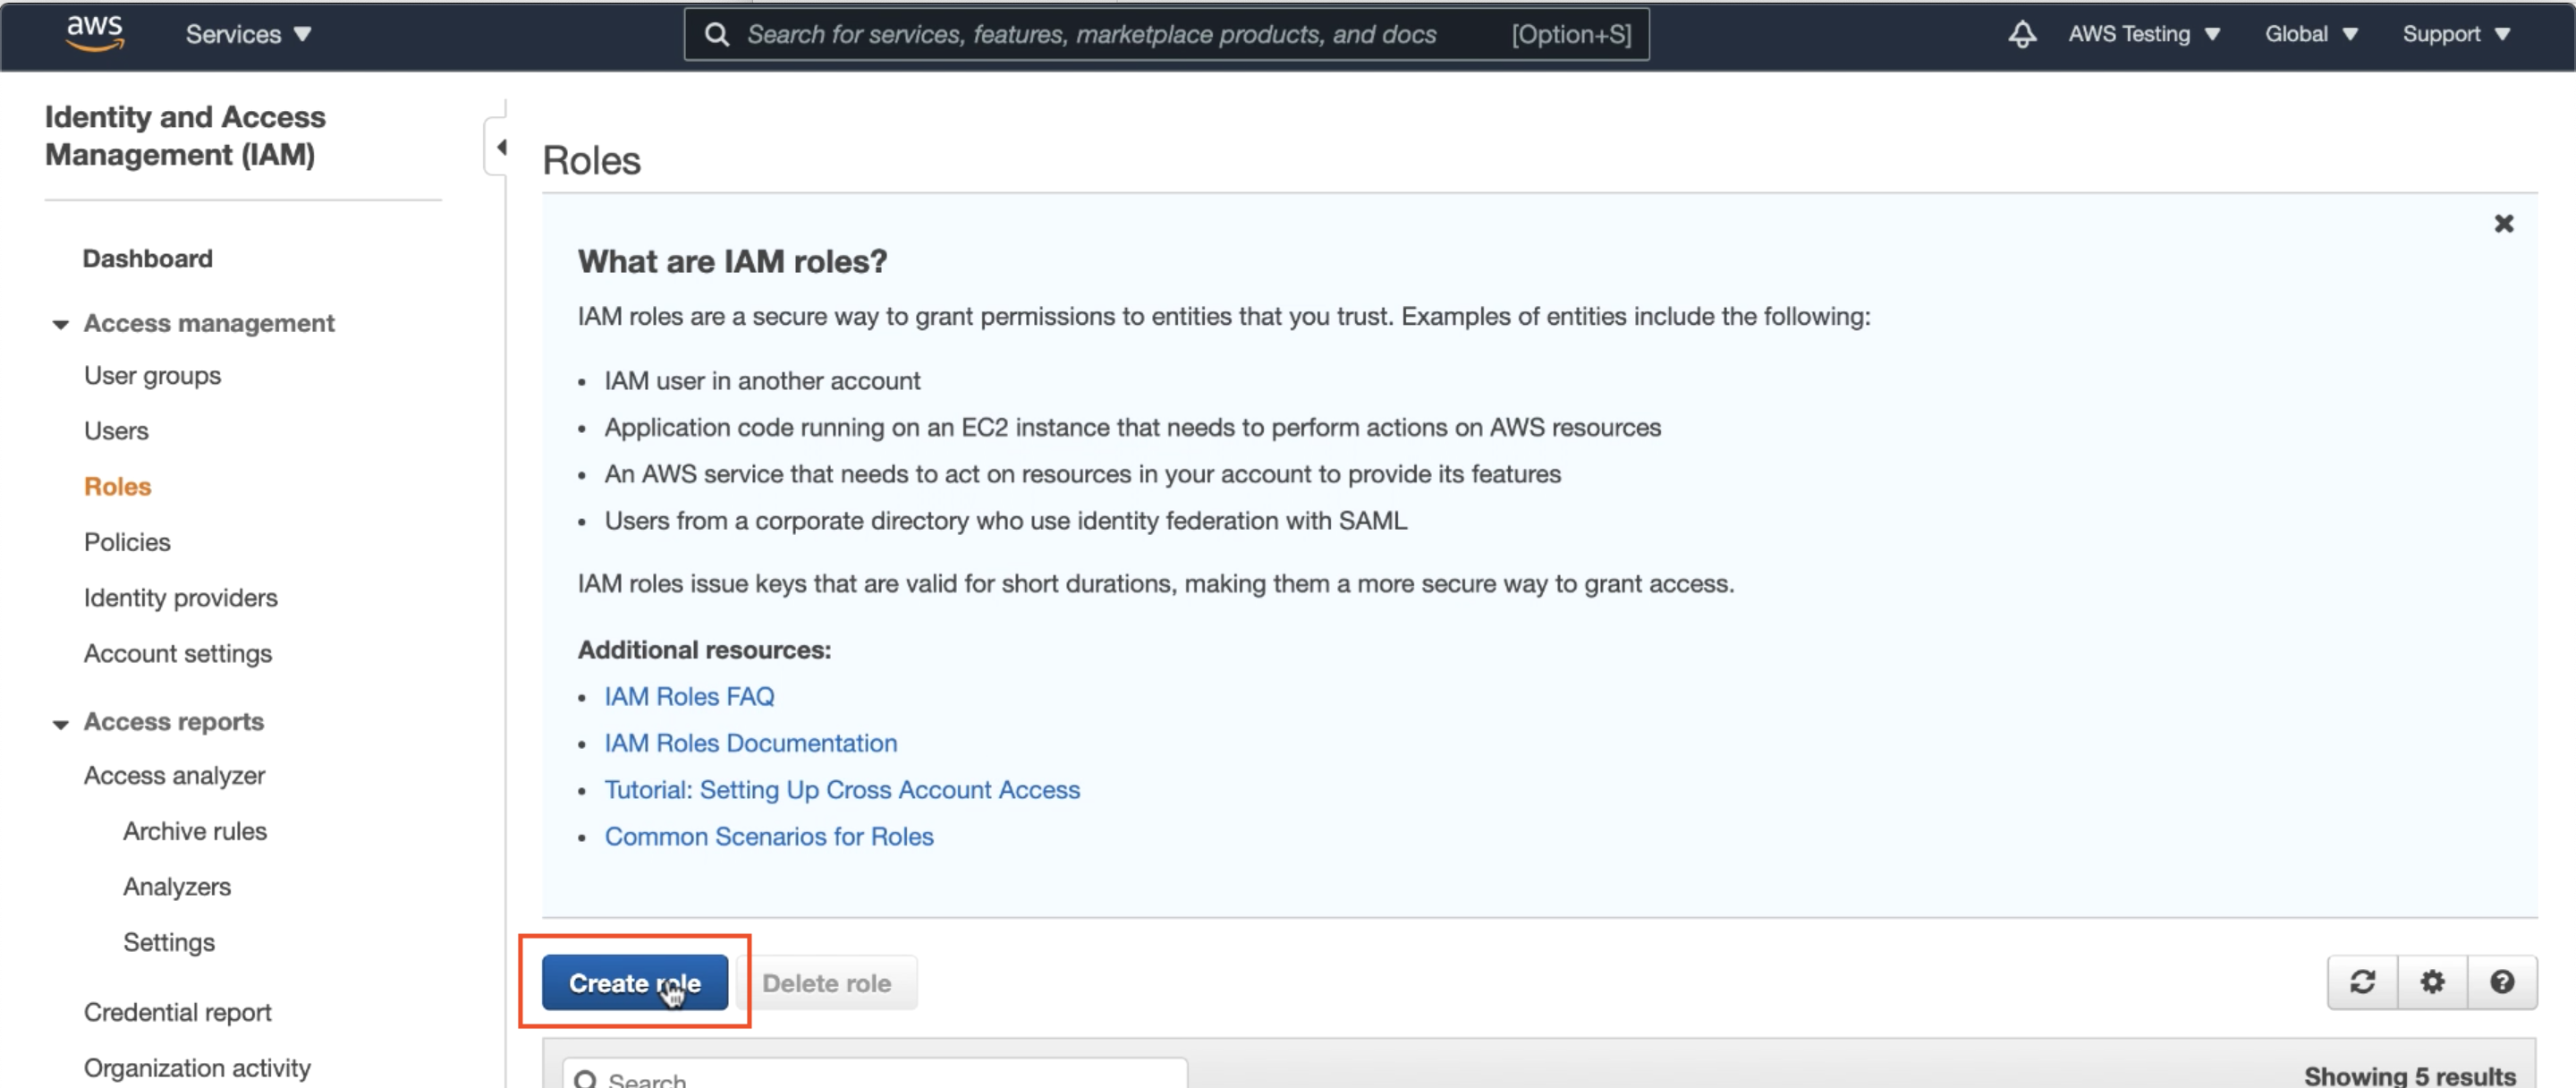
Next, we will create an AWS Role, which is a secure grouping containing the policy(s) that will grant the necessary access to your AWS resources. Once again under IAM, select Create Role.
Since we will be using our new role to trust our Oracle Cloud ADB instances (which is third-party to the AWS Cloud) select Another AWS Account. We will be updating the User Account ID and External IDs with Oracle Cloud Infrastructure (OCI) values in Step 3; for now, simply use your existing AWS Account ID as a placeholder (which you can find as shown in the screen below)
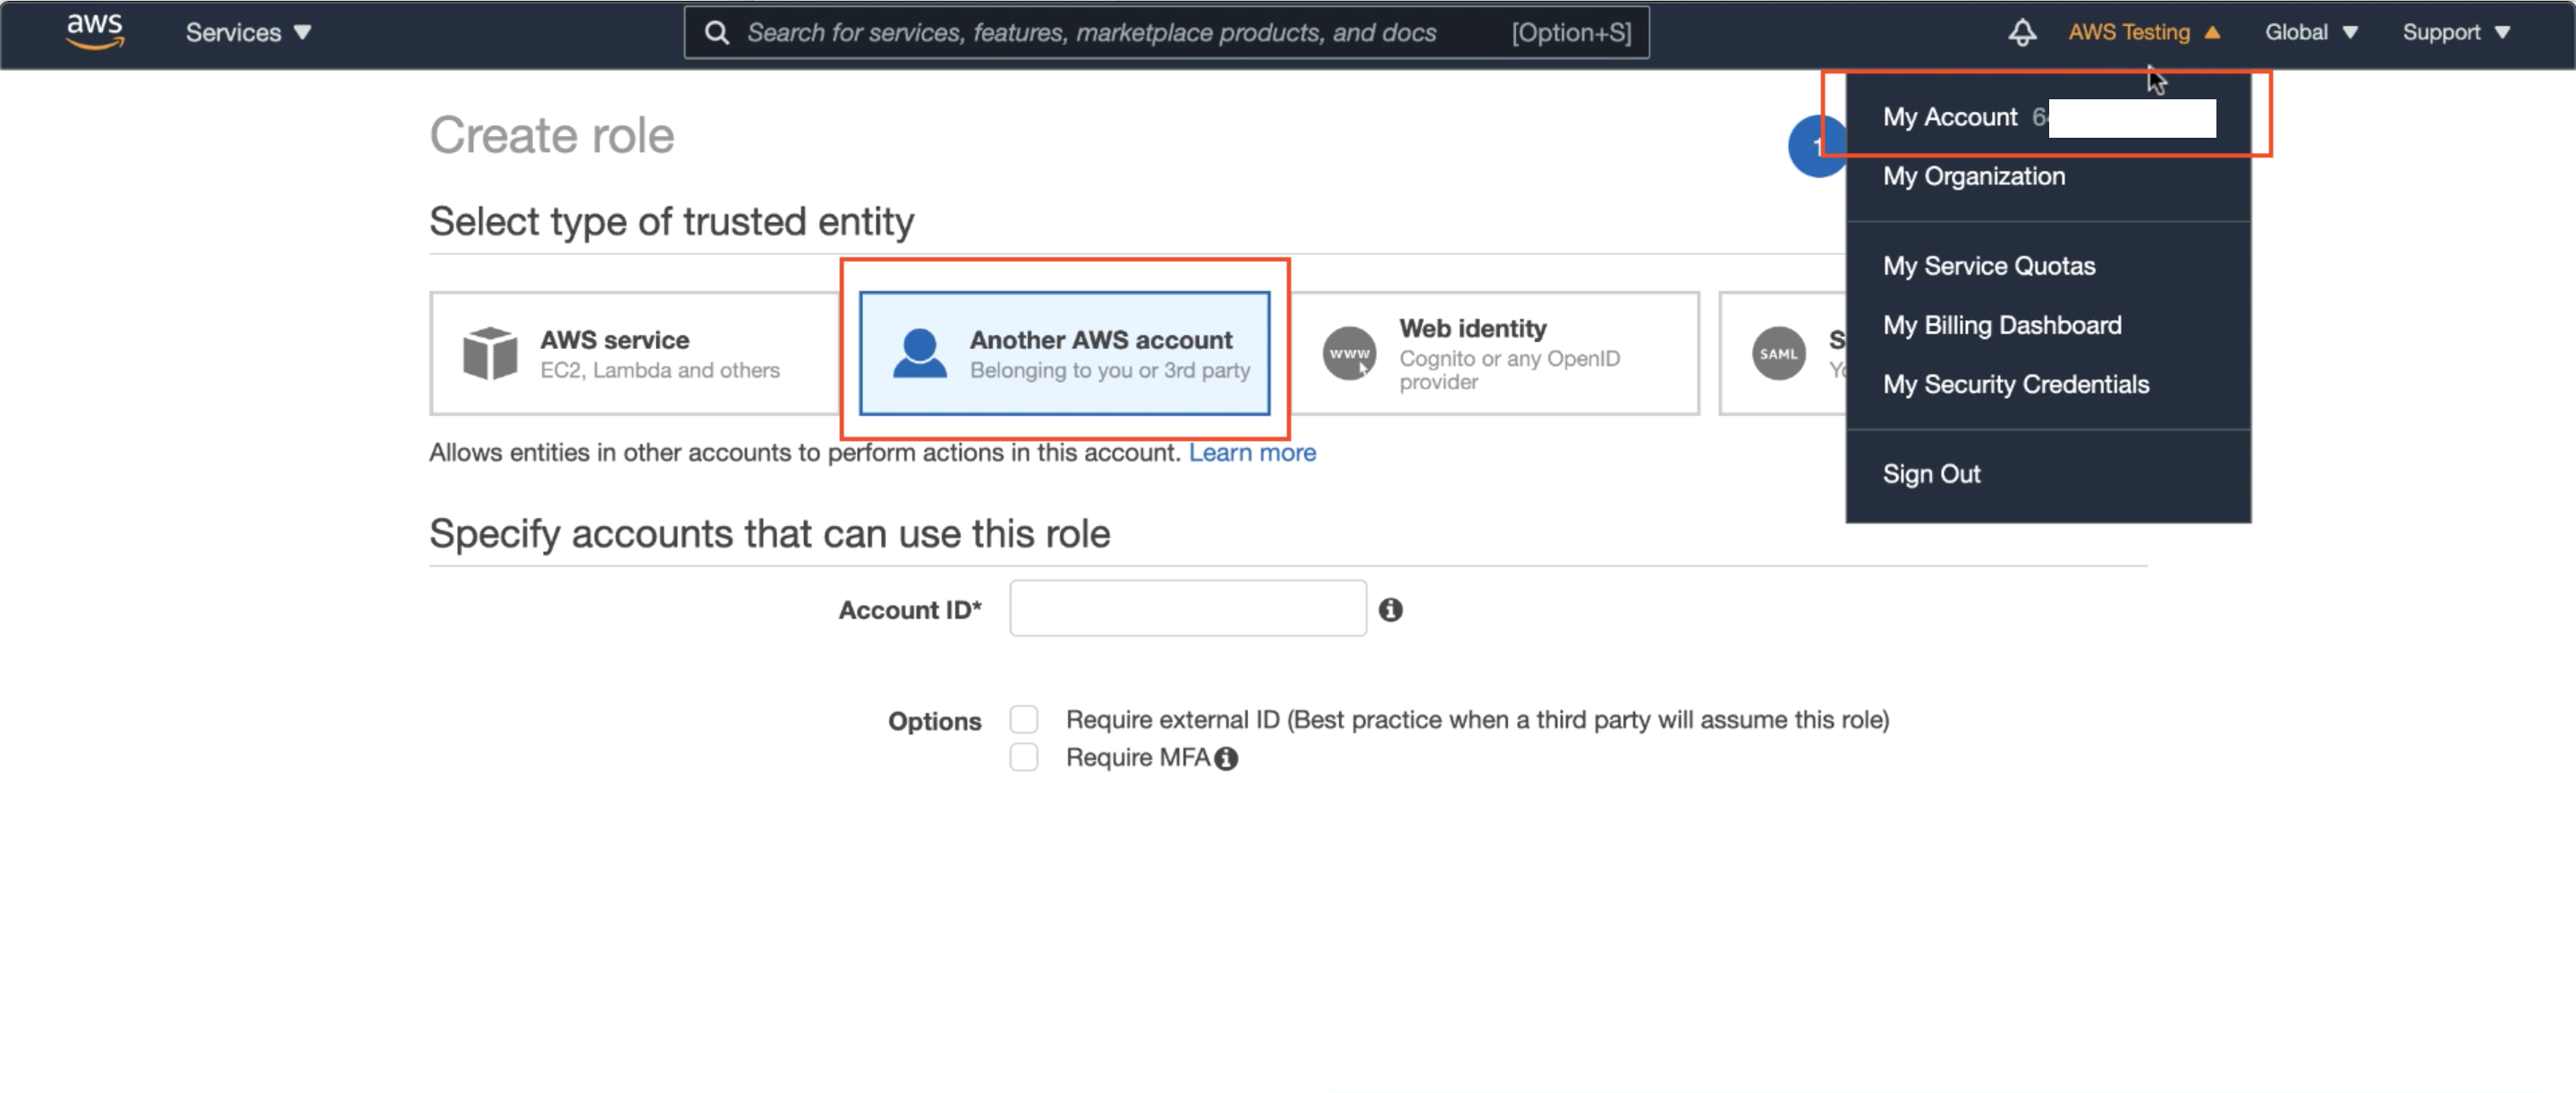
As well as any placeholder value for an External ID. Here, I’ve used 0000.
Follow along the wizard. Select the policy(s) you would like to include in your role (I include our created ARNDemoPolicy from Step 1) and then click Create Role.
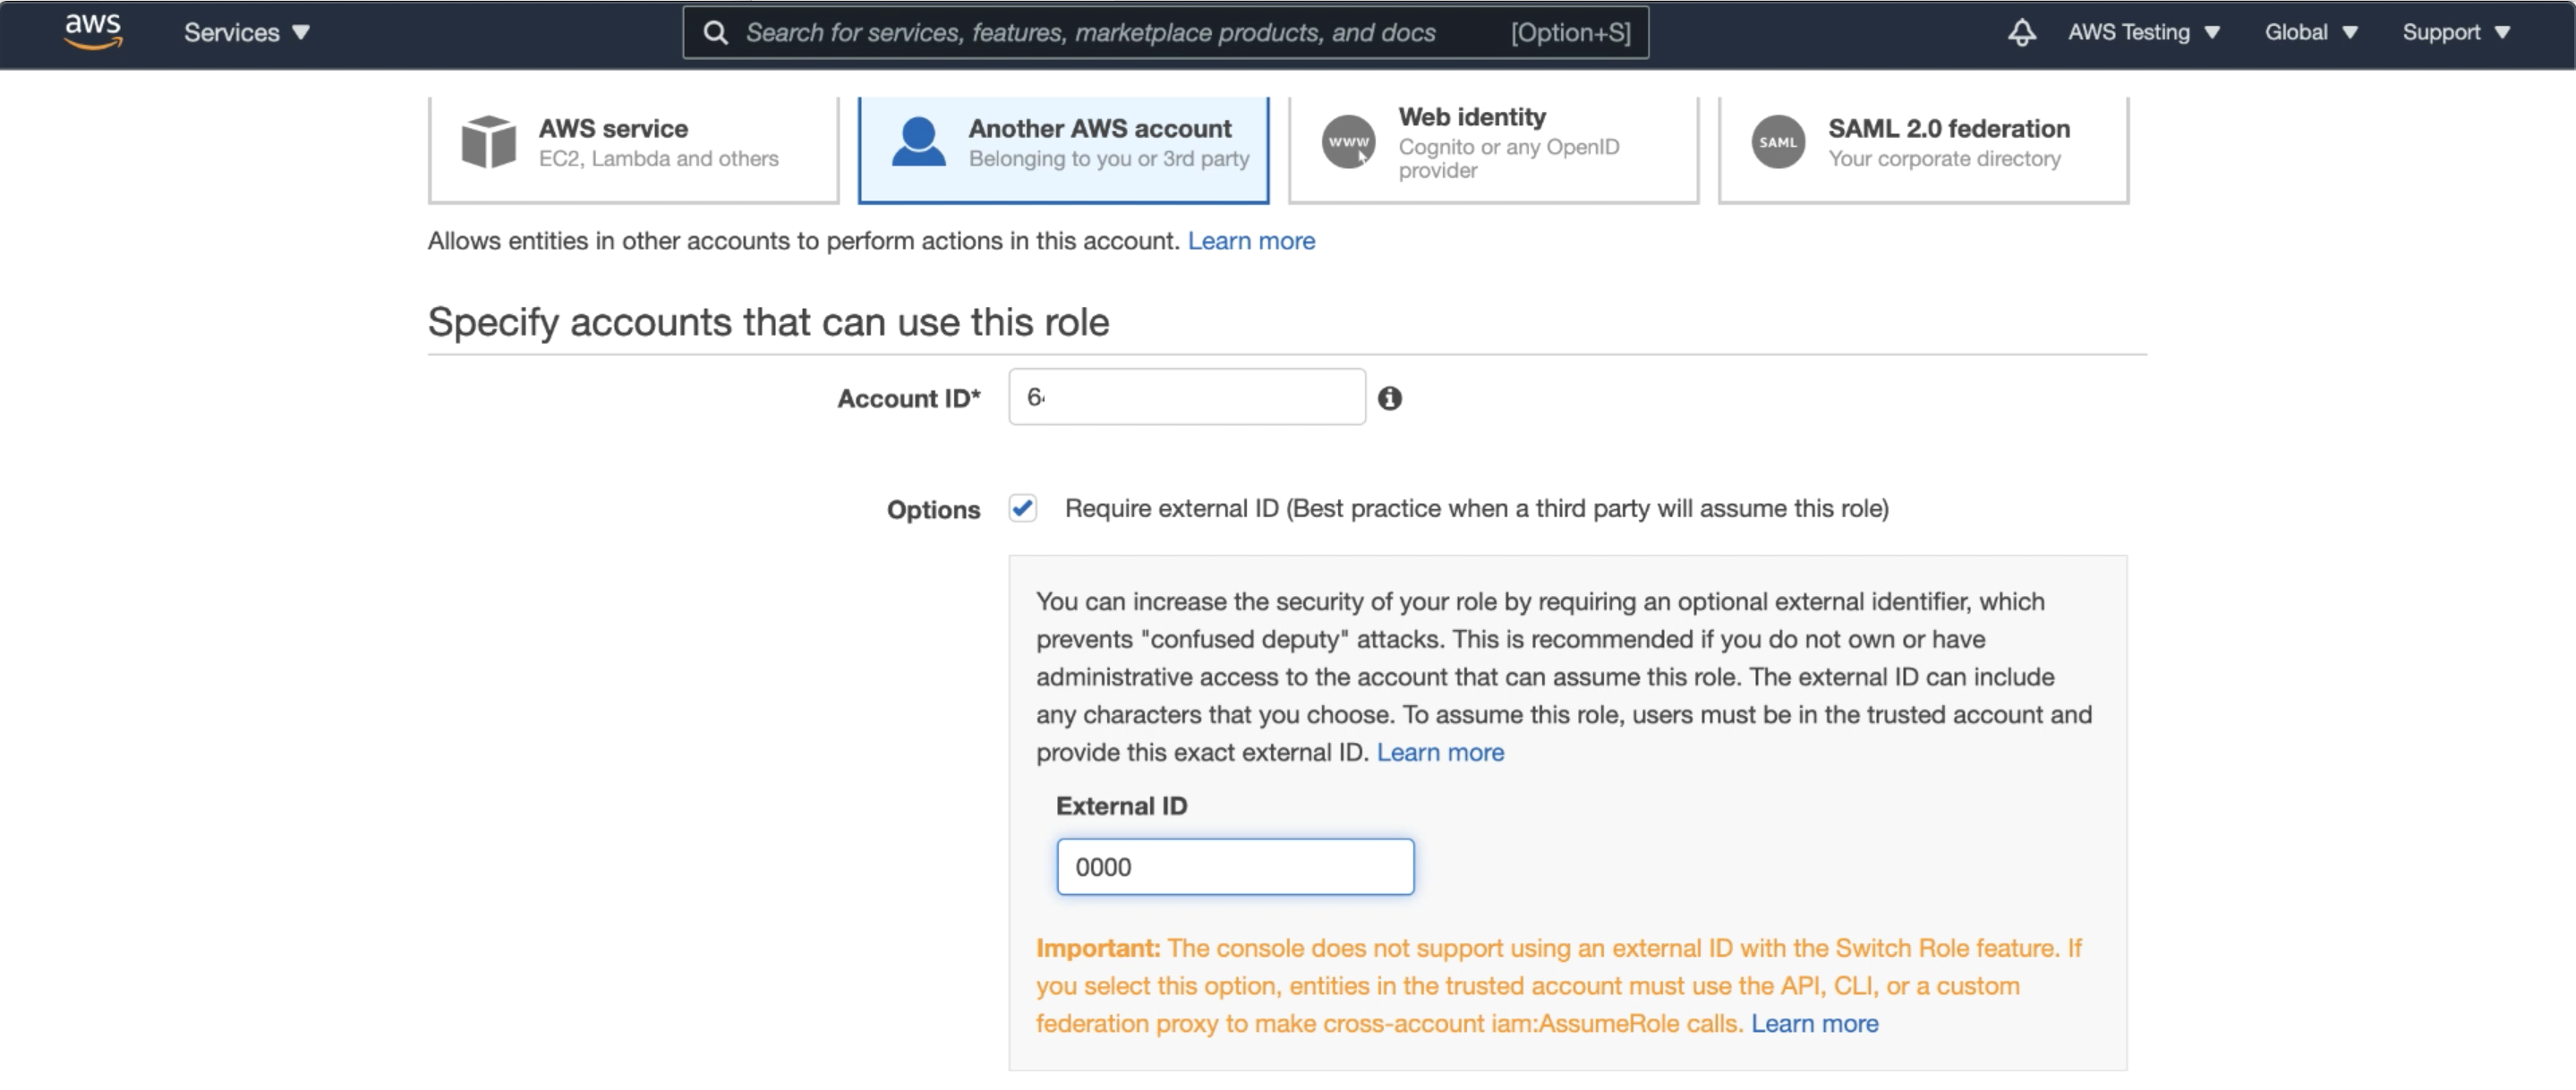
Step 3: Edit AWS Role’s Trust Relationship to include Oracle’s User ARN, and an External ID for additional security
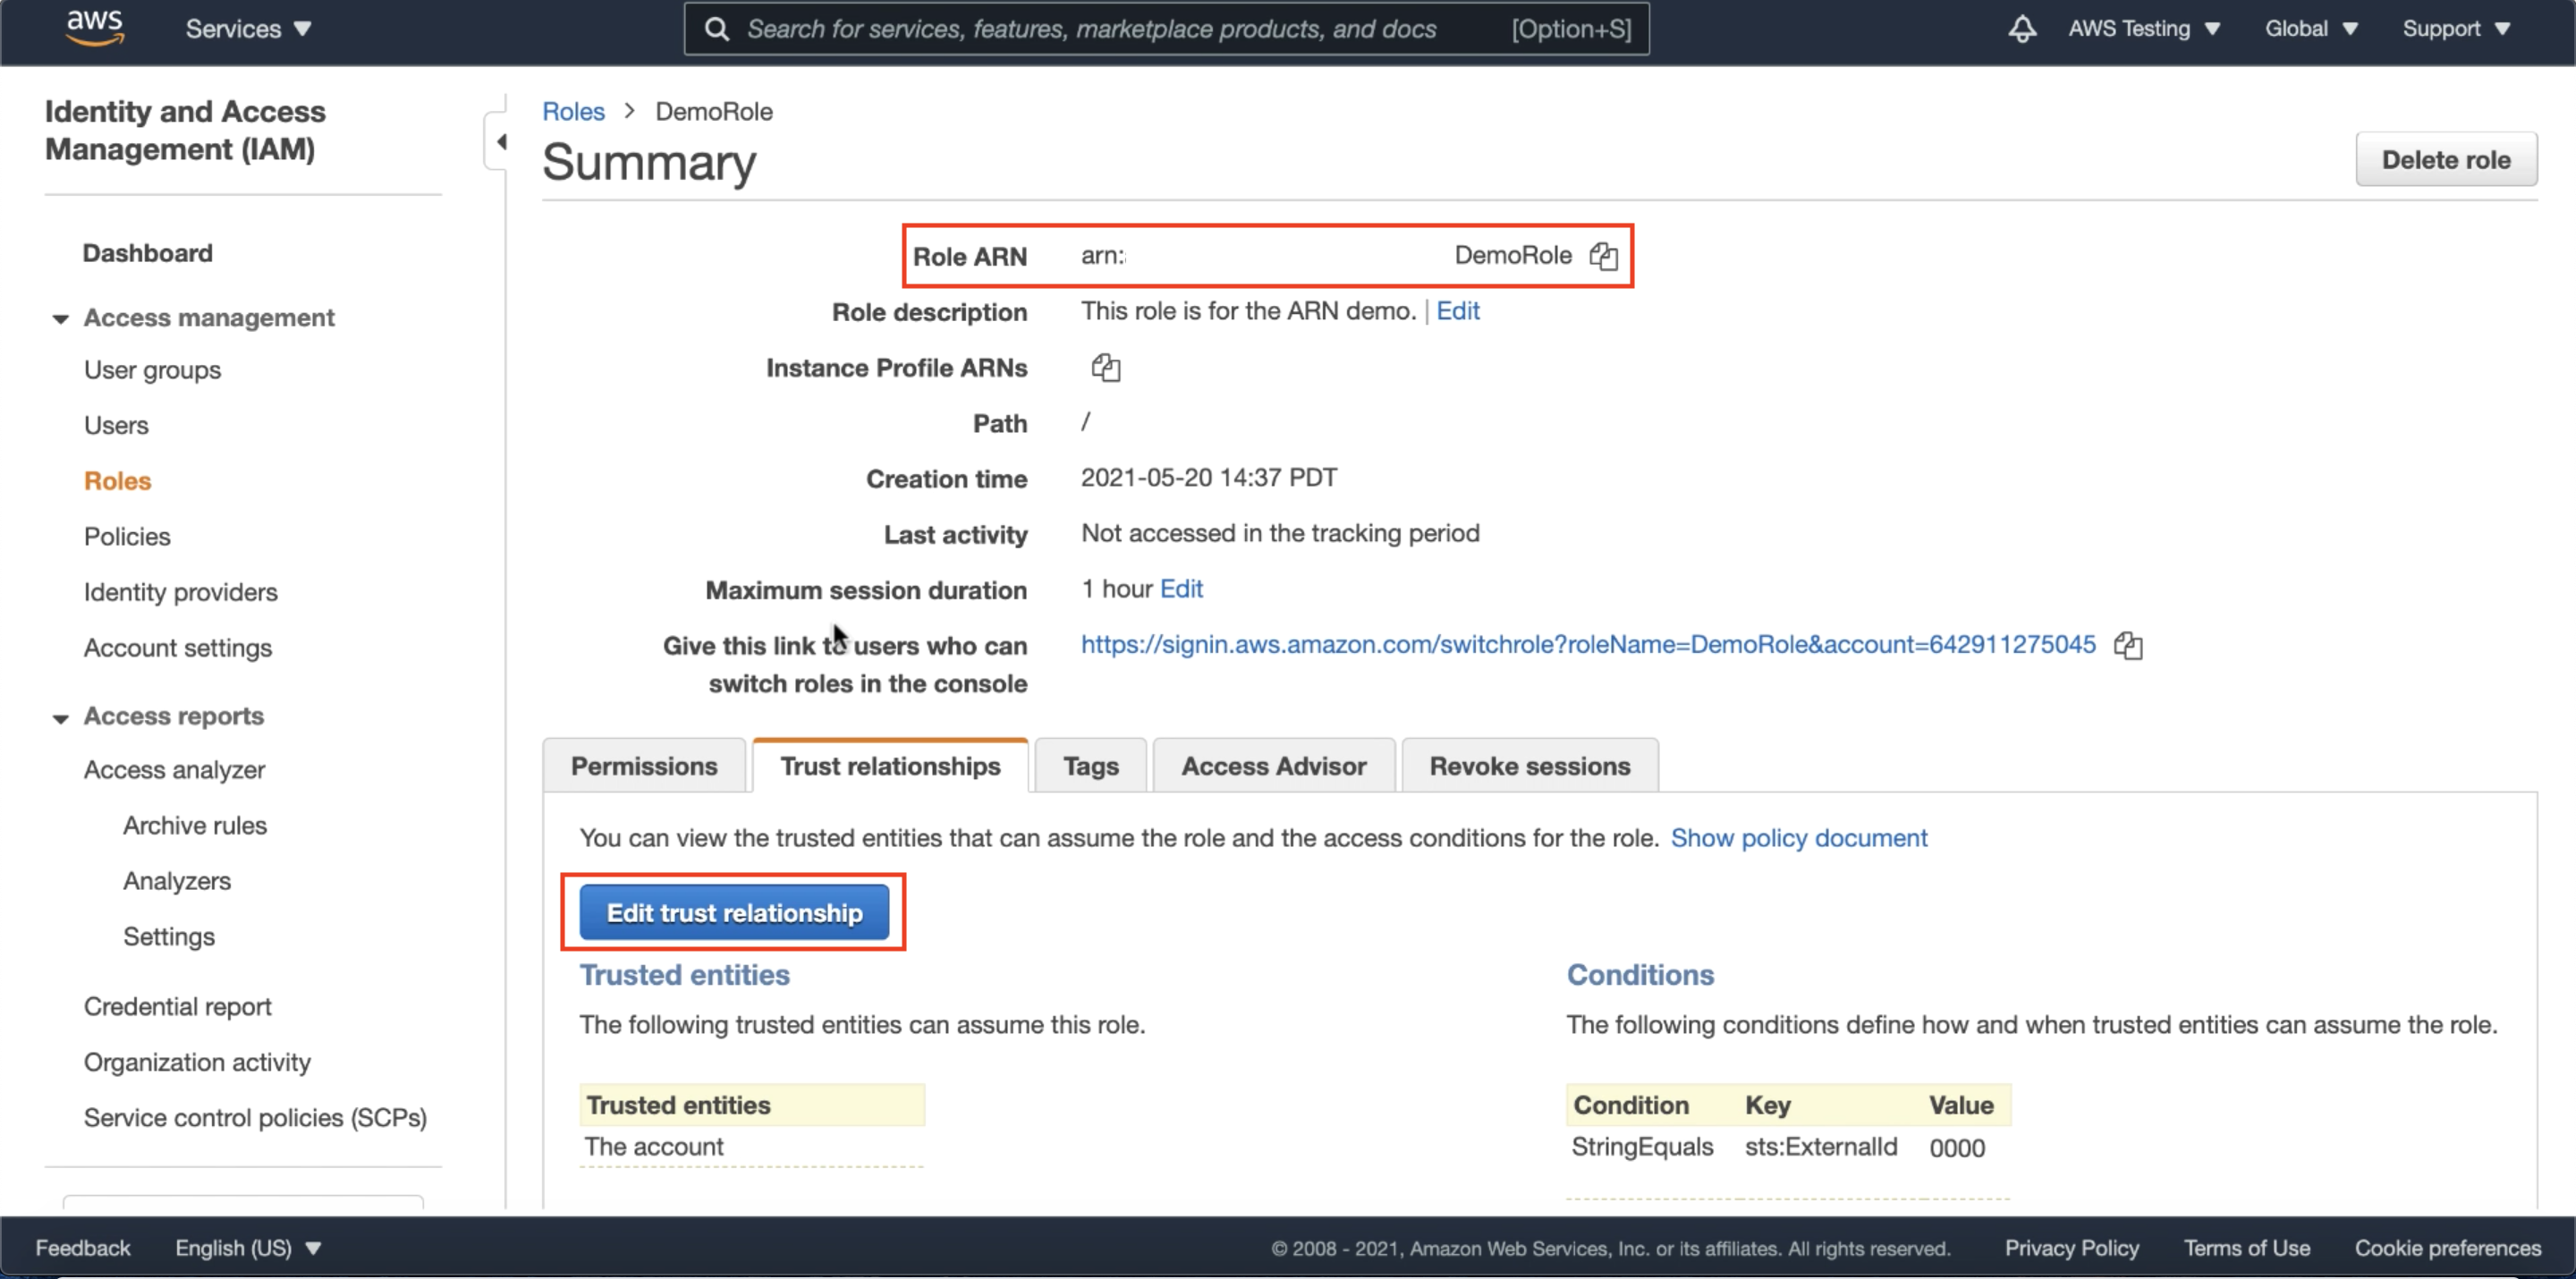
Under your newly created role on the AWS Console, as in the screen below, you will now see a Role ARN; In AWS, the role ARN is the role’s identifier to be used for access to AWS resources. Note your Role ARN, we will use it in a later step.
Click on Edit Trust Relationship. The trust relationship is a configuration in your role that informs your AWS Resources about which external AWS account and external ID it can trust. You may read more about trust relationships here.
Next, let us switch over to query our Autonomous Database for the necessary information for our AWS role’s trust relationship. From your Autonomous Database console, go to Tools -> Database Actions -> SQL
For the trust relationship, we will need
- Oracle Cloud’s user ARN
- An External ID, which will be an Oracle Cloud Identifier (OCID).
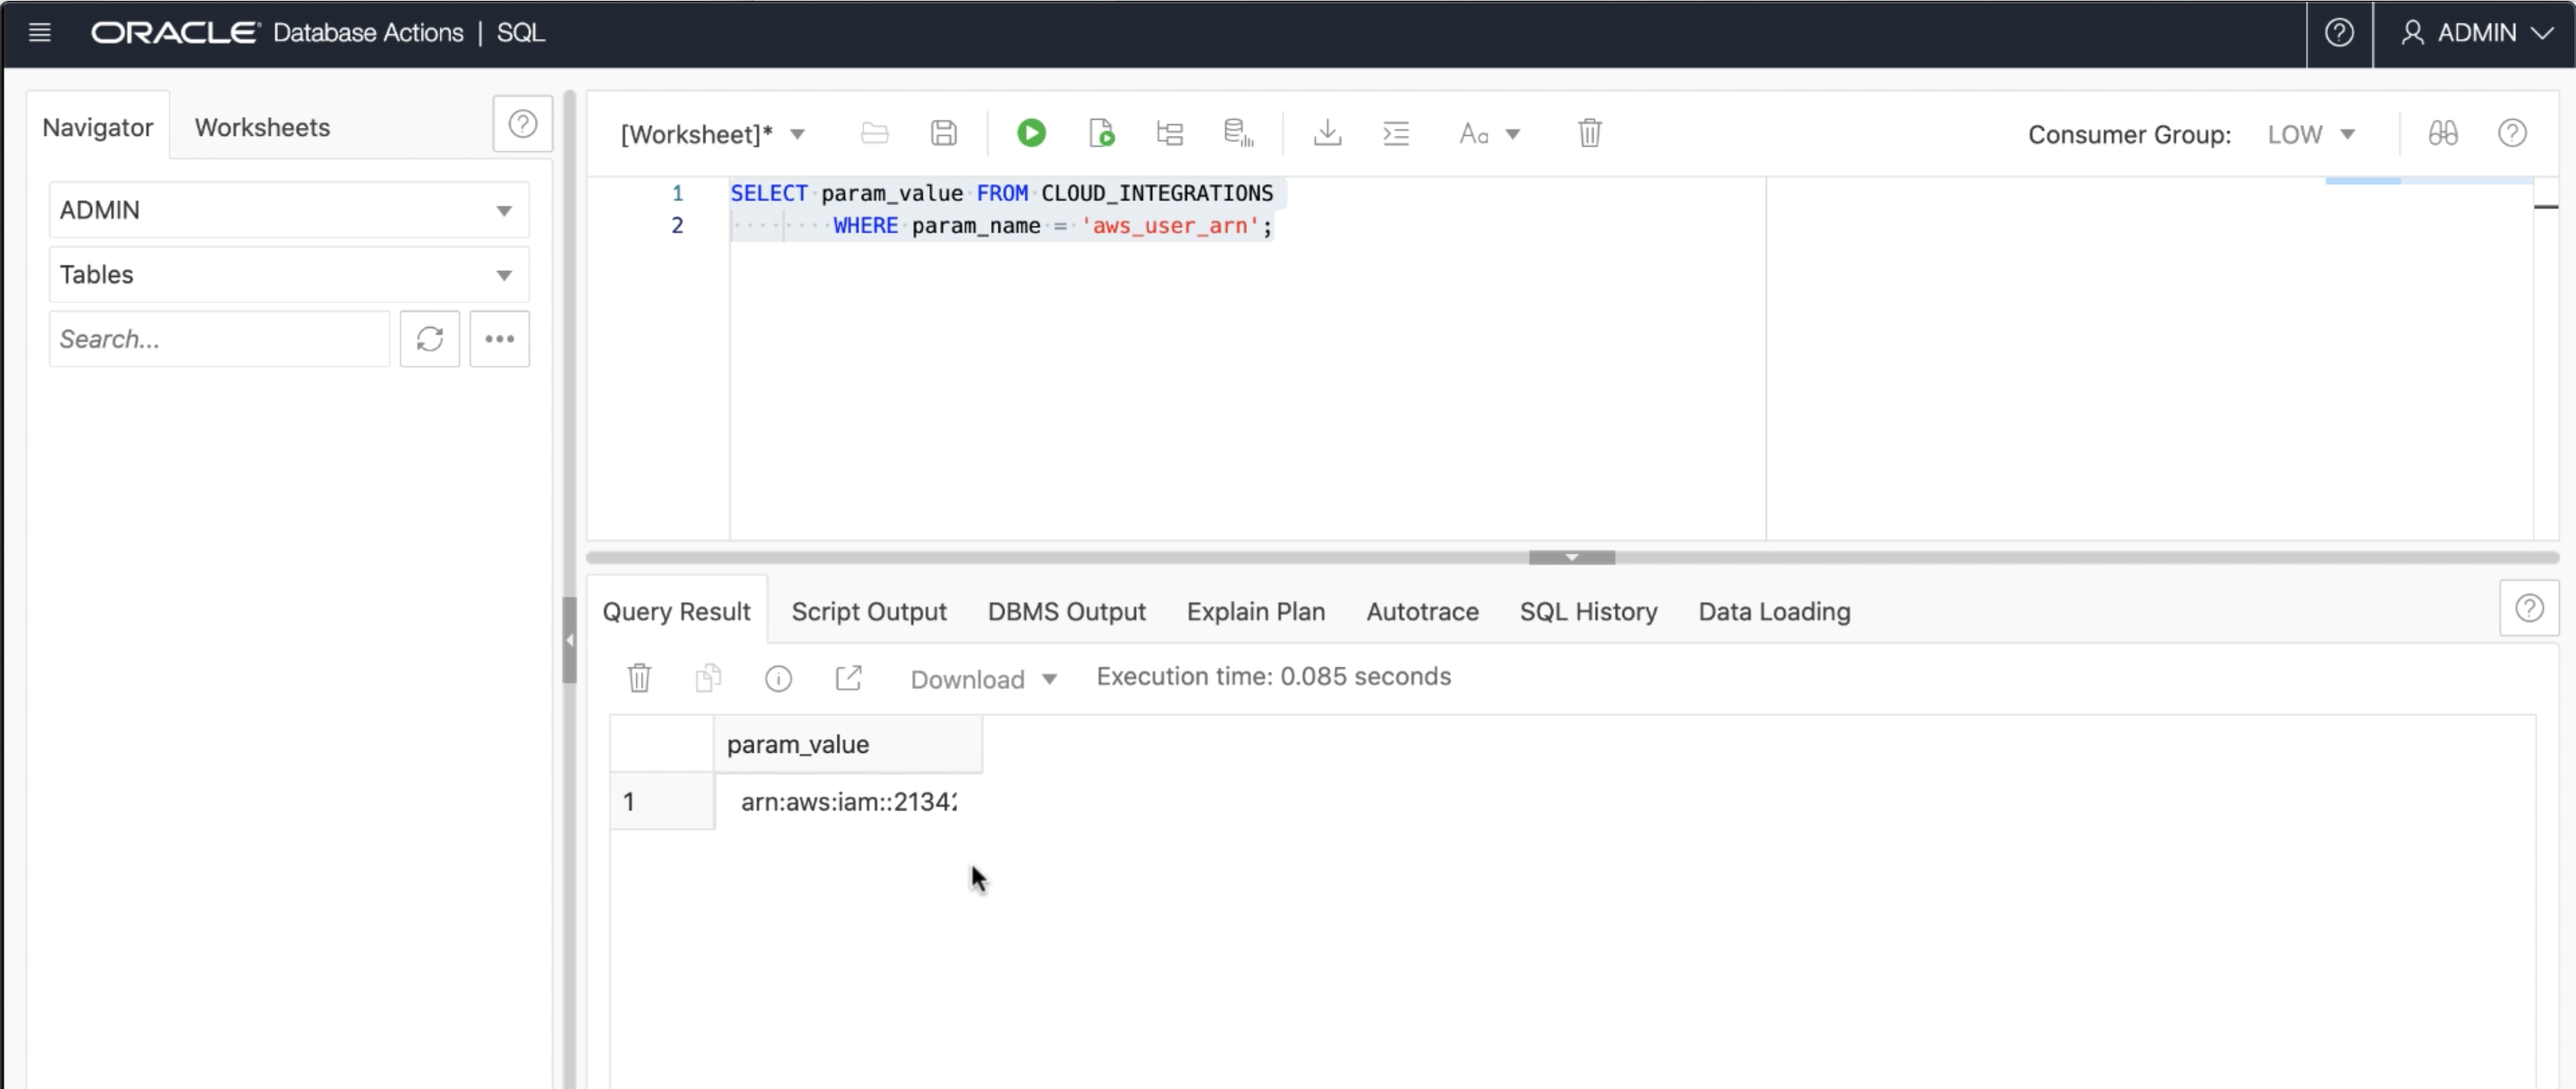
Run the following query in your database and copy down the Oracle user ARN
SELECT param_value FROM CLOUD_INTEGRATIONS WHERE param_name = 'aws_user_arn';
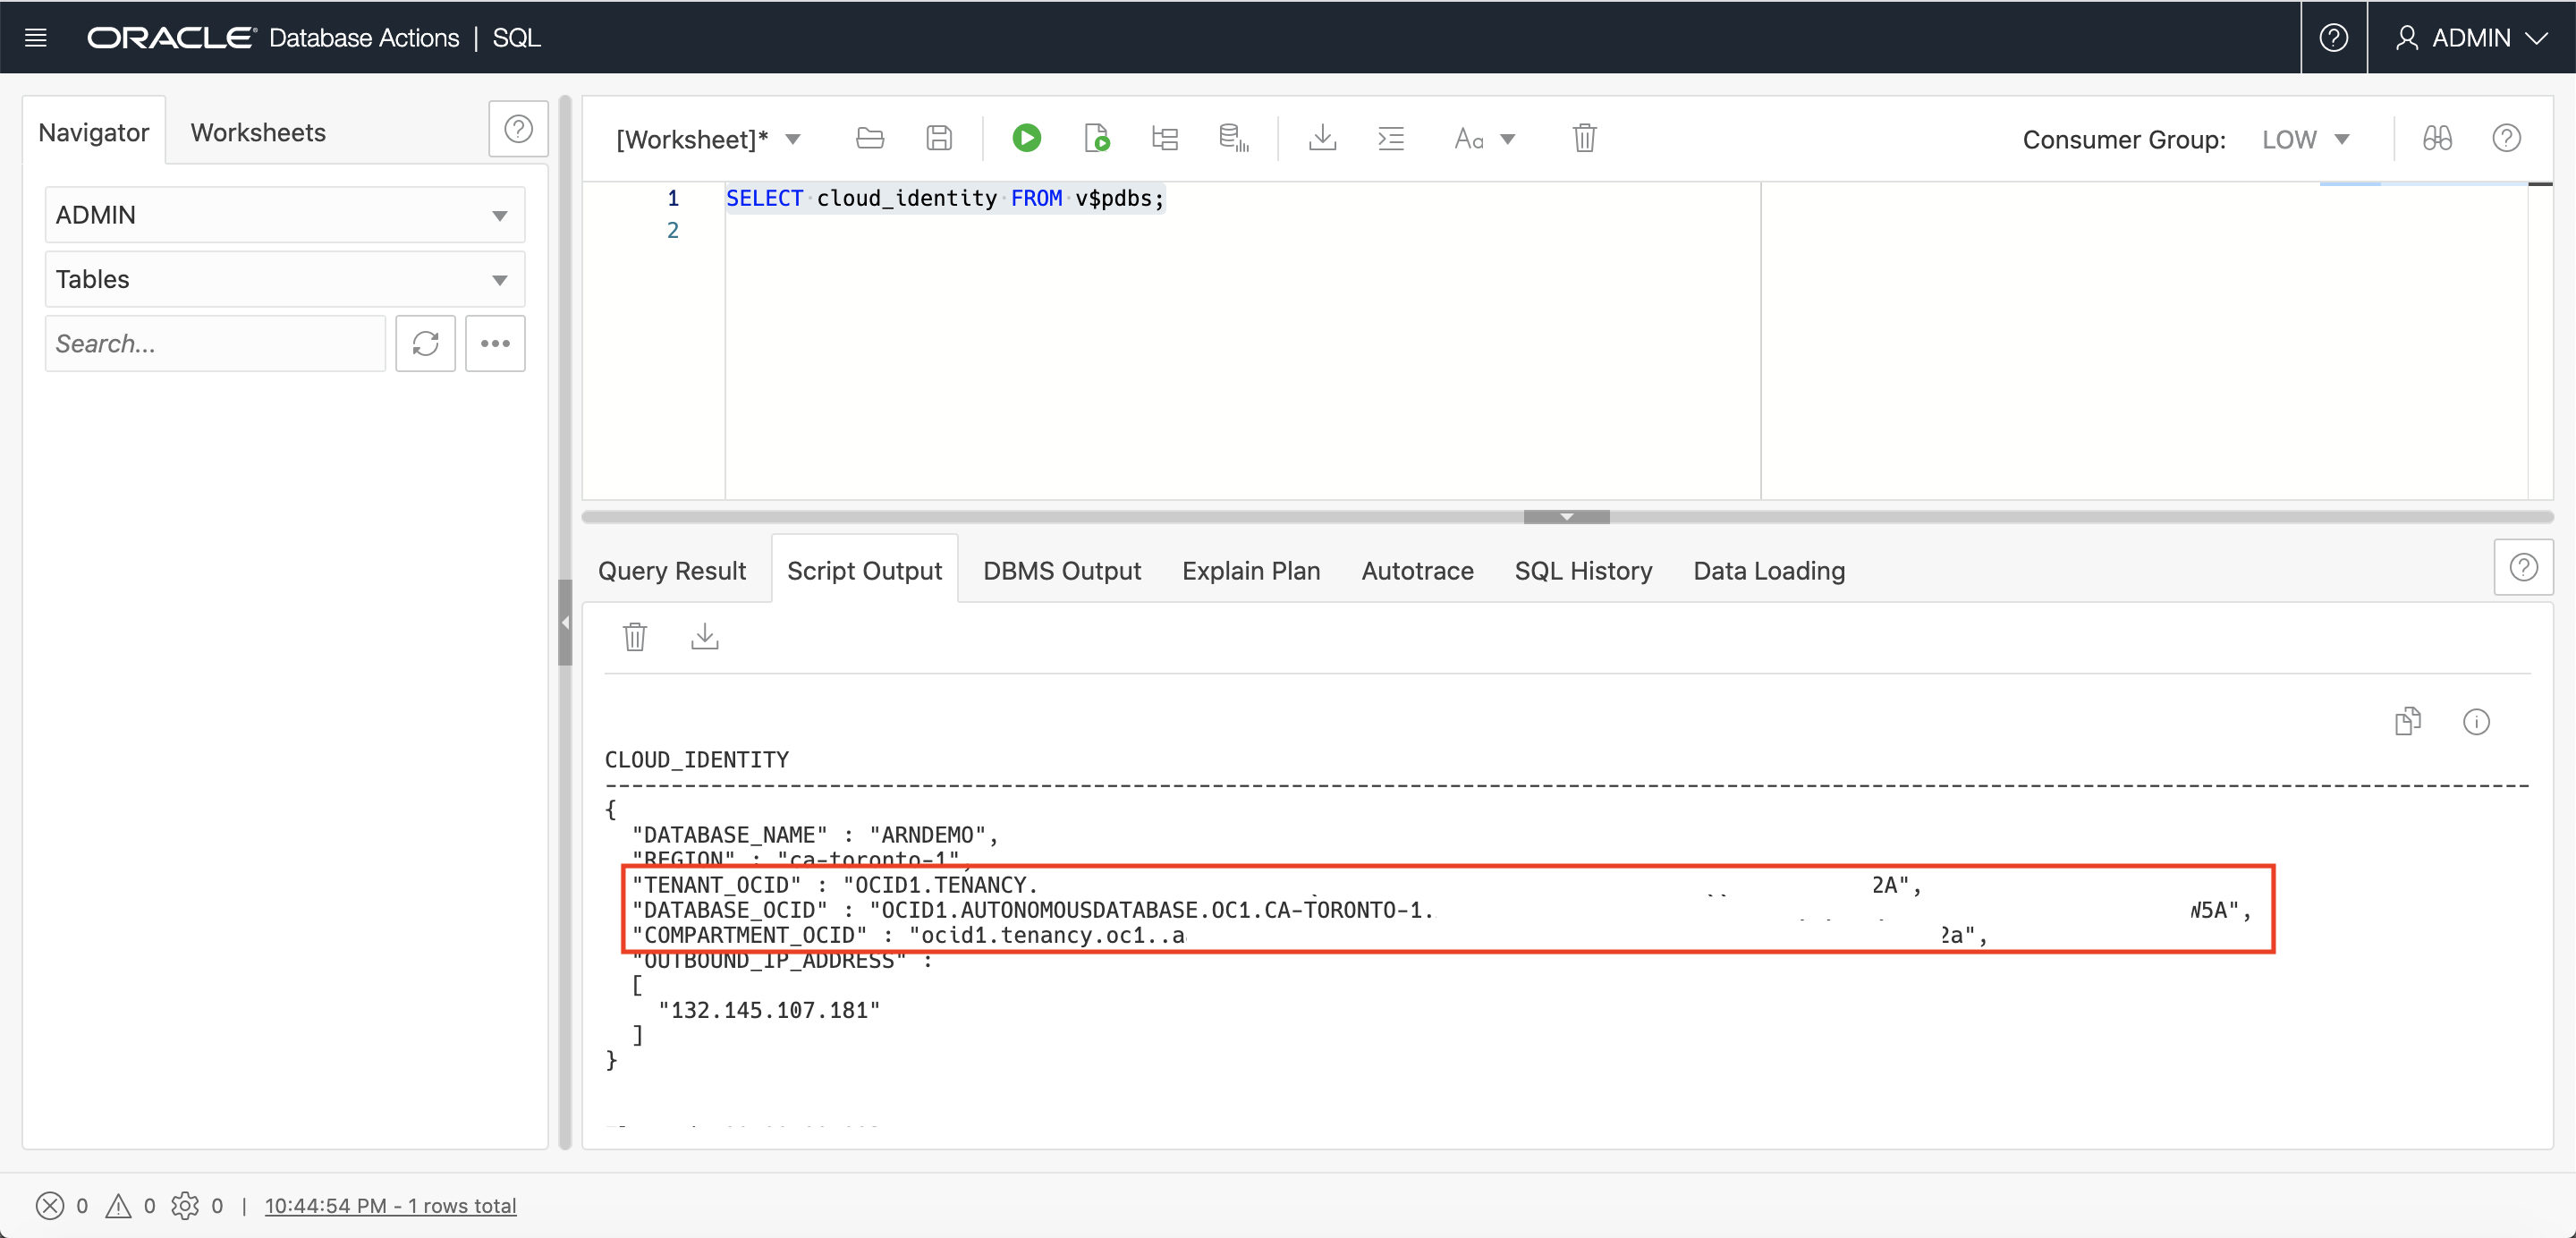
Also run the following query over the v$pdbs view in your ADB, and note down your database, compartment or tenancy OCIDs to use as your role’s External ID.
- If you choose to use your database_ocid as an external ID, your AWS role will trust only your individual database.
- If you choose to use your compartment_ocid as an external ID, your AWS role can trust all your ADB instances in that entire Oracle Cloud compartment.
- If you choose to use your tenancy_ocid as an external ID, your AWS role can trust all ADB instances in your Oracle Cloud tenancy.
SELECT cloud_identity FROM v$pdbs;
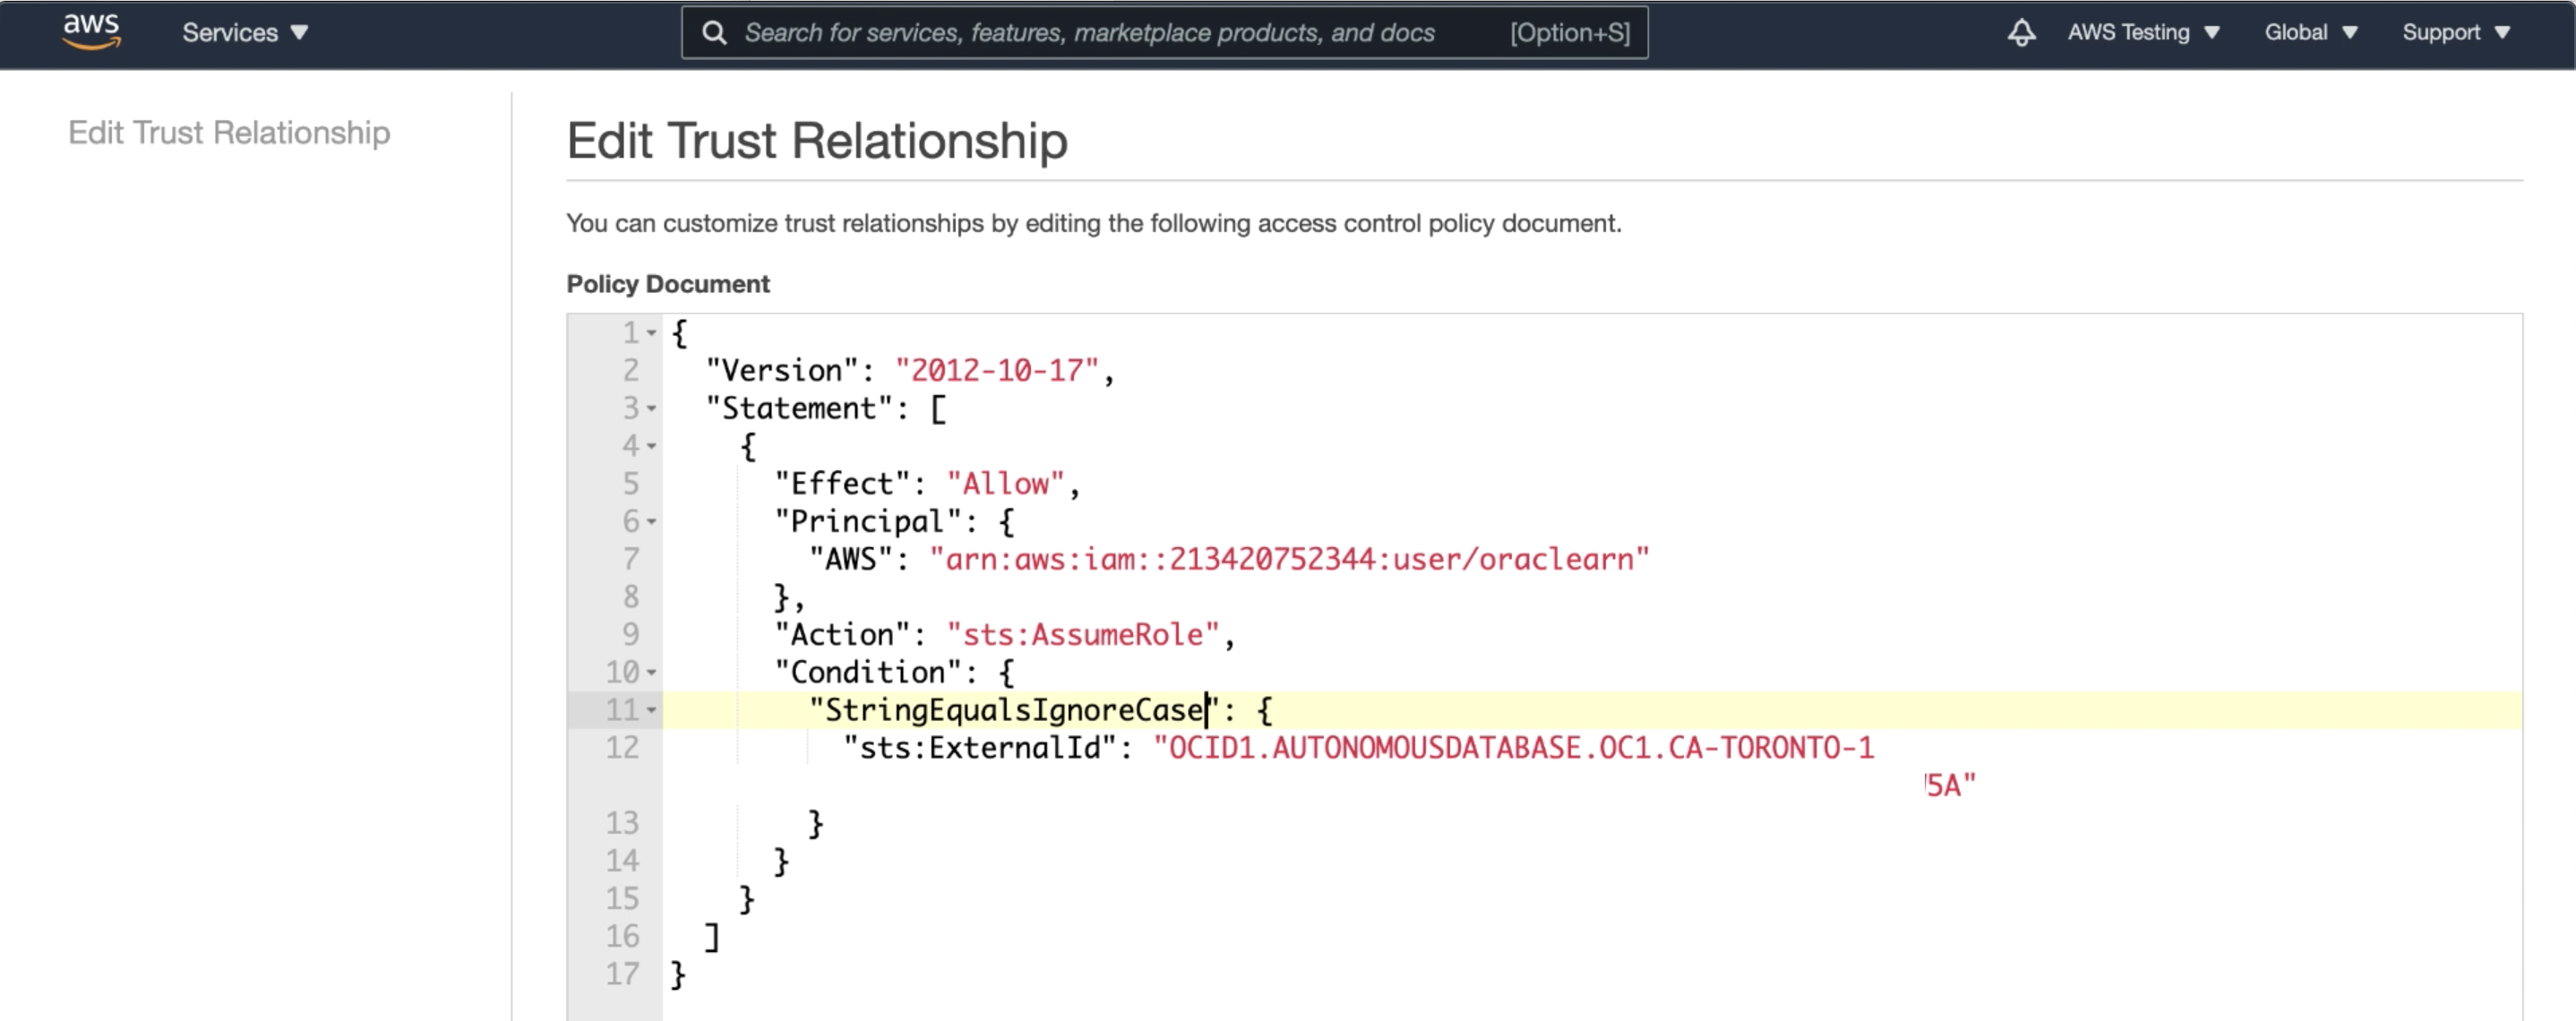
Now, head back over to your AWS role’s trust relationship.
- Paste in the Oracle User ARN in place of your Account ID
- Paste in the External ID you chose above in place of your dummy External ID
Note: When you set the value for ExternalID, by default the value is expected to be in upper case. If you are supplying any part of the OCID in lower case, set the condition “StringEqualsIgnoreCase” instead of “StringEquals” in the JSON configuration of the trust relationship
This completes the setup required on AWS.
Step 4: Enable ARN credentials in your Autonomous Database
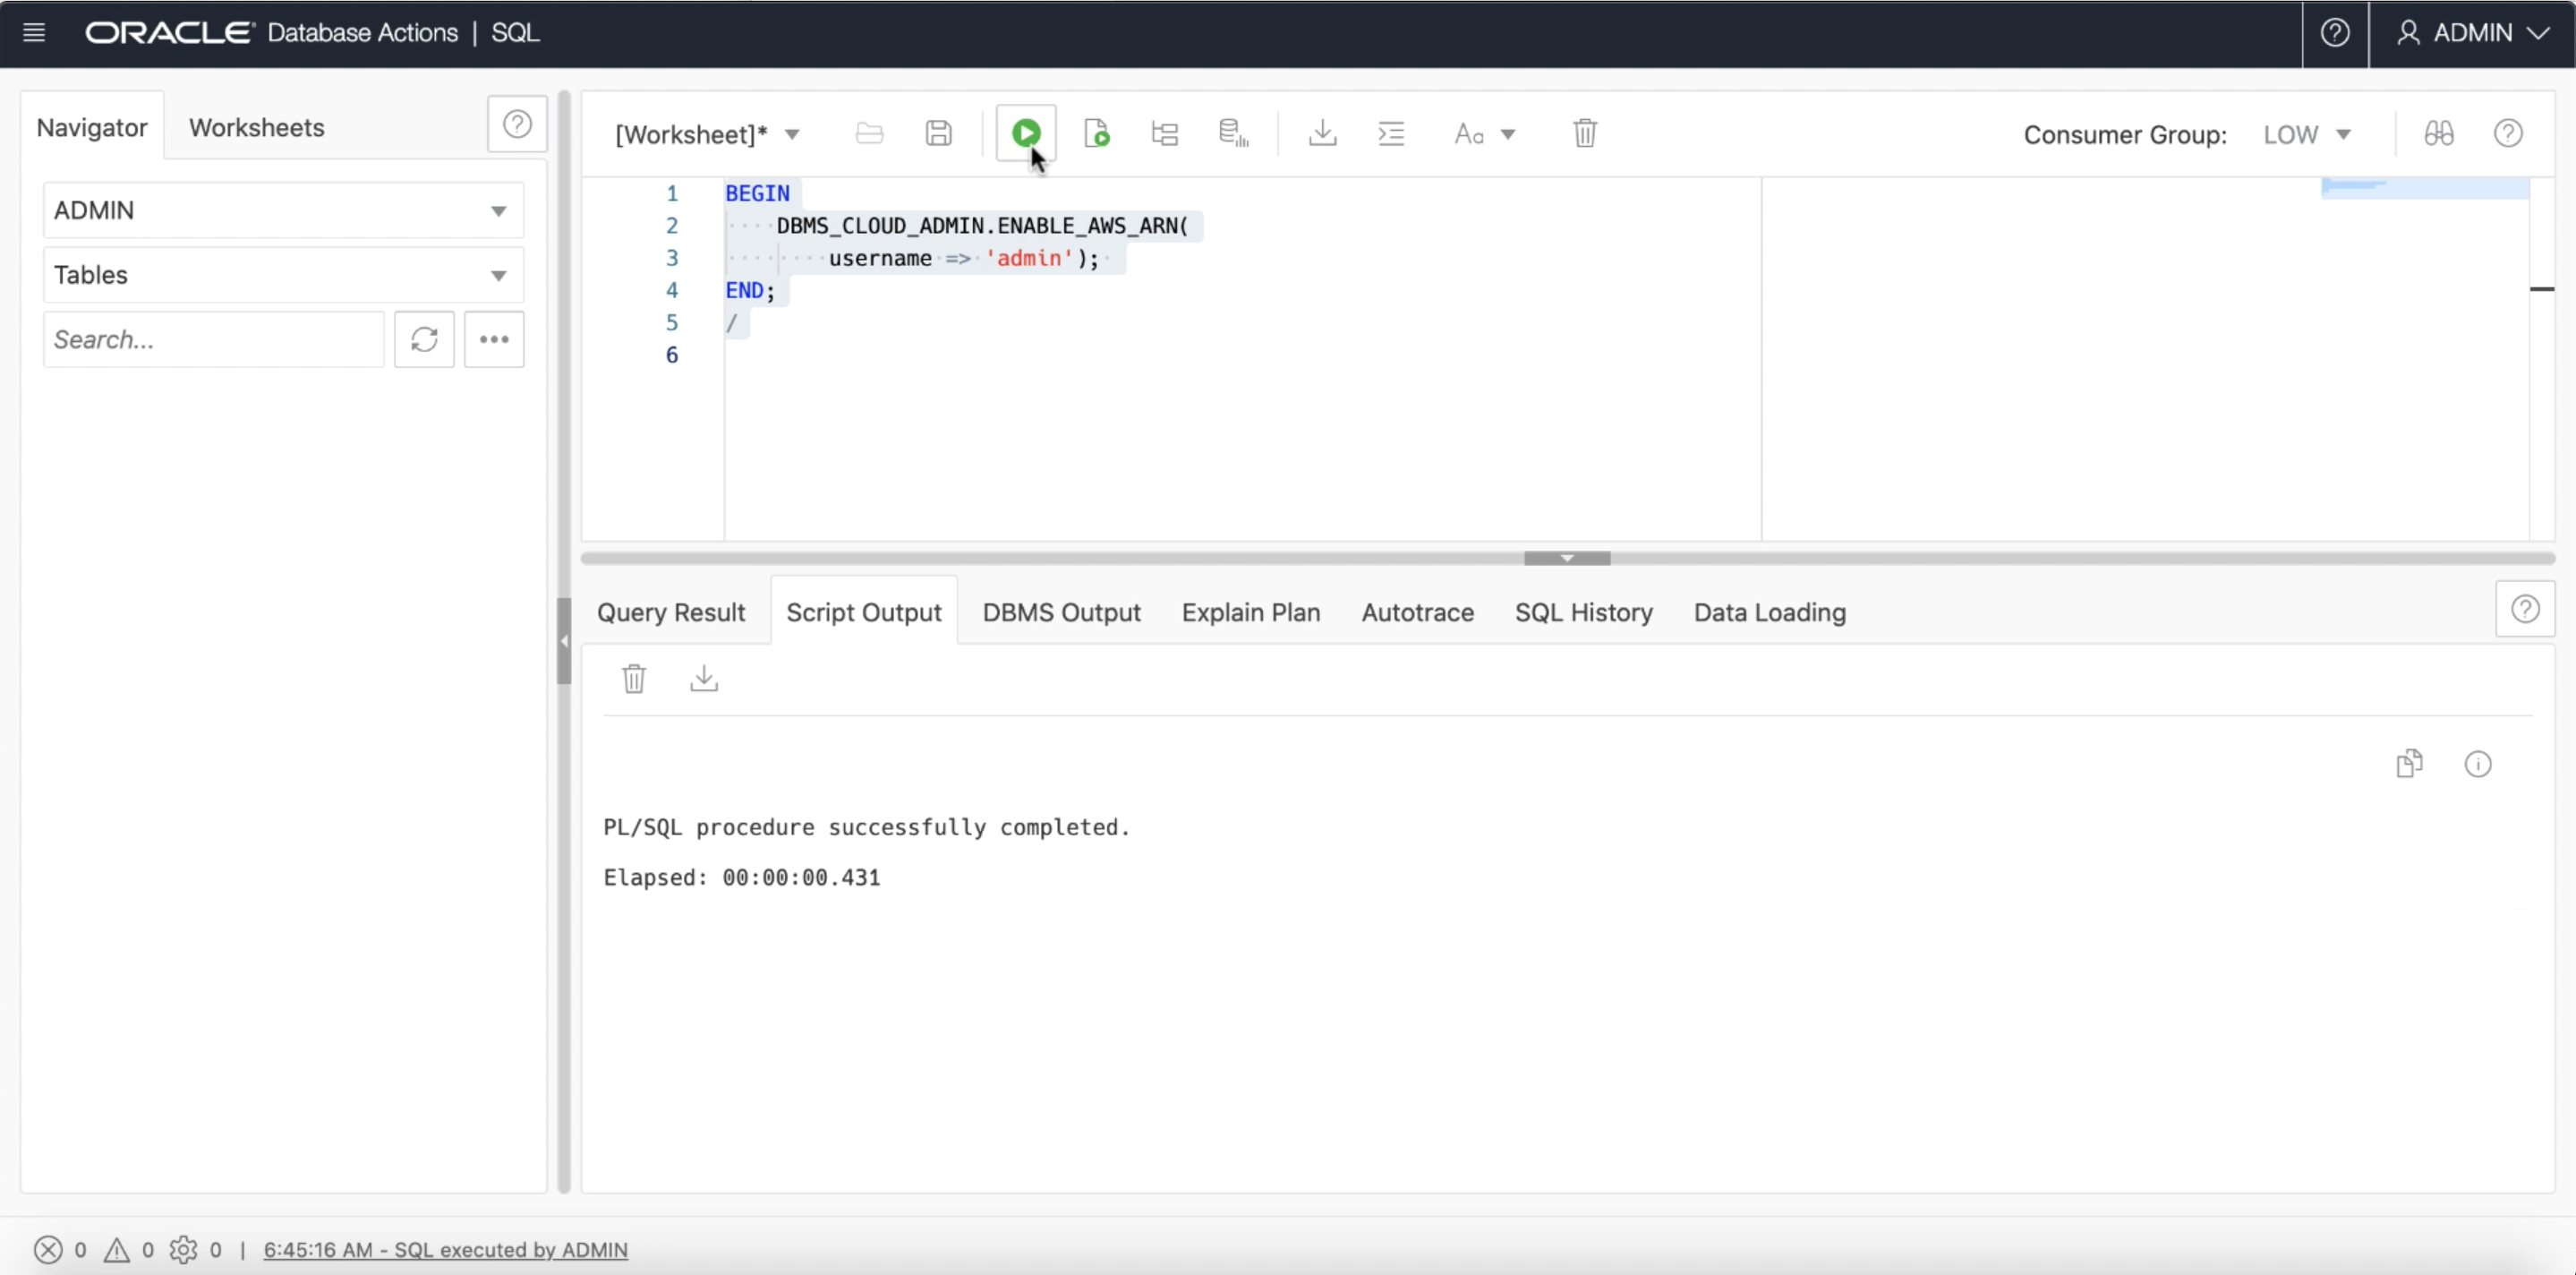
Now that we are done with our AWS setup, let us jump back into our ADB instance’s SQL worksheet and run the following script to enable the use of ARN credentials for the database user that you want to give access to your AWS resource. Replace “adb_user” with your database user’s username; In my example, I am providing access to the Admin user.
Note: Only an Admin user with privileges to access the DBMS_CLOUD_ADMIN package may run this procedure
BEGIN
DBMS_CLOUD_ADMIN.ENABLE_AWS_ARN (username => 'adb_user');
END;
/
Step 5: Create an ARN credential with your AWS Role ARN
After ARN usage is enabled for the Autonomous Database instance and the necessary role is configured in AWS, we may now create a credential object with ARN parameters by running the following script, which calls the DBMS_CLOUD package. This credential will provide the database user access to Amazon resources.
- You may enter any credential name of your choosing
- Paste in the Role ARN we copied from the Role information on the AWS IAM Console, as the value for the ‘aws_role_arn’ parameter
- Specify the ‘external_id_type’ parameter as ‘database_ocid’, ‘compartment_ocid’ or ‘tenancy_ocid’, depending on the type of OCID you specified in the trust relationship in Step 3. Depending on the type specified here, your ADB will internally send across the corresponding OCID for authorization when connecting to your AWS resource
You may repeat Step 5 and 6 for any database user that you wish to grant access to the same AWS resources.
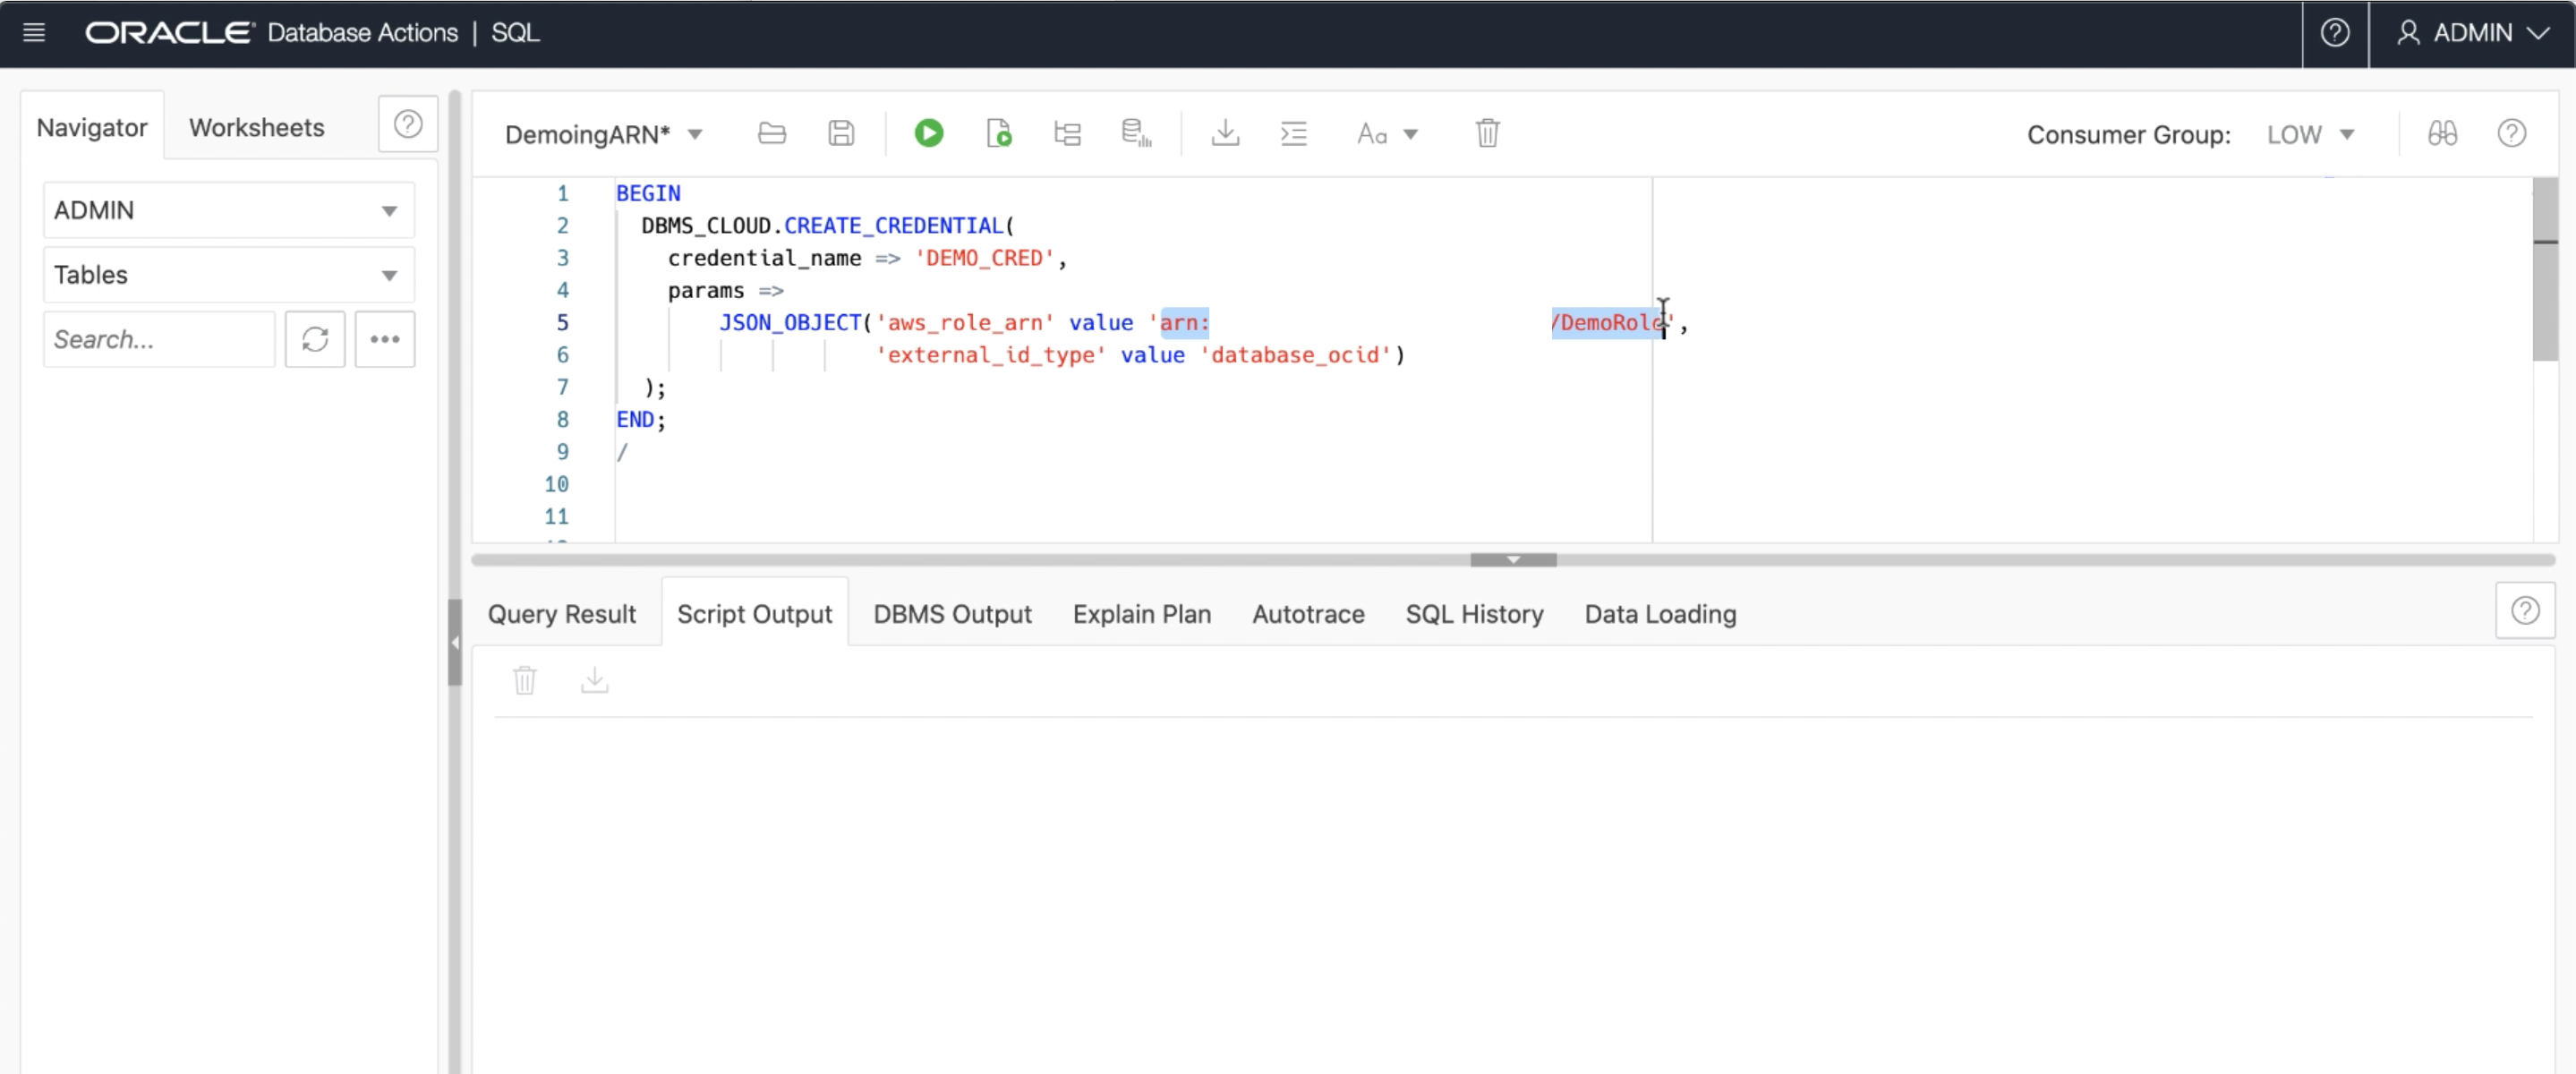
BEGIN
DBMS_CLOUD.CREATE_CREDENTIAL(
credential_name => 'DEF_CRED_ARN',
params =>
JSON_OBJECT(
'aws_role_arn' value
'arn:aws:iam::123456:role/AWS_ROLE_ARN',
'external_id_type' value 'database_ocid'
)
);
END;
/
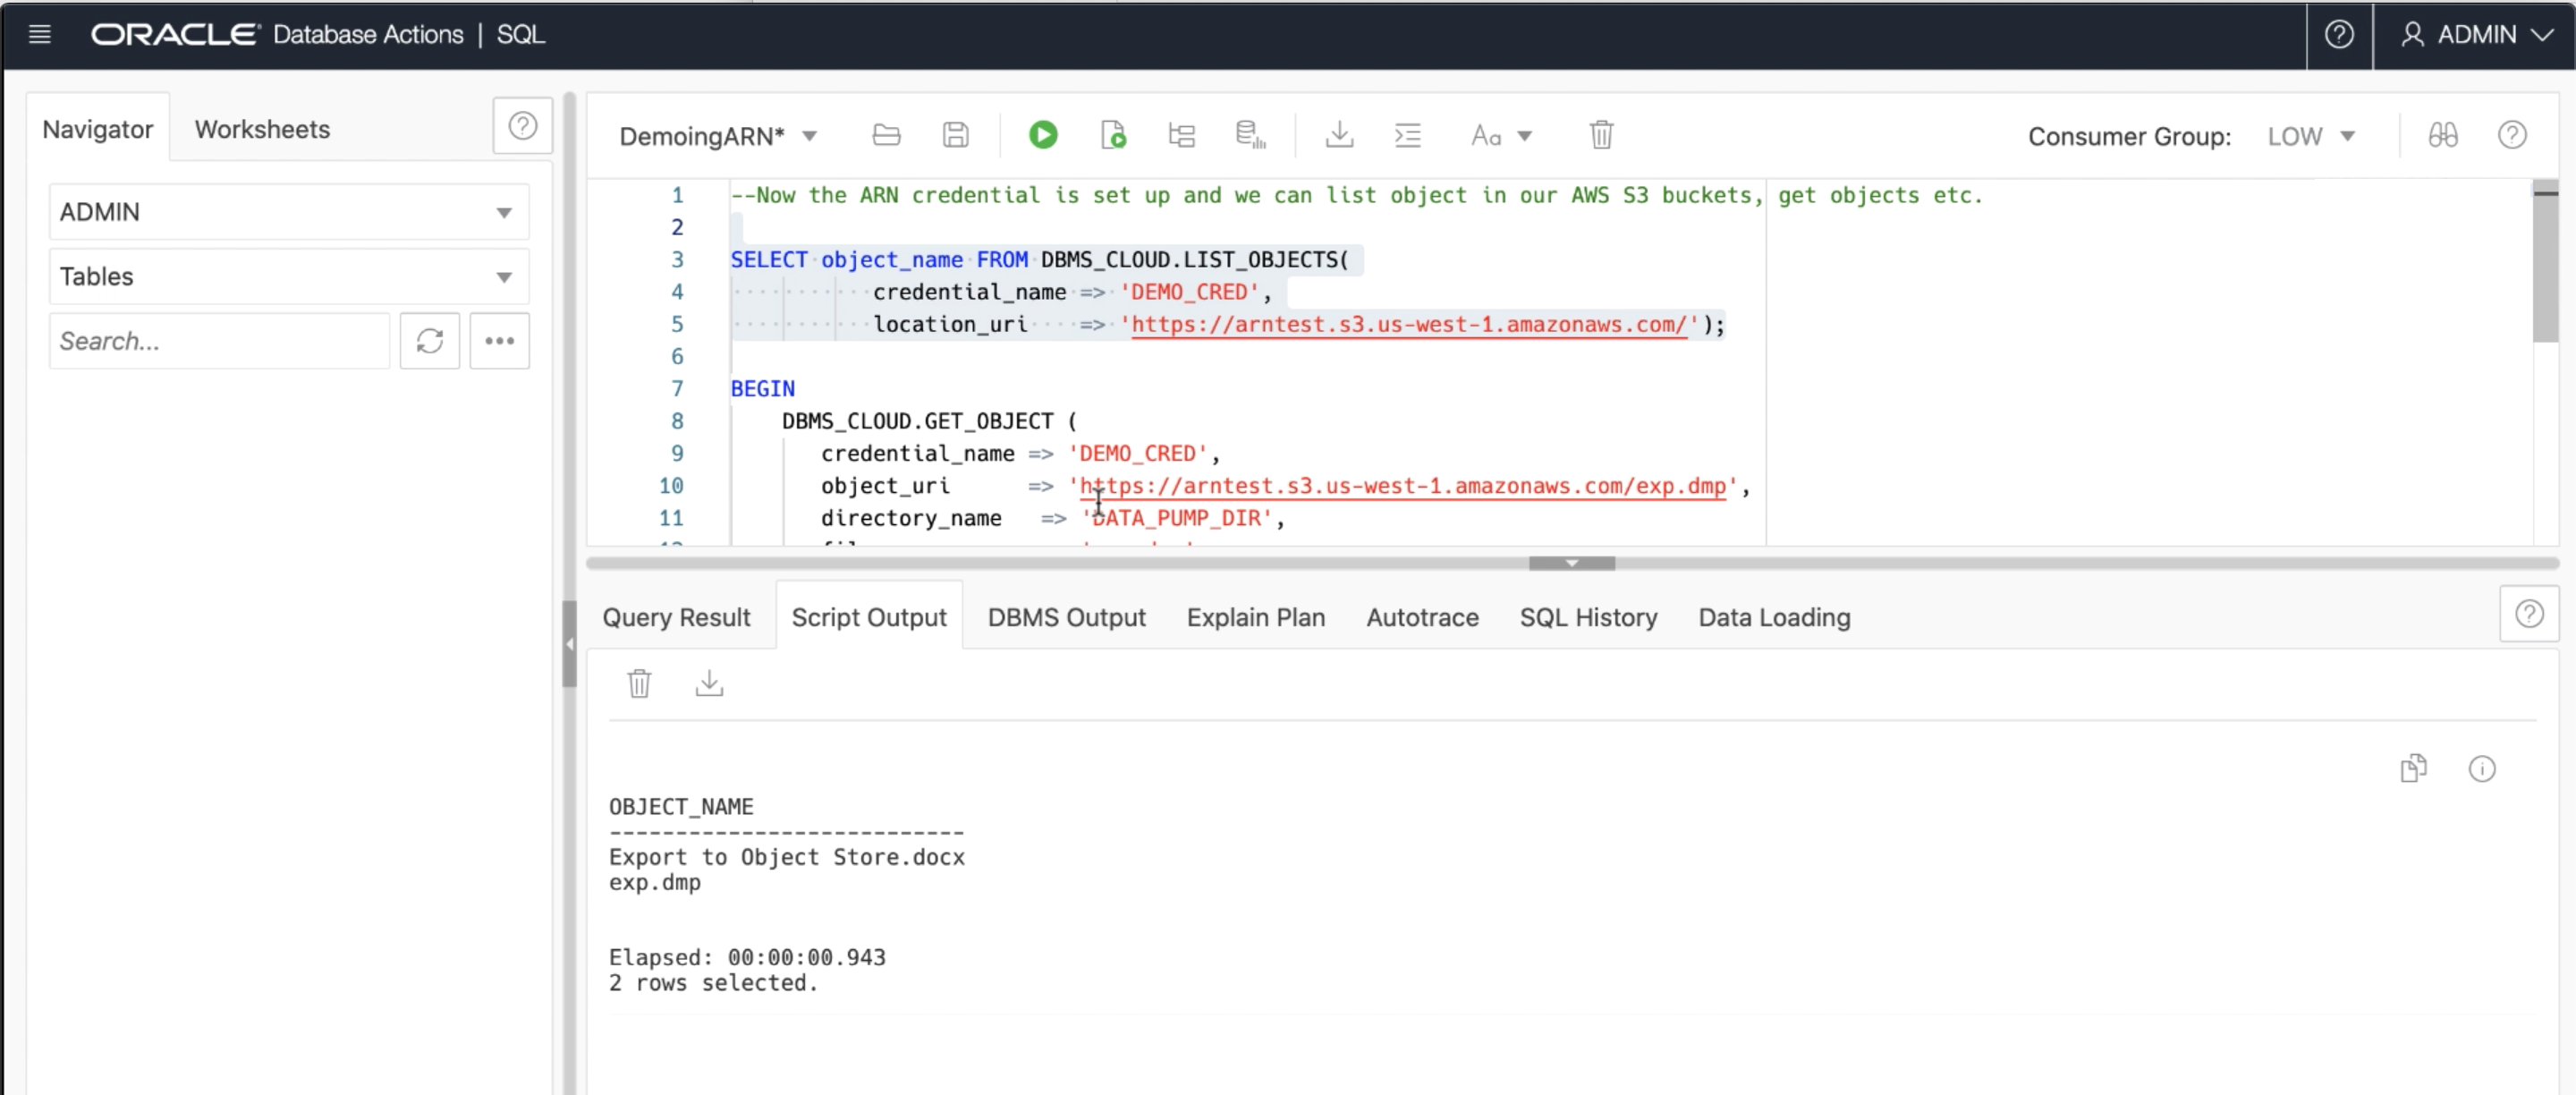
Step 6: You may now access your AWS Resource!
Now, with the ARN credential setup, our ADB user has access to the AWS S3 object store. We can verify this by running the following example script, passing in the “credential_name” of the credential created above and the S3 object store bucket URI, to list all the objects present in the S3 bucket!
SELECT object_name FROM DBMS_CLOUD.LIST_OBJECTS(
credential_name => 'DEF_CRED_ARN',
location_uri => 'https://my-bucket.s3.us-west-2.amazonaws.com/')
Conclusion
Refer to the official documentation for more information about the use of ARN credentials in Autonomous Database. We are continuing to work on releasing such one-time, repeatable and simplified methods for ADB authorization both for Oracle Cloud (see Can’s post on authorization using Resource Principles) as well as for other cloud platforms.
