Over the last year we have added a lot of new features to Autonomous Data Warehouse; all of which have made it easier and faster to work with your data warehouses, data marts and data discovery sandboxes. If you want to look at the full list of features we have added then click over to our “New Features” page on Oracle.com.
When you create a new autonomous data warehouse it is created so that it’s accessible by all your data warehouse tools and applications via any IP address. In networking terminology: there is no whitelist or network access control list specified.
Therefore, one thing a lot of customers have asked for is a simple way to add an additional layer of security around their autonomous data warehouse using network access control lists (ACLs for short). Essentially what is needed is a way to specify a list of client IP addresses that are allowed to connect to an autonomous data warehouse and all other IP addresses should be blocked. With our latest update, this is exactly what we are providing. So now you have another layer of control.
The purpose of this post is to explain how to make your autonomous data warehouse even more secure by using network ACLs!
How to restrict access to your autonomous data warehouse in 5 steps!
Controlling client tools and application access to your autonomous data warehouse could not be simpler. It’s simple because we have reduced this process to 5 steps:
- Goto the management console for your instance
- Select “Access Control List” under the “Actions” menu
- Select the type of list being created – IP or CIDR.
- Enter the list of values for the IPs or the CIDRs.
- Click Update.
Couldn’t be simpler but let’s walk through the process…
Step 1 – Accessing the management console
First stage involves signing into your cloud account using your tenancy name and cloud account. Then you can navigate to either your “Autonomous Data Warehouse” or “Autonomous Transaction Processing” landing pad as shown below:
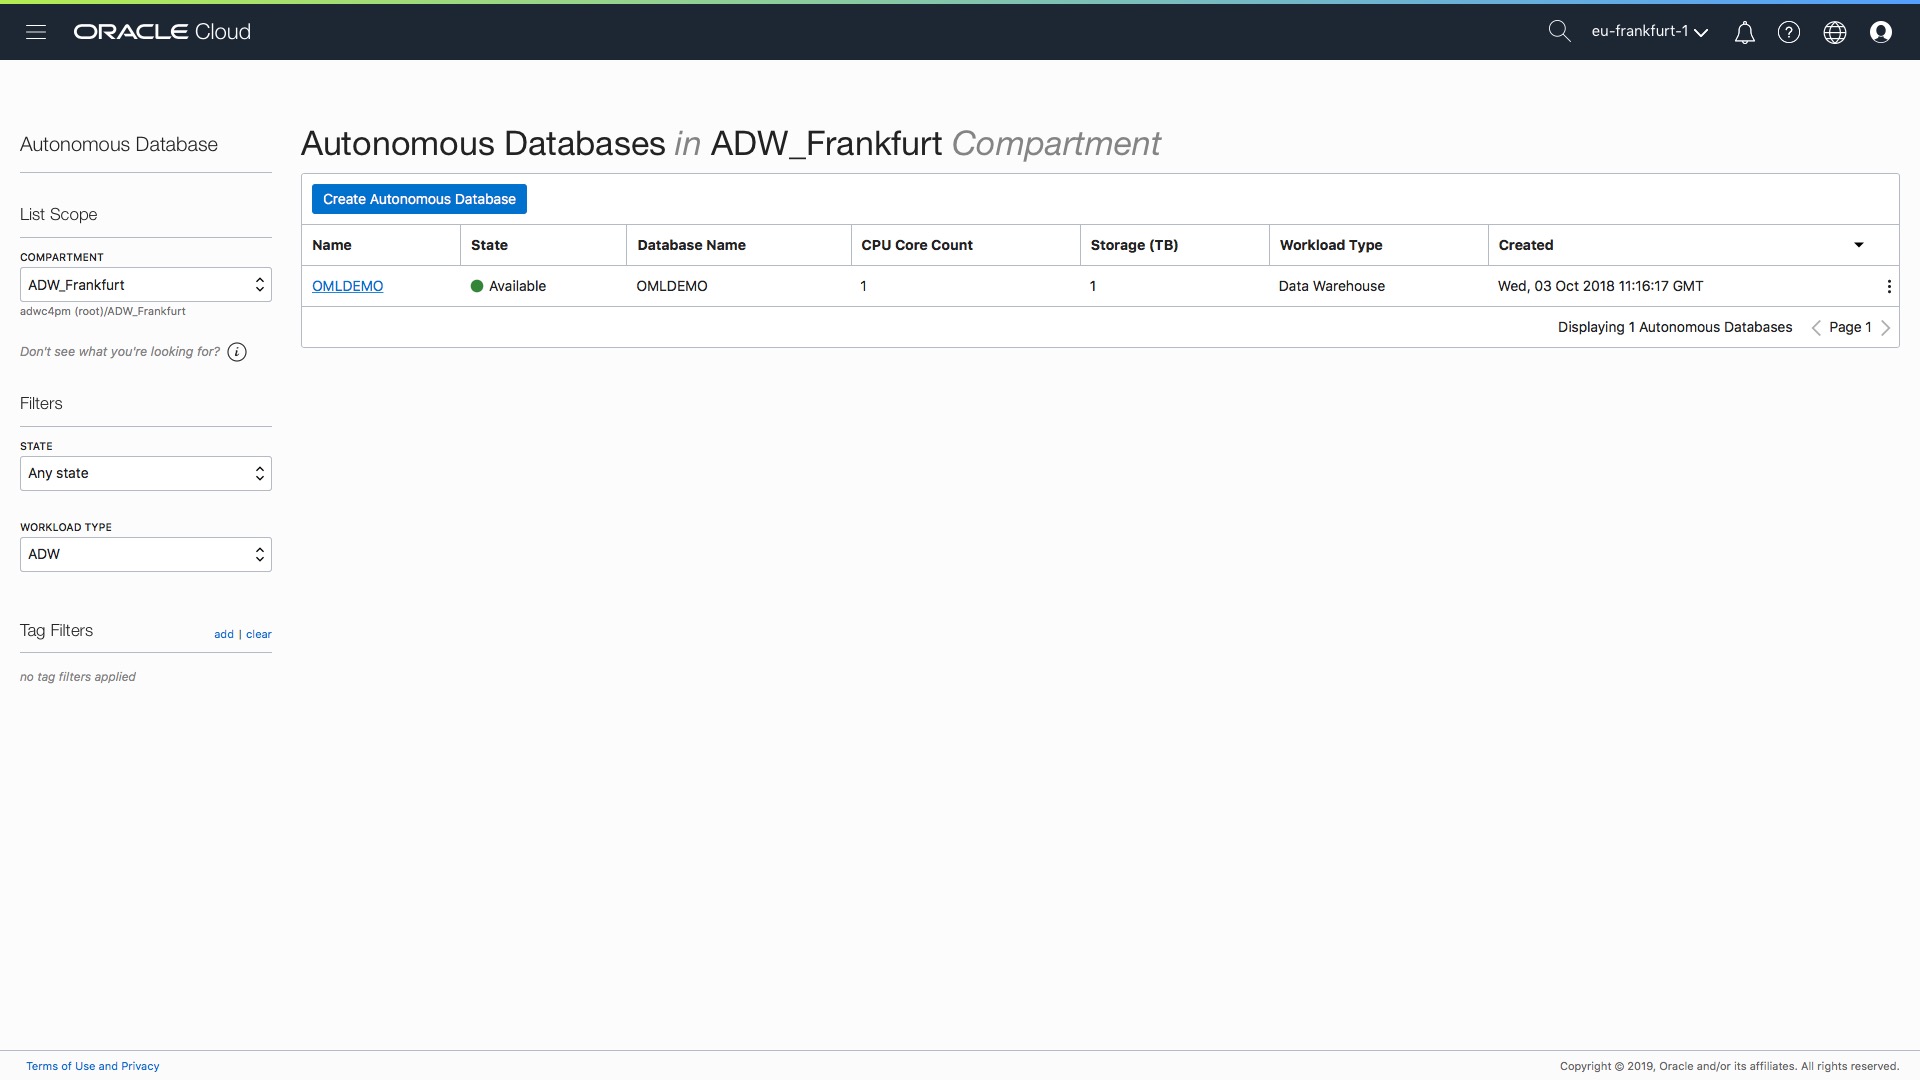
Let’s now configure the network ACLs for the autonomous data warehouse “OML Demo”. If we click on the blue text in the first column this will take us to the instance console page as shown below:

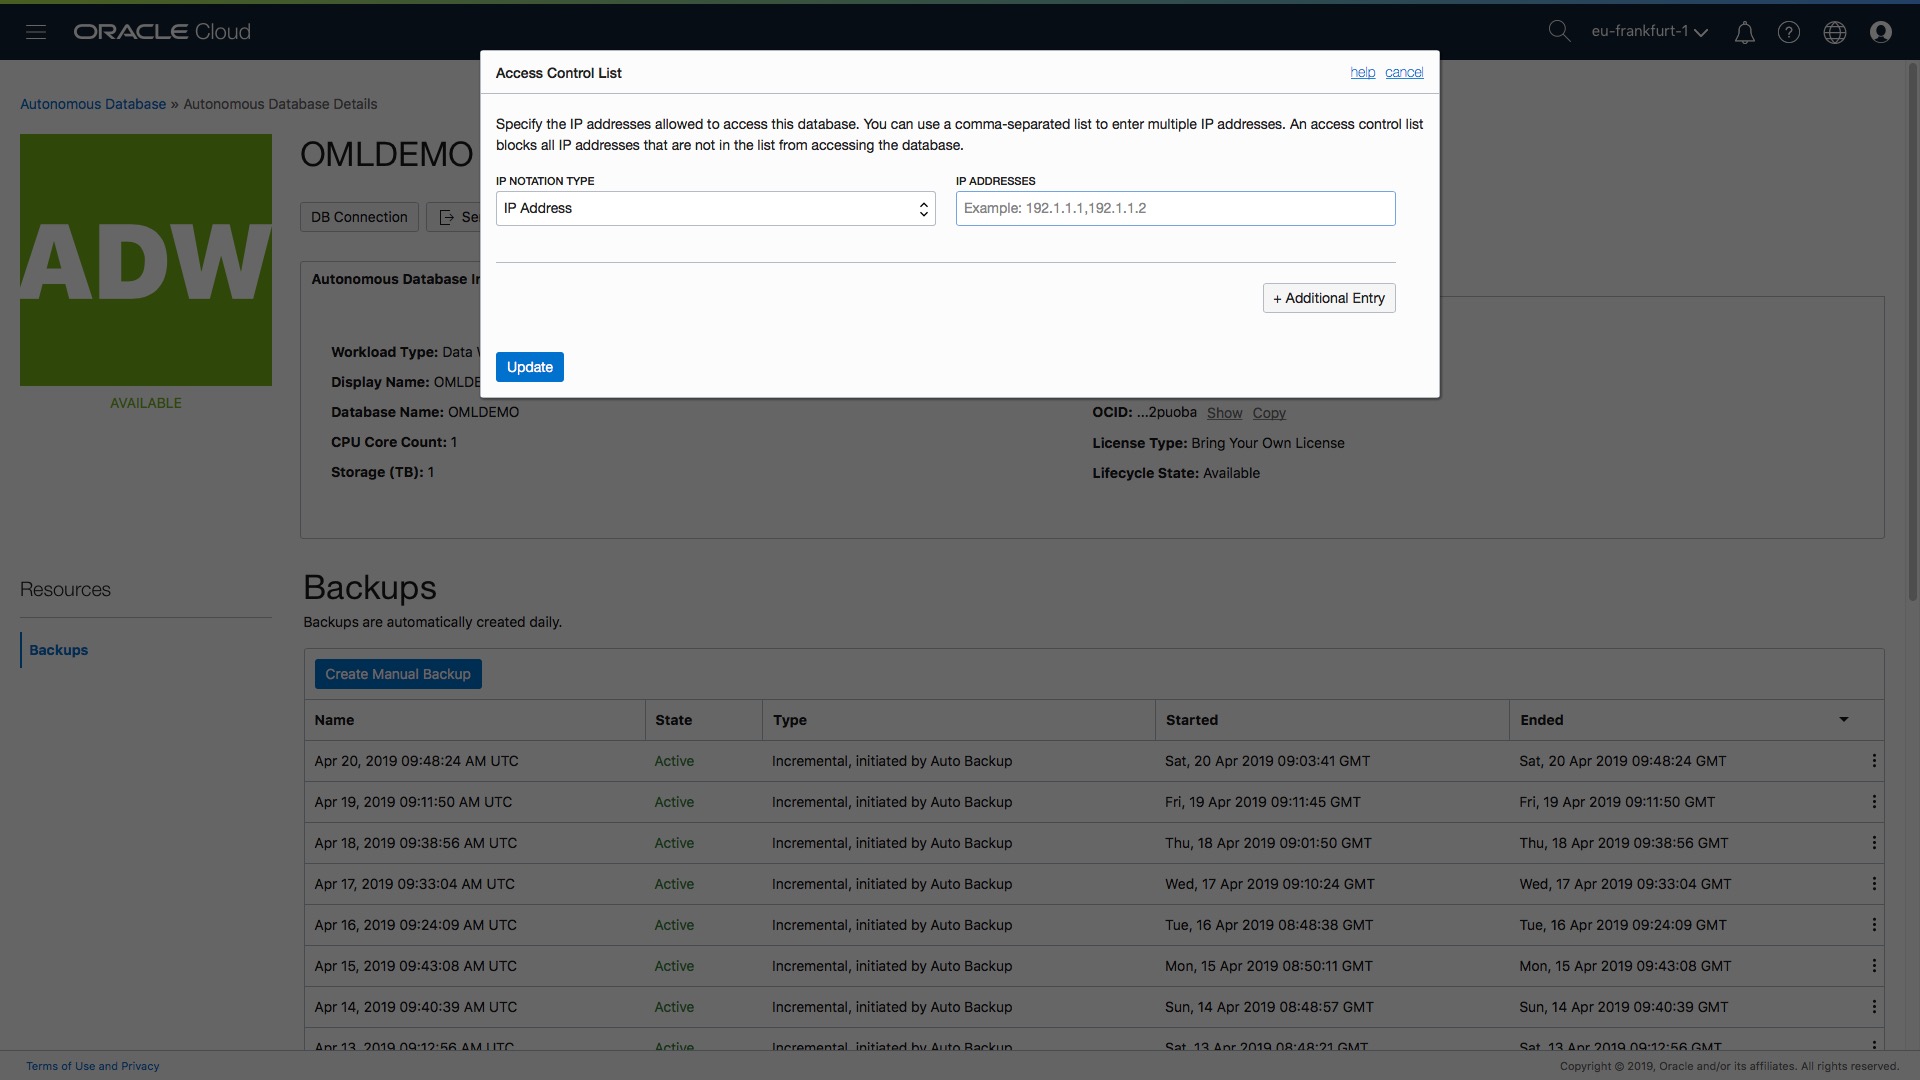
Step 2 – Selecting “Access Control Lists” from Action menu
Now click on the “Actions” button in the row of menu buttons as shown below:

…. (a quick plug for another new feature that we also rolled put today that you can see in the Action menu list – you can now update, change, the type of license assigned to your autonomous database. There is a separate blog post here.)
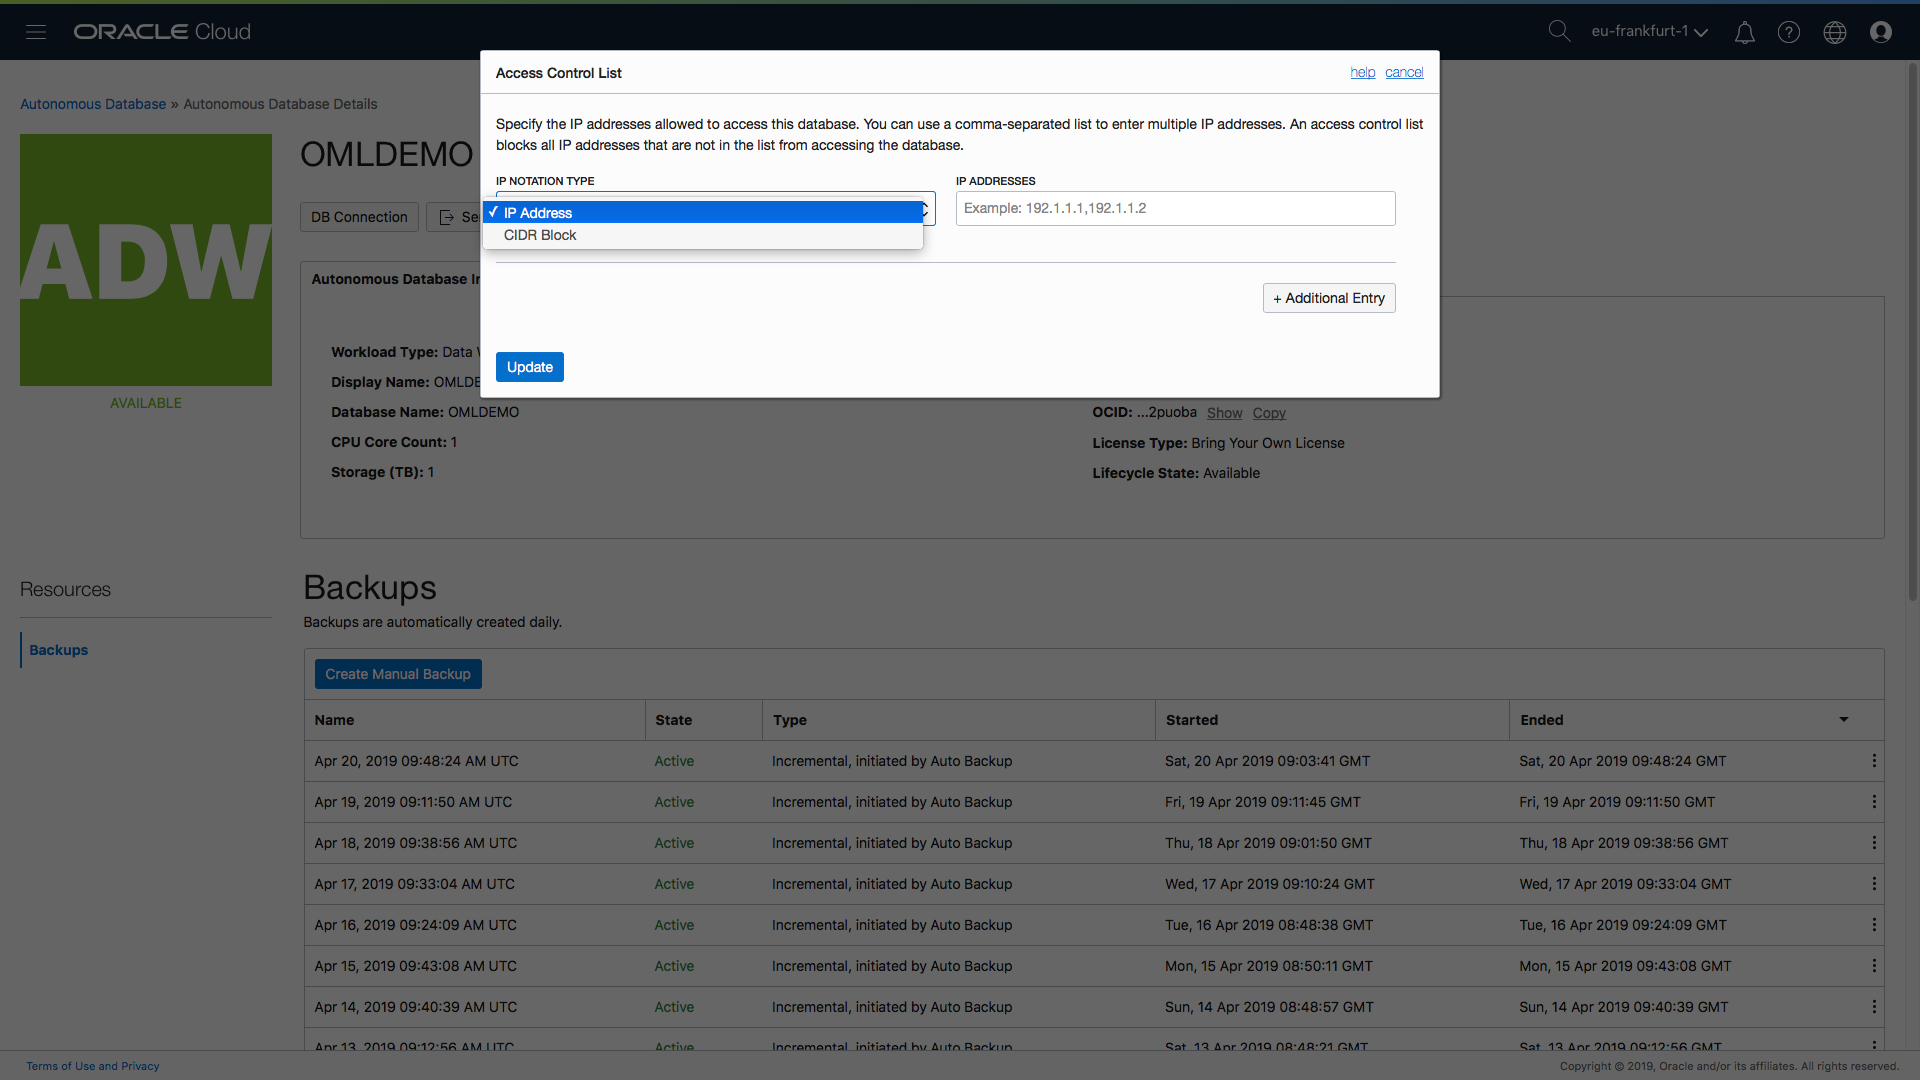
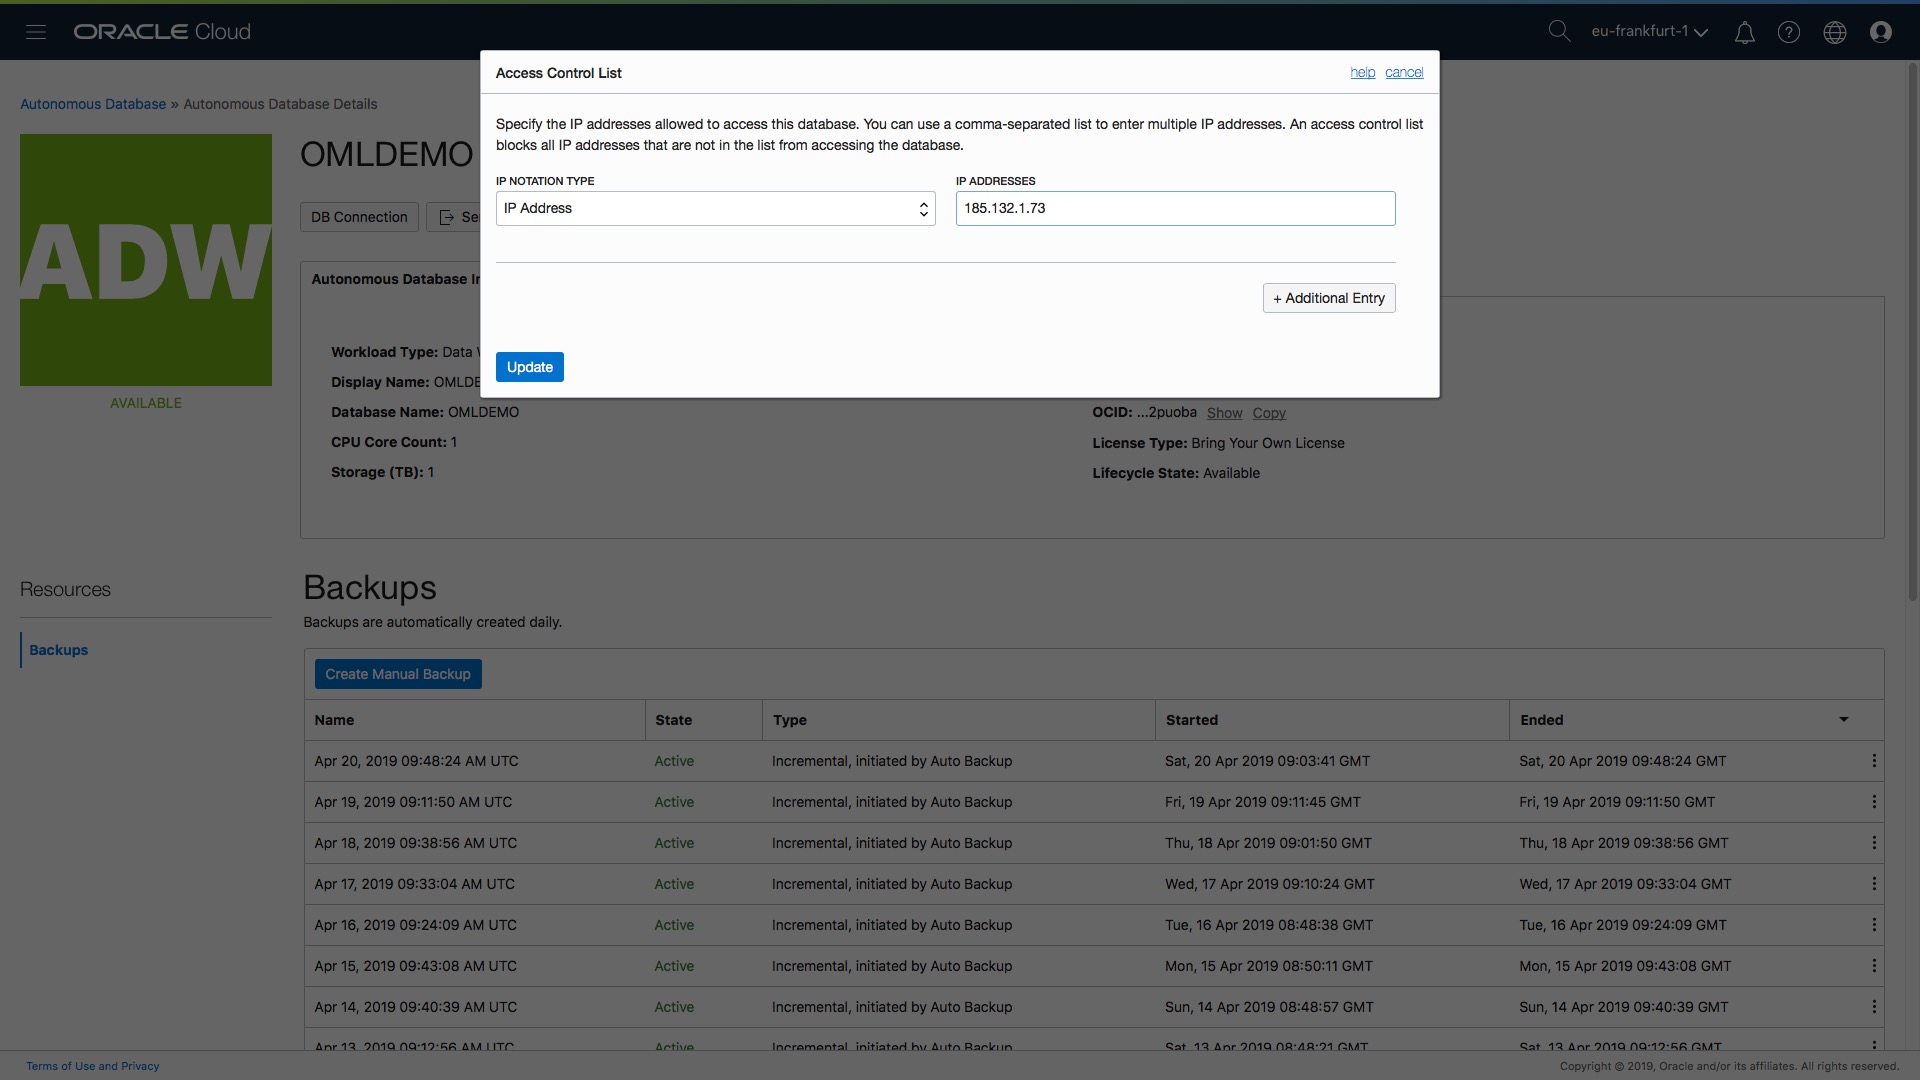
Step 3 – Select the type of list being created – IP or CIDR.
A pop-up form allows you to enter the list or range of IP addresses that will be allowed to connect to your autonomous data warehouse:
Essentially you have two options at this point…you can either provide a comma separated list of IP addresses or you can provide CIDR blocks (if you have no idea what a CIDR block is then check out this definition on wikipedia: https://en.wikipedia.org/wiki/Classless_Inter-Domain_Routing)…
…and of course you can mix-and-match the definitions of IP addresses and CIDR blocks by simply clicking on the “Additional Entry” button and making the appropriate selections and entries…
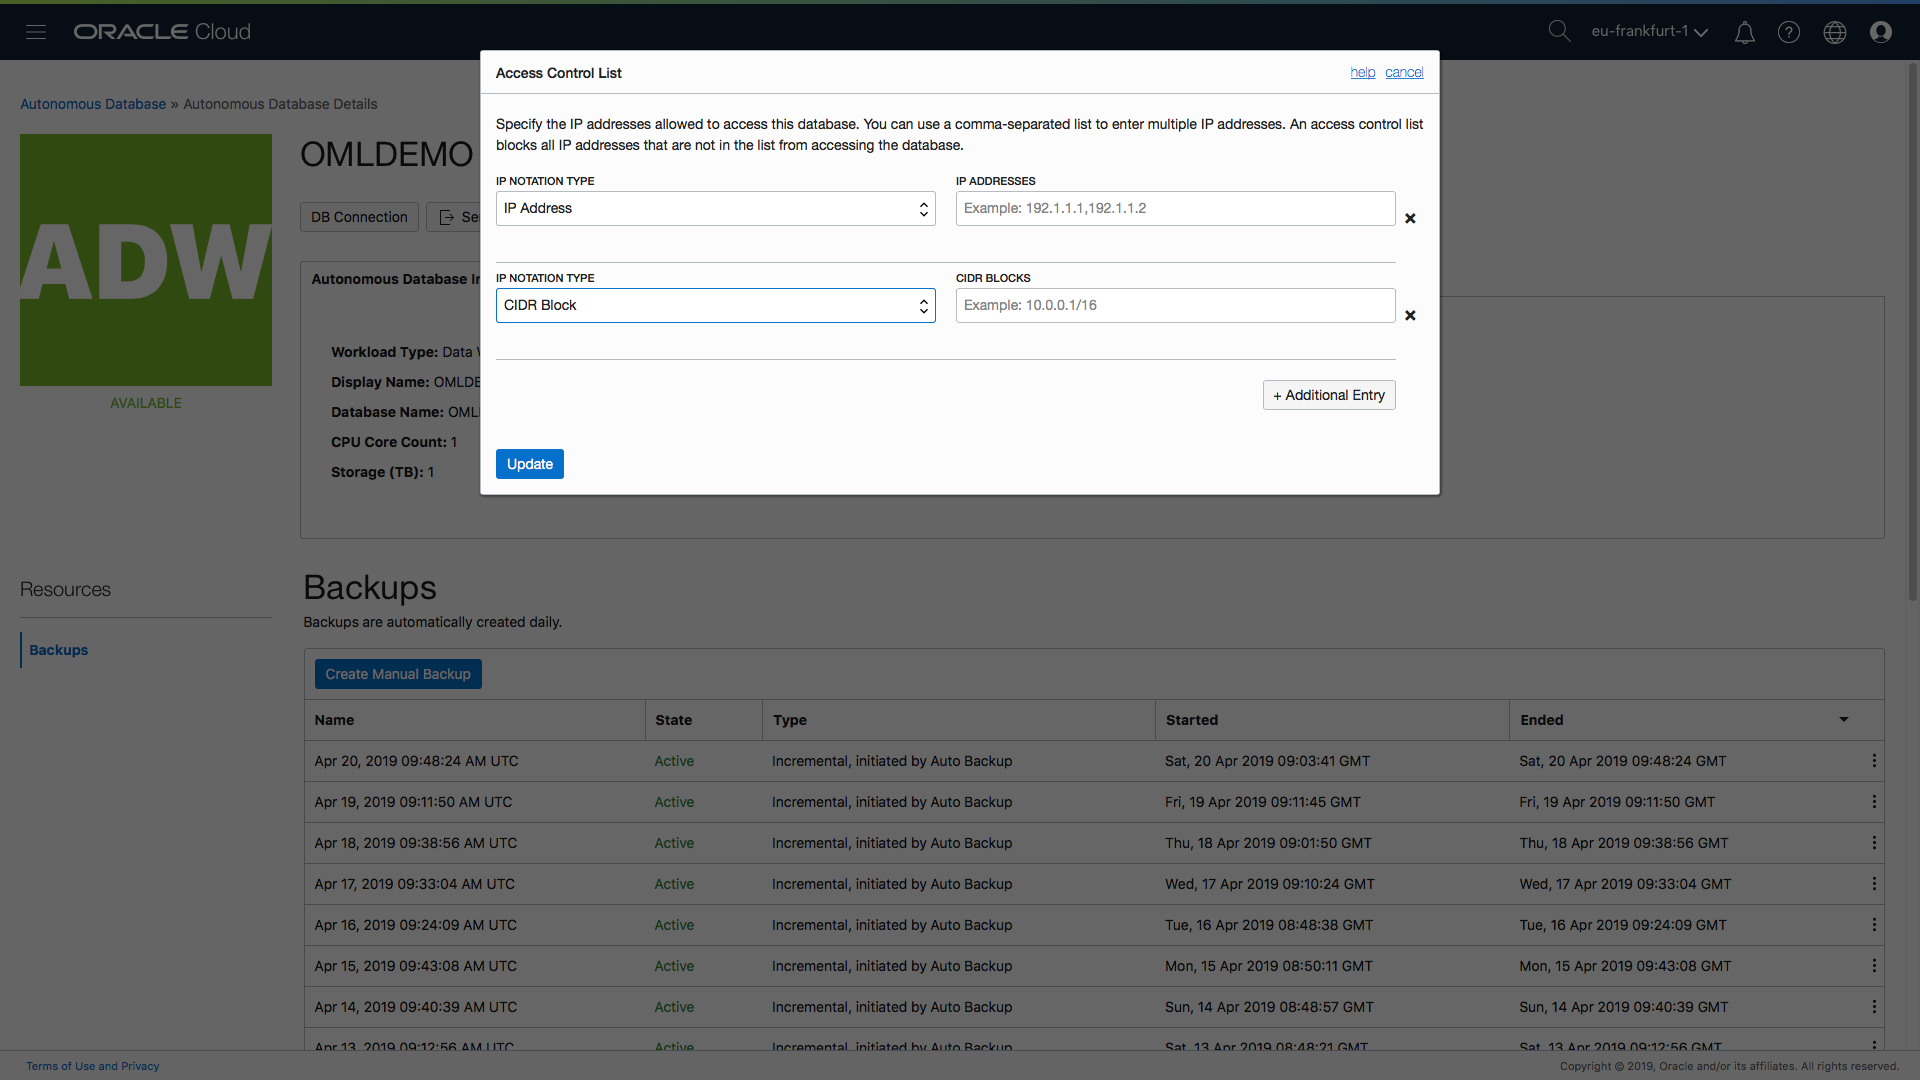
If you need to remove an entry then there is an “x” icon to the right of each entry which will allow you to remove a entry.
Step 4 – Enter the list of values for the IP or the CIDR.
Let’s assume my client IP address for my desktop workstation is 185.132.1.73 and this is the only IP address that should be able to connect to my autonomous database. All I need to do is add an entry for the IP address 185.132.1.73 in the form as shown below:
Everything is now set so all that’s left is the last step….
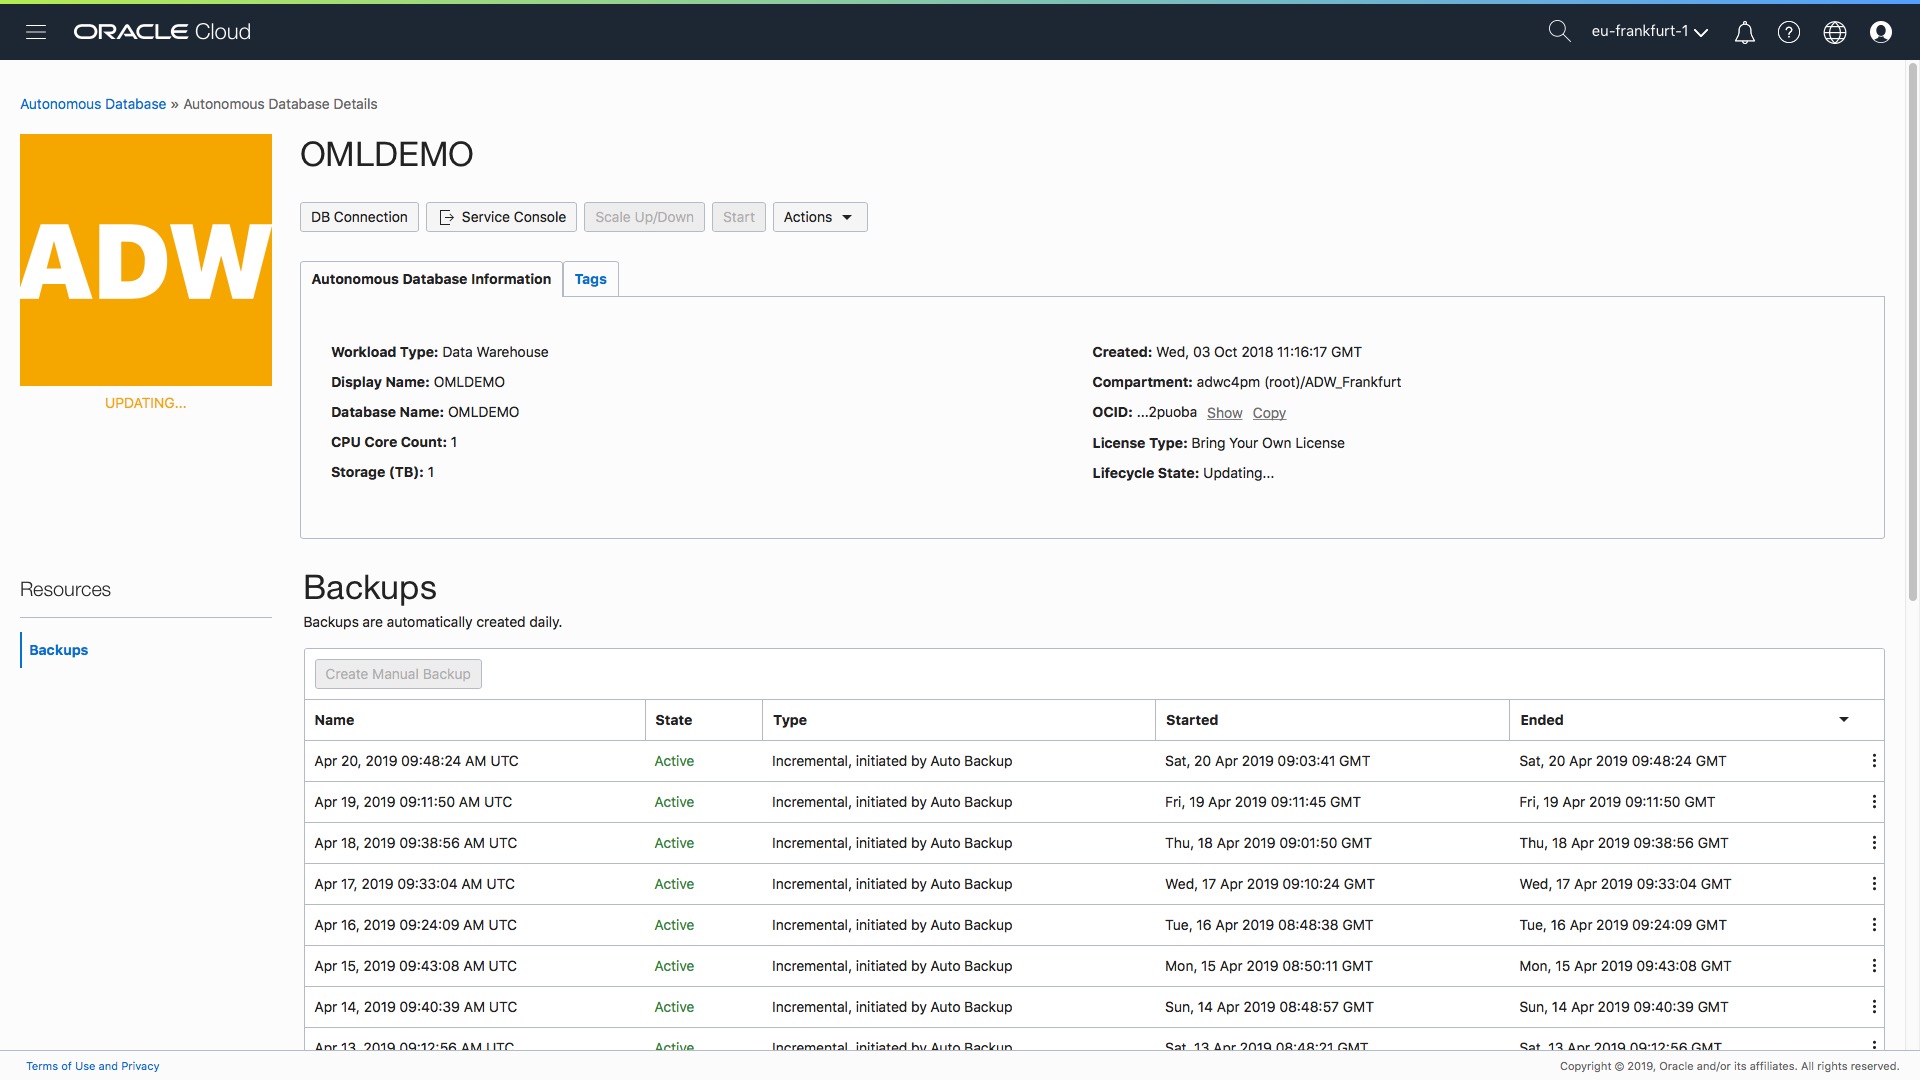
Step 5 – Click Update
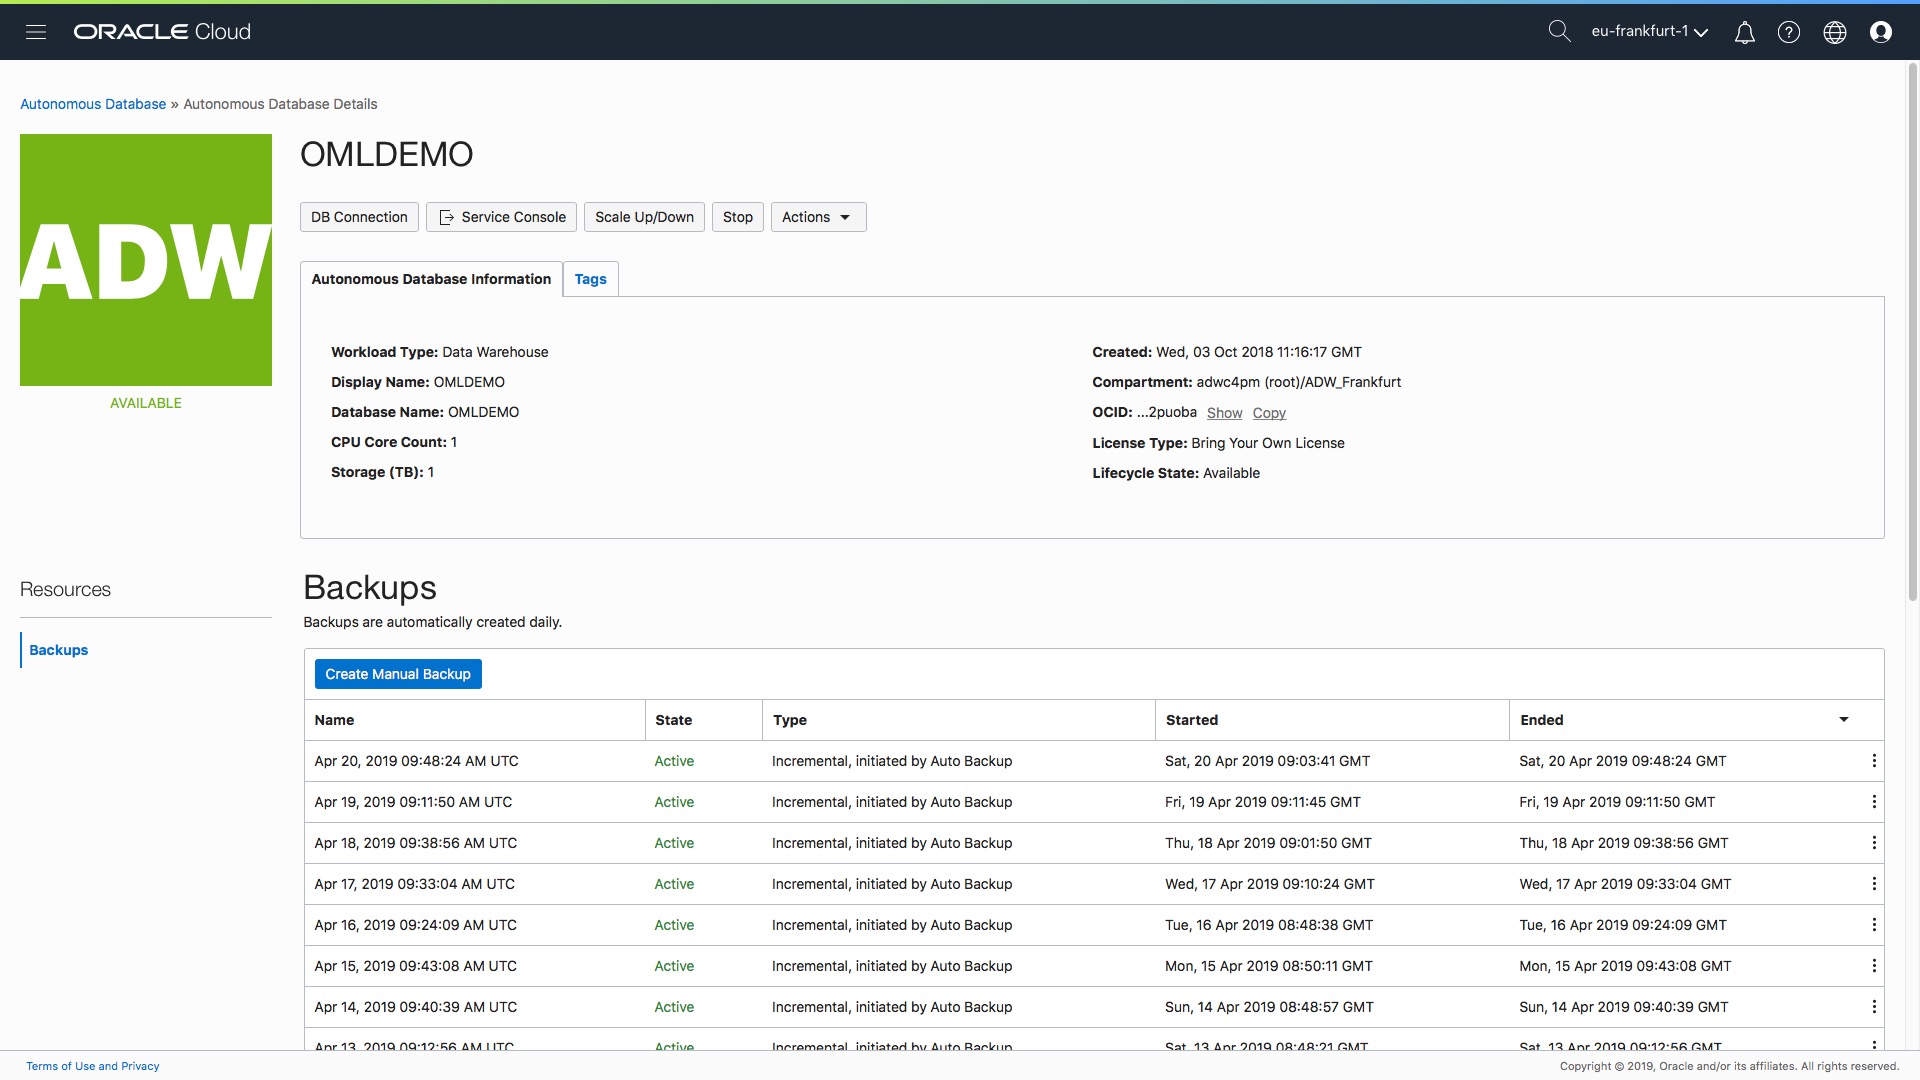
Click the blue update button in the bottom left corner of the form and the changes will be applied. Notice that in all the above screenshots, the current state is “Available”. When you click “Update” the status will change to “Updating” until the network ACL is set.
All Done!
The data warehouse is still up and accessible, there is no downtime. When the update is complete the status will return to “Available” and the network ACLs from the access control list will take affect.
Where is the ACL information stored?
All the information relating to the list of network ACLs is stored directly in the database and treated like any other metadata. This means that your network ACLs are backed up automatically as part of the normal autonomous backup process. One thing to note is the following: if you or someone else decides to restore the database to a previous point in time, for whatever reason, then the network ACLs will be reverted back to the list as of that point in time. So after a restore it’s probably a good idea to check your ACLs are correctly set. Hopefully, that makes sense!
What about access to the service console?
The service console is not subject to network ACLs. This makes it easier for the DBA to access the console from different locations, which is a typical DBA requirement. More importantly, since the management console itself does not expose any of your data, the use of network ACLs is not really necessarily.
What about access to OML SQL Notebooks?
Oracle Machine Learning notebooks are also subject to ACLs. Therefore, if you try to login to OML as a user and your IP address is not whitelisted then you will get an “invalid connection” type error message. The admin user can always access the “Manage OML Users” console screen since the same rules apply as per the service console – managing OML users does not expose any of your data – which means that network ACLs are not enforced for this particular part of the management console.
What happens when you clone a data warehouse?
When you clone an autonomous data warehouse (the steps for doing that are outlined here) then your network ACLs are copied to the new clone. This means your clone will have exactly the same list of approved IP addresses. One less thing to worry about as a DBA!
Summary
Wraping this all up…this post has explained how, in 5 easy steps, you can restrict access to your autonomous data warehouse by creating a preset list of IP addresses (and/or CIDR blocks). If you are a non-technical user then hopefully the screenshots for each step of this simple process will help you setup this feature and avoid the need to log a call with your company’s network team.
There is more information available in the documentation:
An animation of the complete end-to-end process is shown here: