Autonomous Database now fully supports database links. What does this mean? It means that from within your Autonomous Data Warehouse you can make a connection to any other database (on-premise or in the cloud) including other Autonomous Data Warehouse instances and/or Autonomous Transaction Processing instances.
Before I dive into an example, let’s take a small step backwards and get a basic understanding of what a database links. Firstly, what is a database link?
What Are Database Links?
A database link is a pointer that defines a one-way communication path from, in this case an Autonomous Data Warehouse instance to another database. The link is one-way in the sense that a client connected to Autonomous Data Warehouse A can use a link stored in Autonomous Data Warehouse A to access information (schema objects such as tables, views etc) in remote database B, however, users connected to database B cannot use the same link to access data in Autonomous Data Warehouse A. If local users on database B want to access data on Autonomous Data Warehouse A, then they must define their own link to Autonomous Data Warehouse A.
There is more information about database links in the Administrator’s Guide.
Why Are Database Links Useful?
In a lot of situations it can be really useful to have access to the very latest data without having to wait for the next run of the ETL processing. Being able to reach through directly into other databases using a DBLINK can be the fastest way to get an upto-the-minute view of what’s happening with sales orders, or expense claims, or trading positions etc. Another use case is to actually make use of dblinks within the actual ETL processing by pulling data from remote databases into staging tables for further processing. This makes the ETL process impose a minimal processing overhead on the remote databases since all that is being typically executed is a basic SQL SELECT statement.
There are additional security benefits as well. For example if you consider an example where employees submit expense reports to Accounts Payable (A/P) application and that information needs to be viewed within a financial data mart. The data mart users should be able to connect to the AP database and run queries to retrieve the desired information. The mart users do not need to be A/P application users to do their analysis or run their ETL jobs; they should only be able to access AP information in a controlled, secured way.
Setting Up A Database Link in ADW
There are not many steps involved in creating a new database link since all the hard work happens under the covers. The first step is to check that you can actually access the target database- i.e. you have a username and password along with all the connection information.
To use database links with Autonomous Data Warehouse the target database must be configured to use TCP/IP with SSL (TCPS) authentication.
Fortunately if you want to connect to another Autonomous Data Warehouse or Autonomous Transaction Processing instance then everything already in place because ADB’s use TCP/IP with SSL (TCPS) authentication by default. For other cloud and on-premise databases you will most likely have to configure them to use TCP/IP with SSL (TCPS) authentication. I will try and cover this topic in a separate blog post.
Word of caution here…don’t forget to check your Network ACLs settings if you are connecting to another ATP or ADW instance since your attempt to connect might get blocked! There is more information about setting up Network ACLs here.
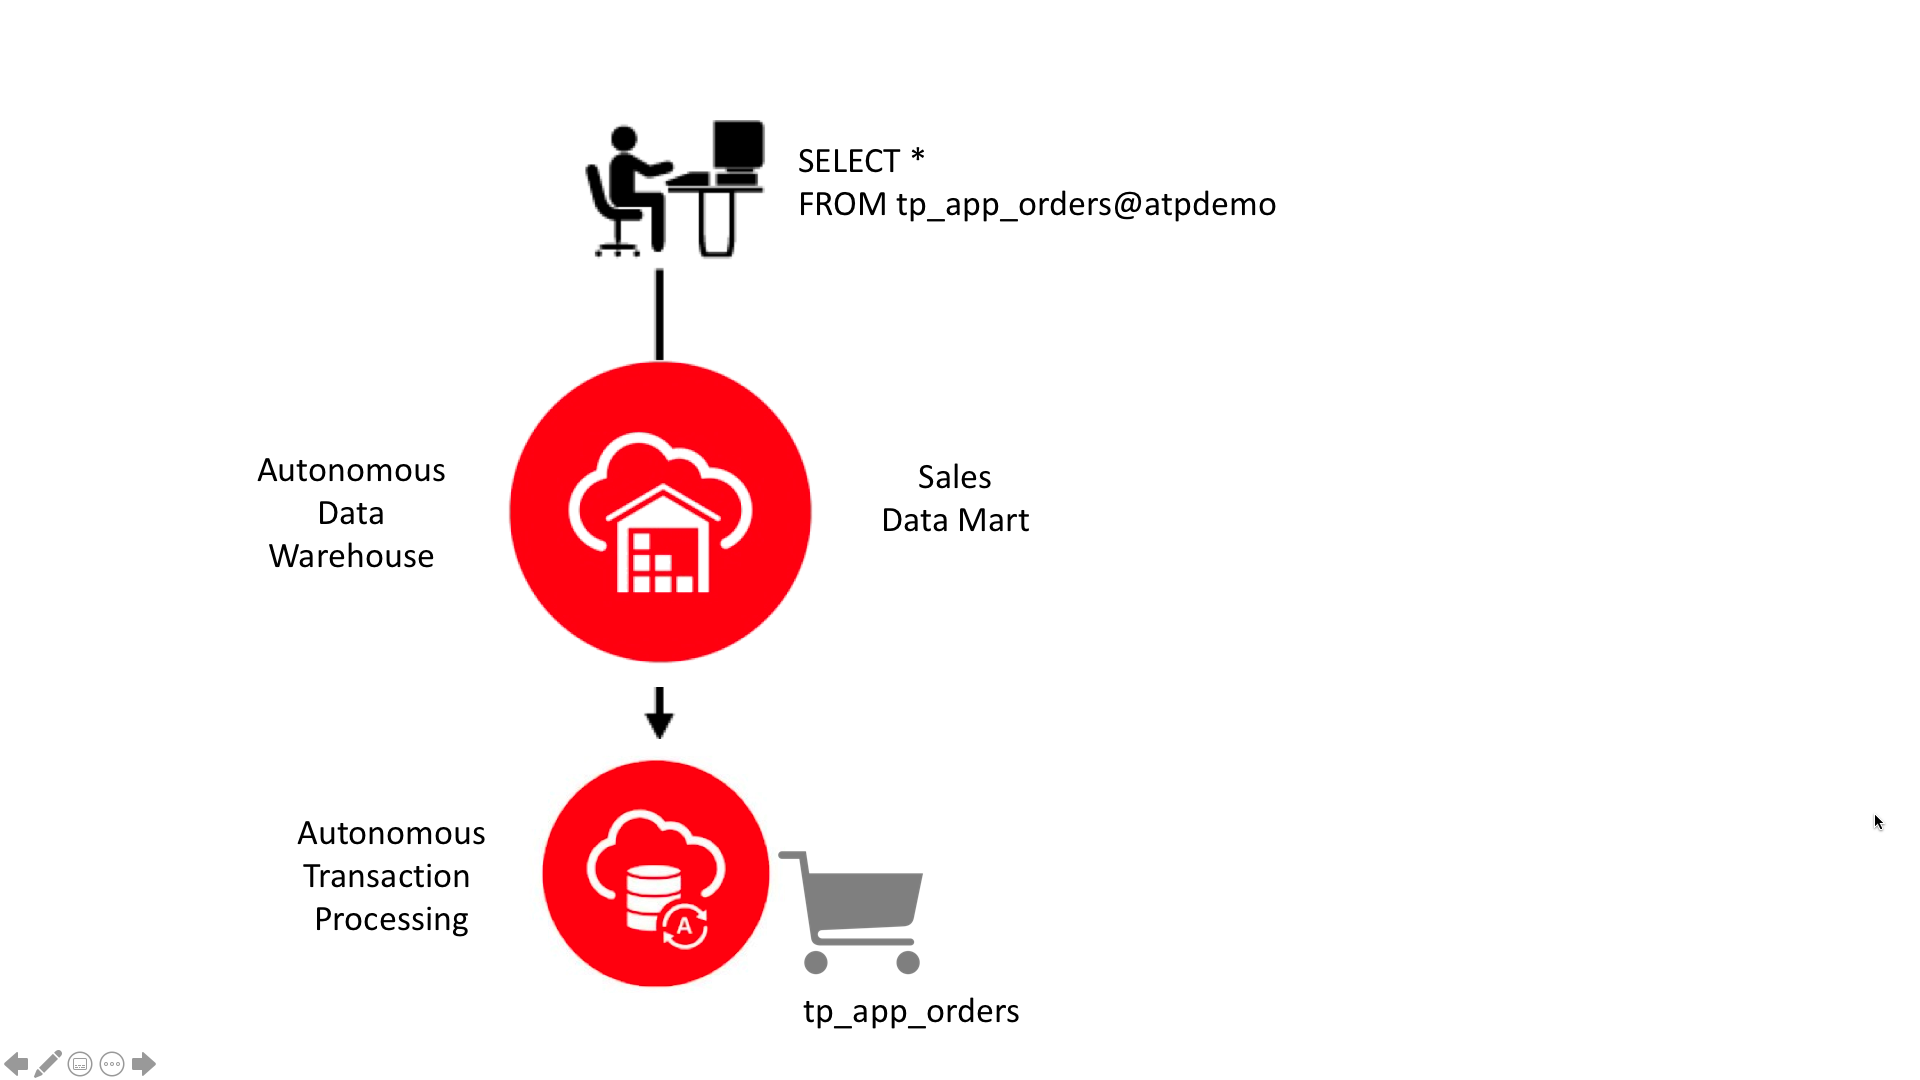
Scenario 1 – Connecting an Autonomous Data Warehouse to your Autonomous Transaction Processing instance
Let’s assume that I have an ATP instance running a web store application that contains information about sales orders, distribution channels, customers, products etc. I want to access some of that data in real-time from within my sales data mart.

The first step is get hold of the secure connection information for my ATP instance – essentially I need the cwallet.sso file that is part of the client credential file. If I click on the “APDEMO” link above I can access the information about that autonomous database and in the list of “management” buttons is the facility to download the client credentials file…

this gets me a zip file containing a series of files two of which are needed to create a database link: cwallet.sso contains all the security credentials and tnsnames.ora contains all the connection information that I am going to need.
Uploading the wallet file…
Next I goto to my Object Storage page and create a new bucket to store my wallet file. In this case I have just called it “wallet”. Probably in reality you will name your buckets to identify the target database such as “atpdemo_wallet” simply because every wallet for each database will have exactly the same name – cwallet.sso – so you will need to have a way to identify the target database each wallet is associated with and avoid over-writing each wallet.

within my bucket and I click on the blue “Upload” button to find the cwallet.sso file and move it to my Object Storage bucket:


once my wallet file is in my bucket I then need to setup my autonomous data warehouse to use that file when it makes a connection to my ATP instance.

This is where we step out of the cloud GUI and switch to a client tool like SQL Developer. I have already defined my SQL Developer connection to my Autonomous Data Warehouse which means I can start building my new database link.
Step 1 – Moving the wallet file
To allow Autonomous Data Warehouse to access the wallet file for my ATP target database wallet I need to put it in a special location – the data_pump_dir directory. This is done by using DBMS_CLOUD.GET_OBJECT as follows:
BEGIN
 DBMS_CLOUD.GET_OBJECT(
 credential_name => 'DEF_CRED_NAME',
 object_uri => 'https://objectstorage.us-phoenix-1.oraclecloud.com/n/adwc/b/adwc_user/o/cwallet.sso',
 directory_name => 'DATA_PUMP_DIR');
END;
/
If you execute the above command all you will get back in the console is a message something like this “PL/SQL procedure successfully completed”. So to find out if the file actually got moved you can use the following query to query the data_pump_dir directory
SELECT *
FROM table(dbms_cloud.list_files('DATA_PUMP_DIR'))
WHERE object_name LIKE '%.sso'
which hopefully returns the following result within SQL Developer that confirms my wallet file is now available to my Autonomous Data Warehouse:

Step 2 – Setting up authentication
When my database link process connects to my target ATP instance it obviously needs a valid username and password on my target ATP instance. However, if I can use an account in mu Autonomous Data Warehouse if it matches the account in my ATP instance. Chances are you will want to use a specific account on the target database so a credential is required. This can be setup relatively quickly using the following command:
BEGIN
  DBMS_CLOUD.CREATE_CREDENTIAL(
    credential_name => ‘ATP_DB_LINK_CRED',
    username => ’scott',
    password => ’tiger'
  );

END;
/
Step 3 – Defining the new database link
For this step I am going to need access to the tnsnames.ora file to extract specific pieces of information about my ATP instance. Don’t forget that for each autonomous instances there is a range of connections that are identified by resource group ids such as “low”, “medium”, “high”, “tp_urgent” etc. When defining your database link make sure you select the correct information from your tnsnames file. You will need to find the following identifiers:
- hostname
- port
- service name
- ssl_server_cert_dn
In the example below I am using the “low” resource group connection:
BEGIN
     DBMS_CLOUD_ADMIN.CREATE_DATABASE_LINK(
          db_link_name => 'SHLINK',
          hostname => 'adb.us-phoenix-1.oraclecloud.com',
          port => '1522',
          service_name => 'example_low.adwc.example.oraclecloud.com',
          ssl_server_cert_dn => ‘CN=adwc.example.oraclecloud.com,OU=Oracle BMCS PHOENIX,O=Oracle Corporation,L=Redwood City,ST=California,C=US’,
          credential_name => 'ATP_DB_LINK_CRED');
END;
/
I could configure the database link to authenticate using the current user within my Autonomous Data Warehouse (assuming that I had a corresponding account in my Autonomous Transaction Processing instance).
That’s all there is to it! Everything is now in place which means I can directly query my transactional data from my data warehouse. For example if I want to see the table of distribution channels for my tp_app_orders then I can simply query the channels table as follows:
SELECT
 channel_id,
 channel_desc,
 channel_class,
 channel_class_id,
 channel_total,
 channel_total_id
FROM channels@SHLINK;
Will now return the following:

and if I query my tp_app_orders table I can see the live data in my Autonomous Transaction Processing instance:

All Done!
That’s it. It’s now possible to connect your Autonomous Data Warehouse to any other database running on-premise or in the cloud, including other Autonomous Database instances. This makes it even quicker and easier to pull data from existing systems into your staging tables or even just query data directly from your source applications to get the most up to date view.
In this post you will have noticed that I have created a new database link between an Autonomous Data Warehouse and an Autonomous Transaction Processing instance. Whilst this is a great use case I suspect that many of you will want to connect your Autonomous Data Warehouse to an on-premise database. Well, as I mentioned at the start of this post there are some specific requirements related to using database links with Autonomous Data Warehouse where the target instance is not an autonomous database and we will deal with those in the next post: How to Create a Database Link from an Autonomous Data Warehouse to a Database Cloud Service Instance.
For more information about using dblinks with ADW click here.