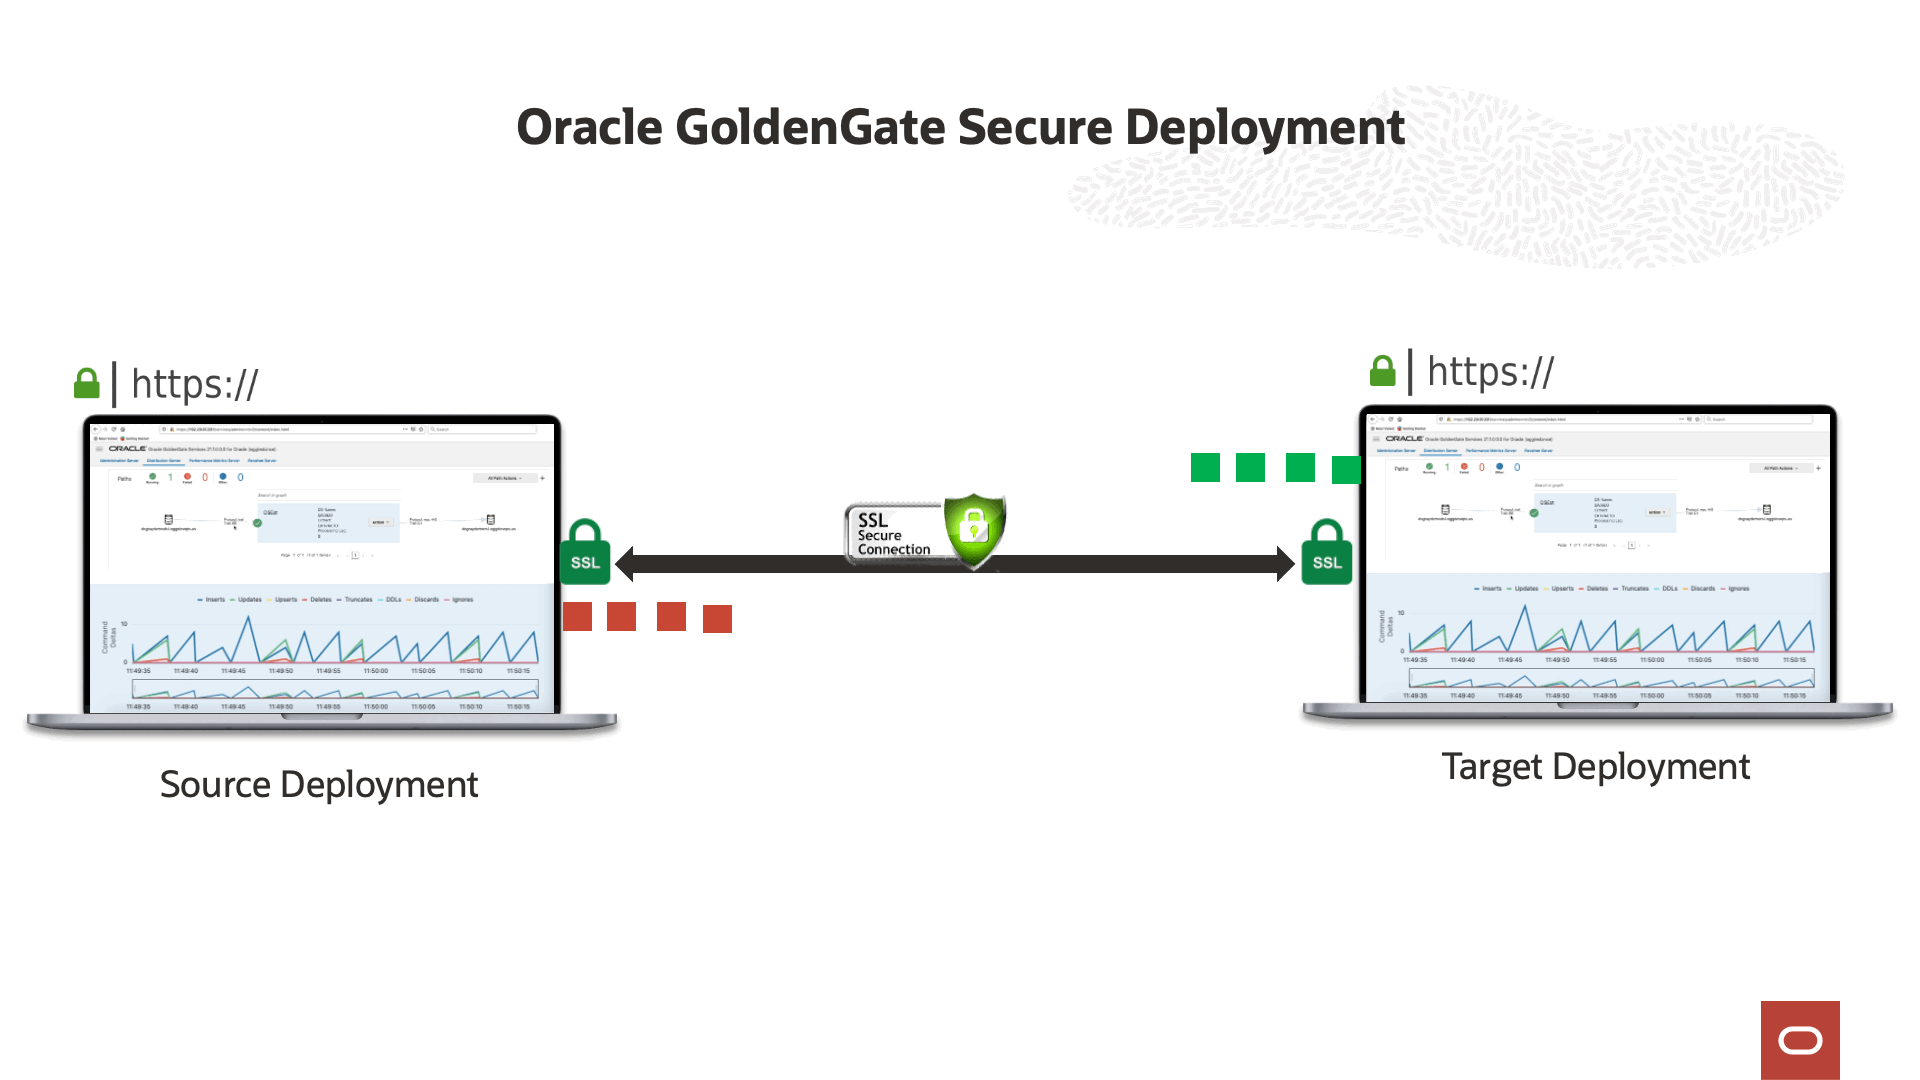
An Oracle GoldenGate Microservices deployment can be installed with various security features. When setting up a secure deployment, some information is required for proper configuration depending on whether self-signed certificates are used or provided.
In case of two deployments, learn about the options to add external certificates in cases where the distribution path needs to be established between deployments with different source and target databases.
Architecture:
Prerequisite
1. Download and install the GoldenGate binaries on both servers.
2. Update the “/etc/hosts” file with both server hostname-to-IP address mapping entries.
ex: <ip-address> <hostname> [<aliases>…]
Please follow the below steps:
1. Crete a server certificate, client certificate and the trusted cert chains.
a. openssl configuration file for Root CA.
cat >rootCA.cfg <<EOF

[ req ]
default_bits = 4096
default_md = sha512
prompt = no
encrypt_key = no
distinguished_name = req_distinguished_name
req_extensions = v3_req
x509_extensions = v3_ca
x509_extensions = usr_cert
[ req_distinguished_name ]
commonName = "gg-Root"
[ v3_req ]
basicConstraints=CA:TRUE
[ v3_ca ]
basicConstraints=CA:TRUE
[ usr_cert ]
basicConstraints=CA:TRUE
[ my_extensions ]
EOF
b. Create a root CA certificate
c. Create a Server Certificate
mkdir server

cd server/

cat > source.cfg << EOF

[ req ]
default_bits = 4096
default_md = sha512
prompt = no
encrypt_key = no
distinguished_name = req_distinguished_name
[ req_distinguished_name ]
commonName = "Source-Server.FQDN"
[ my_extensions ]
EOF

openssl req -new -newkey rsa:2048 -nodes -keyout source.key -out source.csr -config source.cfg

openssl x509 -req -days 73000 -in source.csr -CA ../rootCA.cert -CAkey ../rootCA.key -CAcreateserial -out source.cert
Note : In this example, we are using commonName as the FQDN of the source server. Kindly change the commonName to source server fully qualified domain name, for example, “ggsource.sunetXXXX.integration.oraclevcn.com”
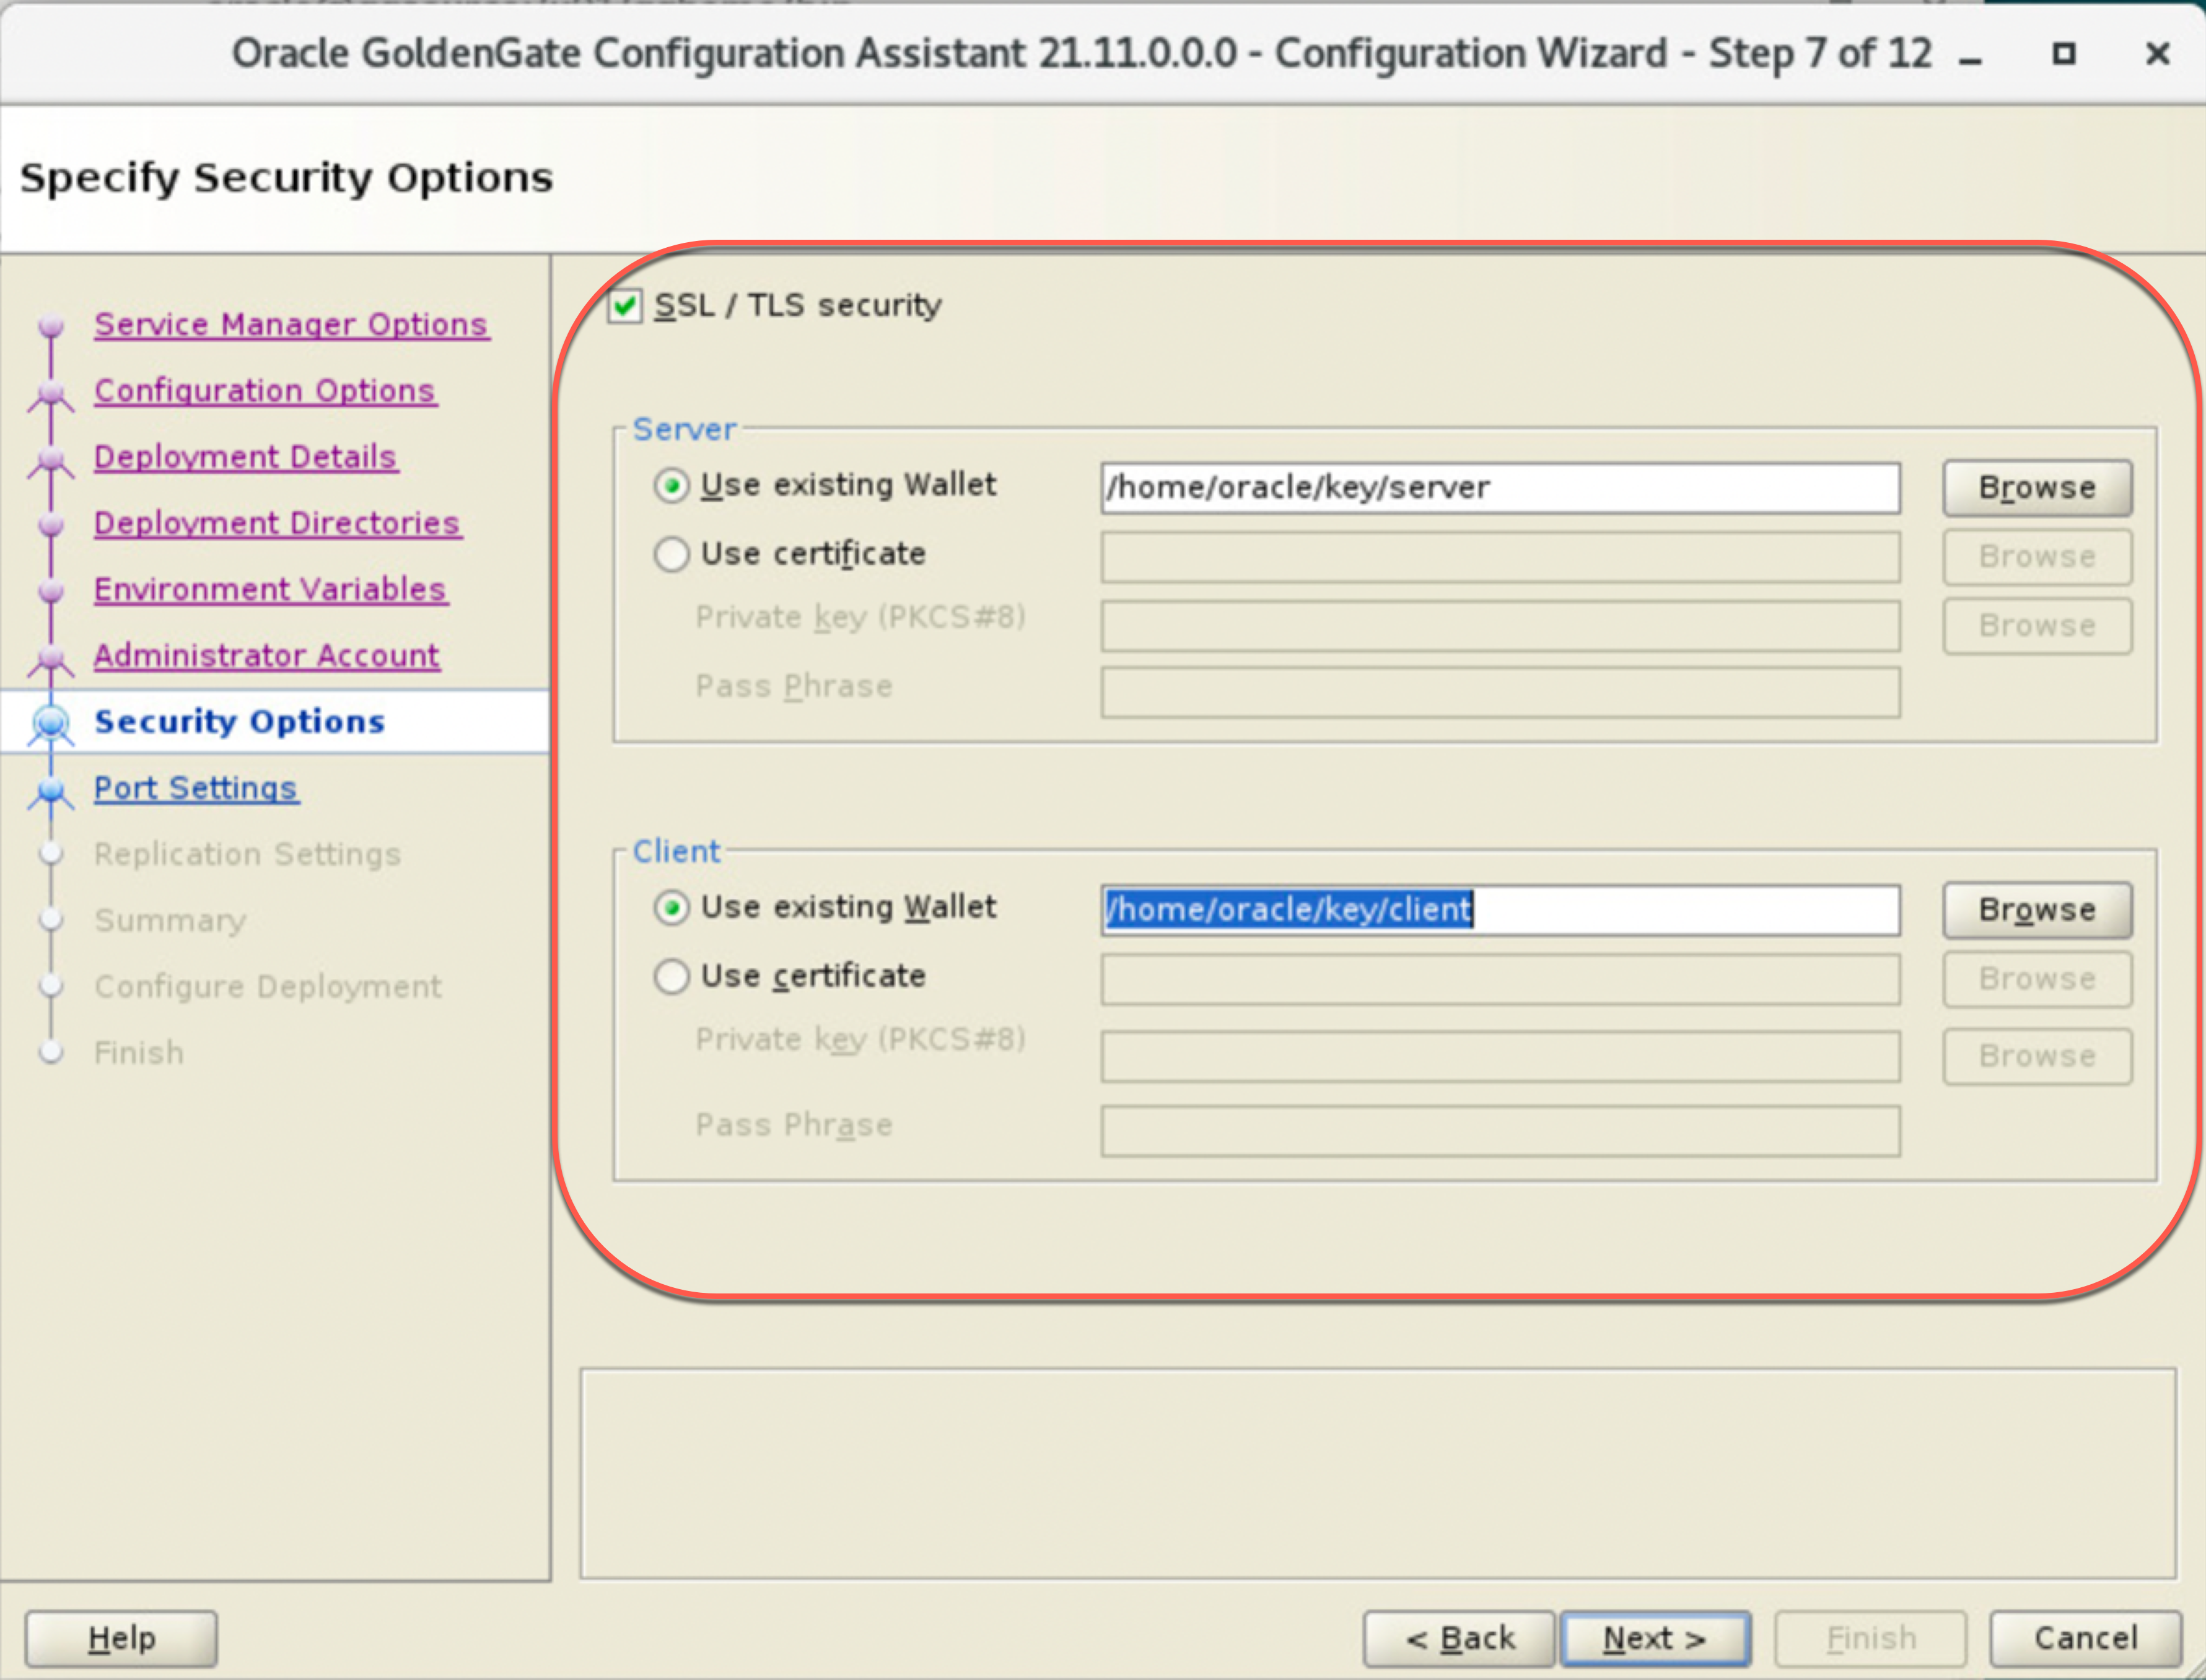
d. Create an empty auto-login Oracle wallet for Server
e. Create pkcs#12 file using the user cert and trusted cert chain info
f. Import the pkcs#12 file into the auto-login wallet
g. View the content of the wallet
2. Kindly follow the same steps for Client and target certifcate creation
++++++++++++++++++++++++++++++++++++++++++++++++++++++++++++++++++++++++++++++++++++++++++++++++++++++++
*********************************CLIENT********************************************
++++++++++++++++++++++++++++++++++++++++++++++++++++++++++++++++++++++++++++++++++++++++++++++++++++++++
cd ..

mkdir client

cd client

cat >client.cfg <<EOF

[ req ]
default_bits = 4096
default_md = sha512
prompt = no
encrypt_key = no
distinguished_name = req_distinguished_name
[ req_distinguished_name ]
commonName = "gg-Client"
[ my_extensions ]
EOF

openssl req -new -newkey rsa:2048 -nodes -keyout client.key -out client.csr -config client.cfg

openssl x509 -req -days 73000 -in client.csr -CA ../rootCA.cert -CAkey ../rootCA.key -CAcreateserial -out client.cert

orapki wallet create -wallet ../client -auto_login

openssl pkcs12 -export -out client.p12 -inkey ./client.key -in ./client.cert -chain -CAfile ../rootCA.cert

orapki wallet import_pkcs12 -wallet ../client -pkcs12file ./client.p12

orapki wallet display -wallet ../client/ -complete
++++++++++++++++++++++++++++++++++++++++++++++++++++++++++++++++++++++++++++++++++++++++++++++++++++++++
*********************************TARGET********************************************
++++++++++++++++++++++++++++++++++++++++++++++++++++++++++++++++++++++++++++++++++++++++++++++++++++++++
cd ..

mkdir target

cd target

cat > target.cfg << EOF

[ req ]
default_bits = 4096
default_md = sha512
prompt = no
encrypt_key = no
distinguished_name = req_distinguished_name
[ req_distinguished_name ]
commonName = "Target-Server.FQDN"
[ my_extensions ]
EOF

openssl req -new -newkey rsa:2048 -nodes -keyout target.key -out target.csr -config target.cfg

openssl x509 -req -days 73000 -in target.csr -CA ../rootCA.cert -CAkey ../rootCA.key -CAcreateserial -out target.cert

orapki wallet create -wallet ../target -auto_login

openssl pkcs12 -export -out target.p12 -inkey ./target.key -in ./target.cert -chain -CAfile ../rootCA.cert

orapki wallet import_pkcs12 -wallet ../target -pkcs12file ./target.p12

orapki wallet display -wallet ../target/ -complete
Note : In this example, we are using commonName as the FQDN of the target server. Kindly change the commonName to target server fully qualified domain name “, for example, “ggtarget.sunetXXXX.integration.oraclevcn.com”
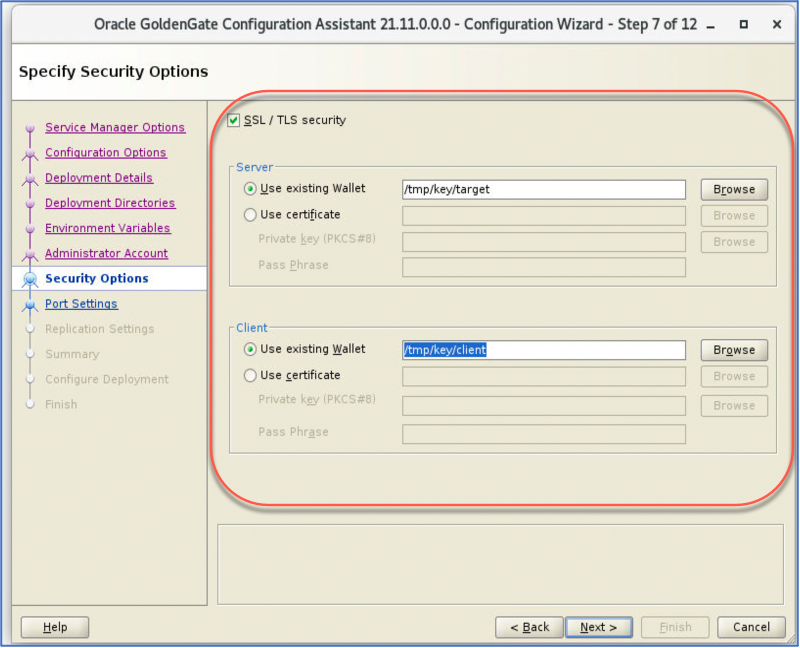
3. Run oggca.sh creating the Service Manager and secured deployment with the wallets built.
Source Side configuration:
Target Side configuration:
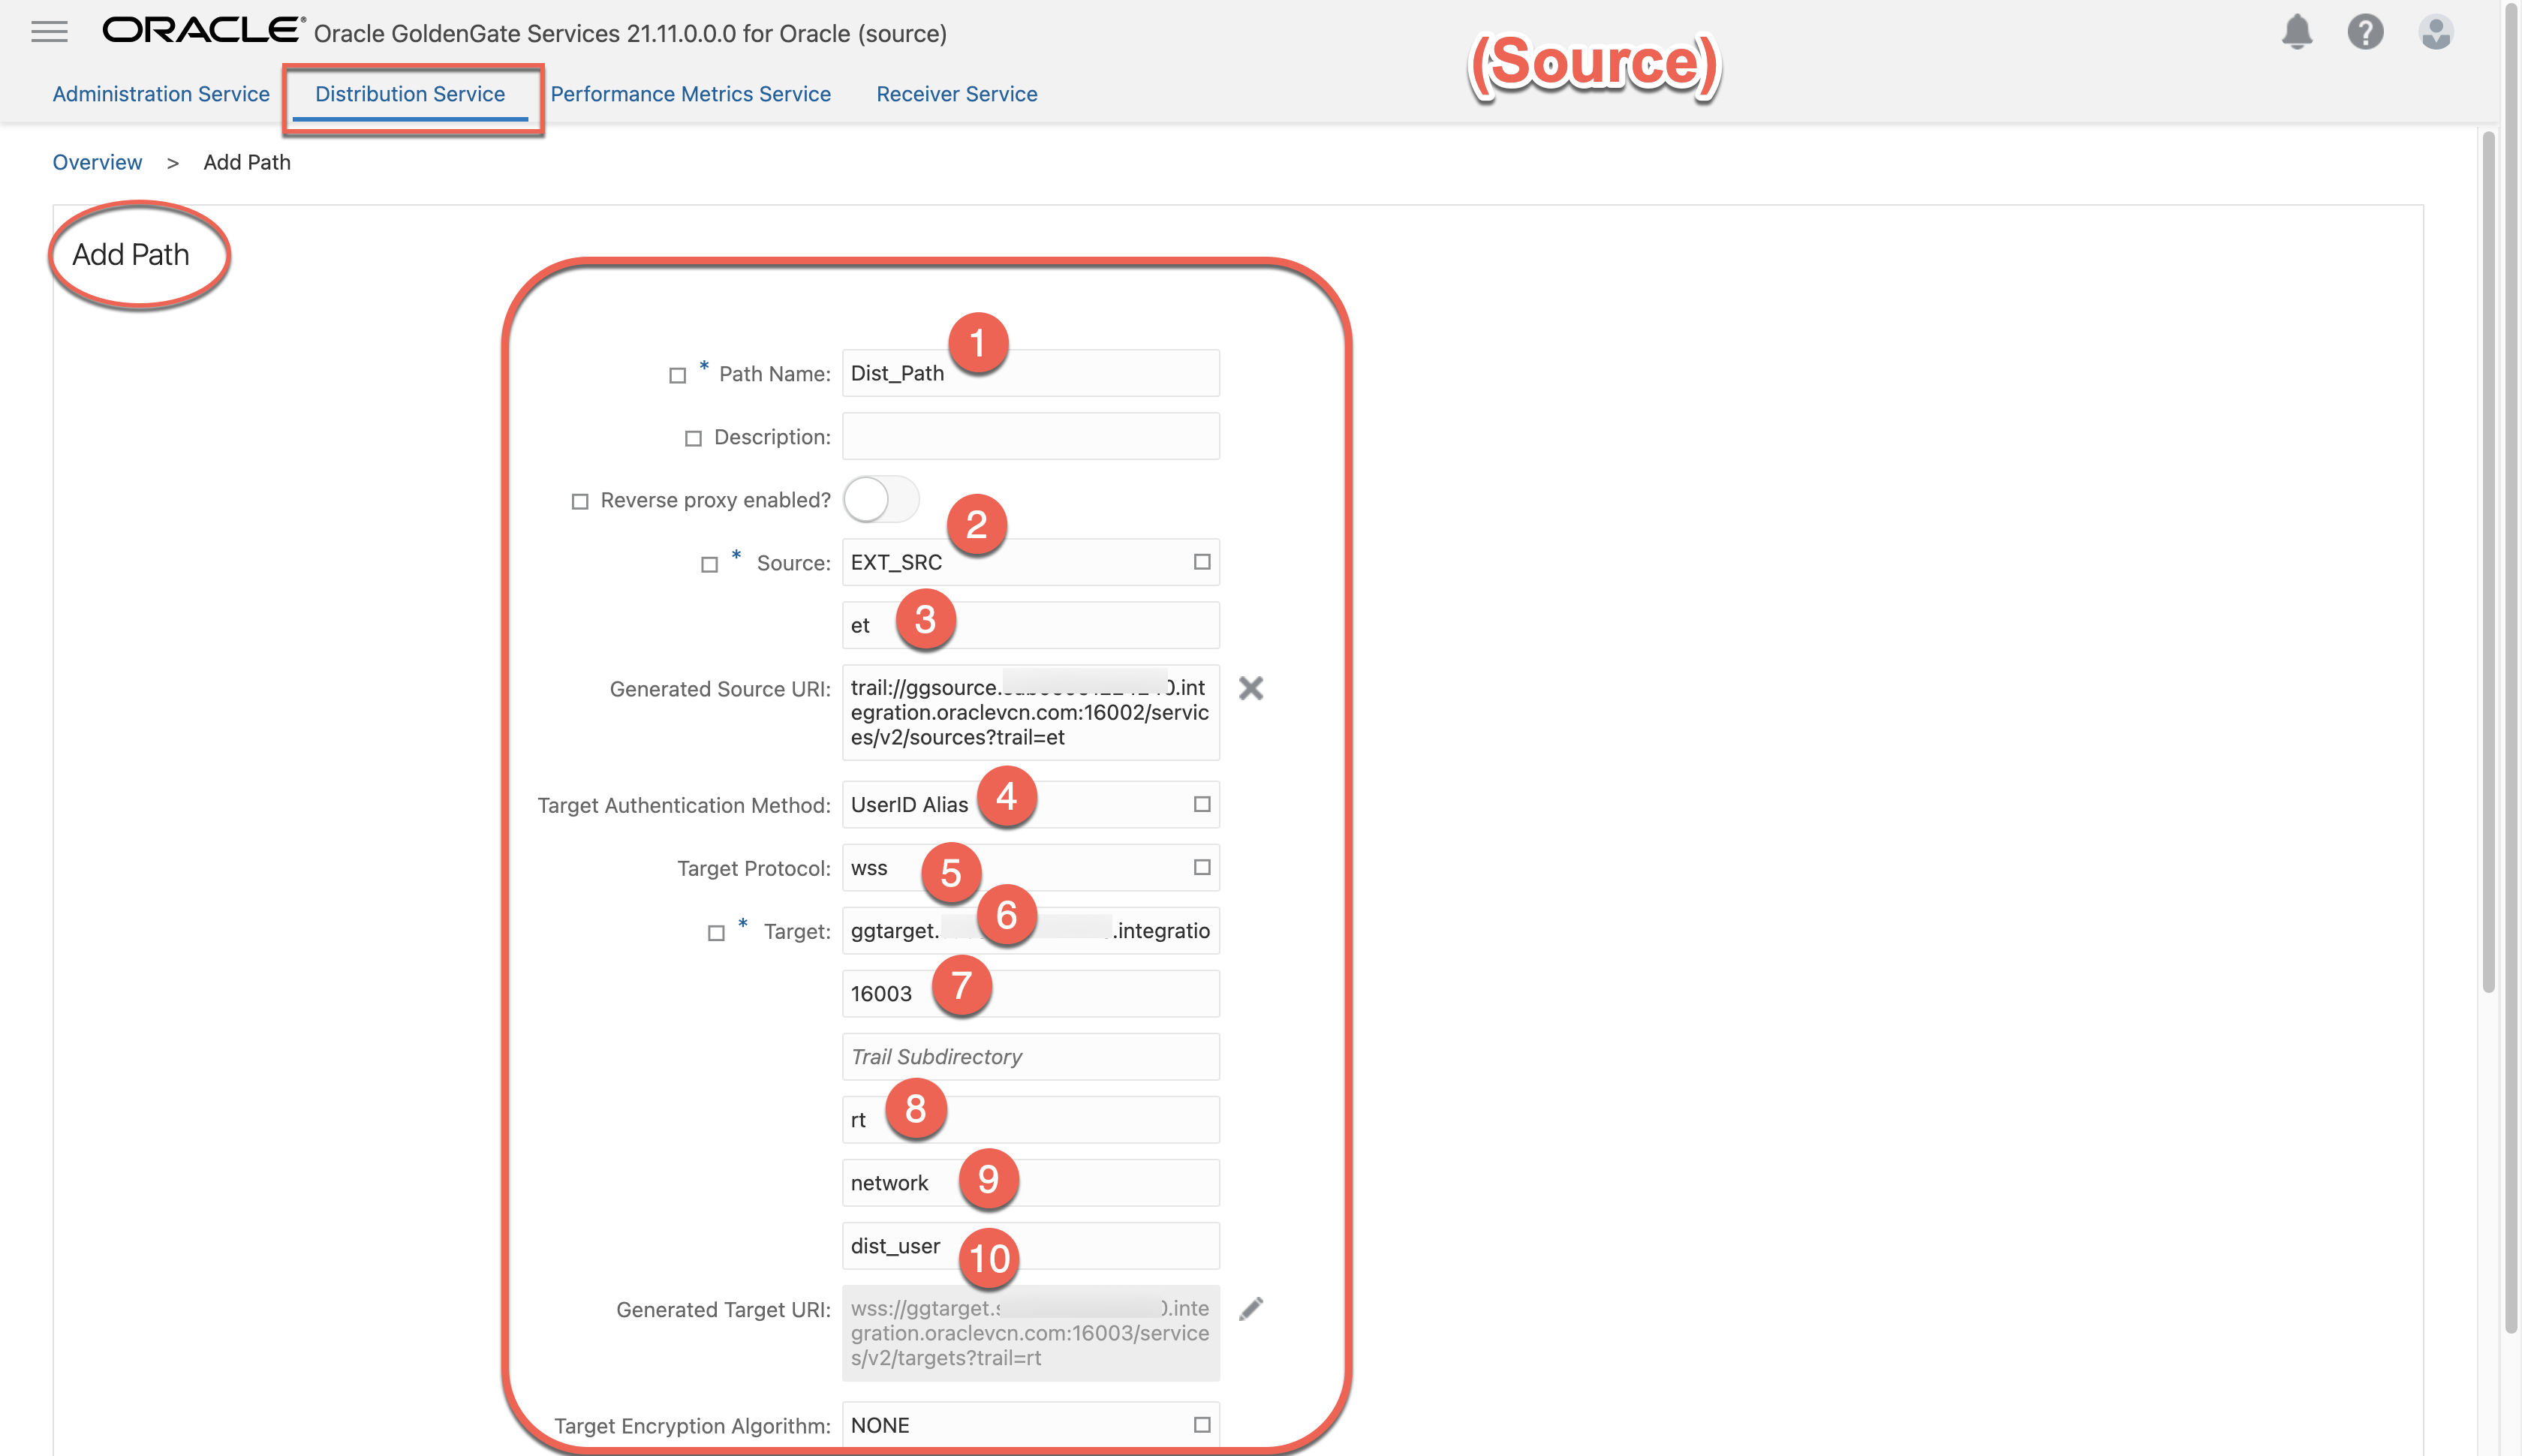
4. Create Distribution Path using wss (Secure to Secure with Alias Authentication)
4.1 Create an Operator user in target deployment to be used by the source when the distpath connects.
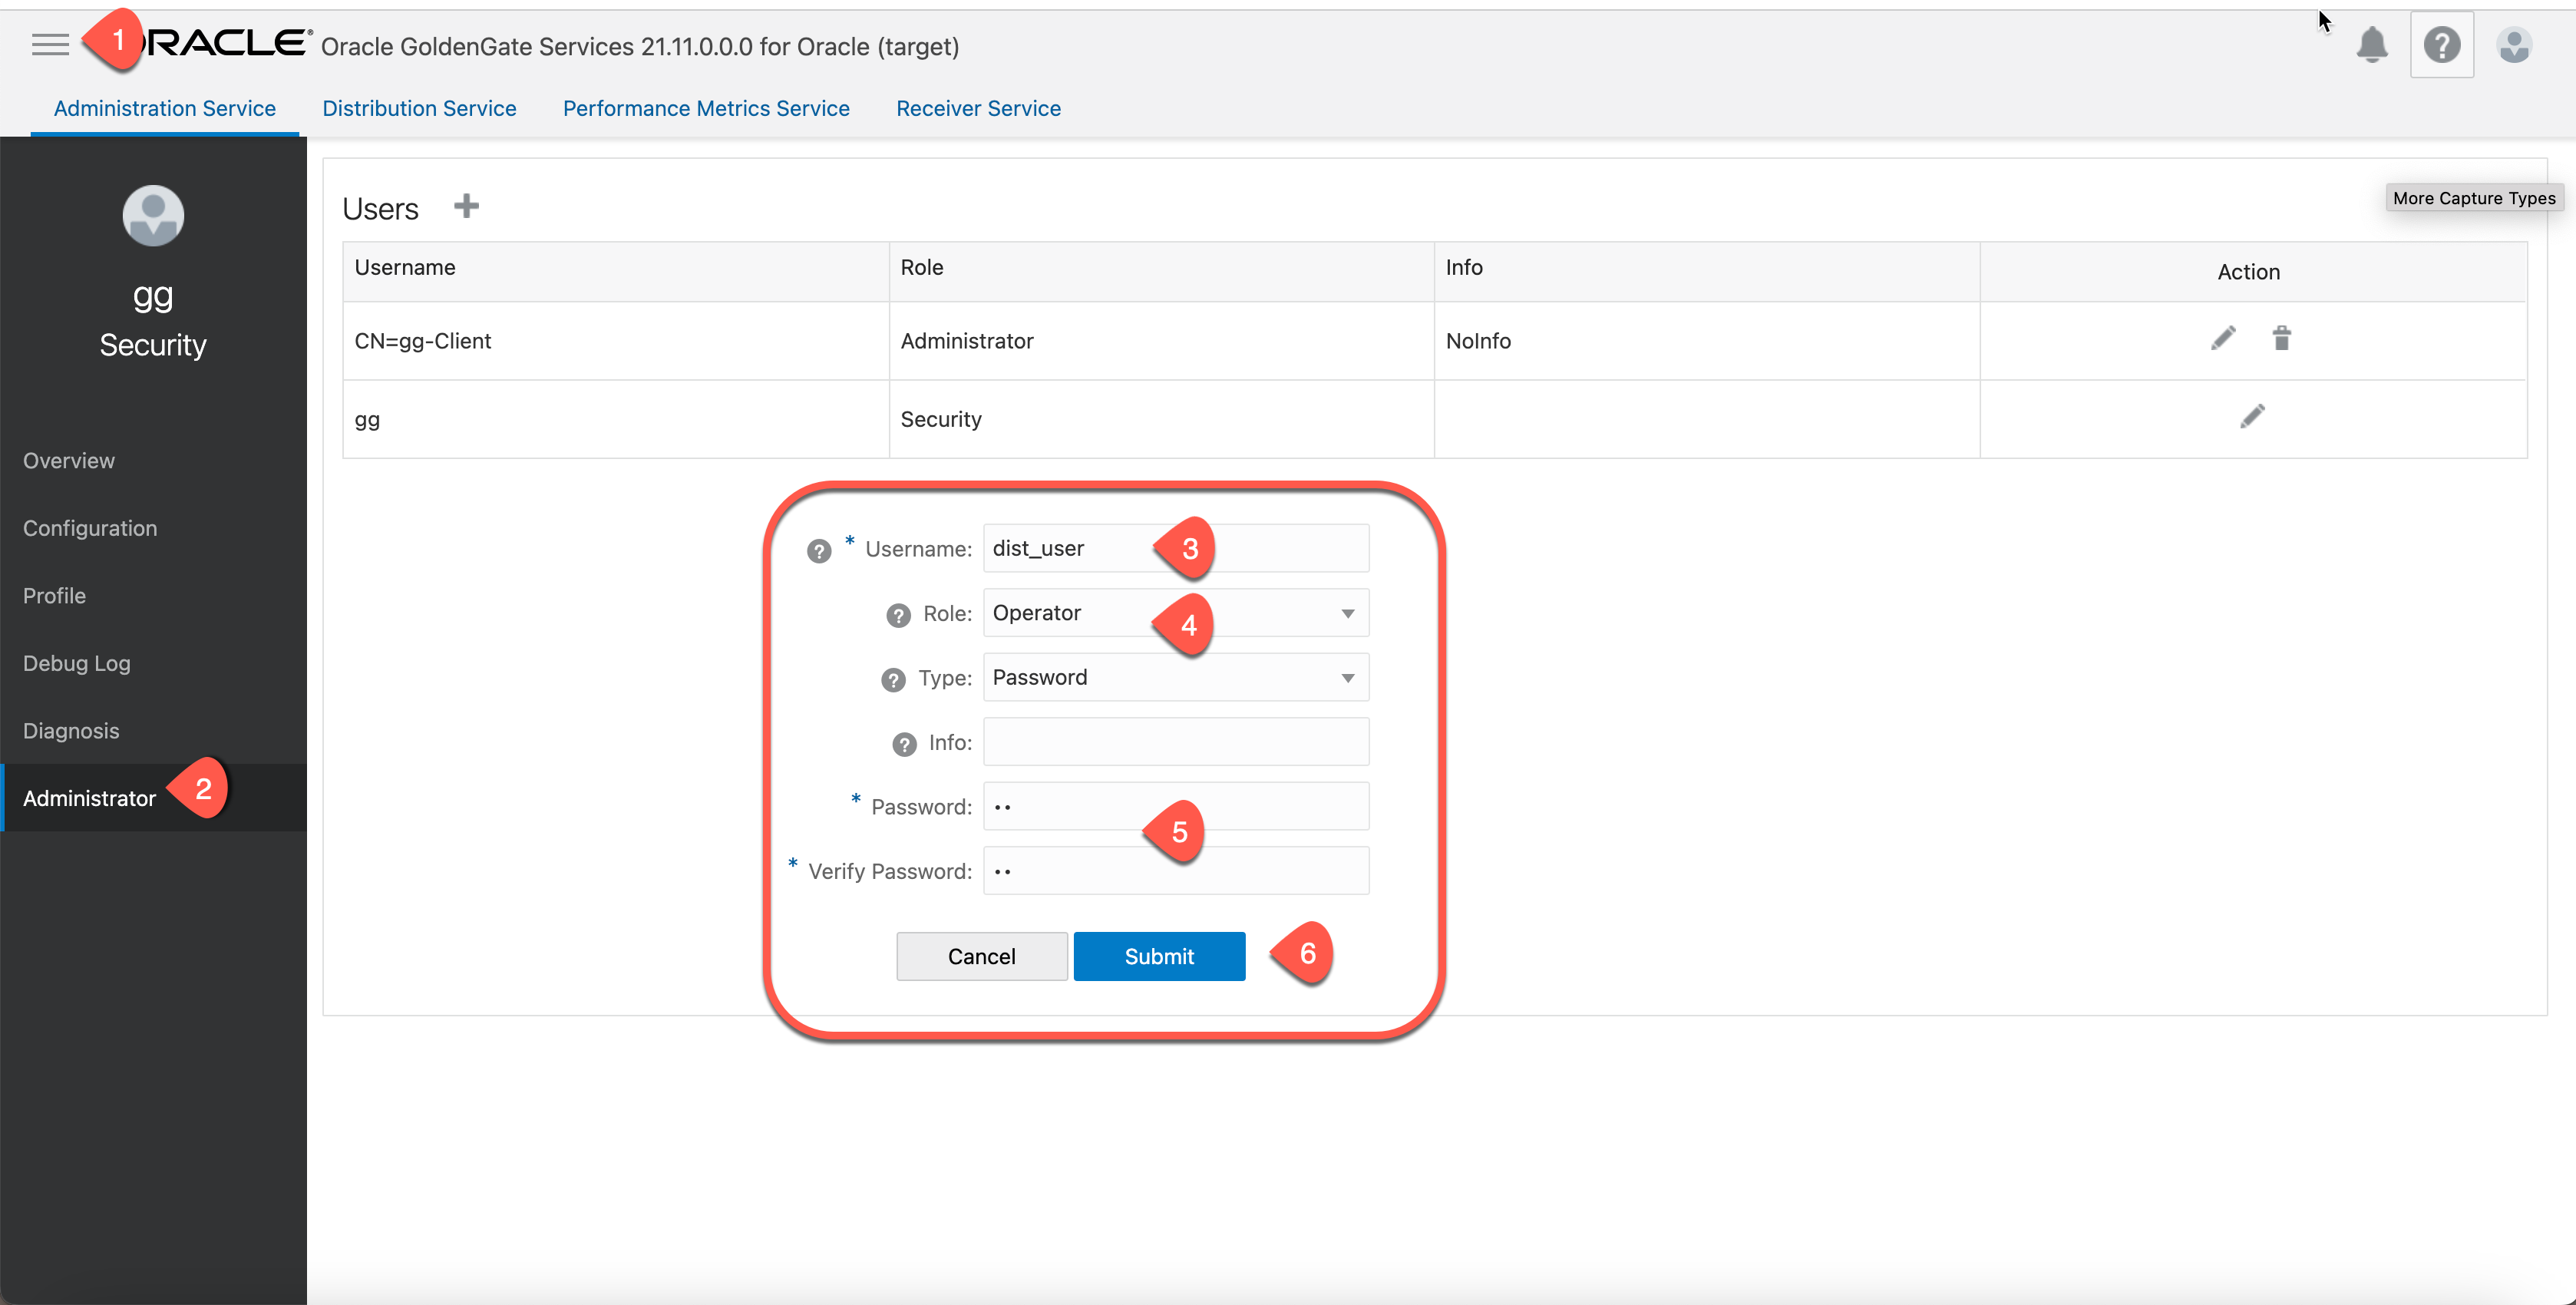
a. Create an alias in the source credentailstore to store the userid and password from last step 4.1
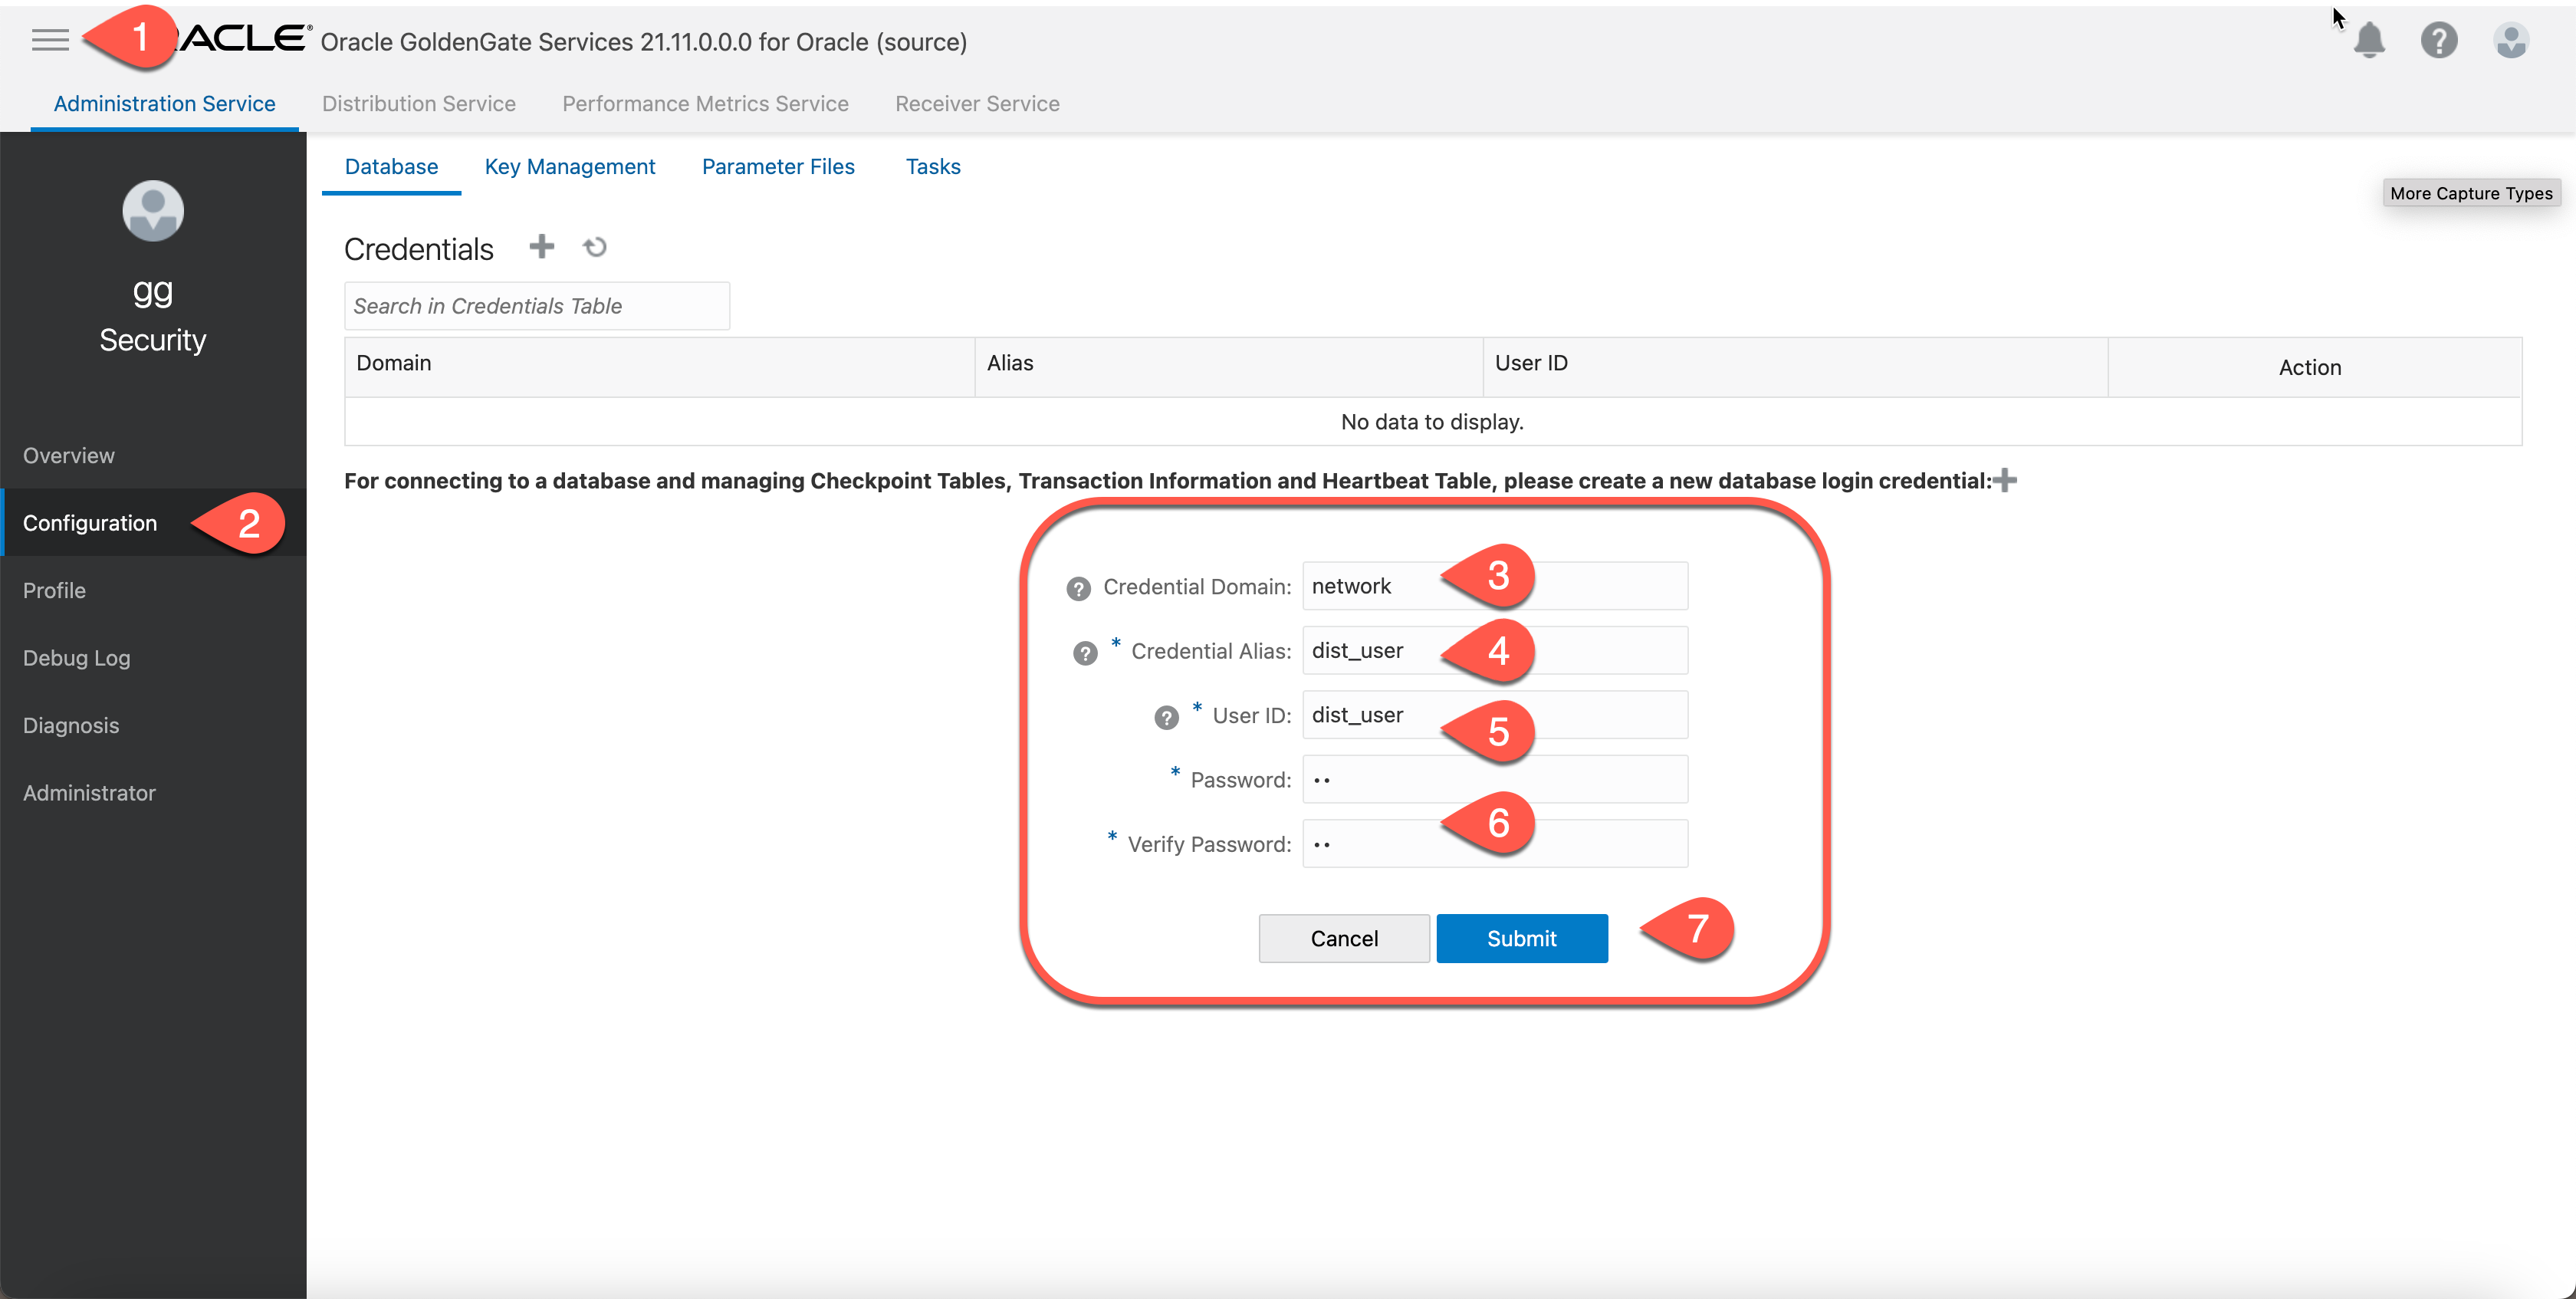
b. Create the distpath in distribution service at source deployment.
• Use wss protocol
• Use the alias authentication created from previous step 4.2
• Make sure the target hostname matches the CN name or SAN name(s) in the target certificate
4.4 Click on Create PATH button.
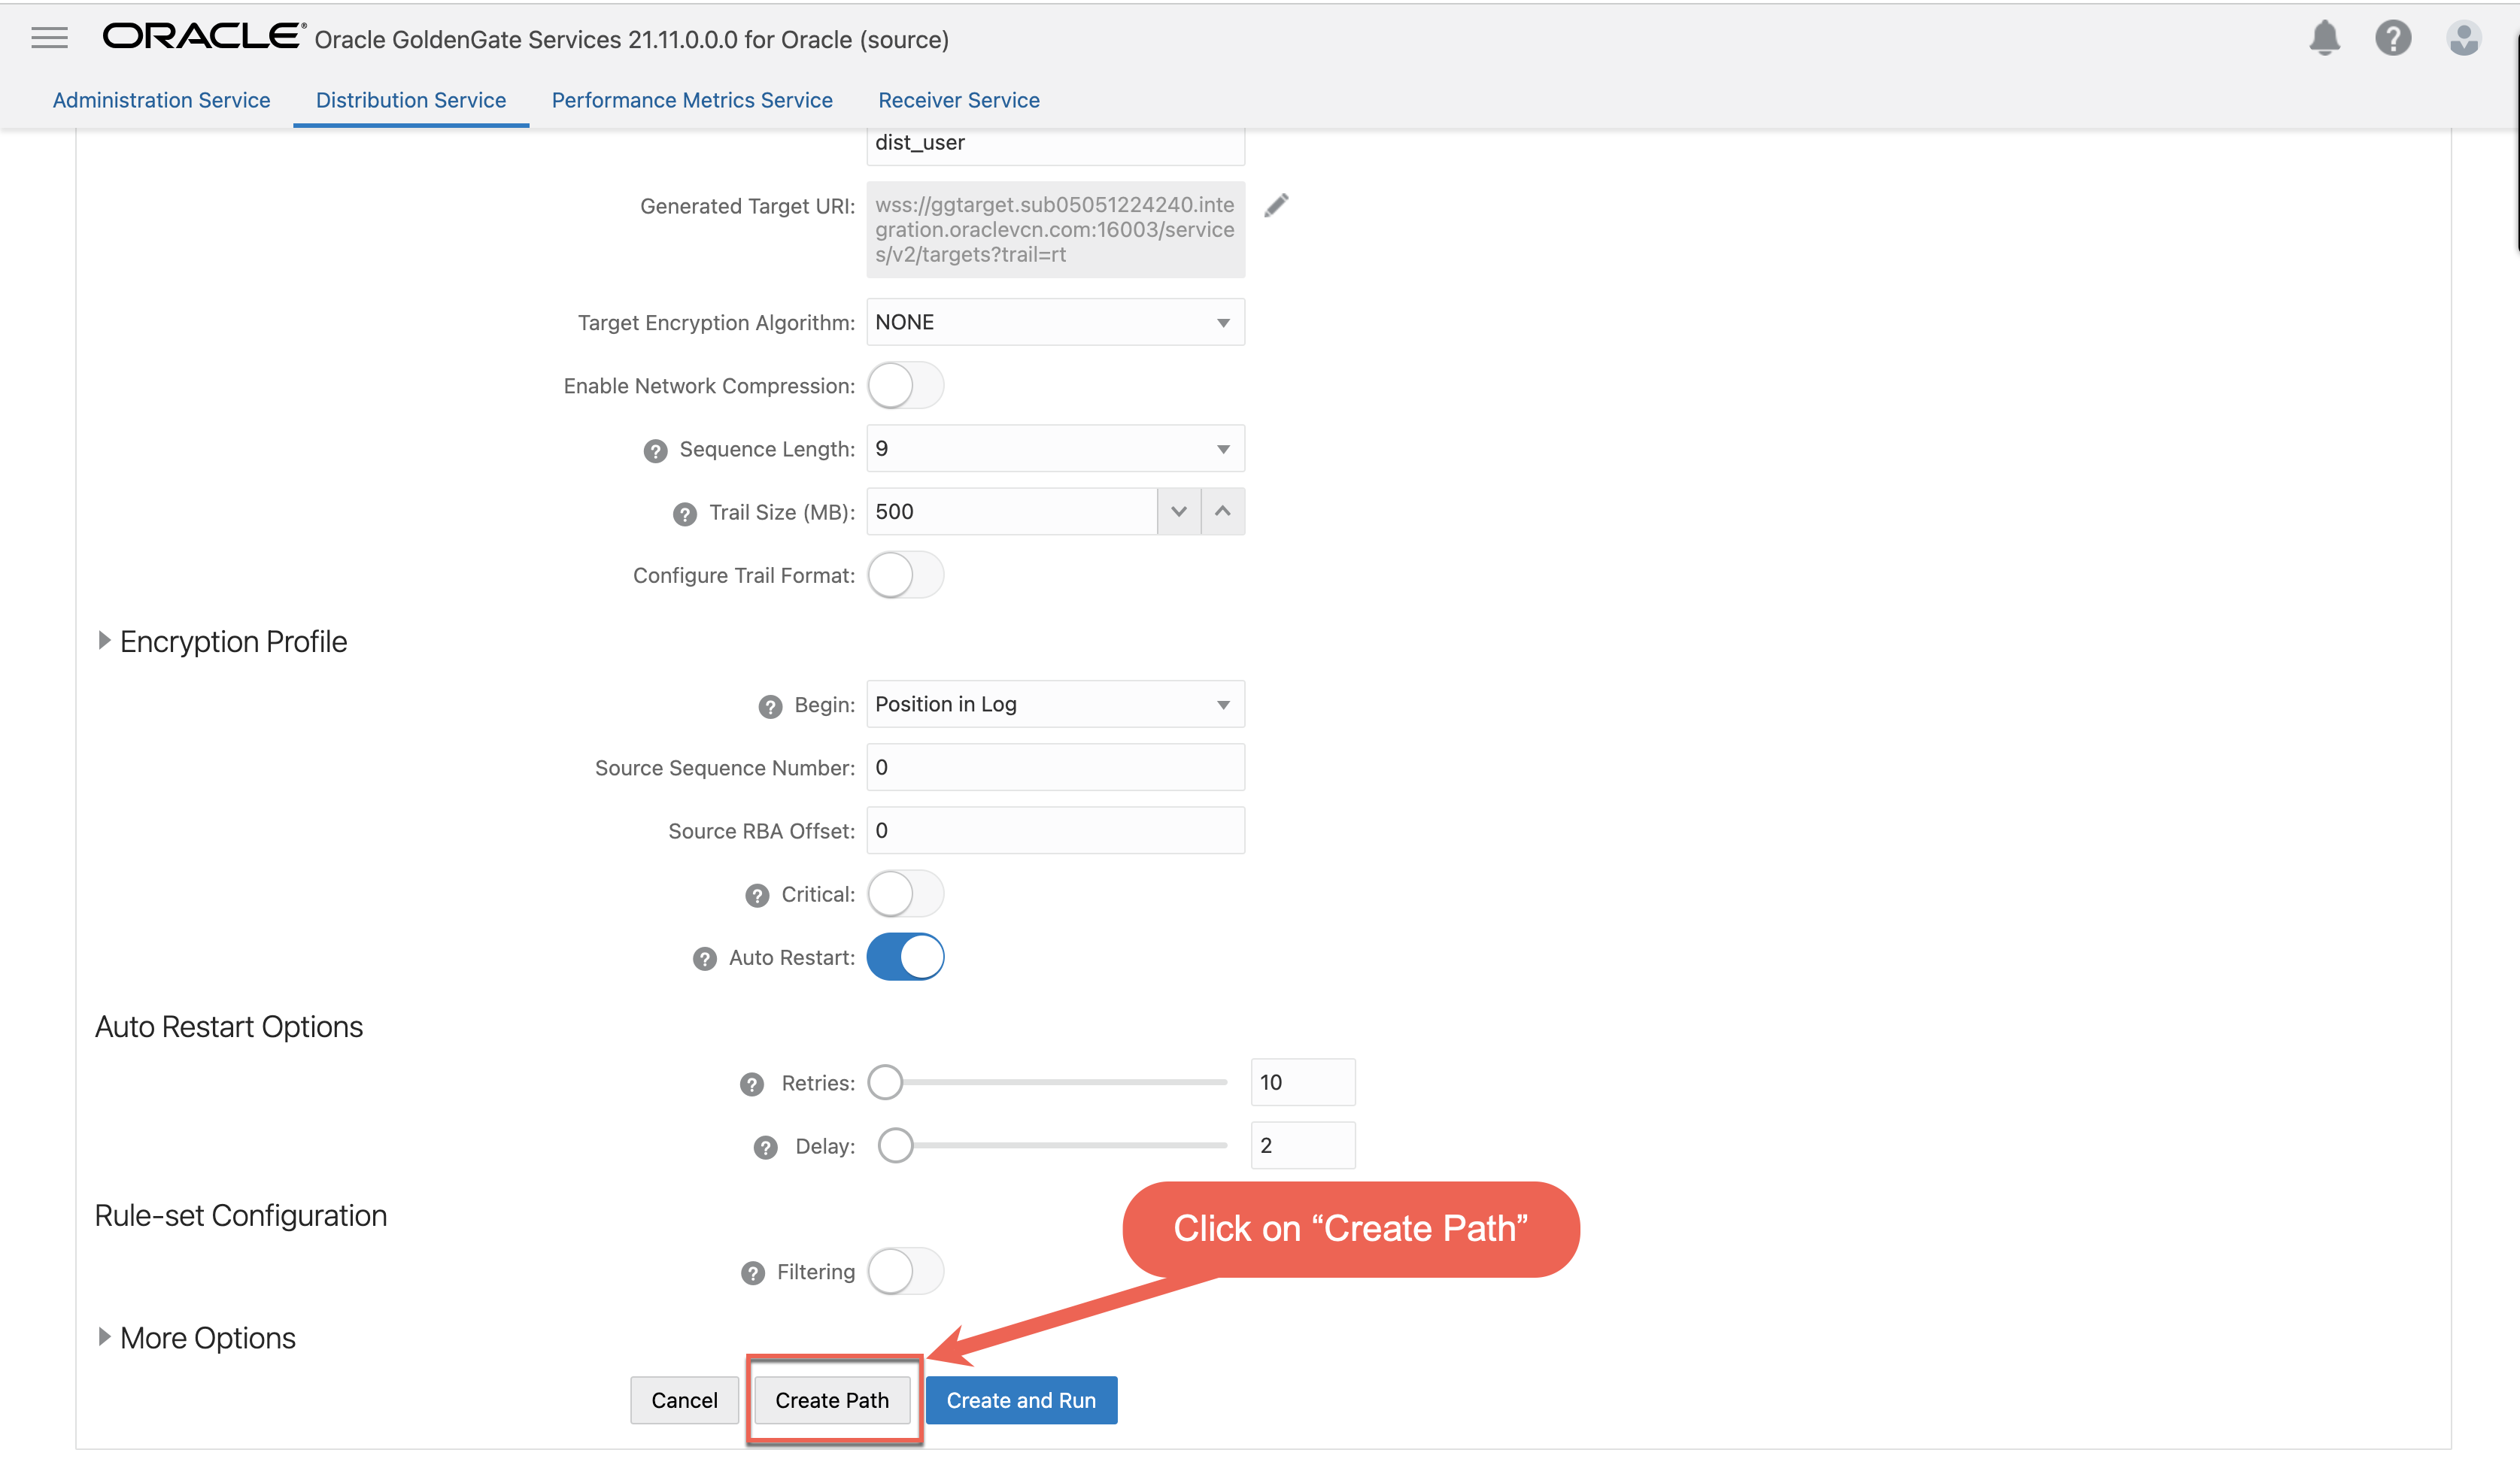
4.5 “Dist_Path” created successfully.
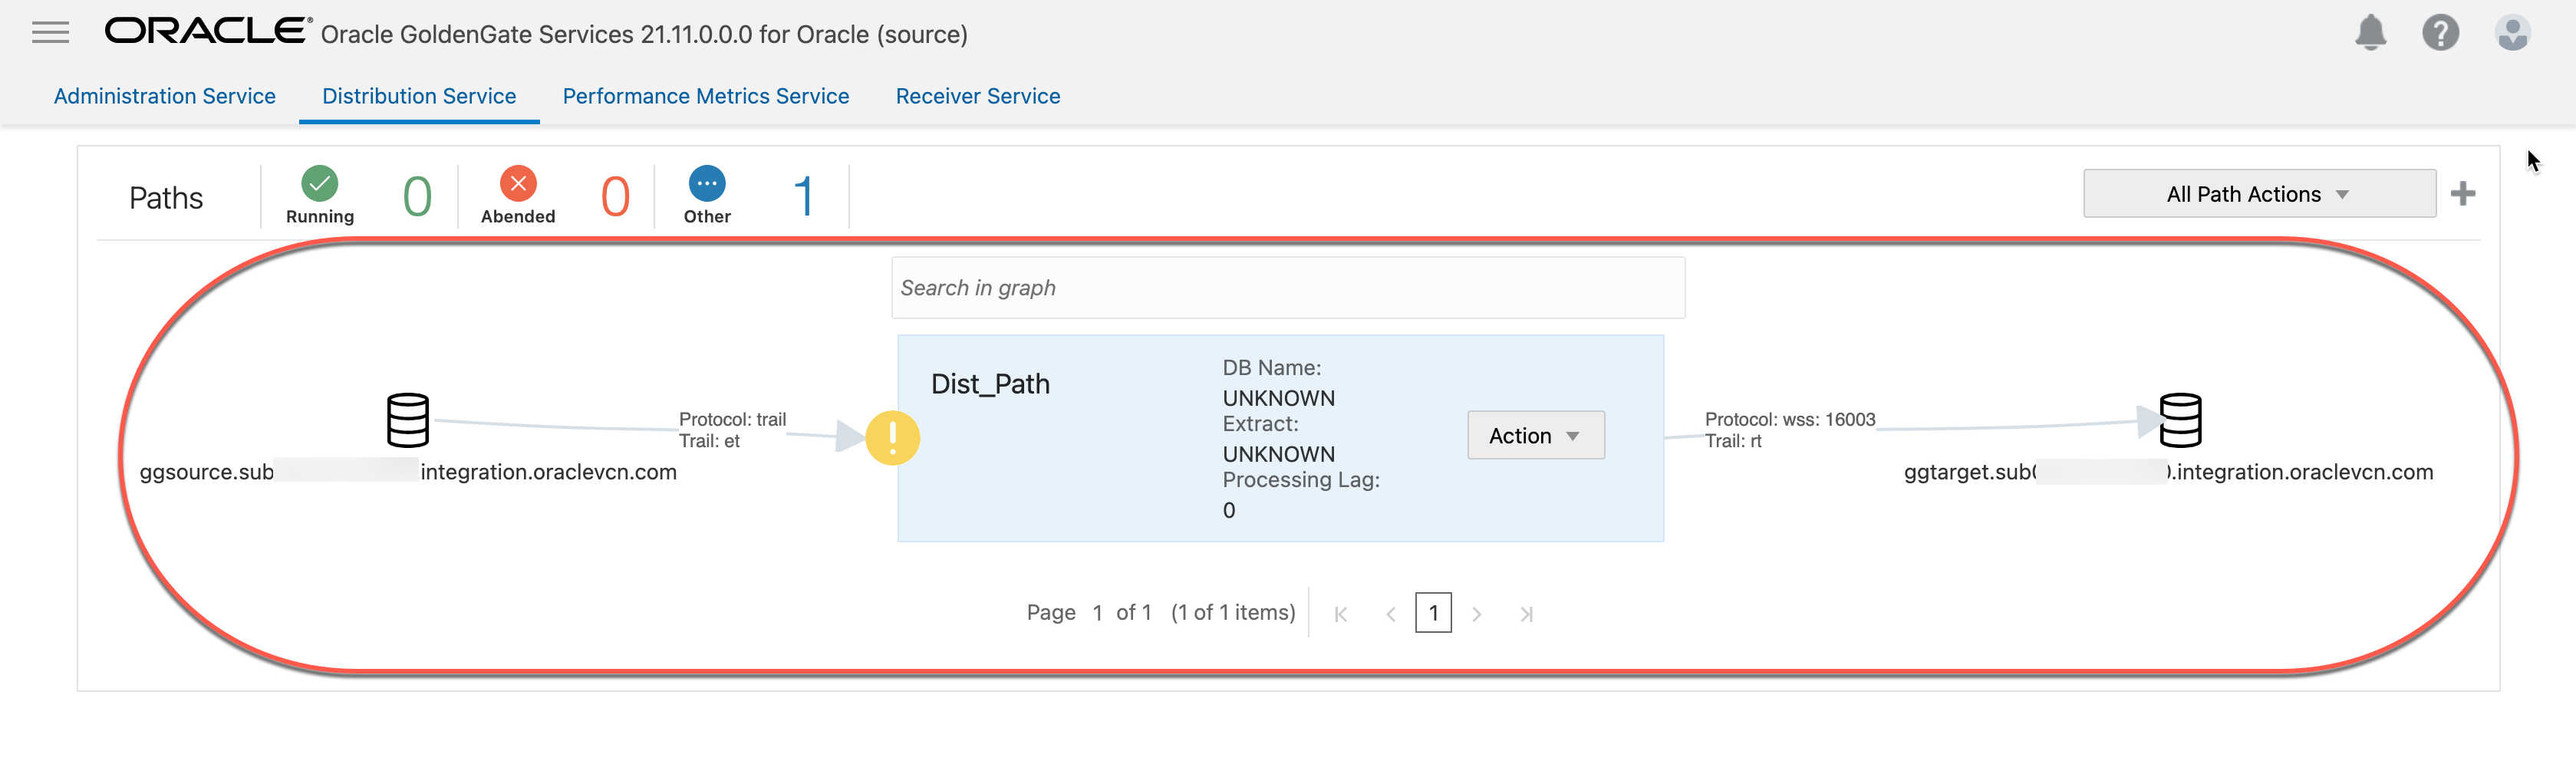
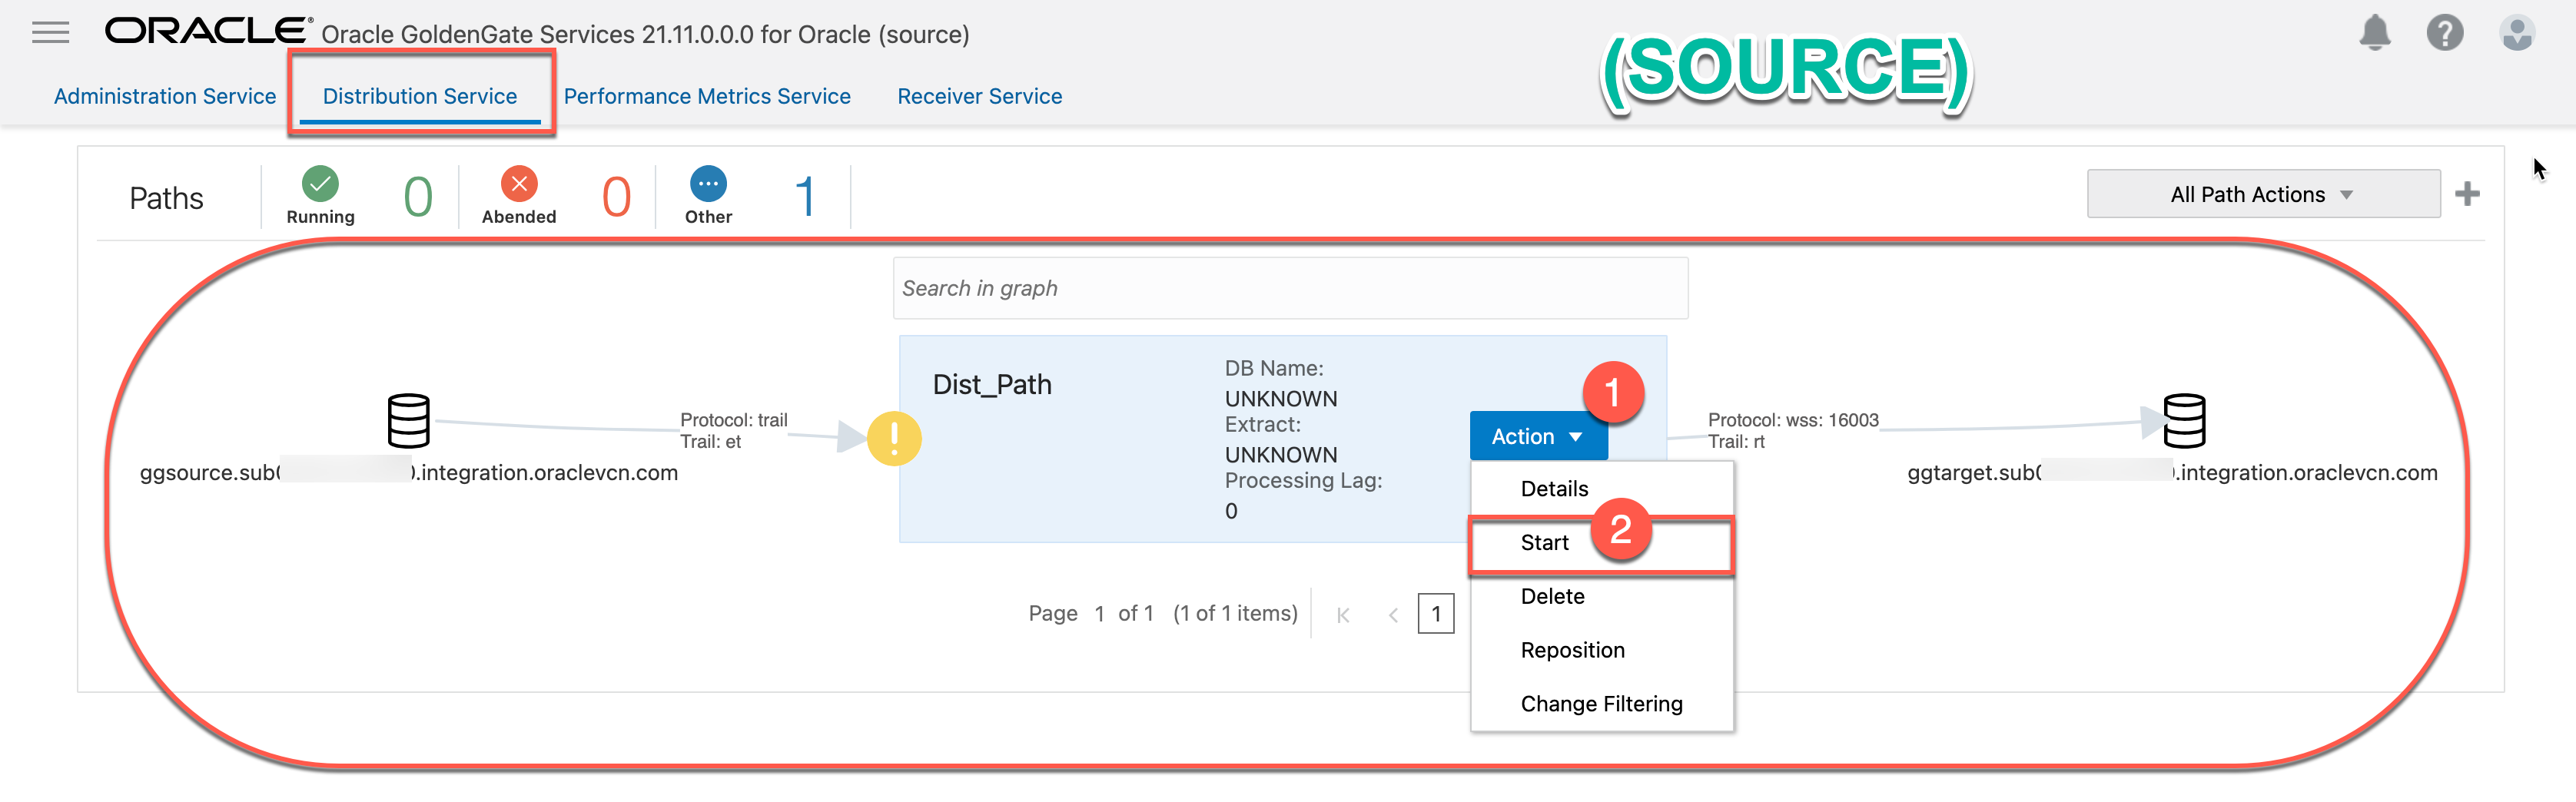
4.6 Start the distribution path (Dist_Path).
Click 1. “Action” ==> 2. “Start”
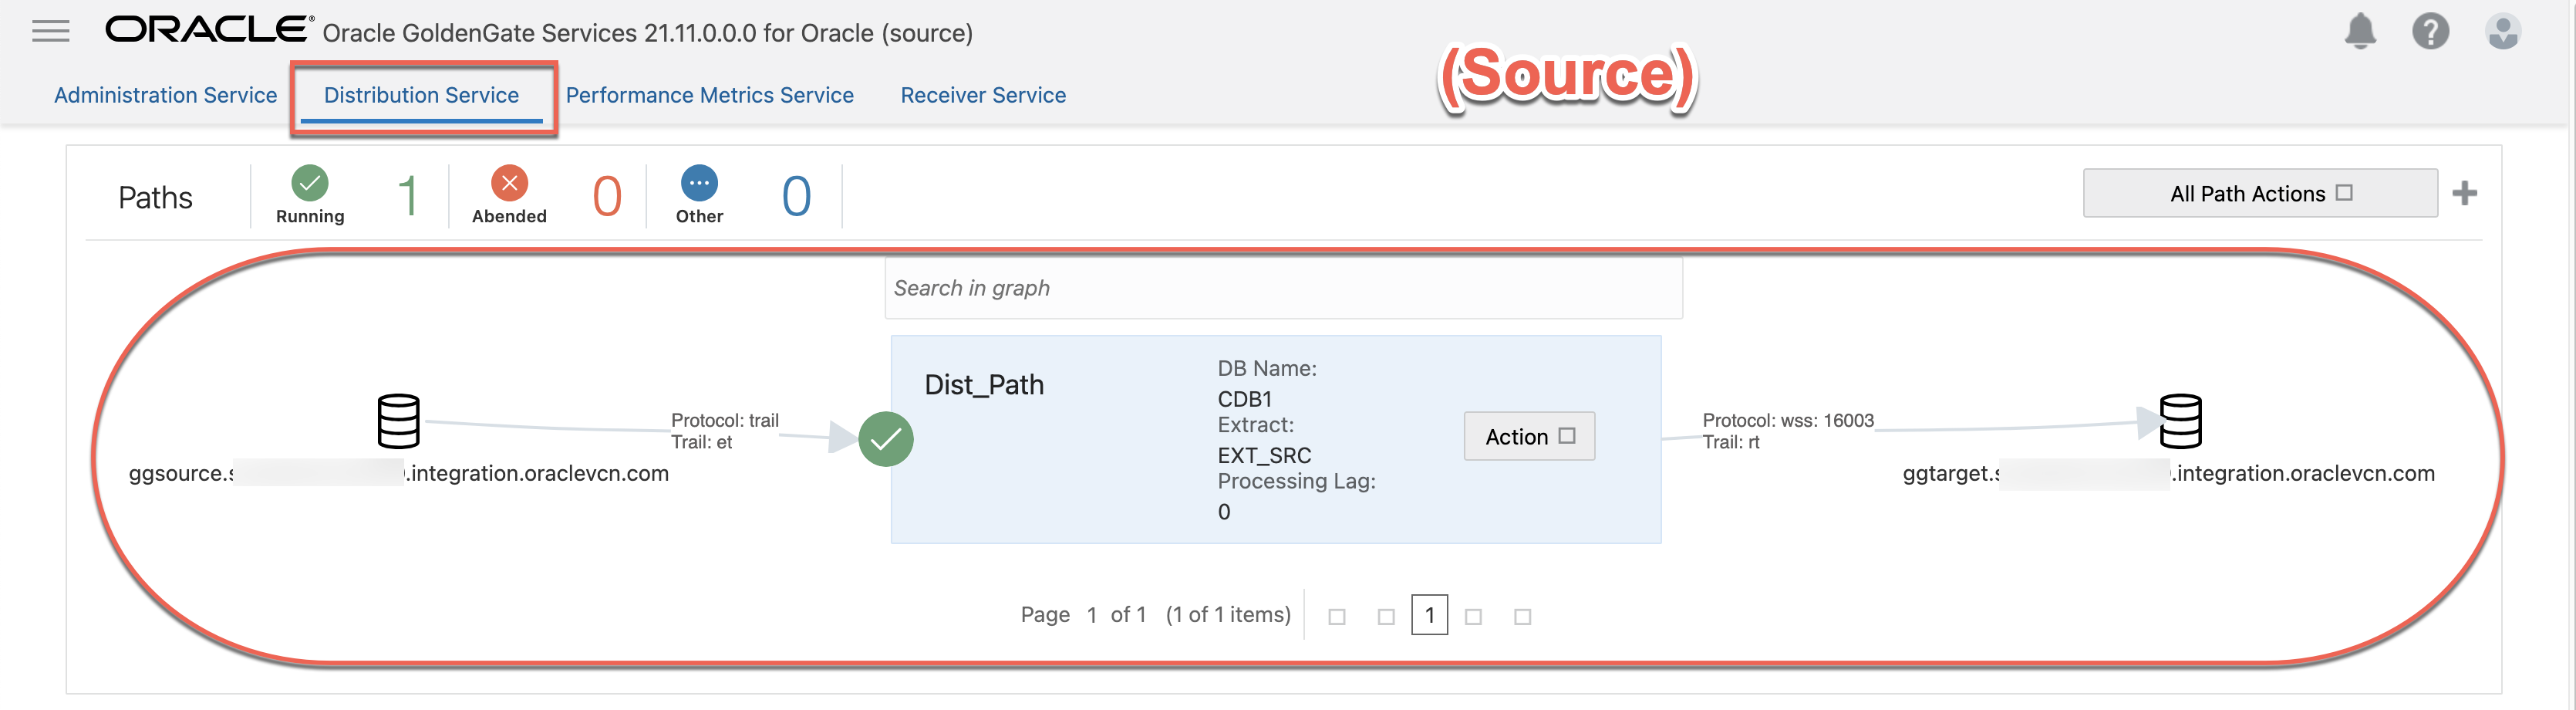
4.7 “Dist_Path” started running successfully at Distribution Service
4.7 “Dist_Path” created successfully at Receiver Service

