![]()
GoldenGate Free is a starter version of Oracle’s best in class replication software. With GoldenGate Free, application databate administrators (DBAs) can learn basic concepts while creating simple data replication processes in a simplified user interface.
It is the same powerful Oracle GoldenGate that enterprises rely on worldwide, packaged for simple download, ease-of-use, and a fully-featured experience. It is the entire application portfolio delivered in an Oracle Docker container ready to be deployed anywhere – on premises, in OCI, or on other cloud platforms.
Oracle Cloud Infrastructure (OCI) Container Instances is a serverless compute service that enables you to instantly run containers without managing any servers. OCI Container Instances enables you to easily run applications on serverless compute optimized for containers.
Objectives:
- Pull latest GoldenGate Free image from Oracle Container Registry
- Push the image to a repository in your OCI Container Registry
- Create OCI Container instance using the GoldenGate Free image
- Access the WebUI of GoldenGate Free (21.9)
Prerequisites:
- Access to the Oracle Container Registry
- Access to a OCI tenancy and Cloud Shell
- User privileges to be able to create dynamic group, policies (these will allow the container instance to manage Compute Instances). If the user does not have these privileges, then a tenancy admin can create the dynamic group and policy.
- User privileges to work with images (push, pull, tag) in Oracle Cloud Infrastructure Registry and a token created for login into Oracle Cloud Infrastructure Registry.
- Familiar with pushing images to Oracle Cloud Infrastructure Registry.
Limitations:
- As a development or test environment
- As a production environment*, if your database is 20GB or smaller
- As a training tool in a learning environment
*Learn more about the limitations for using GoldenGate Free here.
Supported connection types :
The following Oracle Database versions are supported:
- Oracle Database 11.2.0.4
- Oracle Database 12.1.0.2
- Oracle Database 19c
- Oracle Database 21c
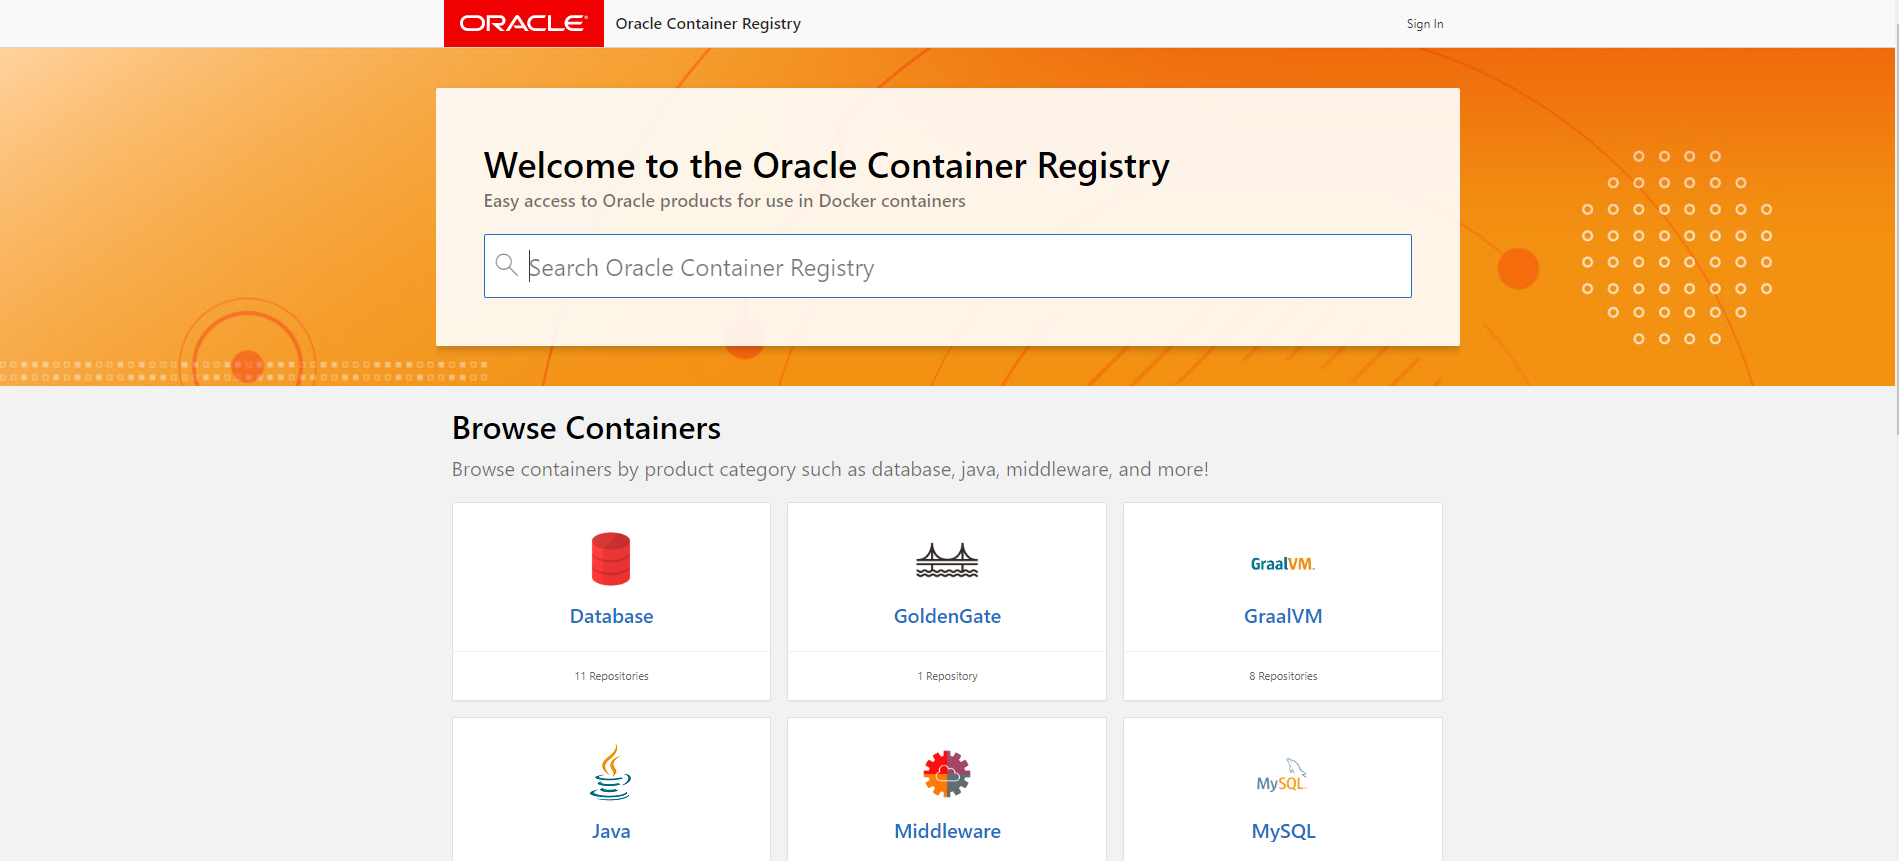
Step I : Oracle Container Registry
Sign in using your Oracle account and accept the license agreement before you can pull the GoldenGate Free docker image from the Oracle Container Registry.
https://container-registry.oracle.com/
Click on GoldenGate repository.Then,click on goldengate-free Repository.
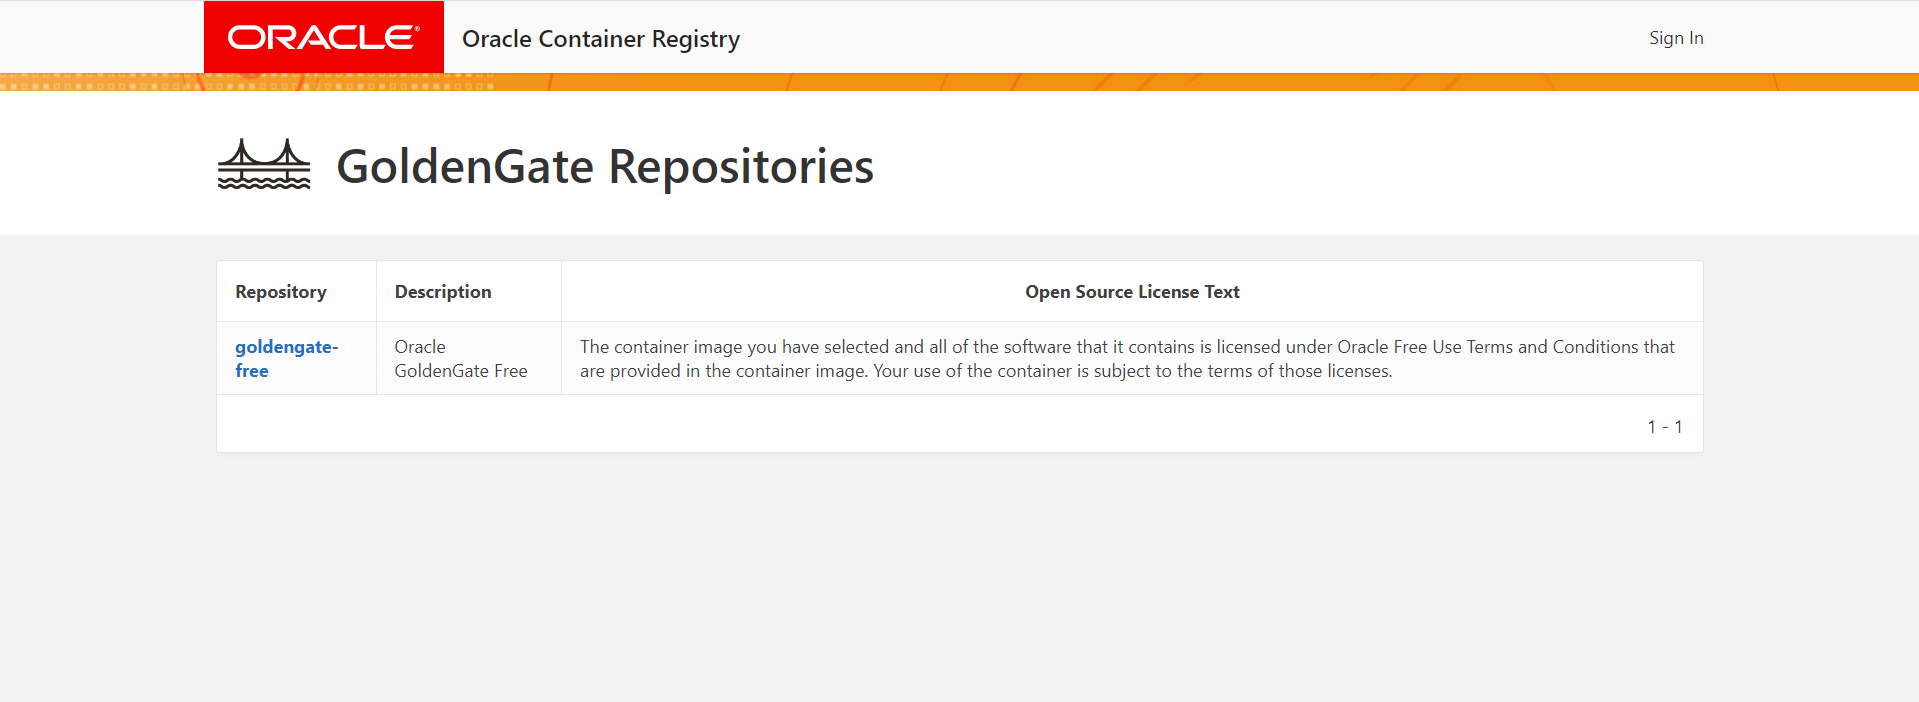
On the Next page, you will find all the details about GoldenGate Free including technical details on How to Run GoldenGate Free in a container.
Step II : Pull GoldenGate Free Image using OCI Cloud Shell
Sign in to your OCI tenancy and open the OCI Cloud Shell.
Execute the following command in cloud shell to log in to the Oracle Container Registry.
When prompted, enter your Oracle account username and password
`Password: <Oracle-account-password>
Use the docker pull command to pull the latest GoldenGate Free image, and run it in cloud shell.
Step III : Push Image to OCI Container Registry
Follow this link for instructions on obtaining the Username and Password for use with Docker CLI to push images to Oracle Cloud Infrastructure Registry.
Use the docker login command to log in to OCI Container Registry from cloud shell
where <region-key> corresponds to the key for the OCI Container Registry region you’re using. For example, docker login iad.ocir.io. See Availability by Region.
When prompted , enter your username and password (auth token) generated earlier.
`Password: <Oracle-account-password>
Execute docker images command to list the available images.You should see an GoldenGate Free Image in the list.
$ docker images
REPOSITORY TAG IMAGE ID CREATED SIZE
container-registry.oracle.com/goldengate/goldengate-free latest 4a4228dc200d 4 days ago 2.07GB
Use the docker tag command to create a copy of the original image as a new image (the new image is actually just a reference to the existing original image).
docker tag <image-identifier> <target-tag>
For example,
where:
<image-identifier> uniquely identifies the original image, either using the image’s id (for example, 4a4228dc200d )
<target-tag> is the fully qualified path to the target location in Container Registry where you want to push the image, in the format <region-key>.ocir.io/<tenancy-namespace>/<repo-name>:<tag>
Use Docker Push command to push GoldenGate Free image to your OCI Container Registry.
docker push <target-tag>
Verify that GoldenGate Free image is successfully pushed to the ggdocker repository in OCI Container Registry through console.
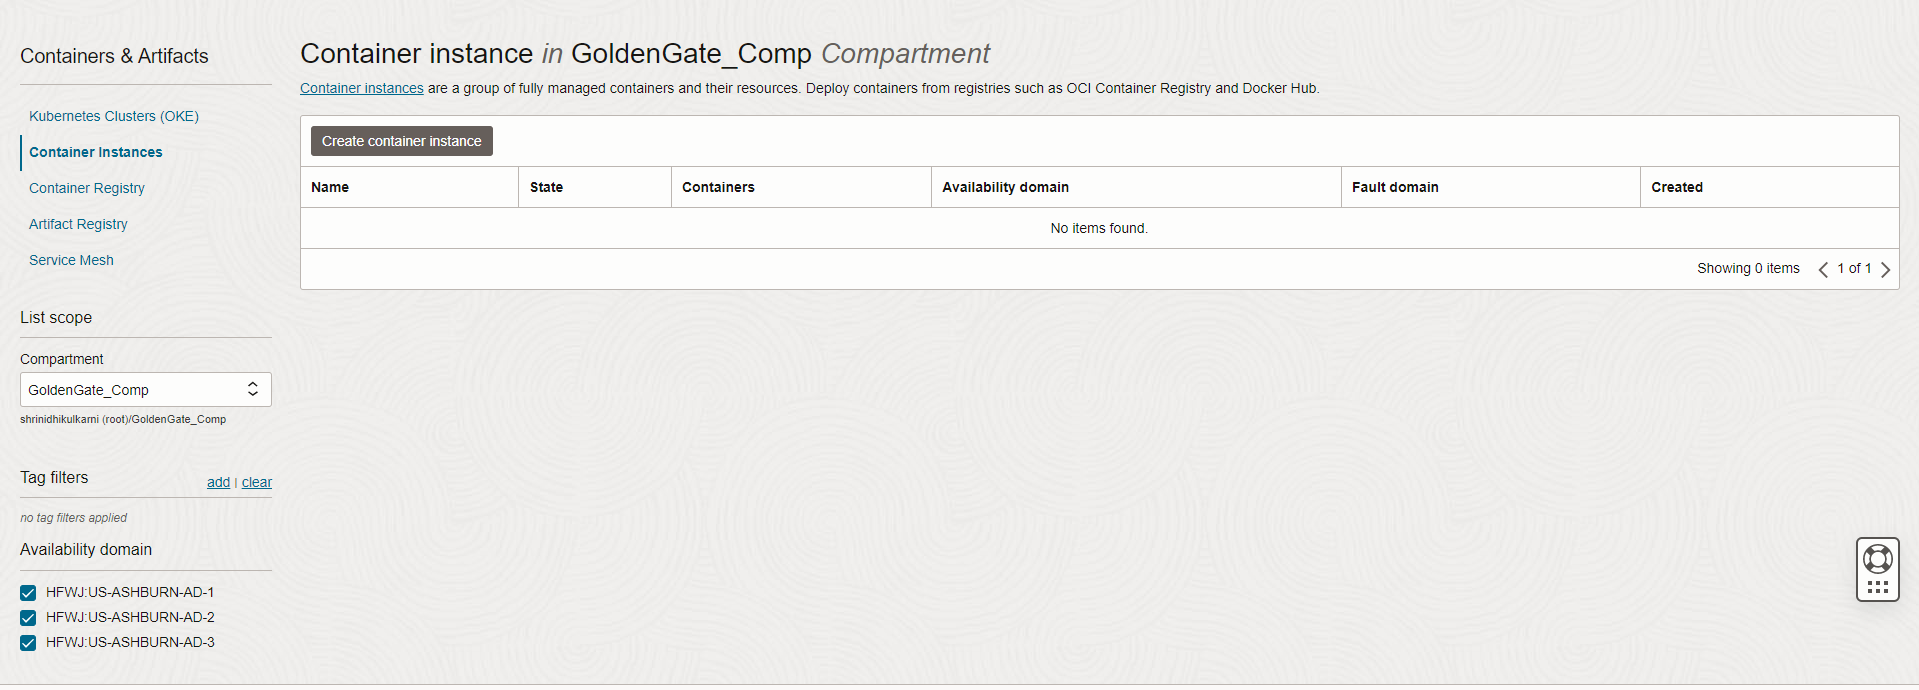
Step III : Create OCI Container Instances
In the Console, open the navigation menu and click Developer Services. Under Containers & Artifacts, click Container Instances.
Click Create container instance.
Add Basic details about the Container Instances
Enter a name for the container instance. You can add or change the name later.
Select the compartment to create the instance in. The other resources that you choose can come from different compartments.
In the Shape section, choose the flexible shape for the container instance. Flexible shapes have a customizable number of OCPUs and amount of memory.
For Number of OCPUs, choose the number of OCPUs that you want to allocate to this instance by dragging the slider. The other resources scale proportionately.
For Amount of memory (GB), choose the amount of memory that you want to allocate to this instance by dragging the slider. The amount of memory allowed is based on the number of OCPUs selected.
In the Networking section, configure the network details for the instance:
Note : You will need a security rule as a part of a security list or a network security group to allow network traffic to the applications running in the container. For example, GoldenGate Free will run on protocol TCP, port 8080, then you will need a security rule for TCP and port 8080. For information on configuring security rules, see Security Rules.
Select Public Subnet, you can optionally assign the instance a public IP address. A public IP address makes the instance accessible from the internet. Select the Assign a public IPv4 address option.
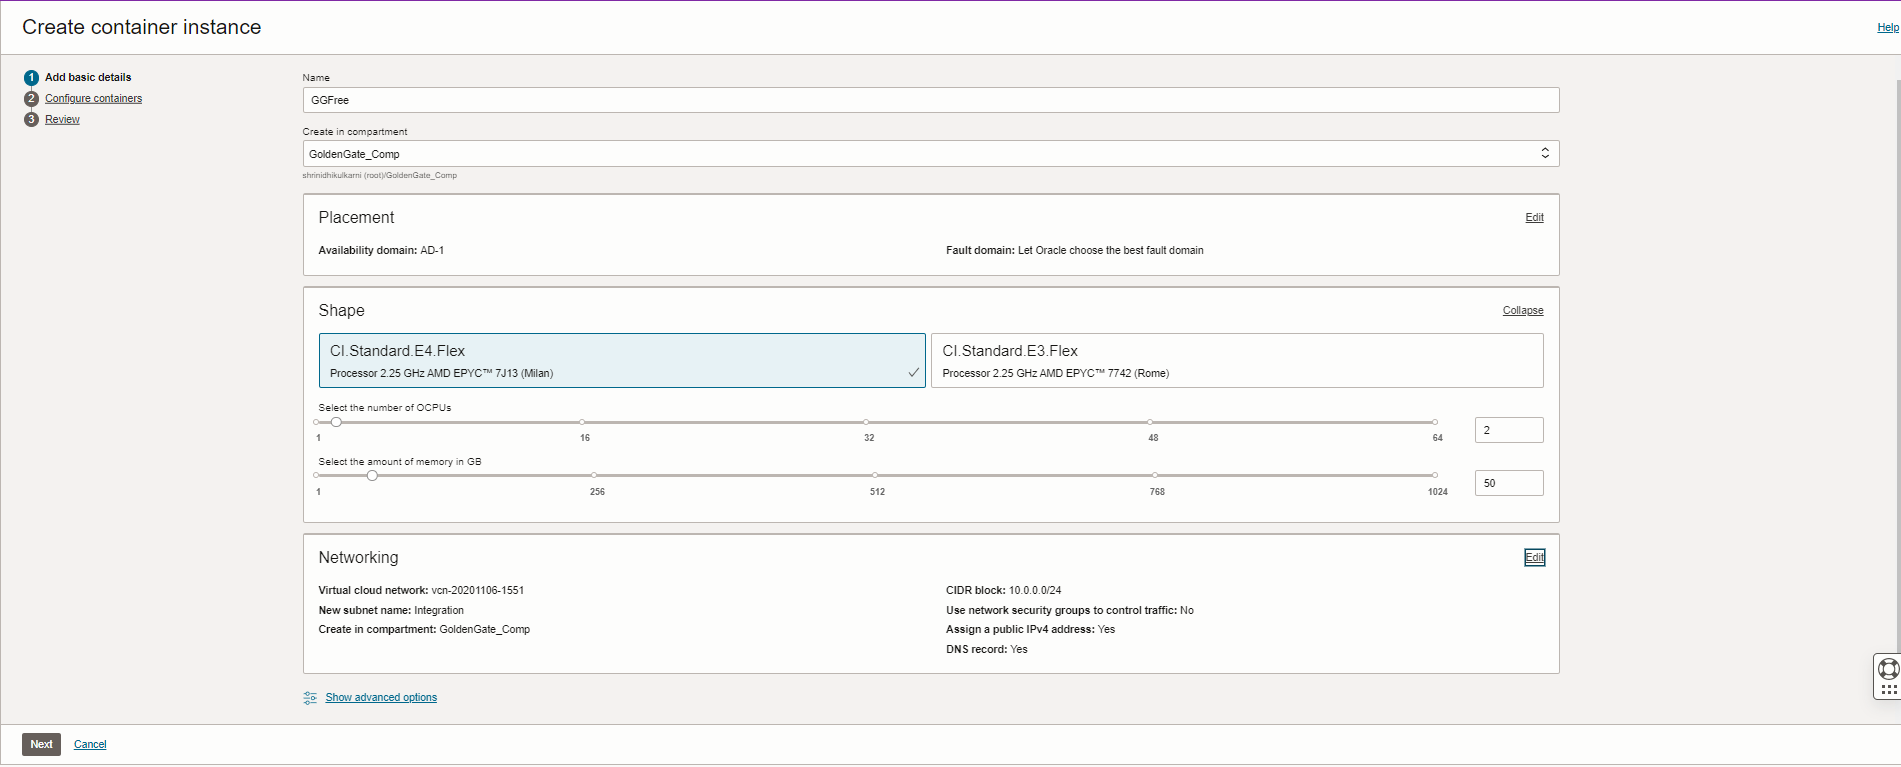
Click Next to configure the containers within the container instance.
Configure the Container
Enter a name for the container. You can add or change the name later.
In the Image section, click Select image to select a container image. Then, select OCI Container Registry as an image source.
Select the Repository hosting the GoldenGate Free Image pushed in previous section. Use the same Username & Password(Auth token) credentials used to push image to the repository.
Optional: In the Environmental variables section, you can set the environmental variables to be used by the container.Refer to the OCI container Registry link for details .
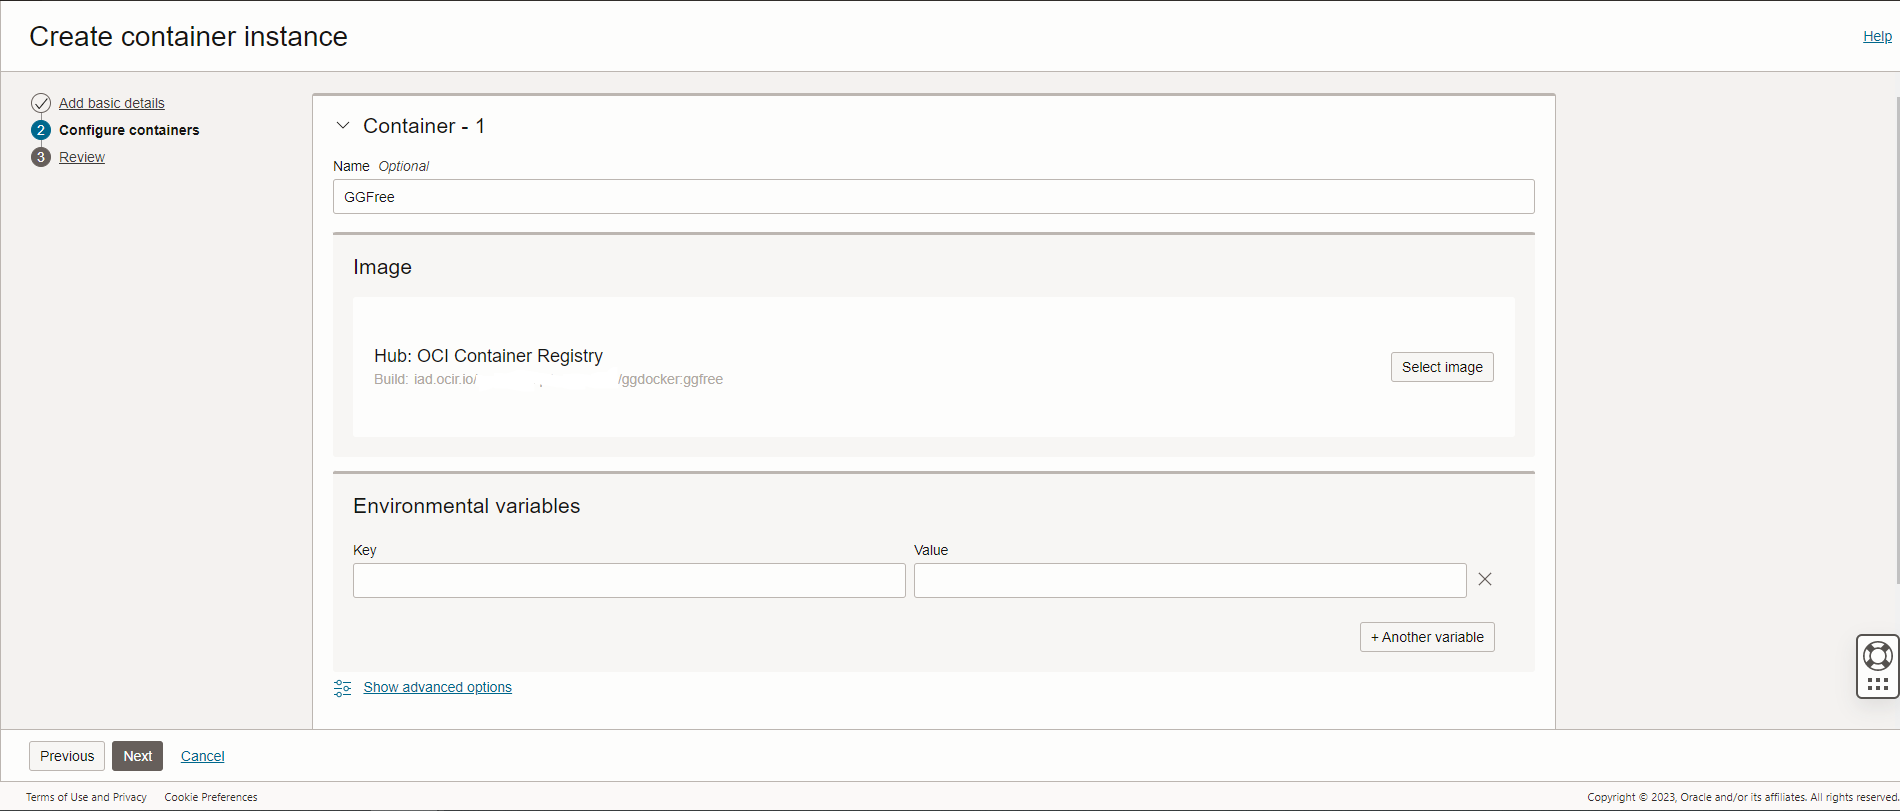
Click Next to review the container instance and its containers.Then,Click Create .
Step IV : Access GoldenGate Free Instance
The container instance launches within seconds and your GoldenGate Free instance is now live. Since we chose to assign a public IP address to the container instance, we can use that to reach our GoldenGate Free WebUI on the internet. The Public IP address assigned in displayed in the overview page for the container instance.
Accessing the IP address from a browser, now takes you to your GoldenGate Free WebUI on the internet.
For example: http://<public-ip>/ (if default 80/443 port were used)
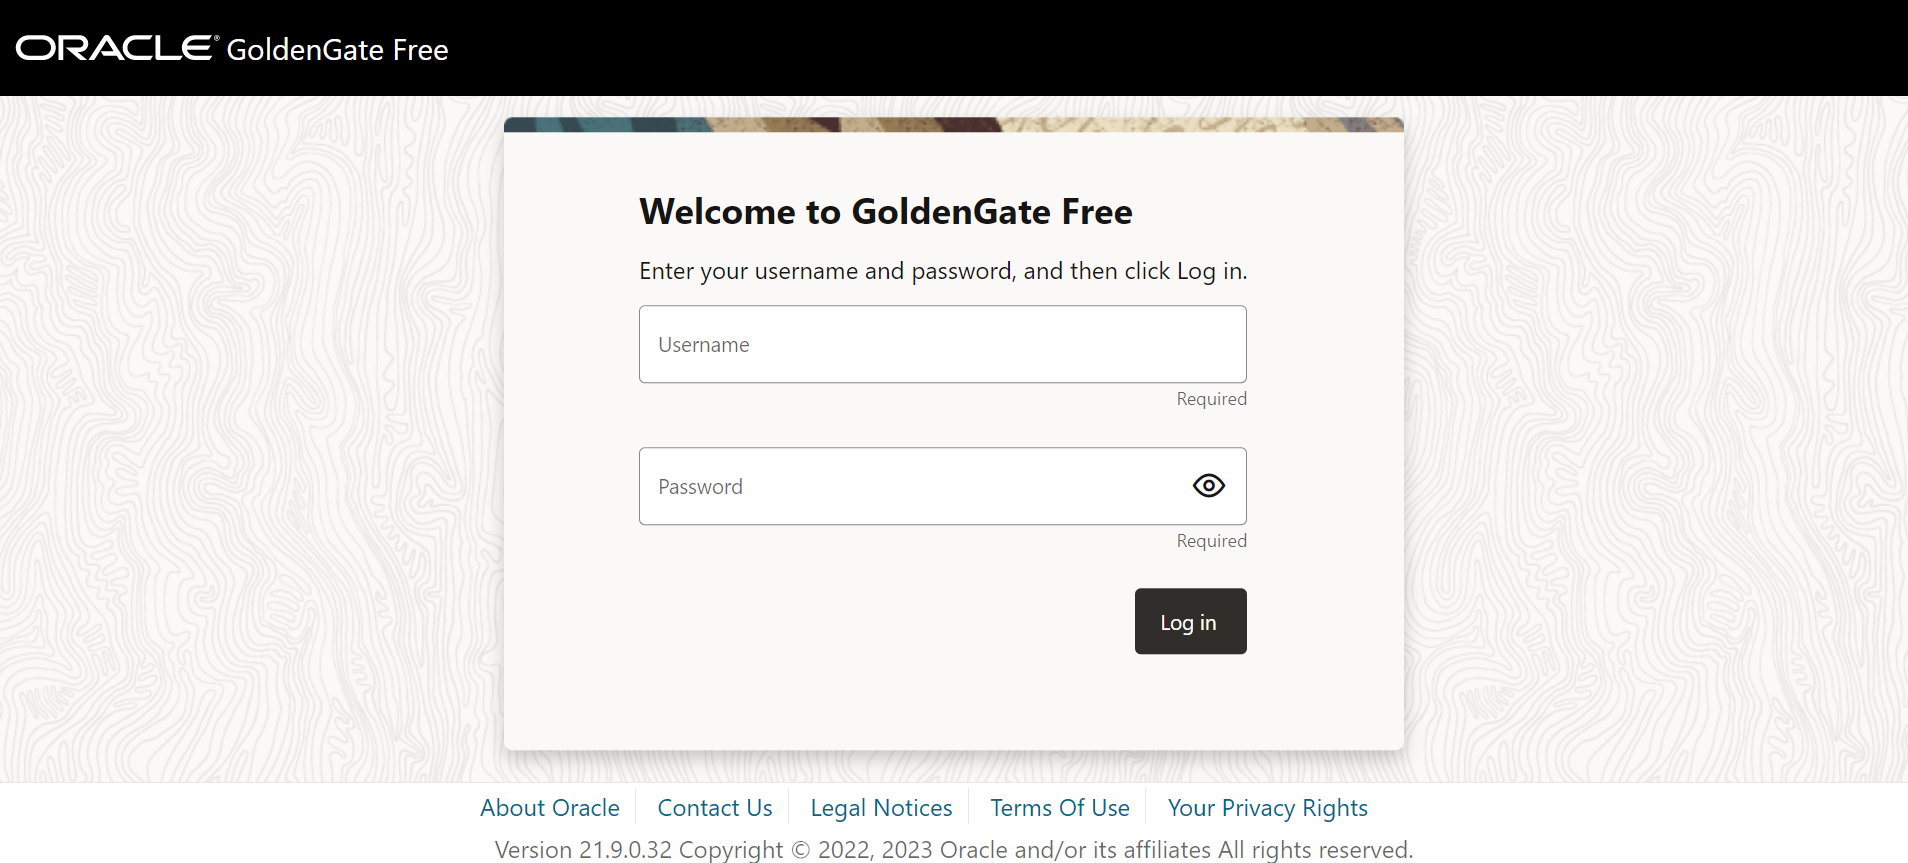
Login Credentials for GoldenGate Free
Default Username : oggadmin
Password:
On the first startup of the container, a random password will be generated for the Oracle GoldenGate administrative user if not provided by the OGG_ADMIN_PWD environment variable. You can find this password at the start of the container log.
You can view your container logs in the OCI Console. Click on Containers under Resources on the left side Menu and then click on the container name. For example: GGFree
Click on View Logs option on the top to view the default password generated.
— Password for OGG administrative user ‘oggadmin’ is ‘xxxxxxxx’
———————————————————————————-

Once logged in, you can start to create connections to the Source/Target database and replication Pipeline.
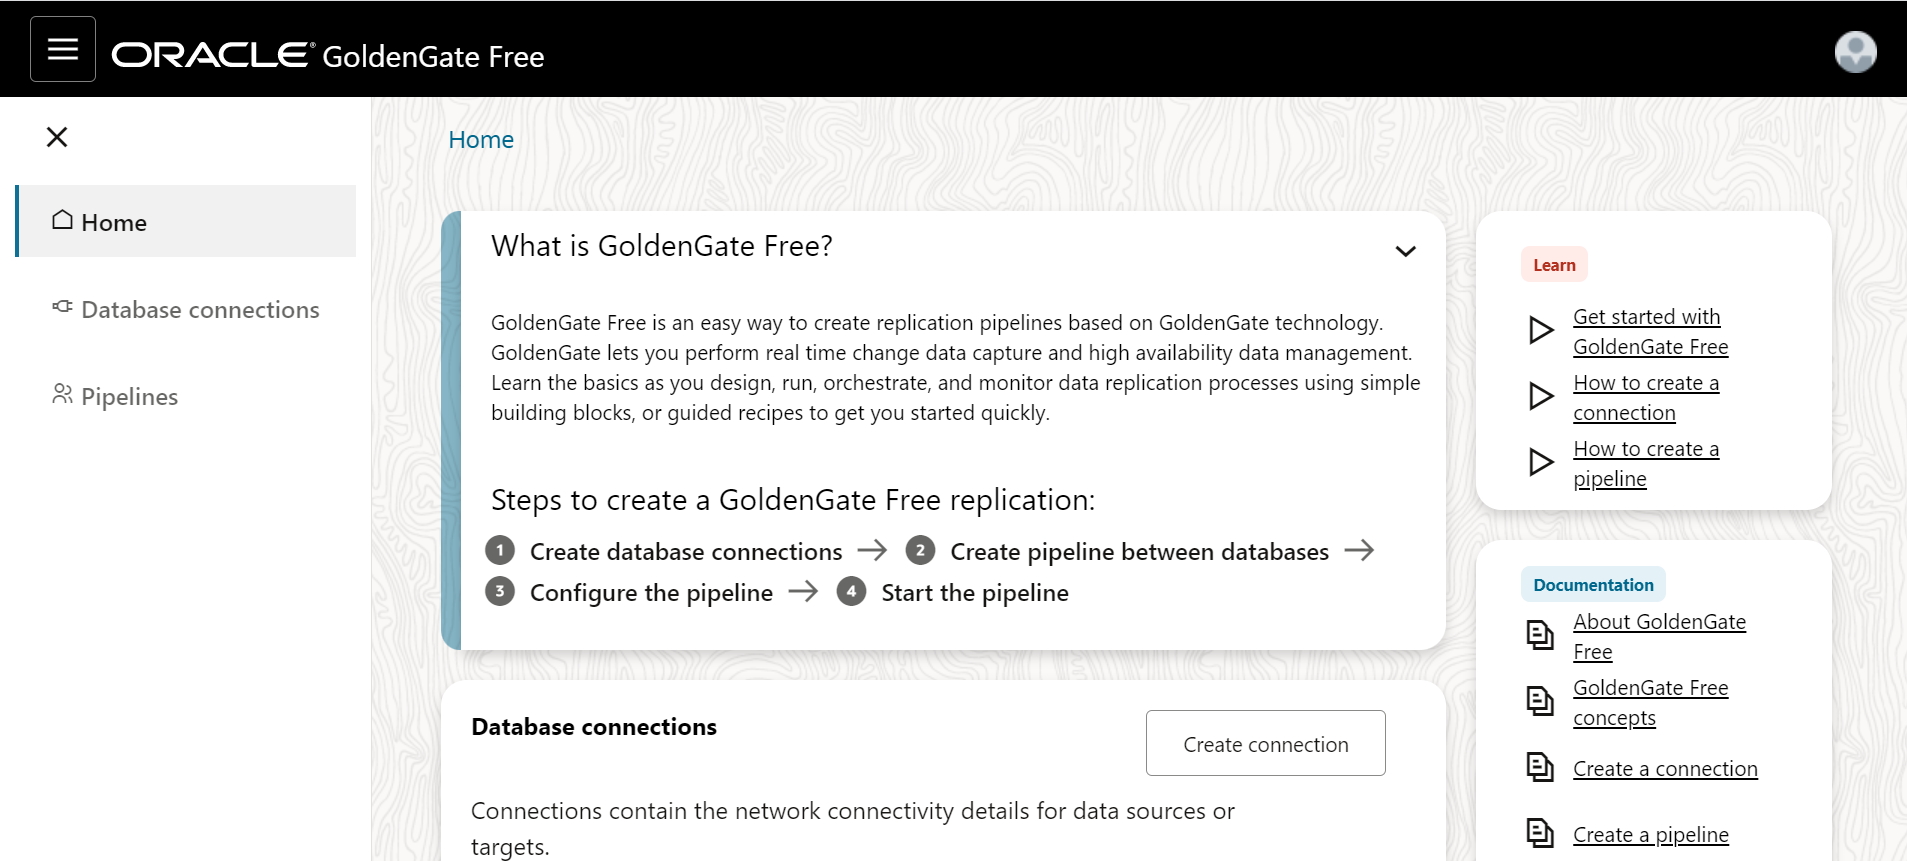
To make things as easy as possible there is dedicated ‘how-to’ documentation for GoldenGate Free, here are some guides to get started:
- Get started with GoldenGate Free:
https://docs.oracle.com/en/middleware/goldengate/free/21/uggfe/get-started-goldengate-free.html - Overview and Limitations of GoldenGate Free:
https://docs.oracle.com/en/middleware/goldengate/free/21/uggfe/overview.html - Begin building solutions with GoldenGate Free:
https://docs.oracle.com/en/middleware/goldengate/free/21/uggfe/replicate.html
