Oracle GoldenGate free was announced in the last days, with this release, Oracle aims to modernize the way that you deploy and use GoldenGate with the use of a Container environment, in this post I will guide in how to create your first replication using GoldenGate free.
We have a nice tutorial in how to deploy GoldenGate free using OCI Container Instances here if you want to know how to deploy your first instance.
If you are used to work with GoldenGate Microservices, you will see a lot of similarities in these processes and a ton of improvements, for example, the GoldenGate free can even run a Datapump job to do an initial Load.
Connection
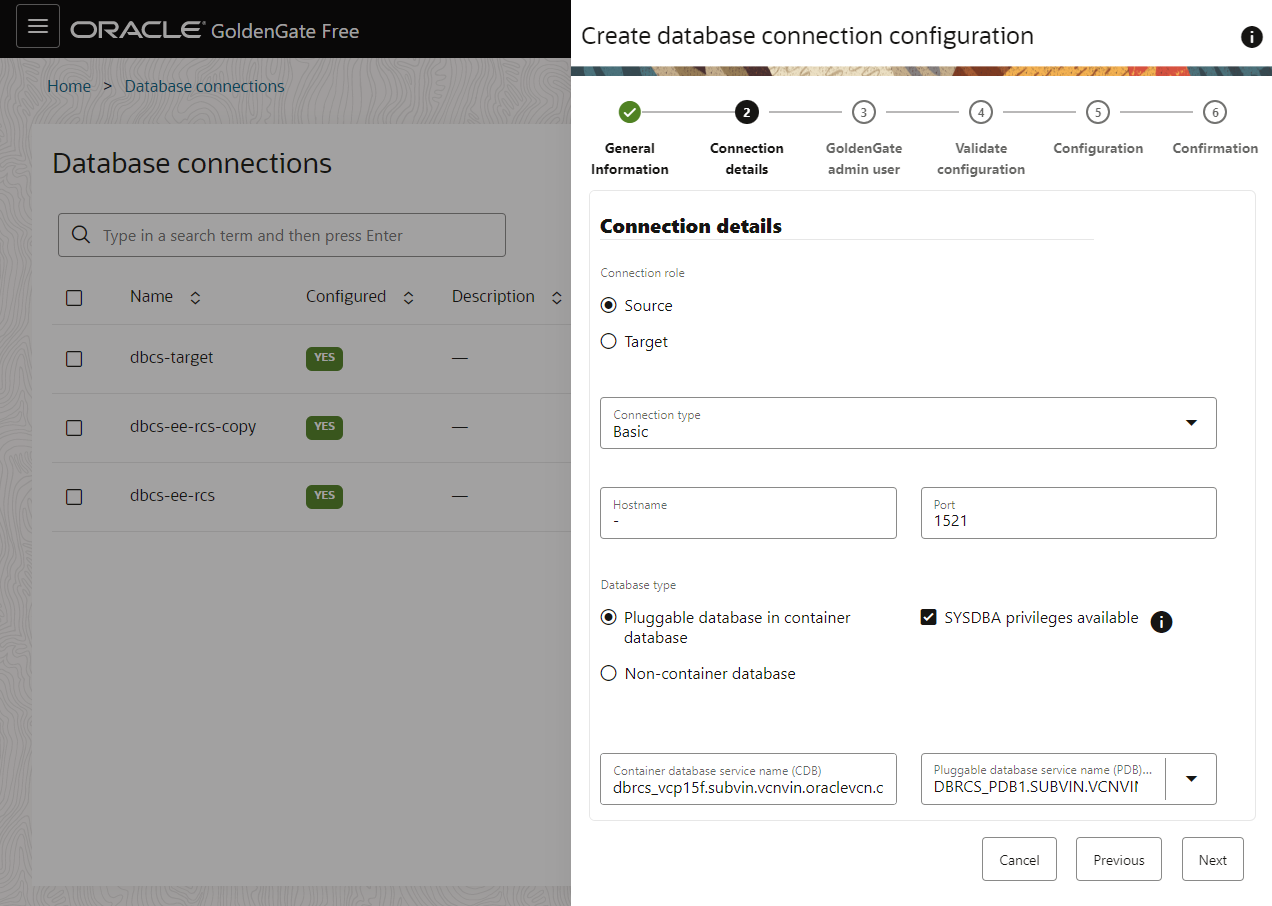
GoldenGate free supports Oracle Database 11.2.0.4, 12.1.0.2, 19c and 21c with a 20GB maximum size, and your database needs to be running in Archivelog Mode before you create the connection.
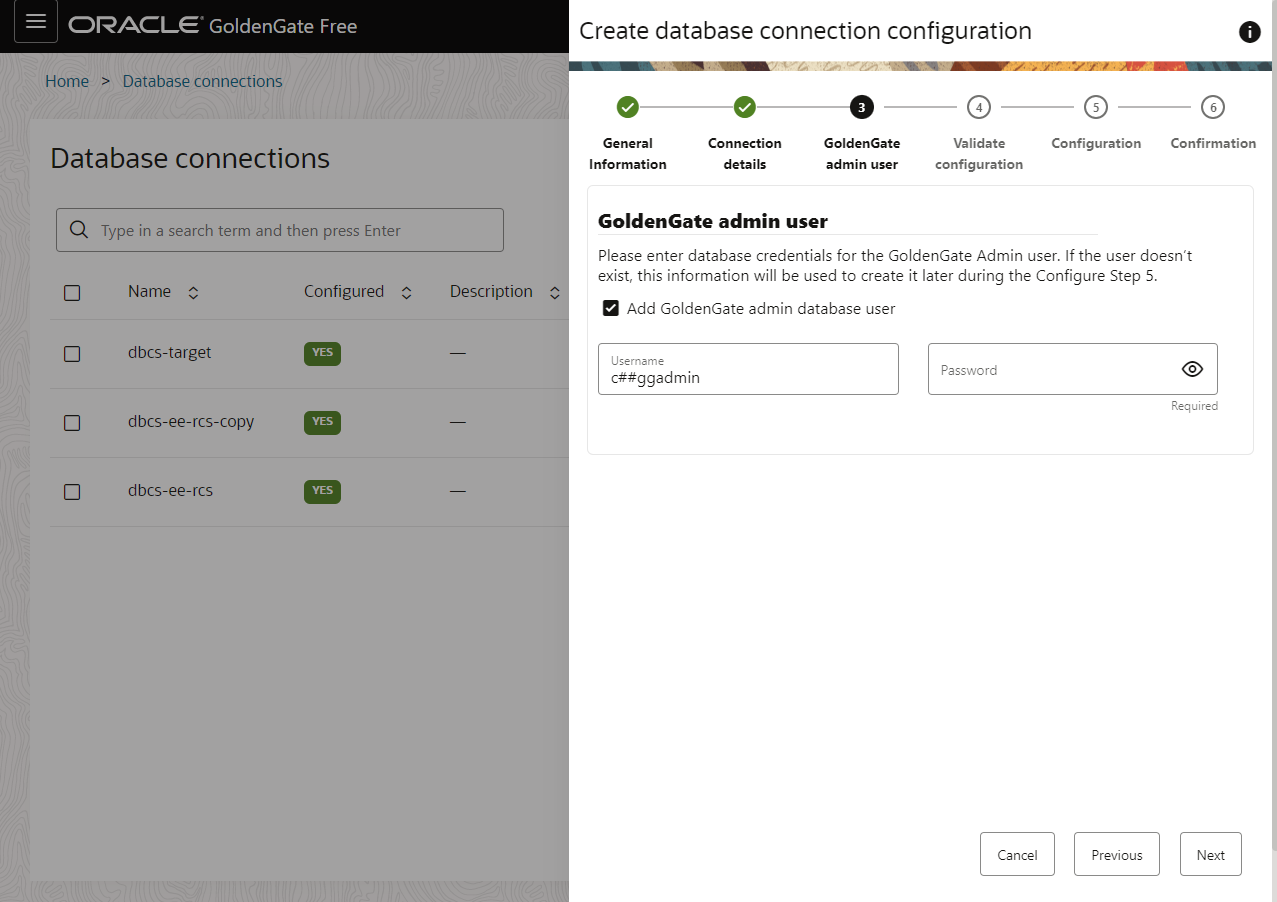
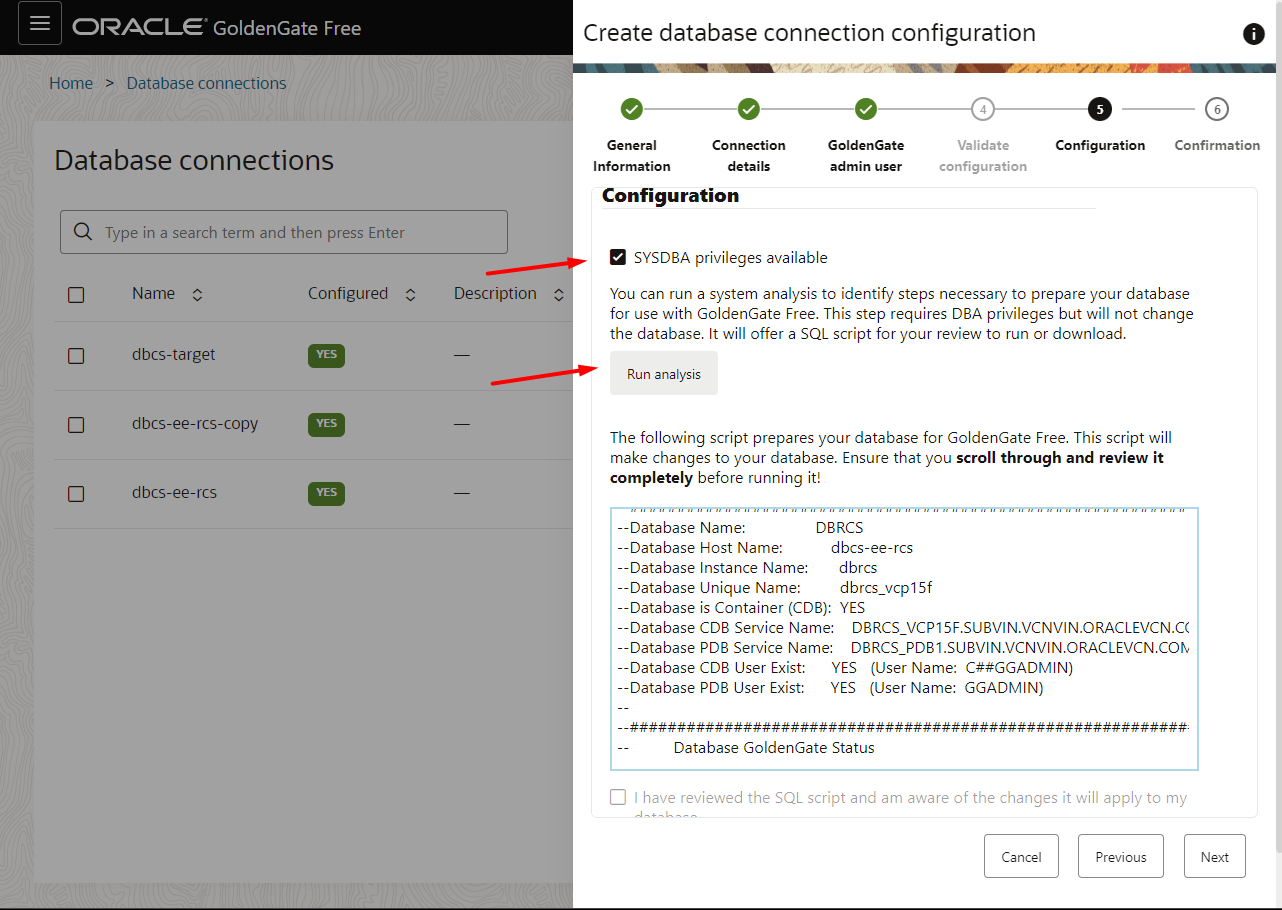
After logging into GoldenGate Free, in the home screen, click in “Create Connection” button, give this connection a name and in the second screen we start to see some differences, we have to specify if this connection points to a source or a target(we can’t use one connection for everything), CDB and PDB information, the nice thing here is to use the option “SYSDBA privileges available”, with this, the process of configuration will be easier because GoldenGate can connect to source and target to configure everything to you, including adding user and changing database parameters, but you can validate and run commands by hand if you need.

If everyhting is right, create the connection.

Pipeline
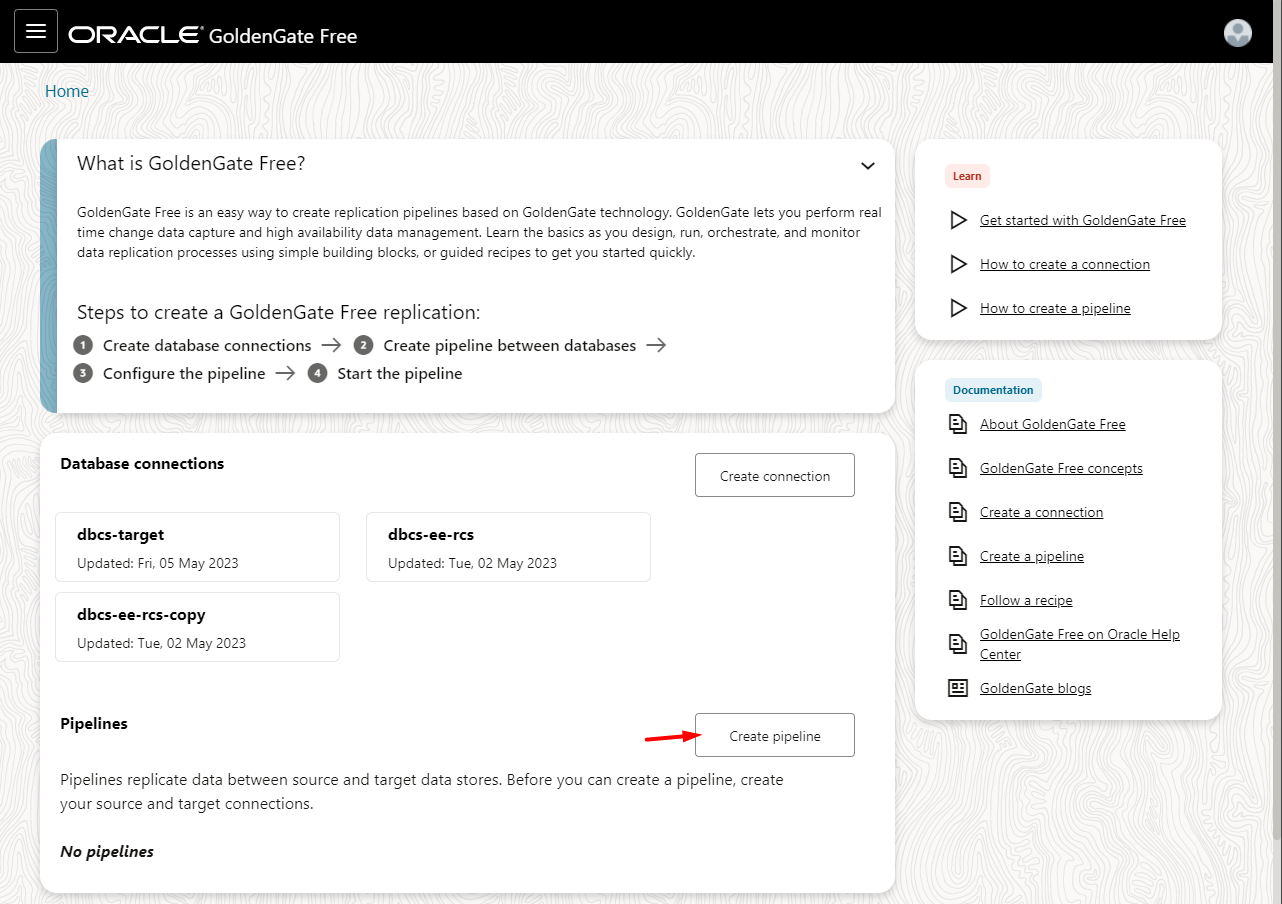
After your source and target connection created, we can proceed to Pipelines.
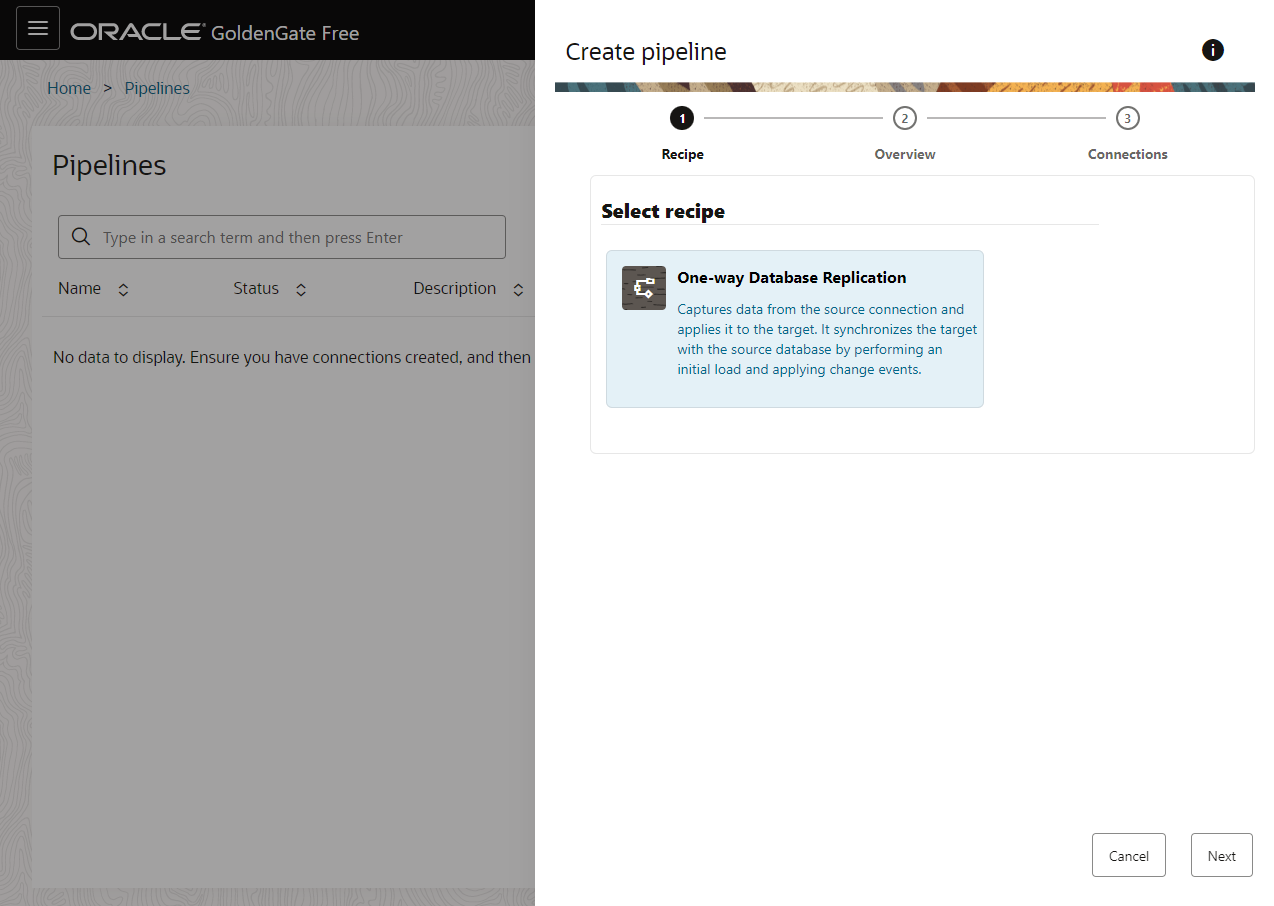
The replication process was simplified, now you don’t need to create an extract and a replicat(but in the background they continue to exist), you create a pipeline with a source and a target and based on a recipe (for now we only have the One-way replication) and configure the mapping options in the same place.
Below the Database Connection section in home screen, you will find the Pipelines, click in Create Pipeline.
Choose the recipe:
Give a name to your pipeline and an optional description

Select the created connections, see that you need to have at least two connections created before

In mapping screen, you can see the available objects to replication and select what you want, here is one of the most waited features, you can select the objects and the GoldenGate will build the extract parameter file to you! No needs to write it by hand anymore.

In this example I’m capturing the SOURCE_TANAKA.GG table and writing into DEST_TANAKA.GG ,in Mapping Rules you can verify or edit the created rule

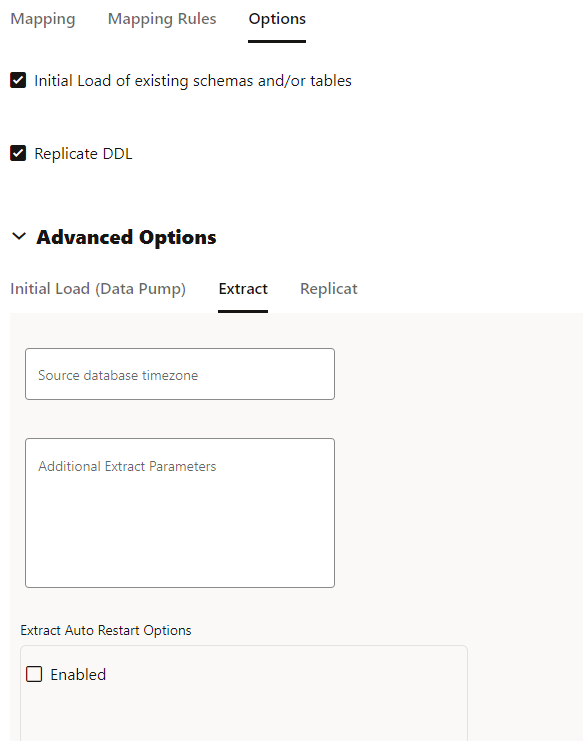
In the Options you can specify if you want an initial load using datapump, it will create a temporary database link and run the job for you, and customize some extract/replicat parameters:
If everything is right, you can Save and start the replication to see the magic happening:

If everyhting is configured correctly, the process will start and your replication will just works fine.
Bonus
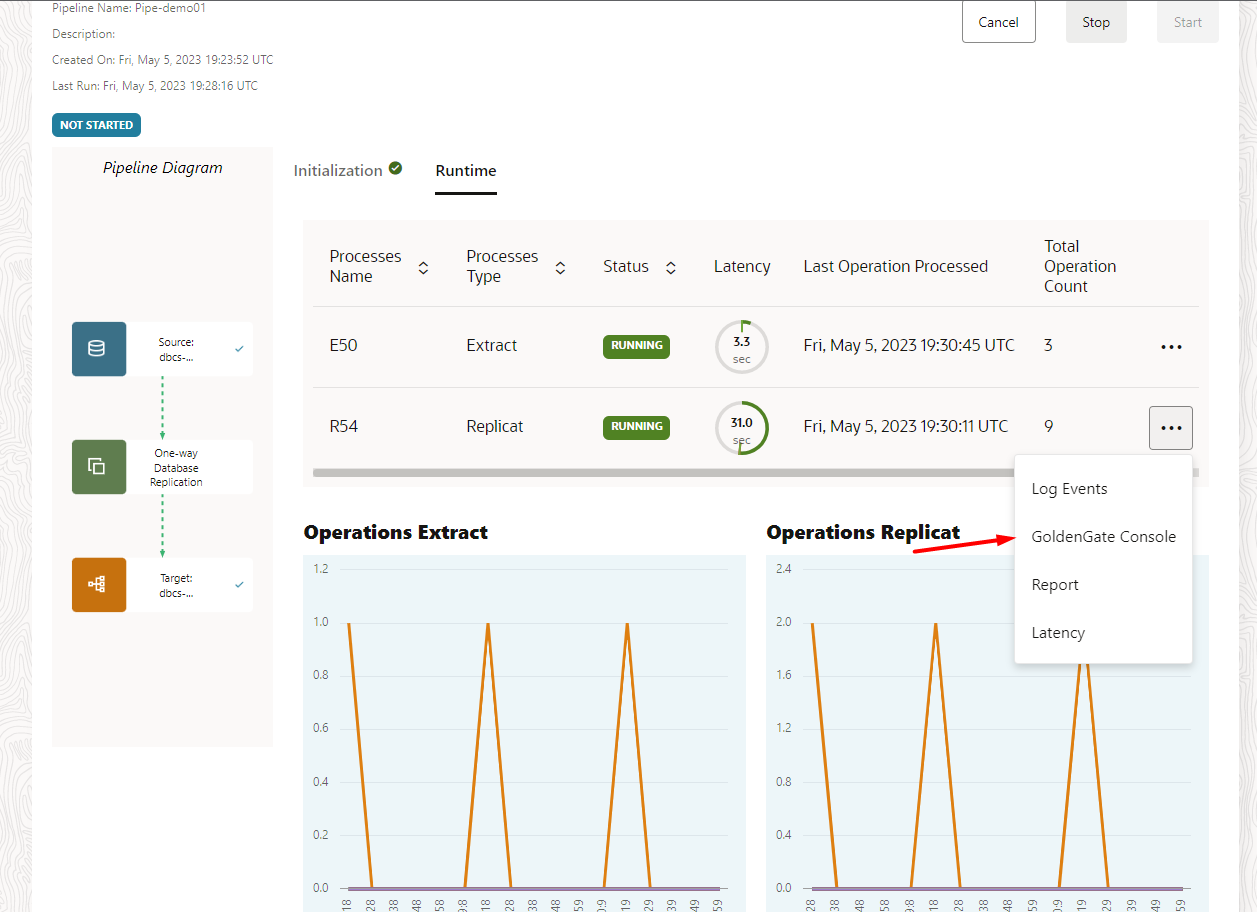
Now he have some good monitoring informations, directly into GoldenGate free dashboard, you chan check and monitor latency, number of operations, the log of process

And if you need you can access the microservices console to edit parameter by hand:
If you need more details, you can always take a look at our documentation:
- Creating connections
- https://docs.oracle.com/en/middleware/goldengate/free/21/uggfe/create-database-connections.html#GUID-F752AD5C-20E4-4397-A5C2-8066CB80A2E6
- Creating pipelines
- https://docs.oracle.com/en/middleware/goldengate/free/21/uggfe/create-pipelines.html#GUID-F8027670-E92C-4187-B312-D9532729CC8F