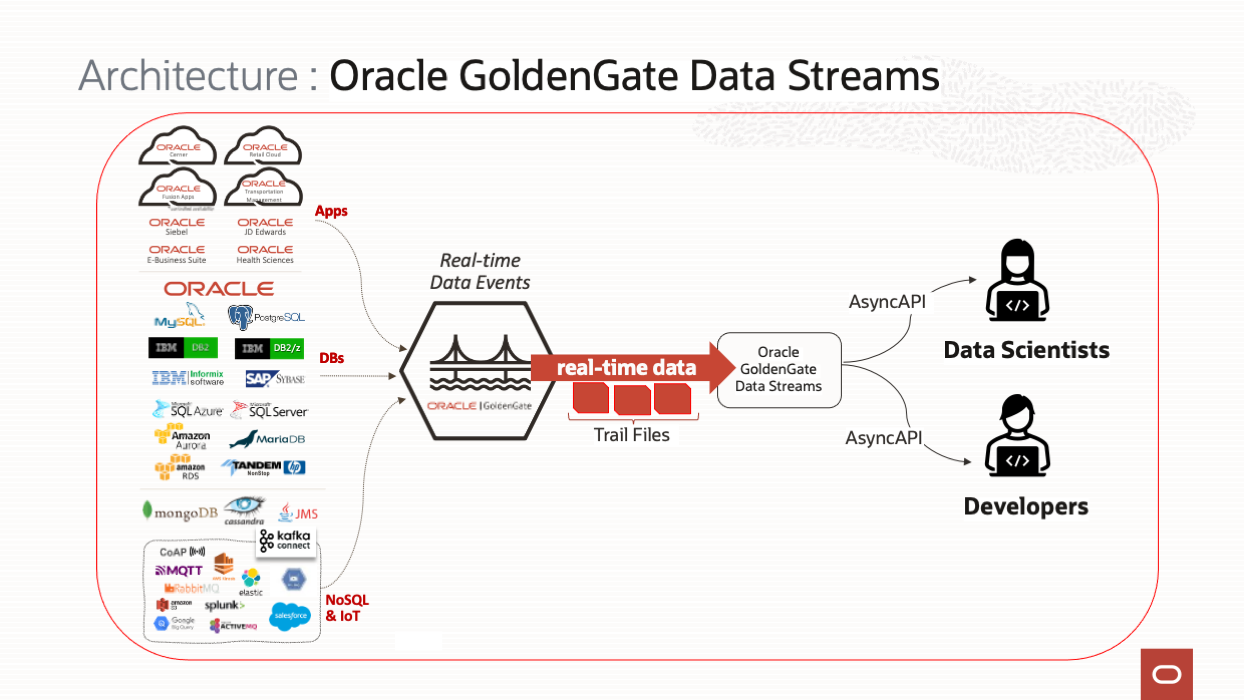
Harnessing the supremacy of Oracle GoldenGate for seamless data integration, Oracle GoldenGate 23ai introduces Data Streams, a new feature that offers application developers and data scientists an approach to access real-time transactional data captured by Oracle GoldenGate. This technology streamlines data ingestion by eliminating the need for intermediary systems and facilitates seamless integration with existing workflows.
Oracle GoldenGate Data Streams utilizes the AsyncAPI specification for defining asynchronous APIs. This approach enables applications to efficiently subscribe to data streams using a Publish or Subscribe model. Updates are received as soon as changes are committed in the source database, minimizing latency and simplifying application development. Additionally, Oracle GoldenGate Data Streams enable users to specify their preferred data format, such as JSON, for seamless integration with existing tools and frameworks within their development environment.
Add Prerequisites.
- GoldenGate Data Streams is available with Oracle GoldenGate 23ai. Oracle GoldenGate 23ai can be either provisioned as managed deployment within OCI GoldenGate or installed on-premises on a Linux host.
- Make sure the Extract process is running and capturing data into trail files. If not, please follow steps outlined here.
- Node.js shines for consuming data streams thanks to its asynchronous and event-driven nature. The Node.js application subscribes to the GoldenGate Data Stream’s Async API, allowing it to receive real-time updates as data changes occur. This empowers to process these updates efficiently and react swiftly to evolving information within your application. For this blog, we are going to use NodeJS application that subscribes to GoldenGate Data Streams .
Architecture :
Follow the steps to create a Data Stream:
A. Creating a Data Streams on OCI console.
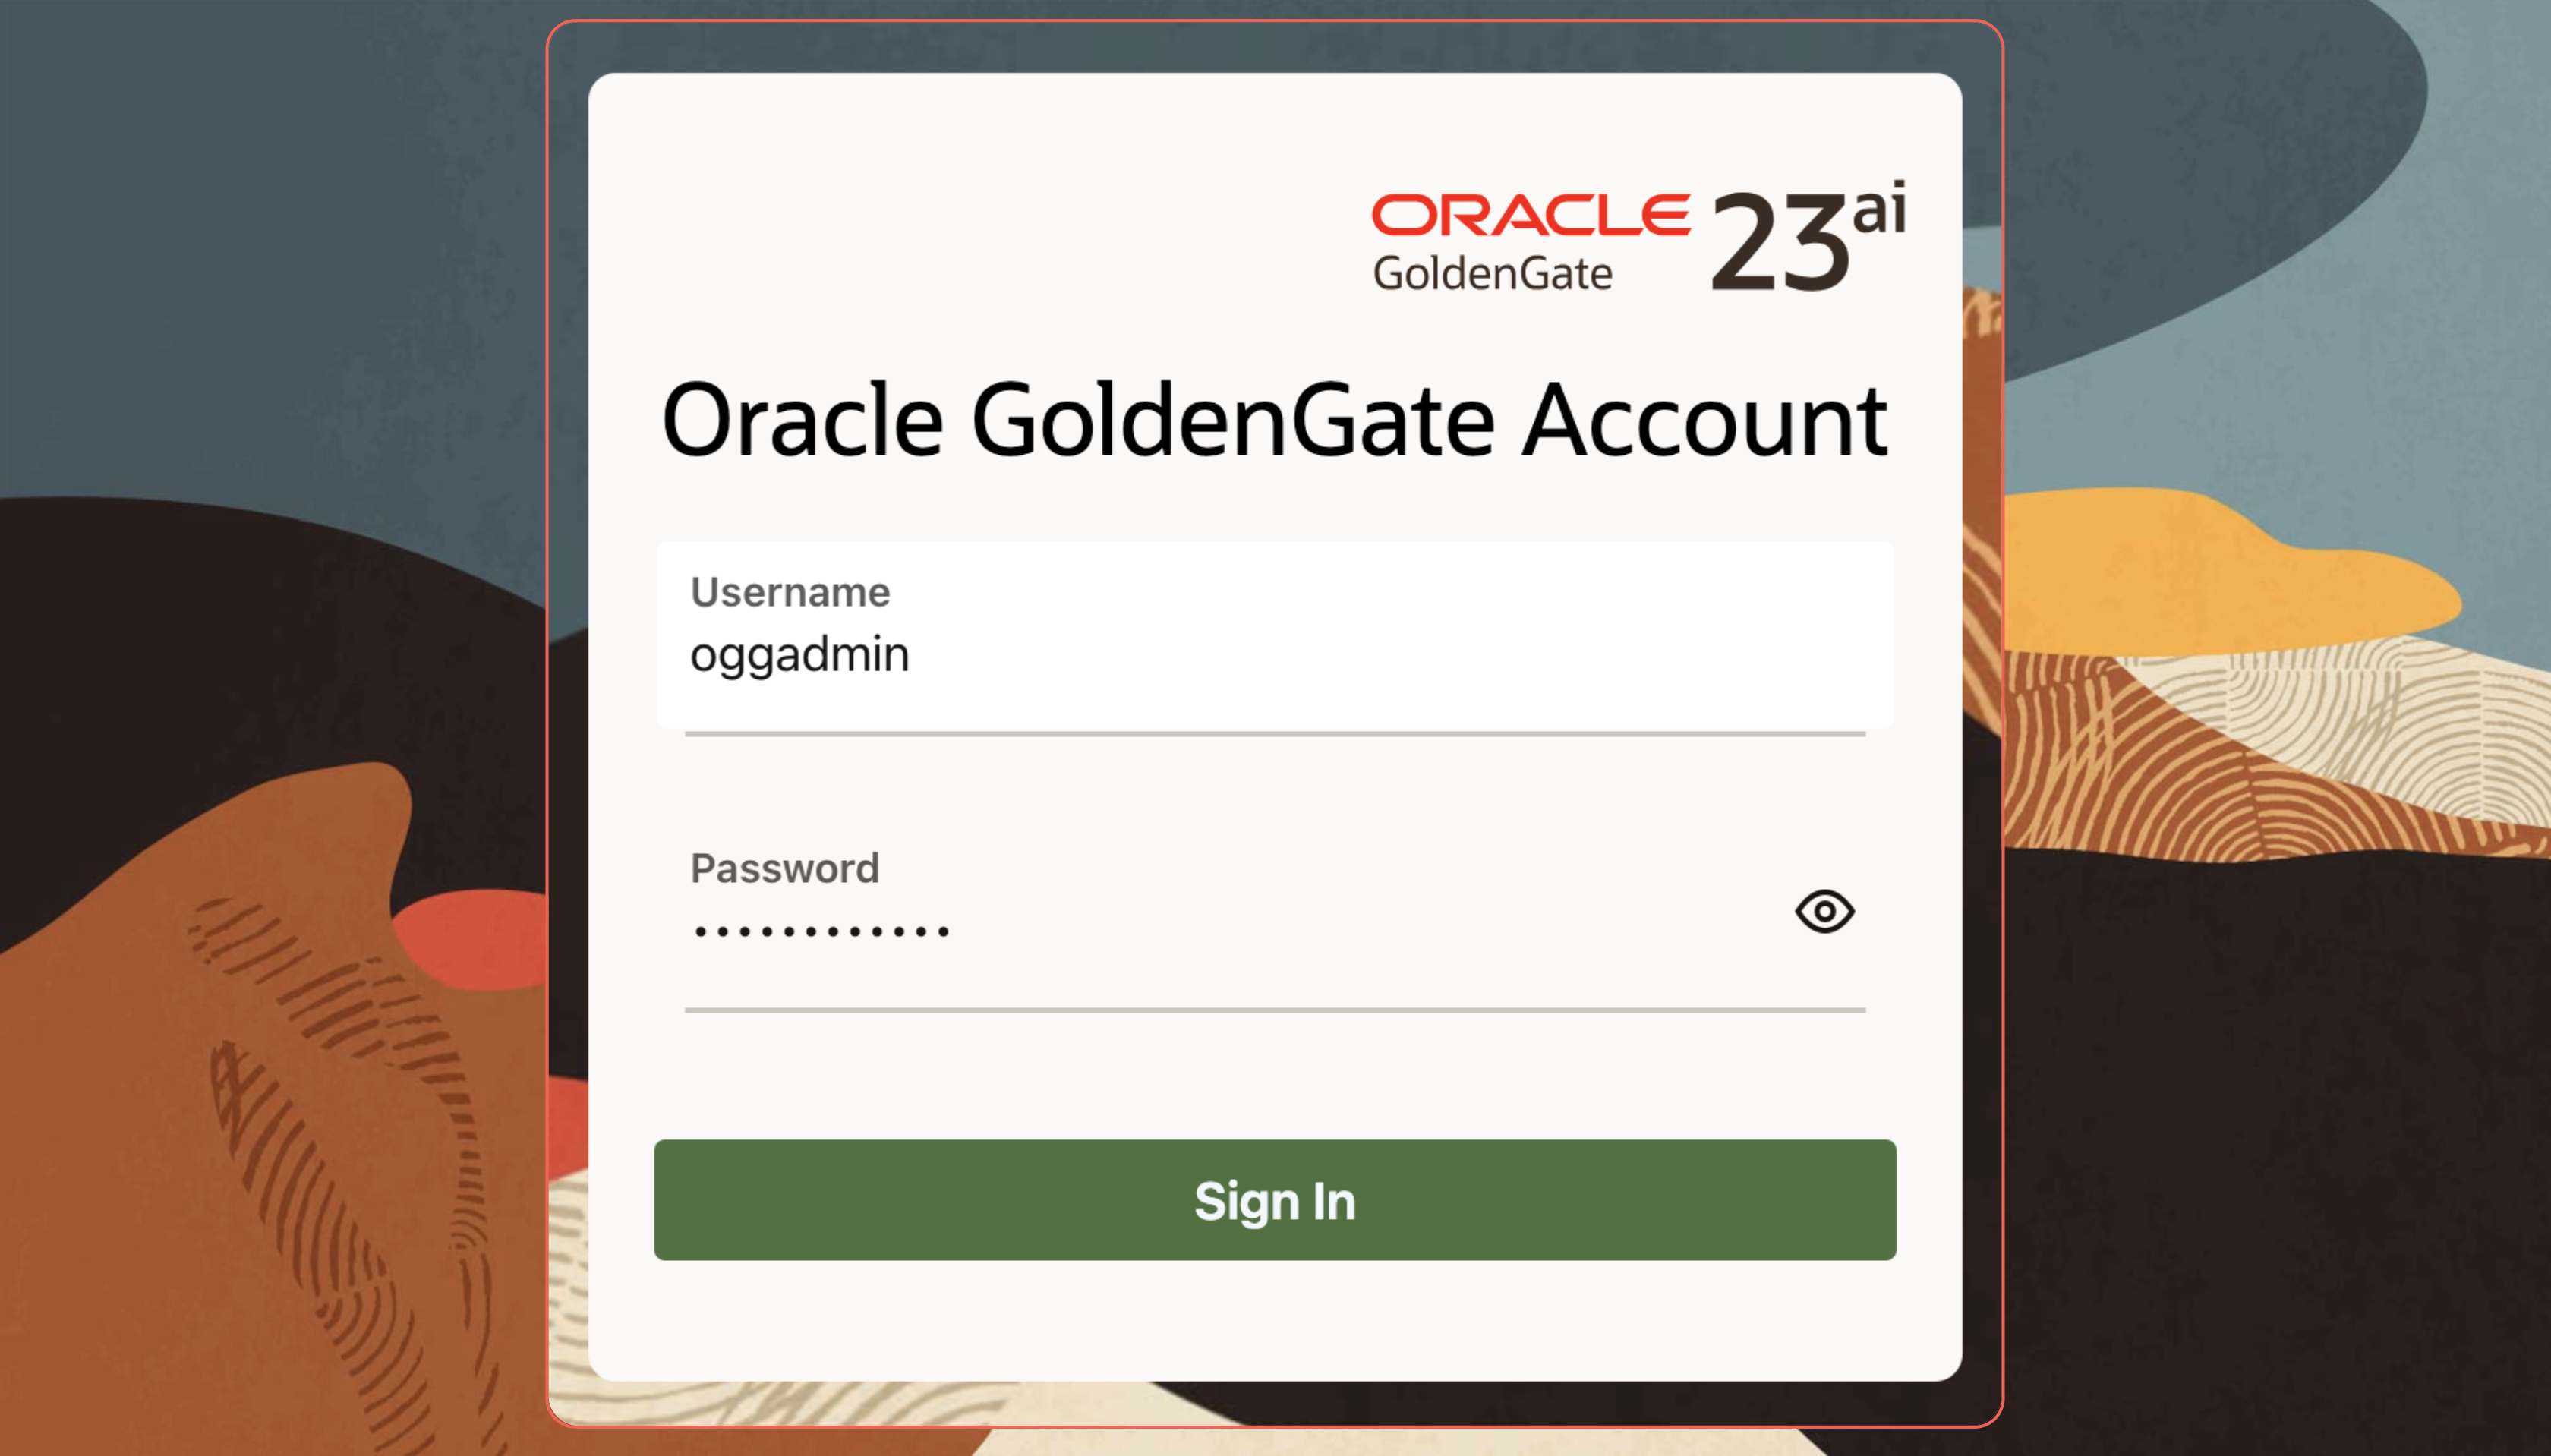
- Login to OCI GoldenGate with username and password.
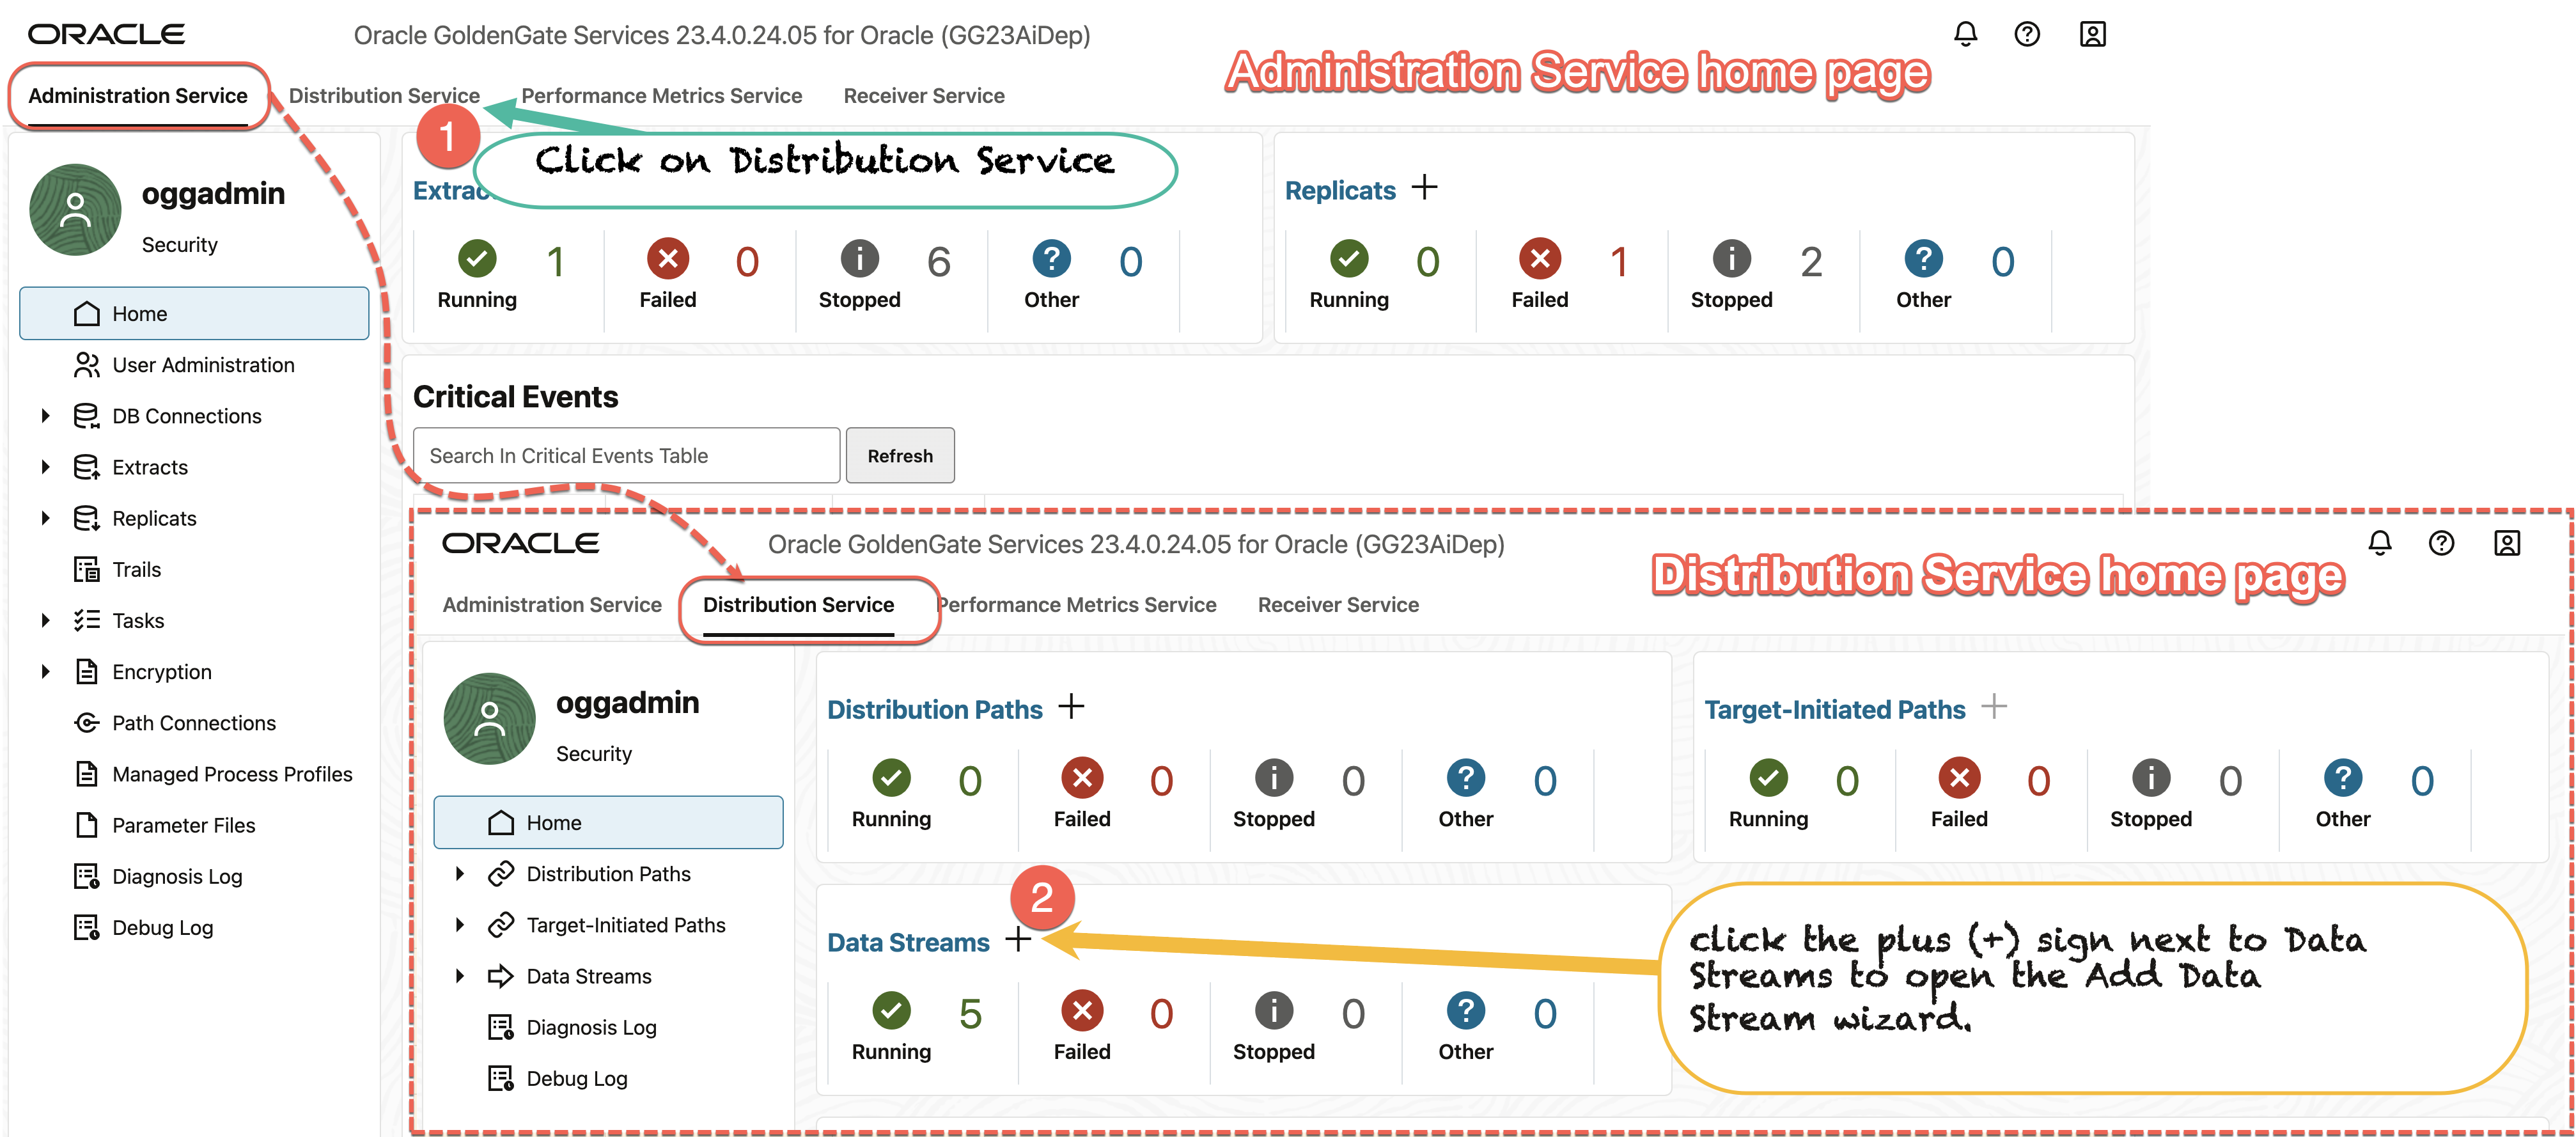
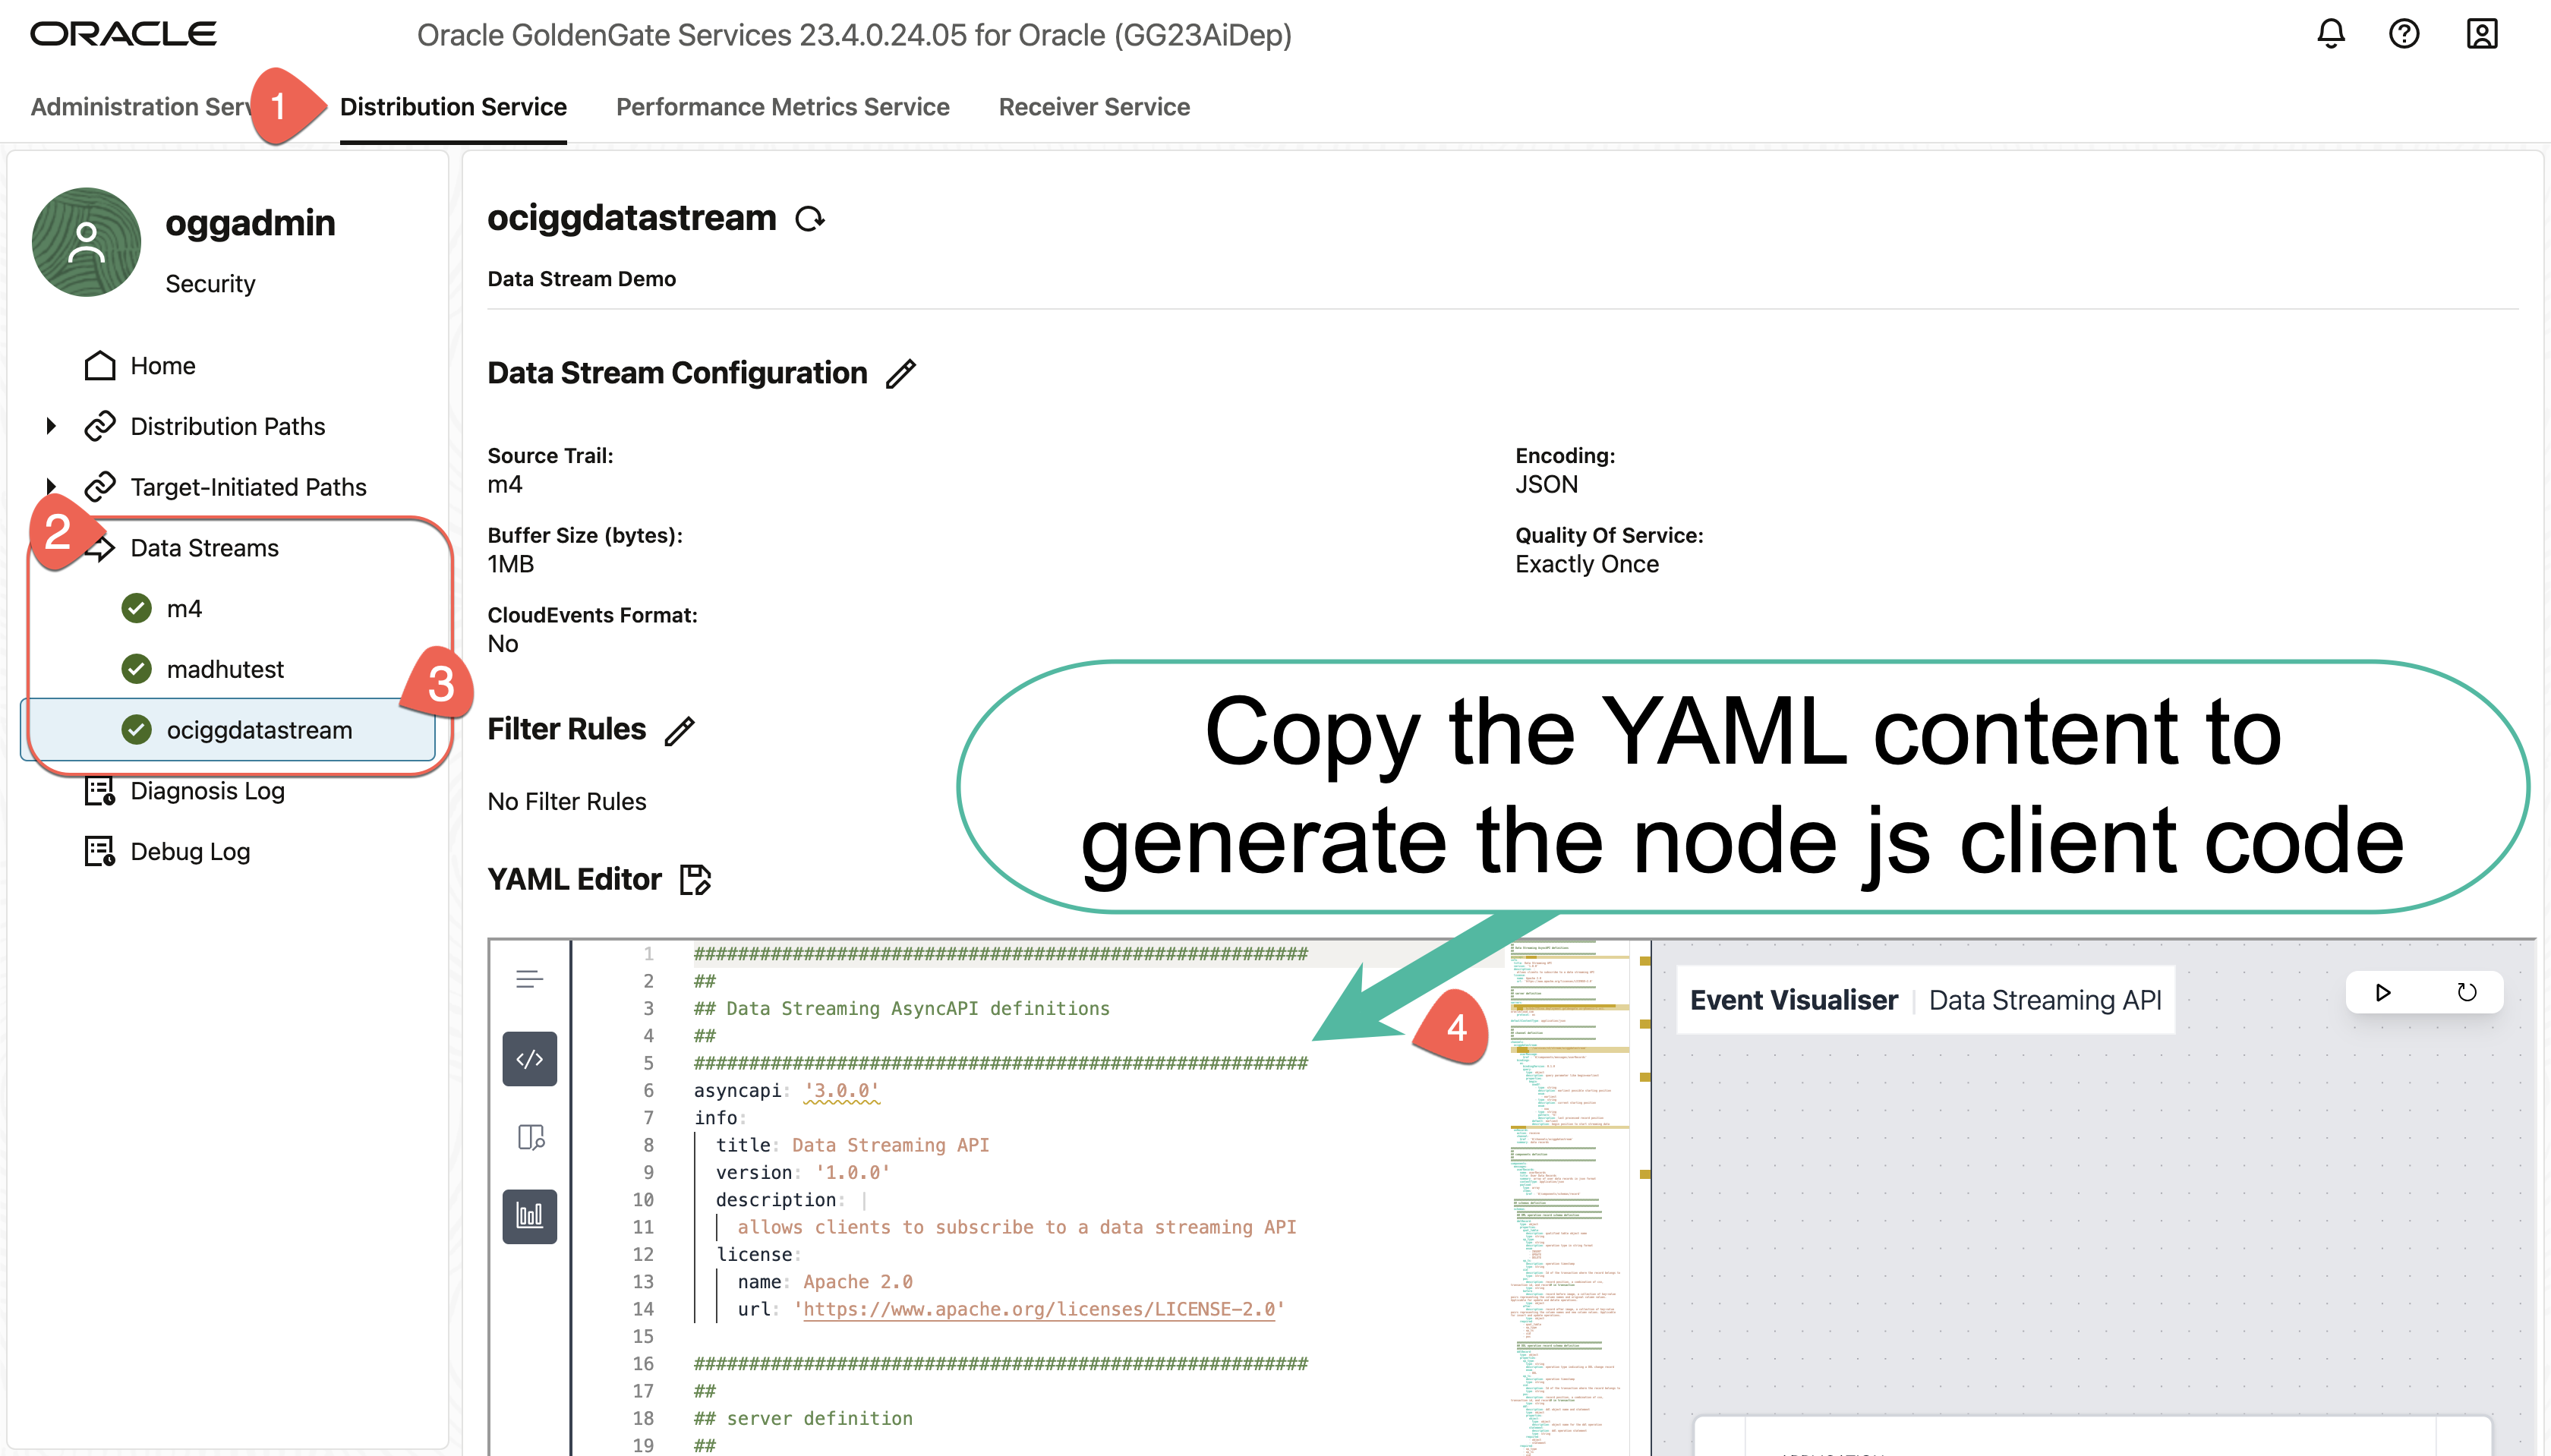
- Data streams are created from the Distribution Service. Switch to Distribution Service to begin creating a Data Stream process.
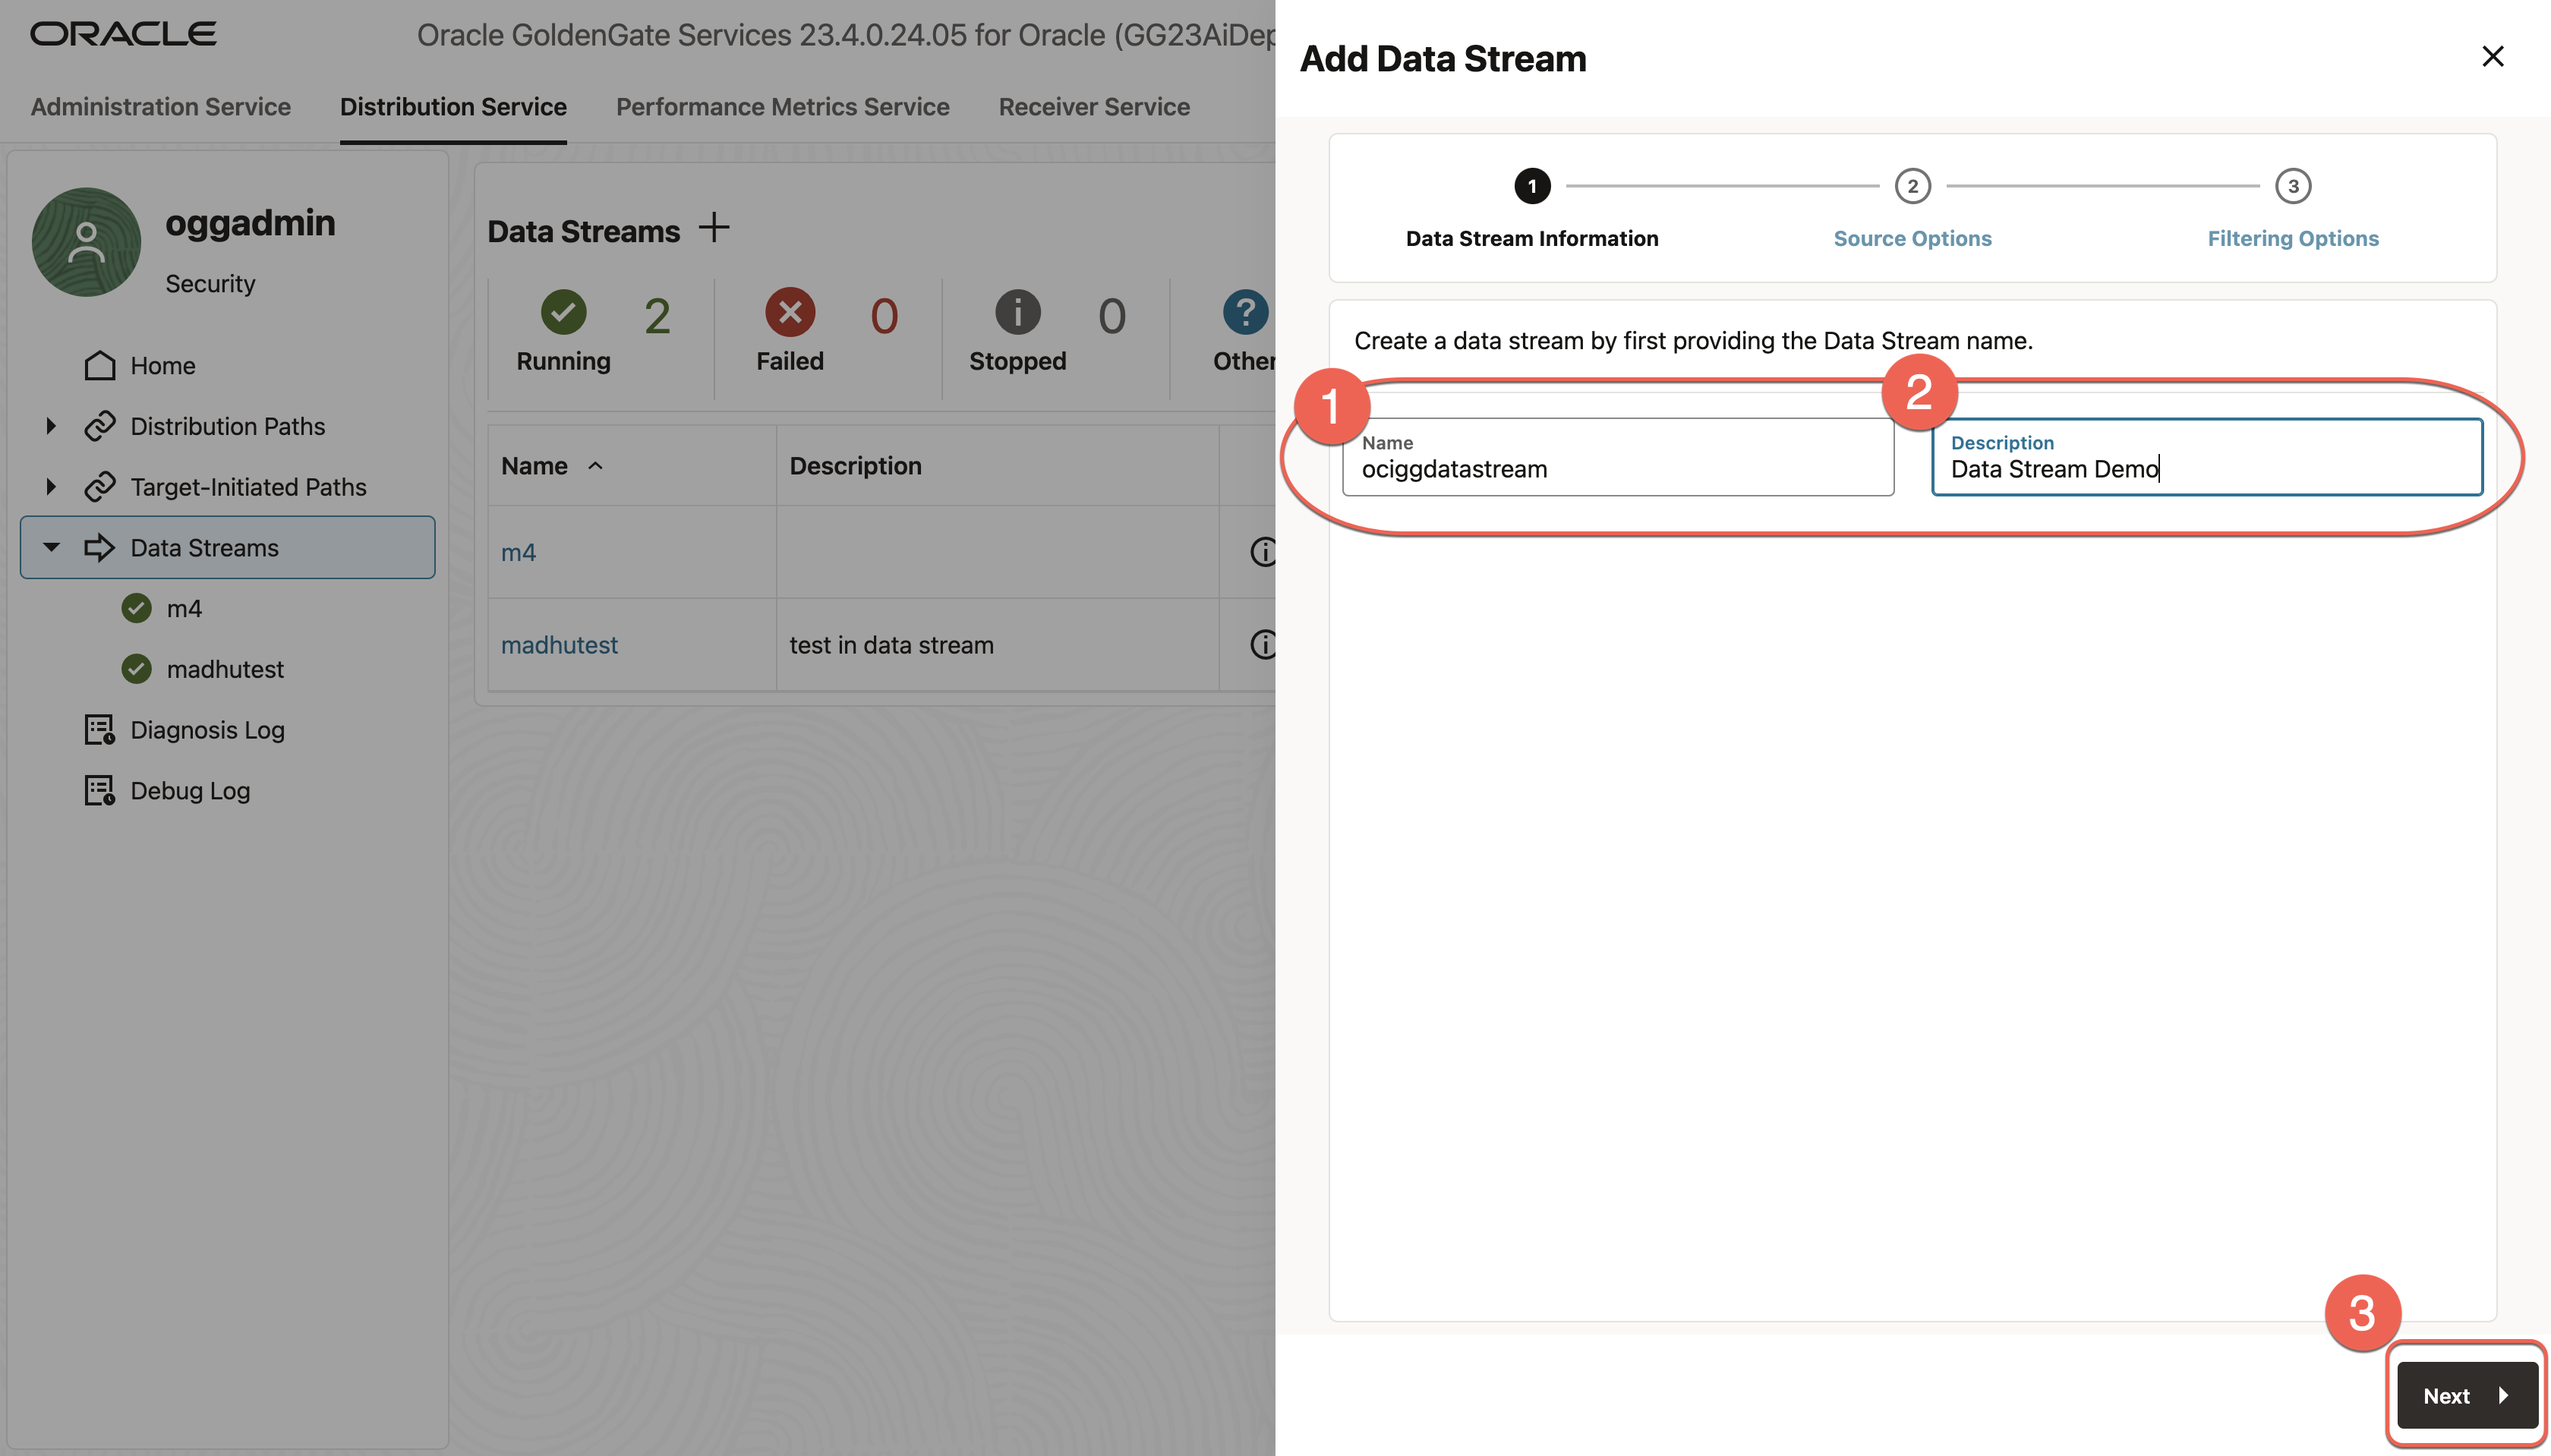
- On the Data Stream Information page, enter a Data Stream process name in the Name box and add a description for it. Click Next.
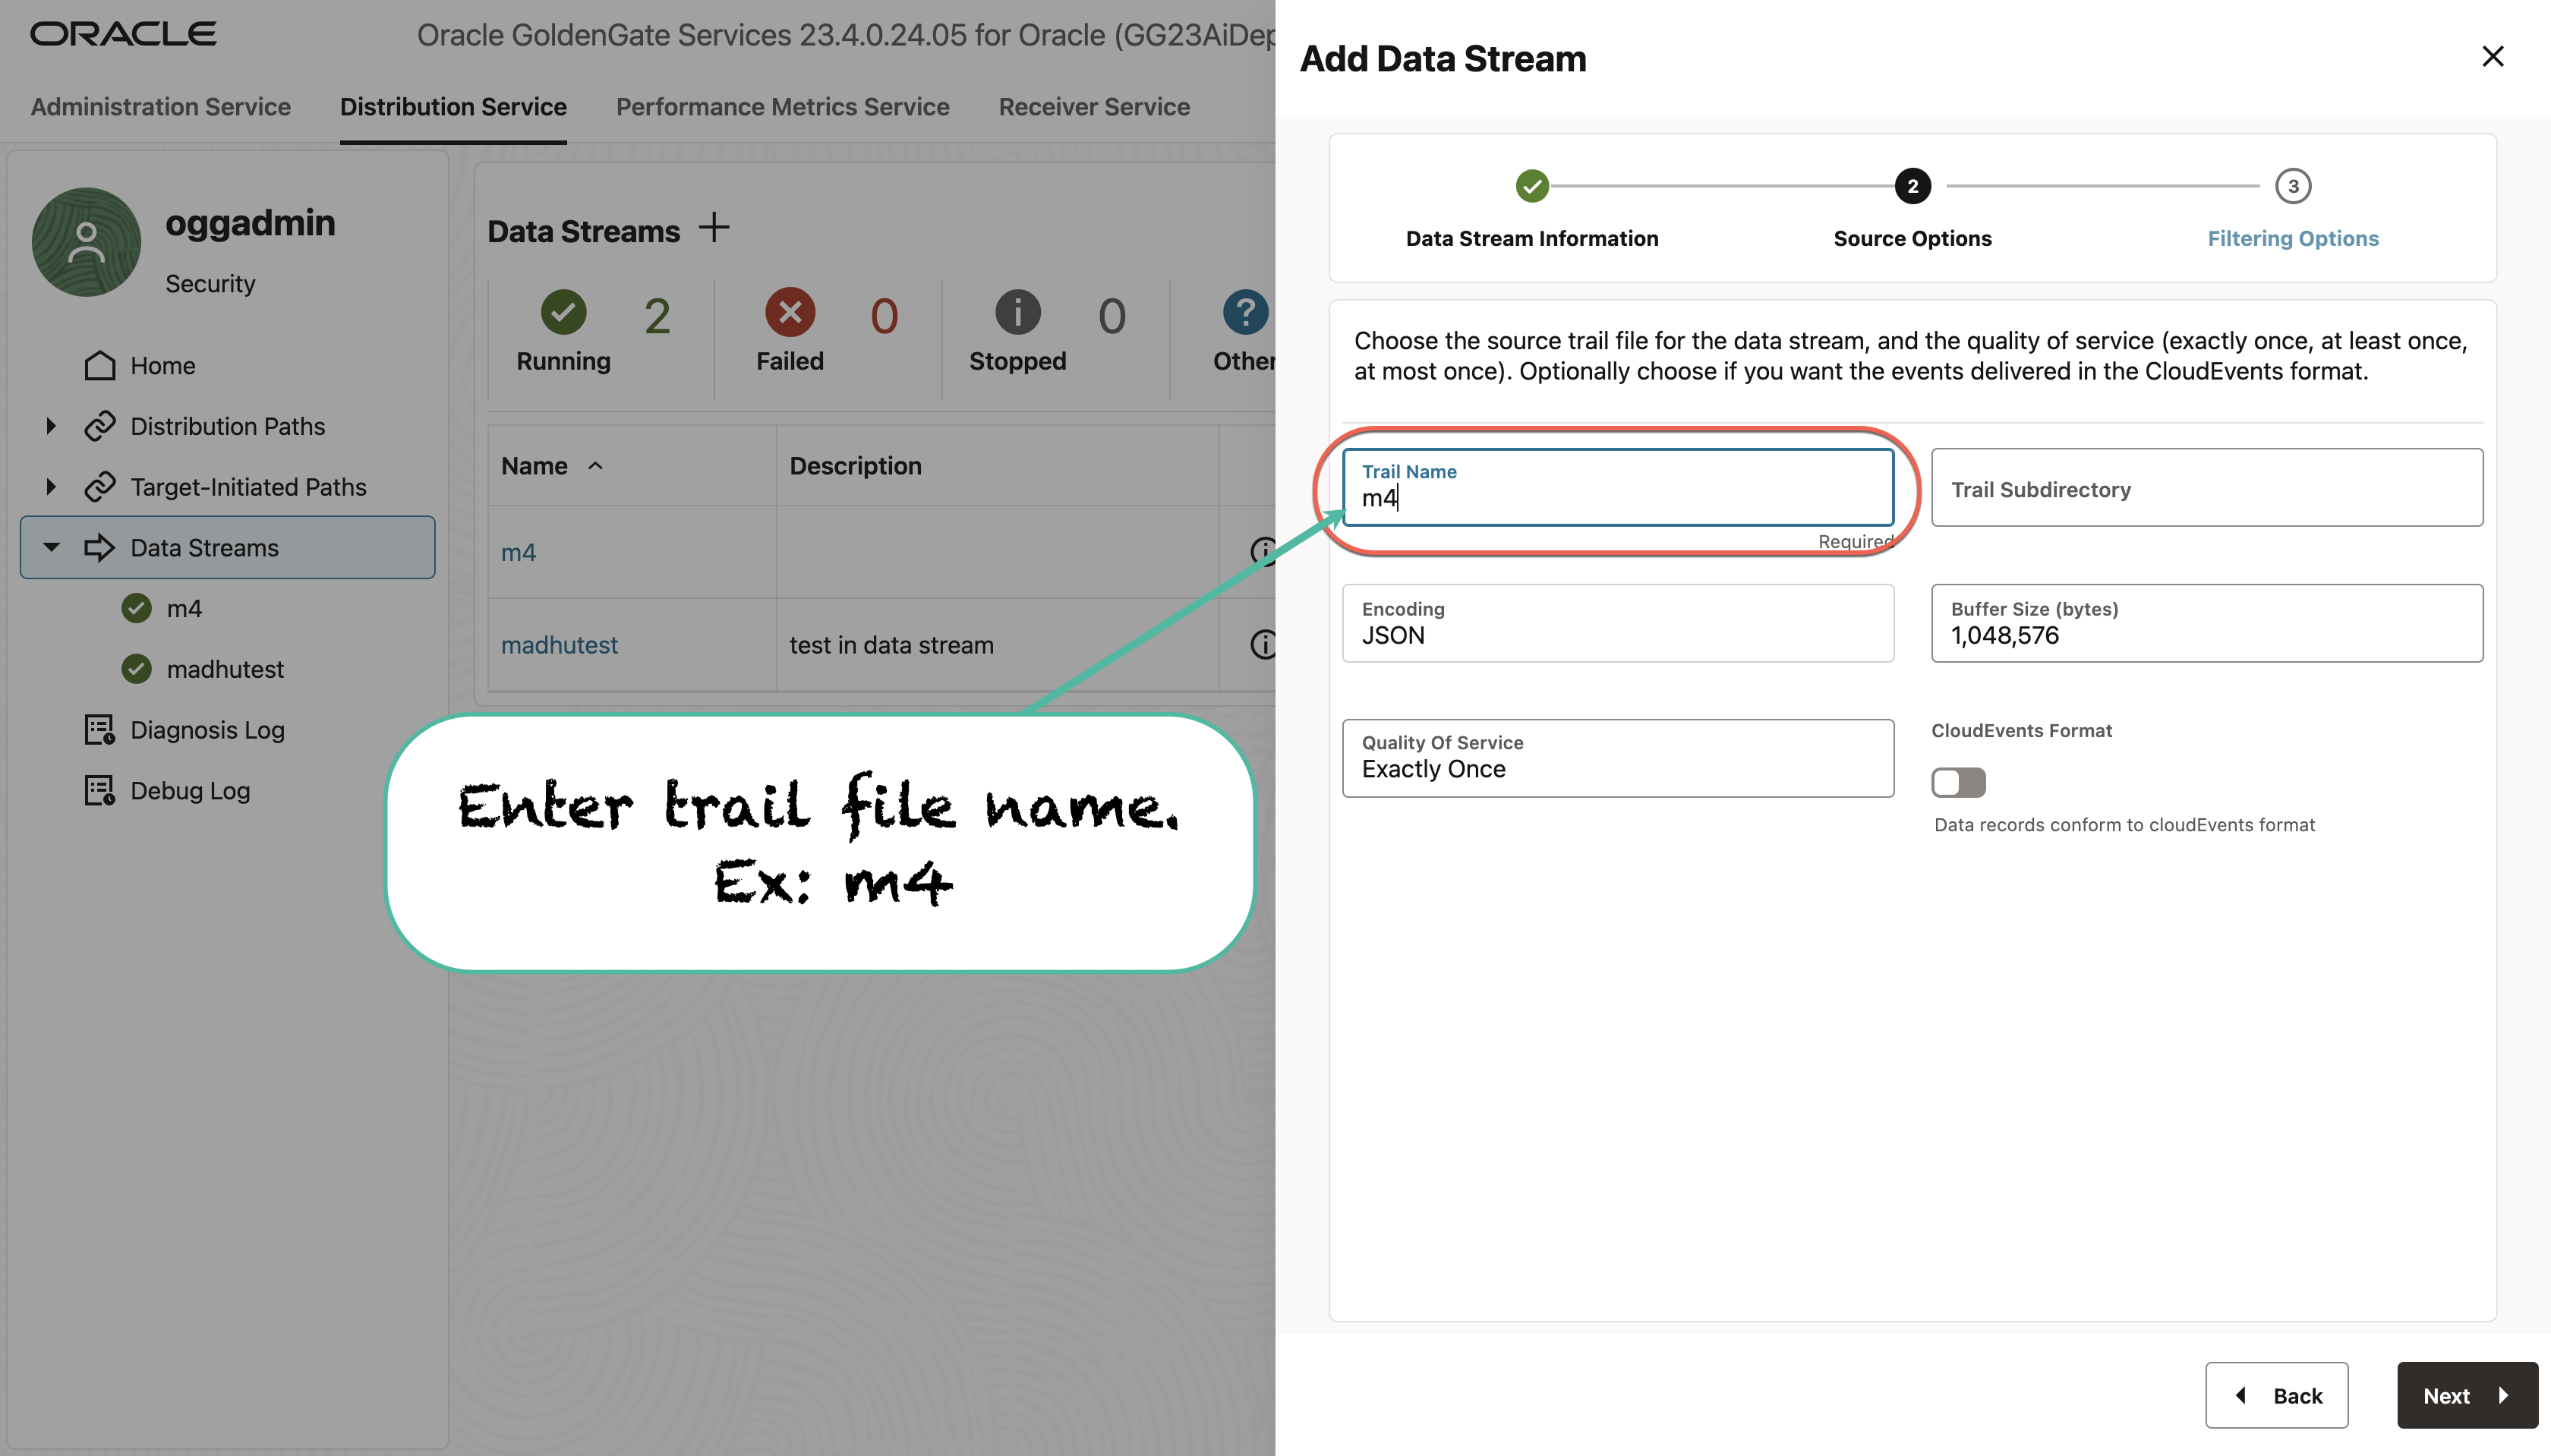
. - On the Source Options page, provide the values for options shown below:
- Enter the Trail Name:
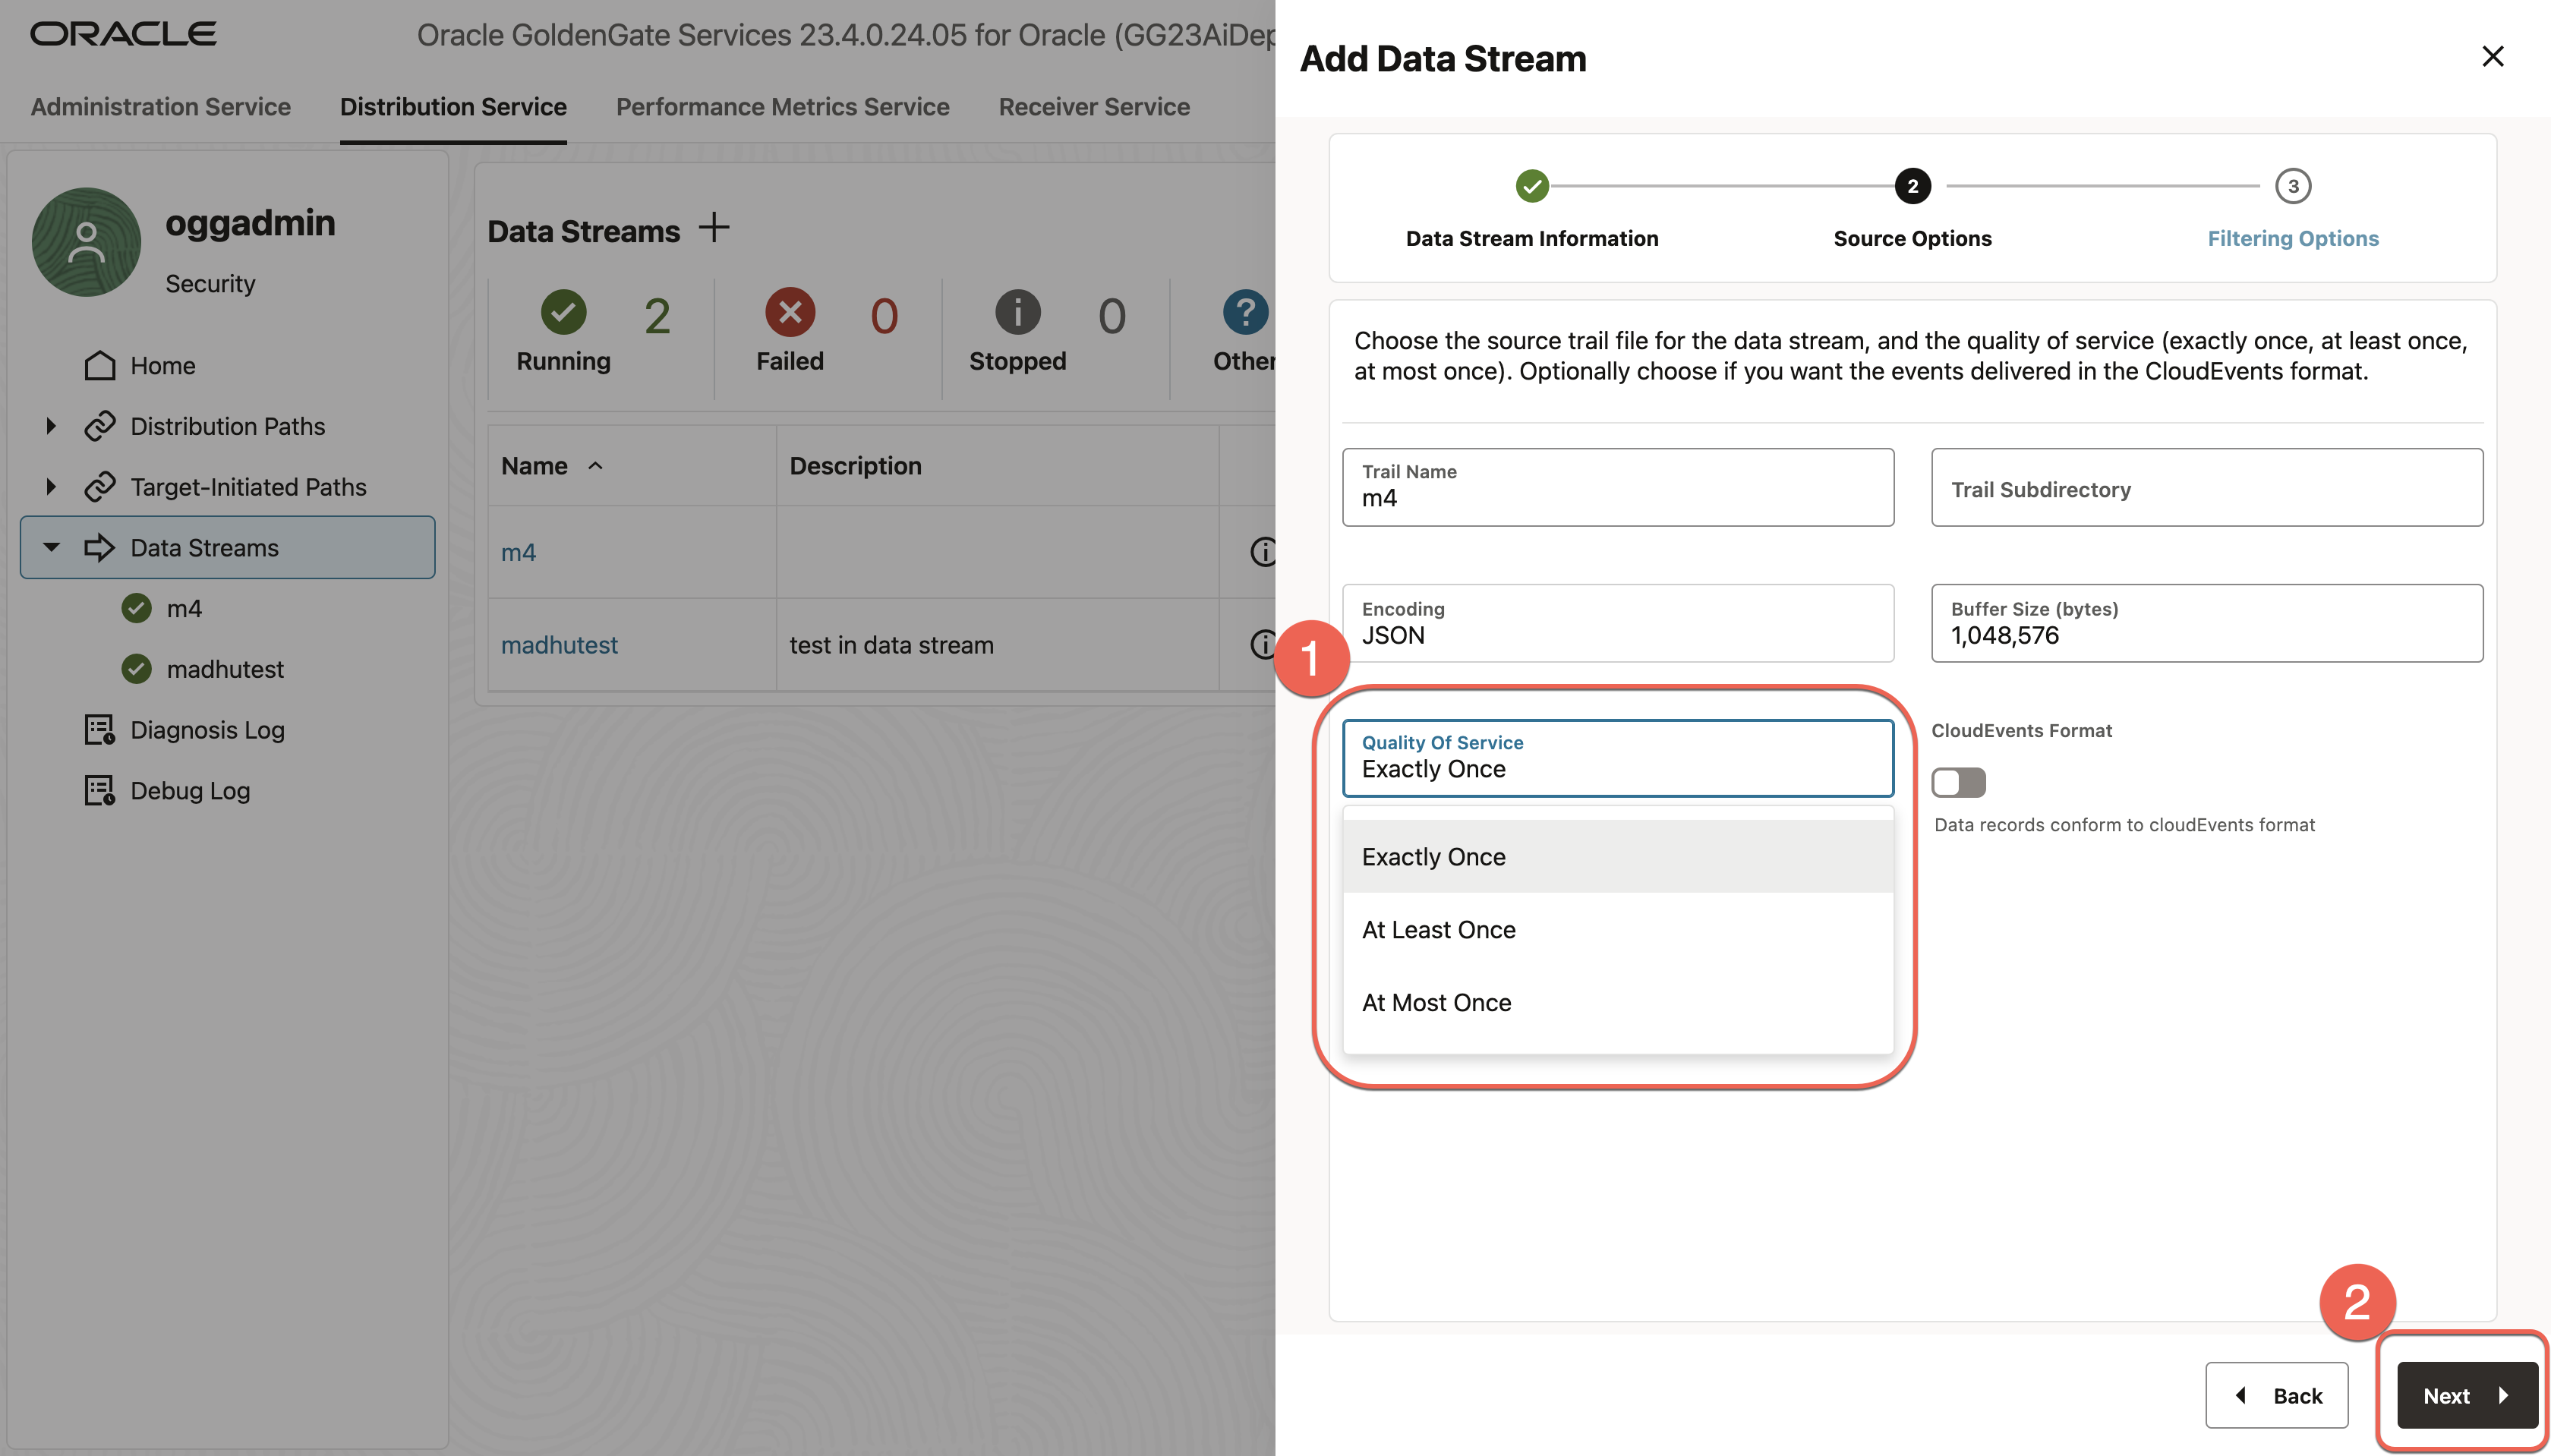
- Choose the “Quality of Service” and click “Next”.
- Enter the Trail Name:
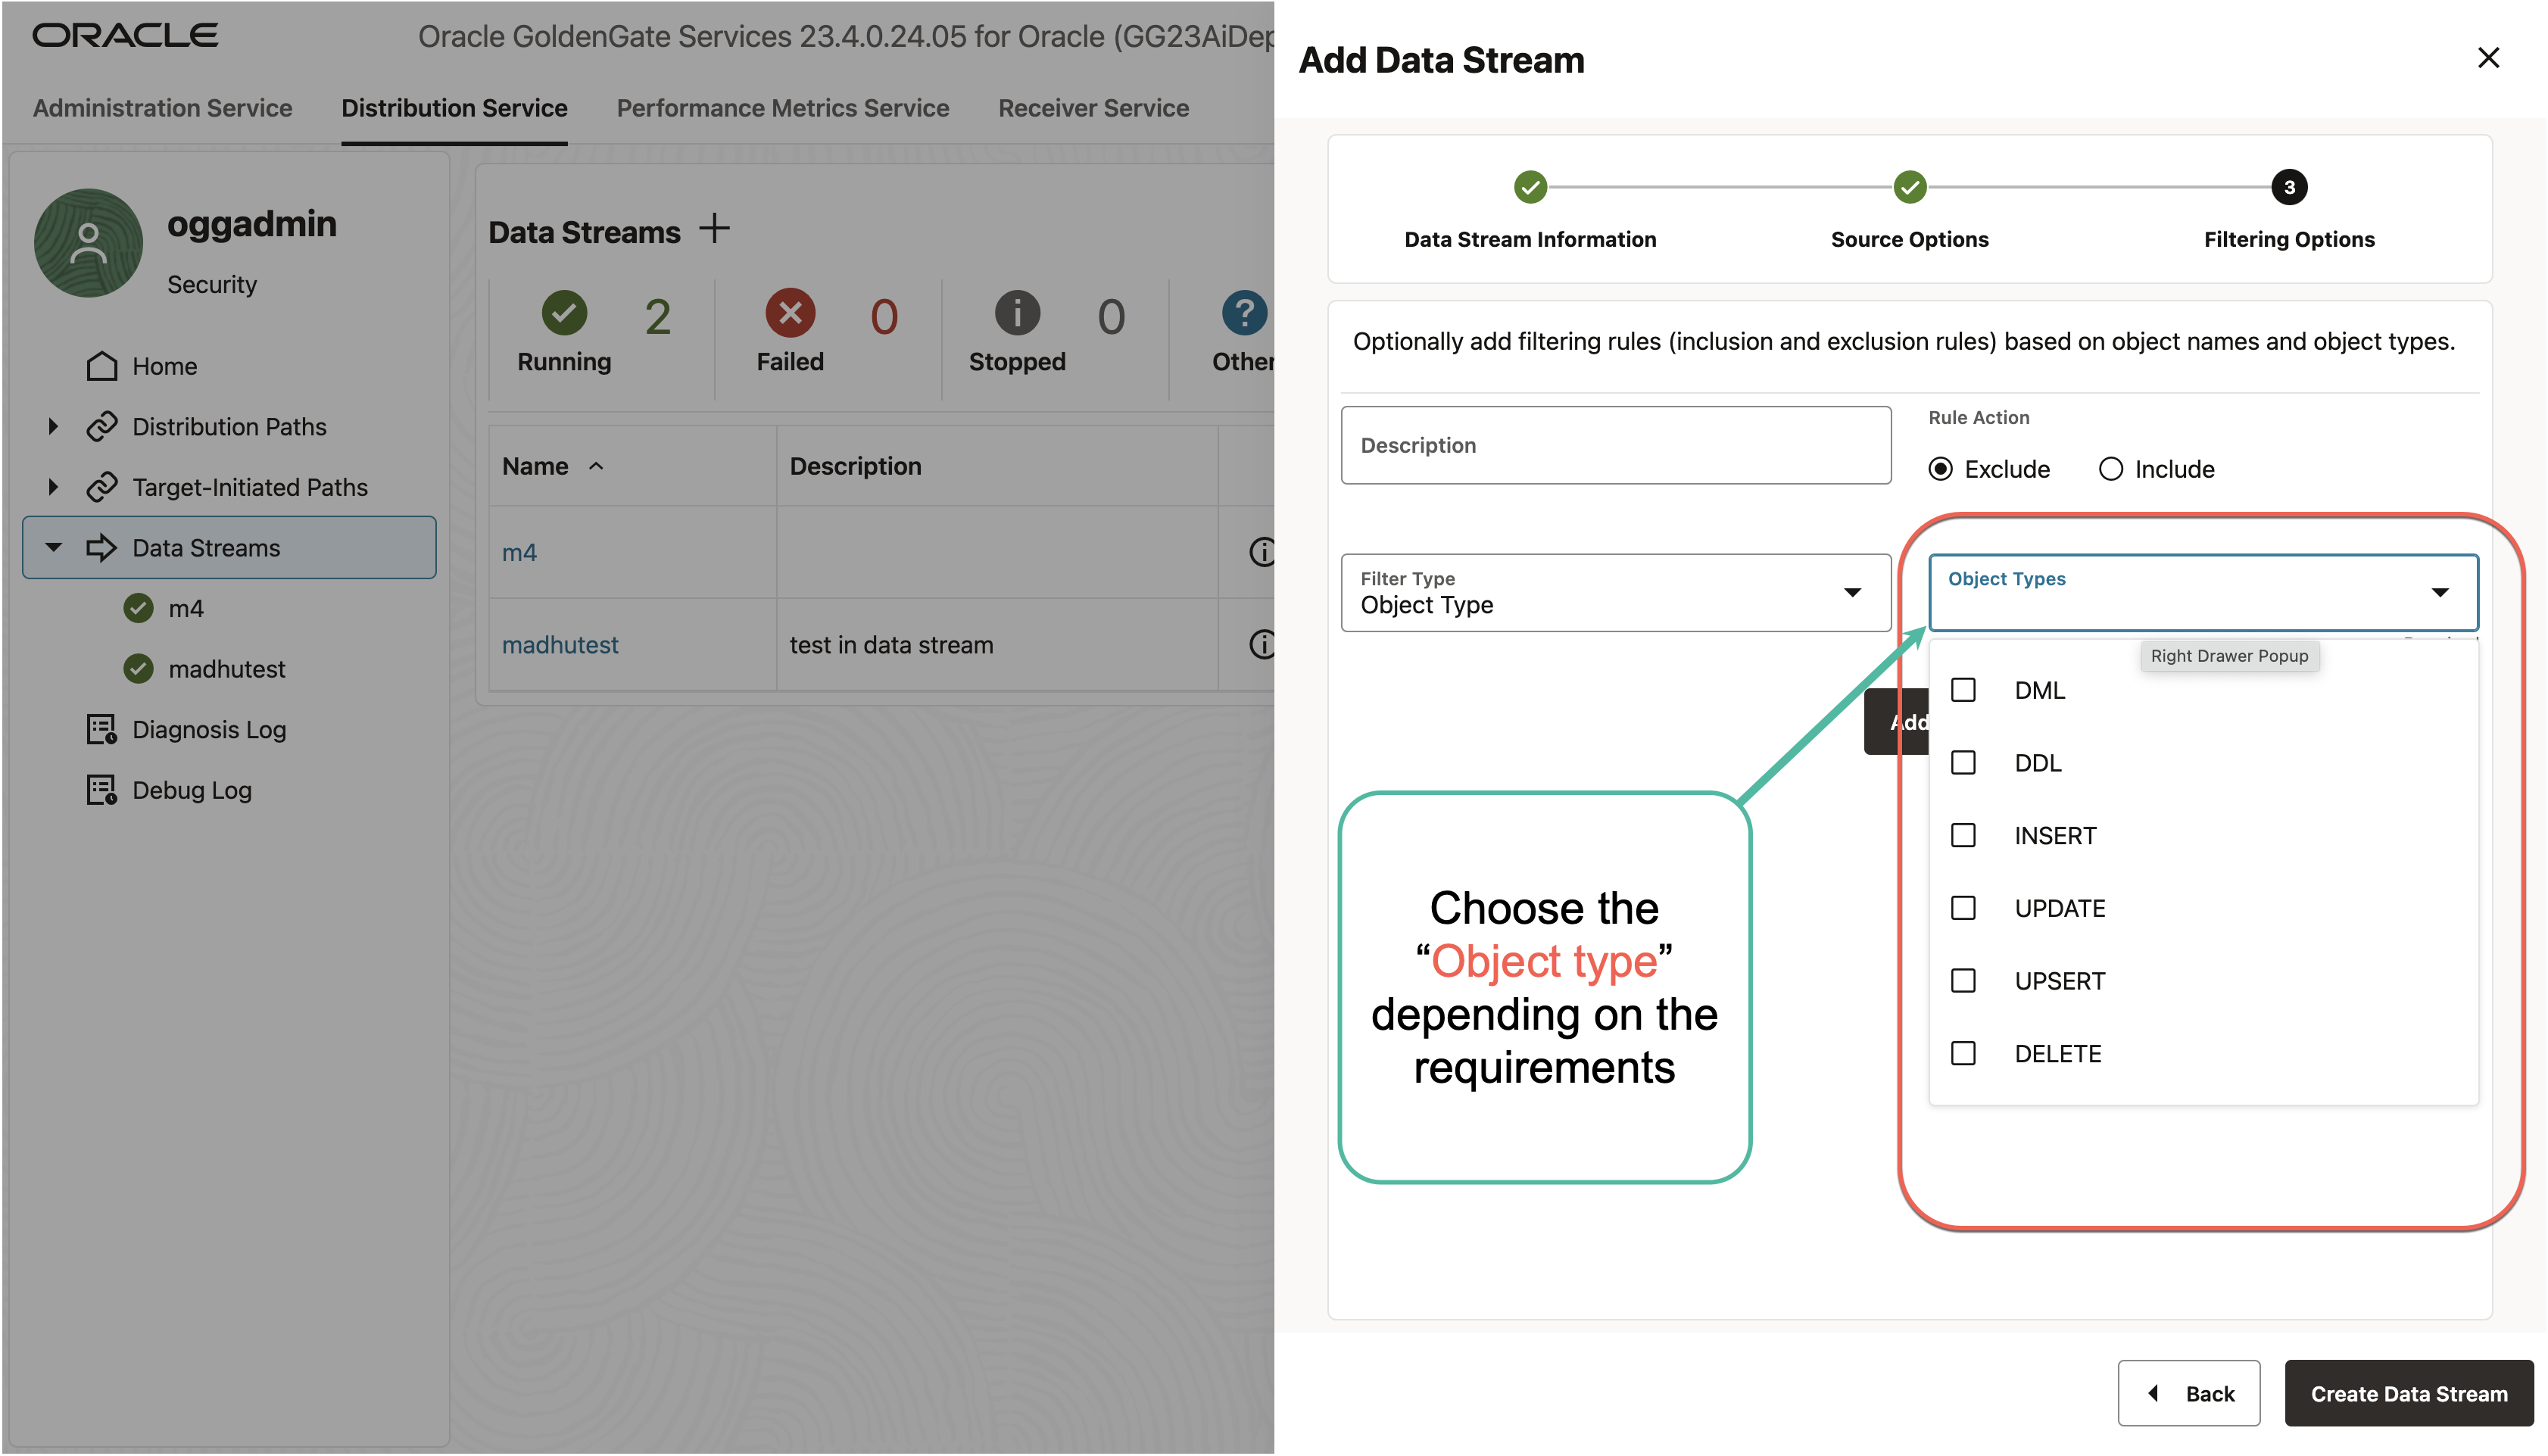
- The Filtering Options page, the options for include and exclude filtering rules are available, as shown in the following image:
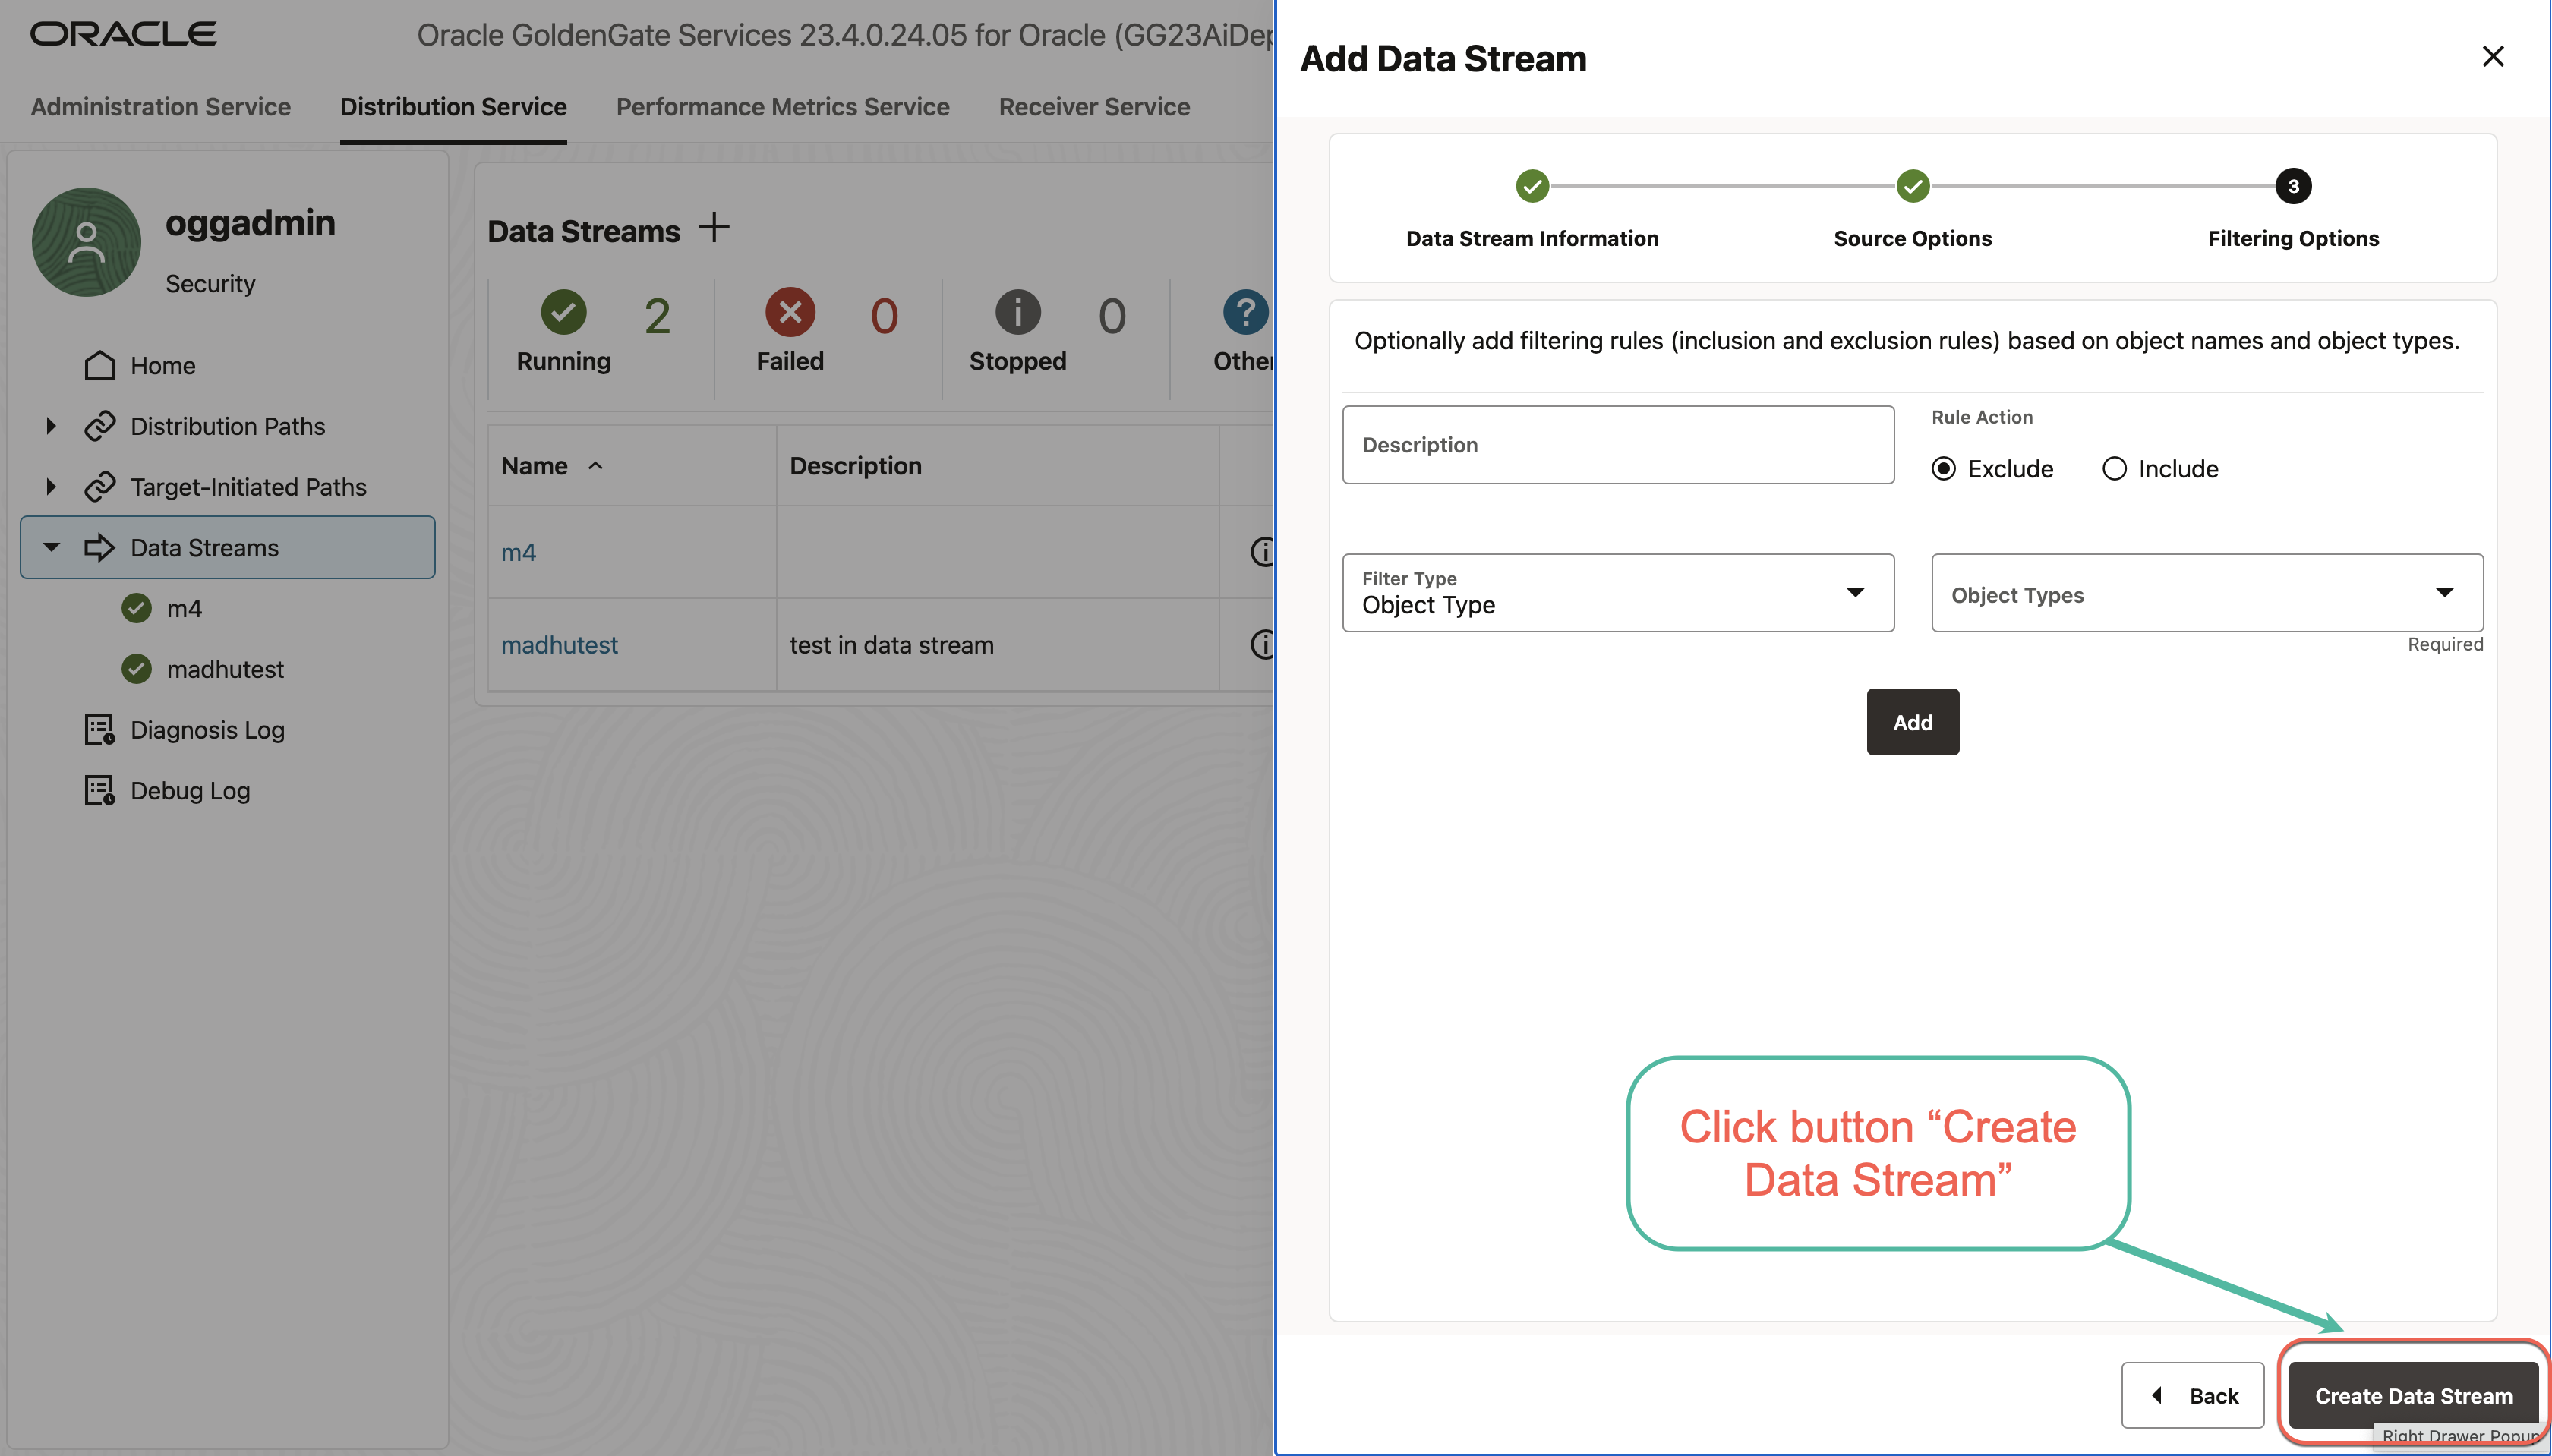
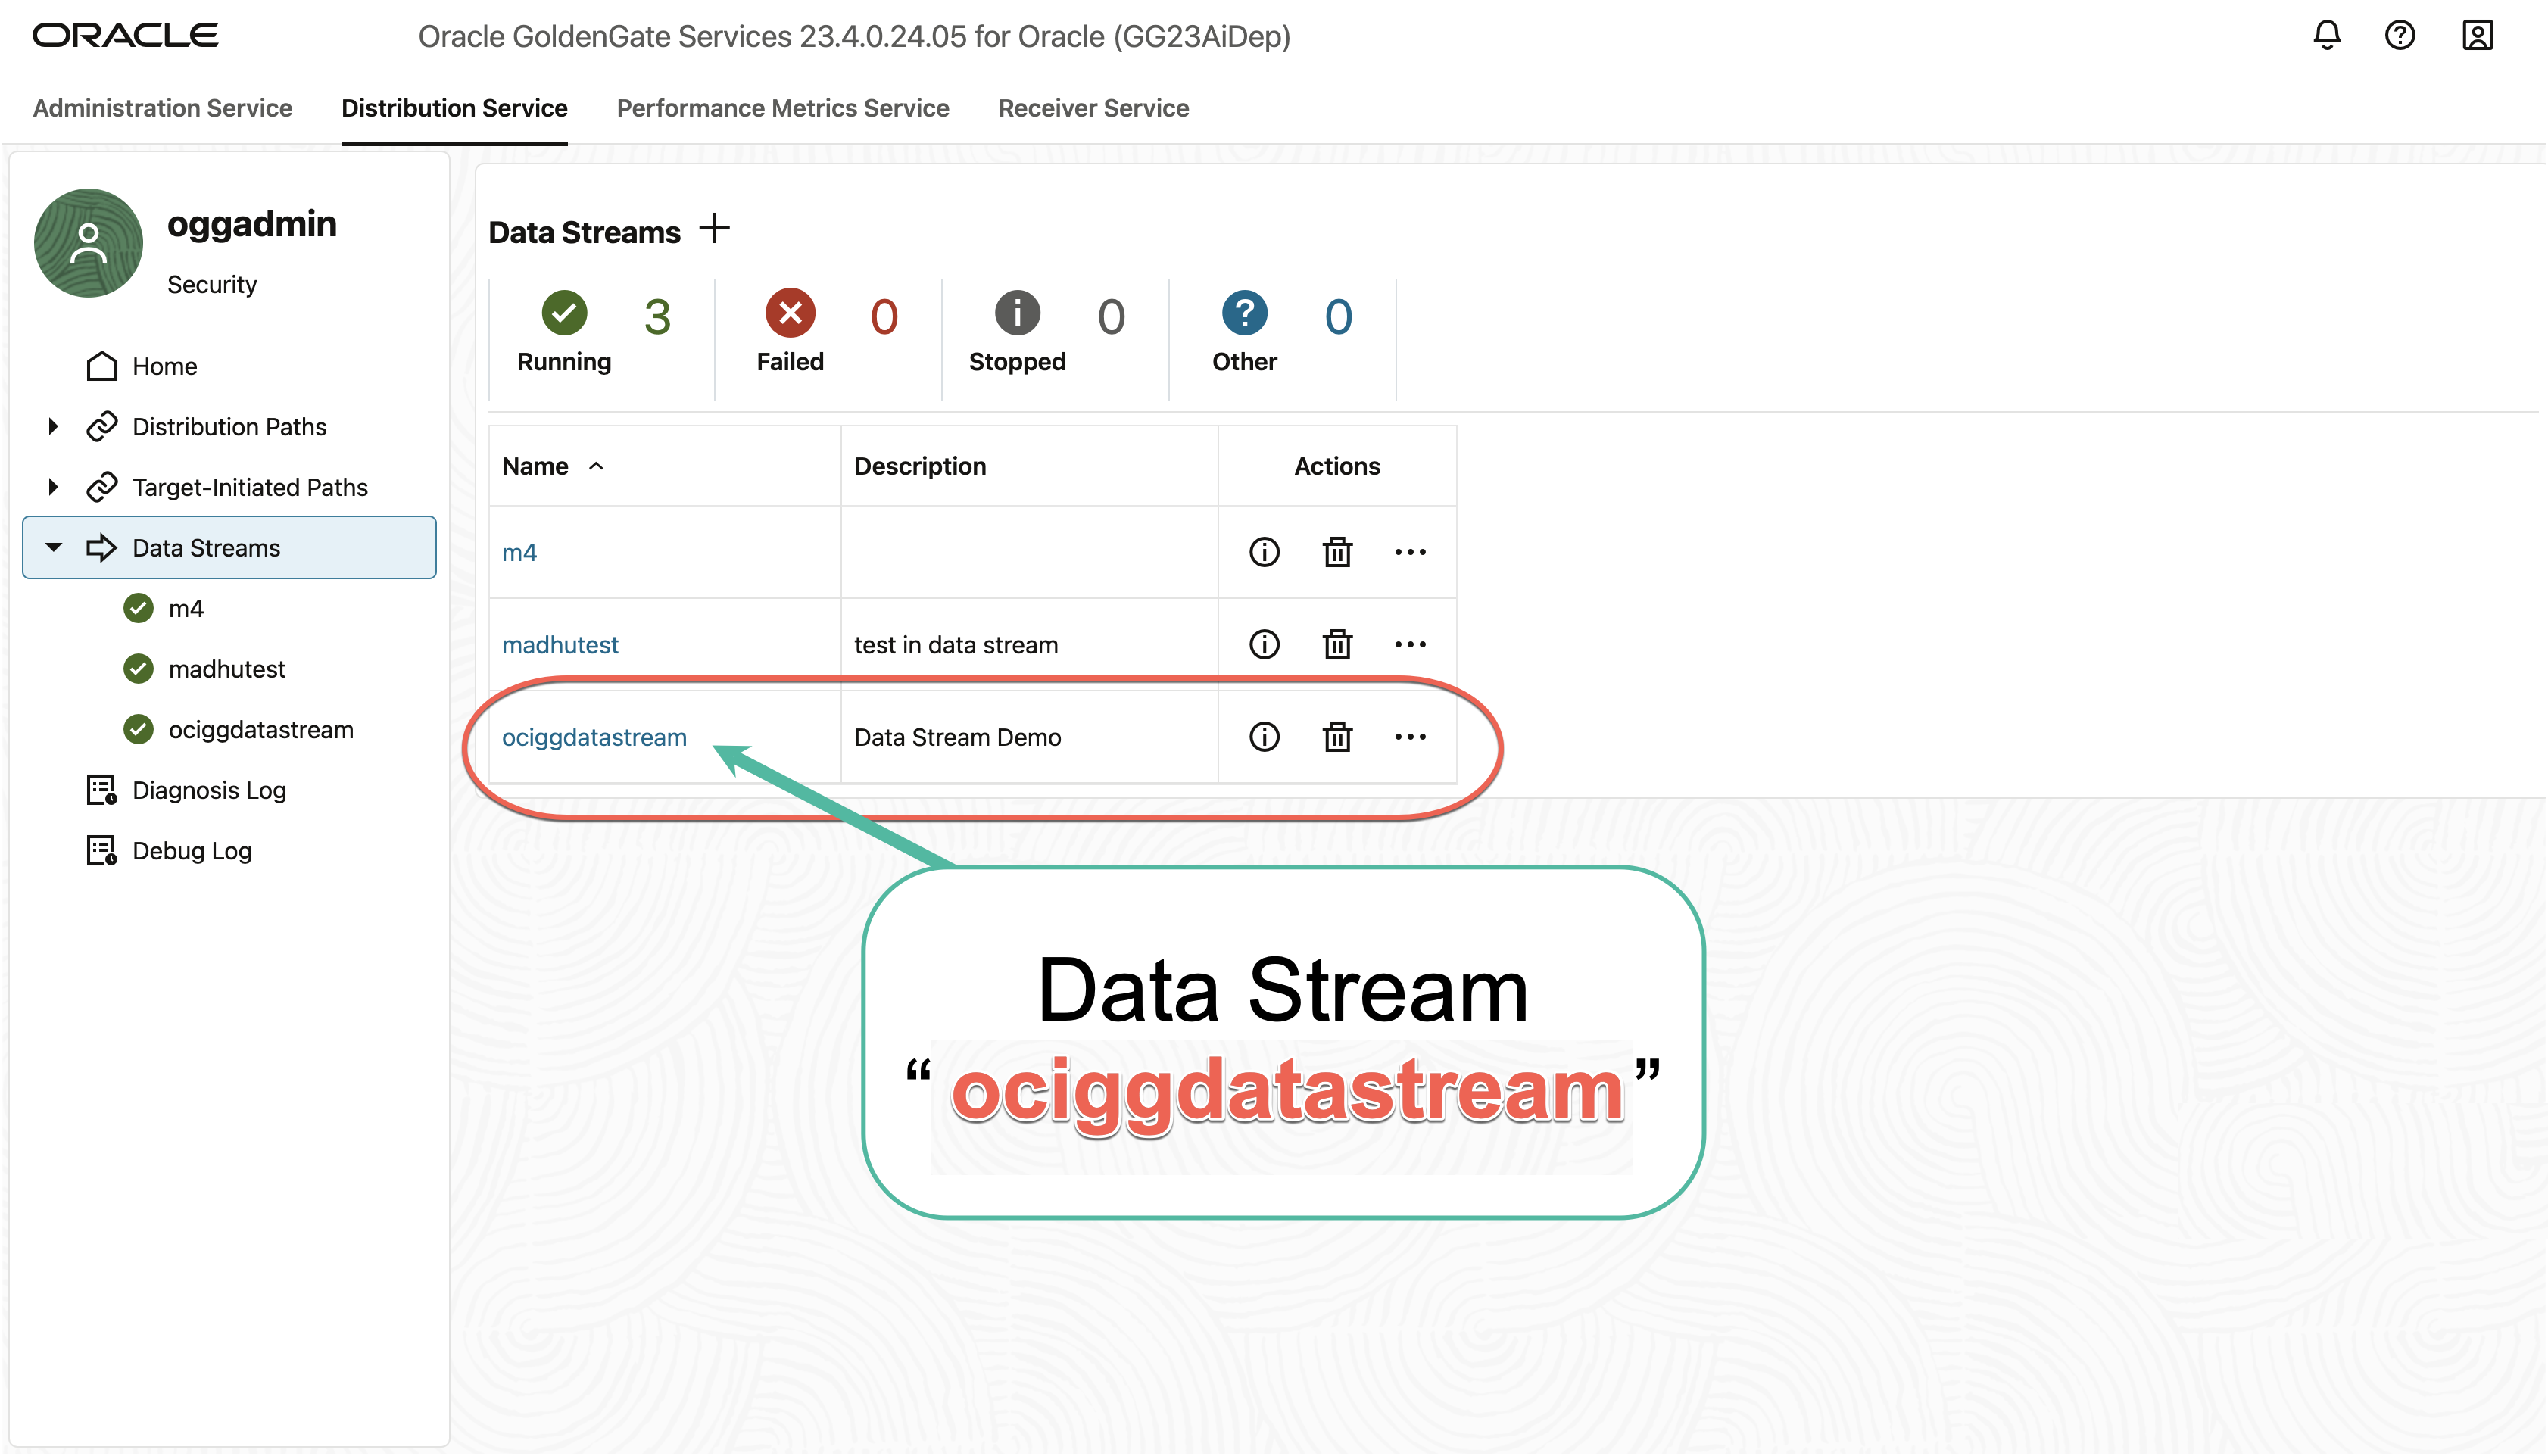
- Click Create Data Stream. You will be returned to the Distribution Service home page where the Data Stream is listed.
- Data Stream “ociggdatastream” created successfully.
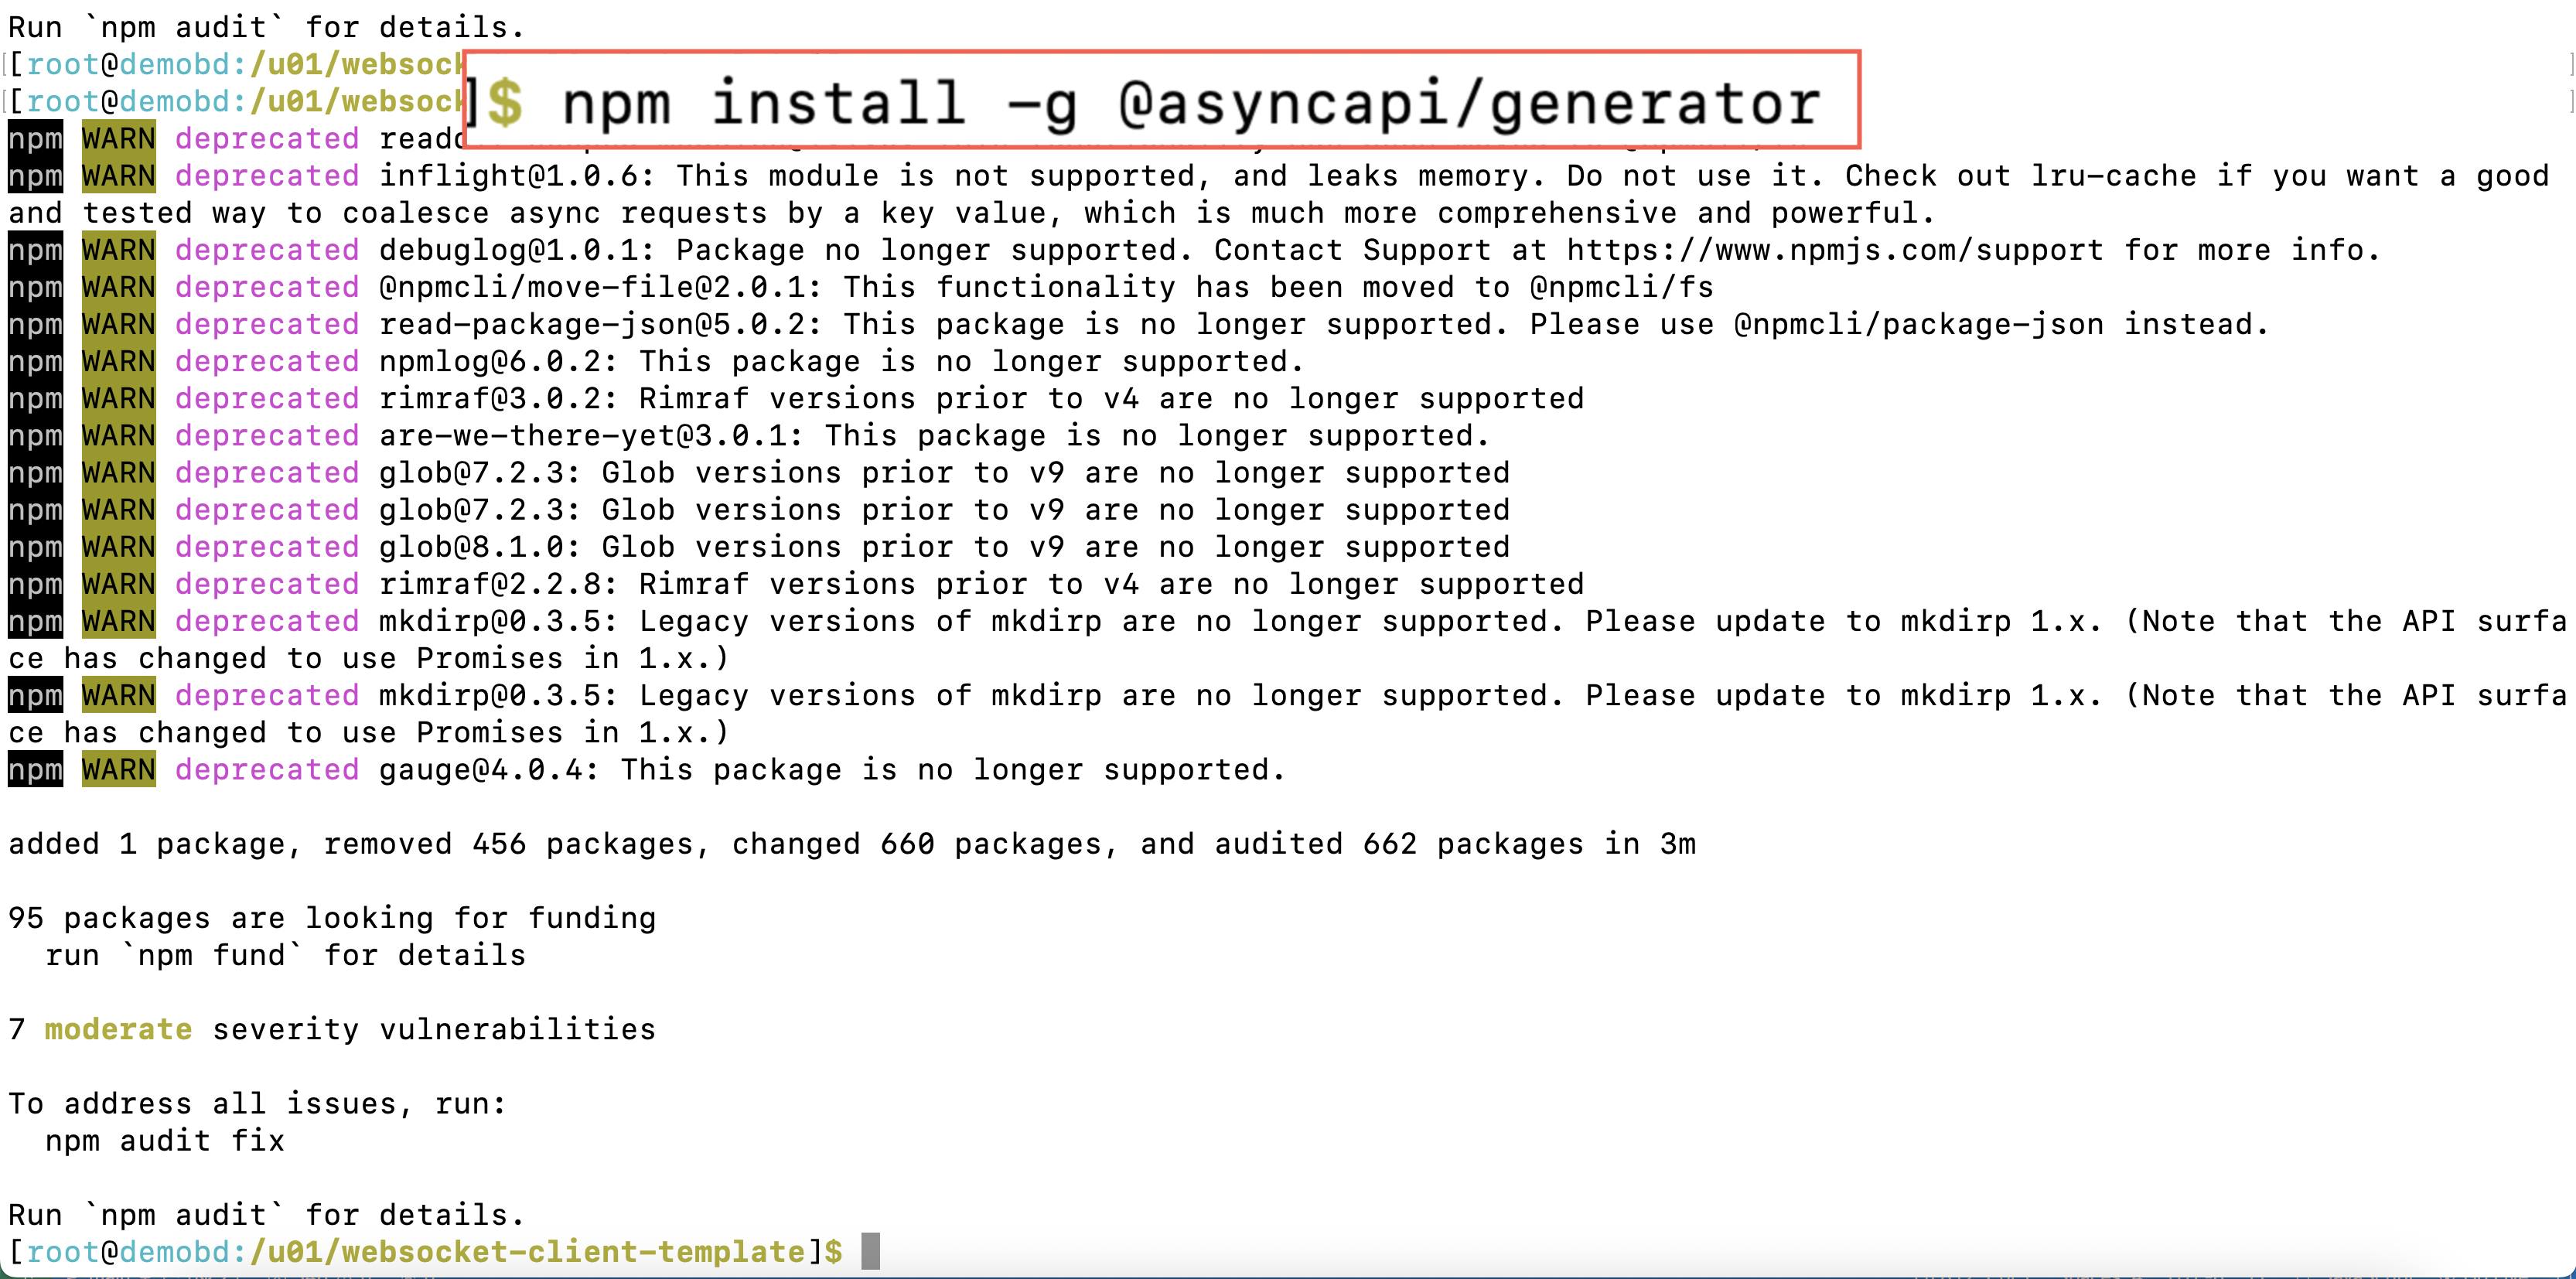
B. Consume the Data Streams by generating Node.js client-side code with @asyncapi/generator.
@asyncapi/generator, a code generator, requires Node.js and npm packages of the versions listed below.
- Node.js v18.12.0+
- npm v8.19.0+
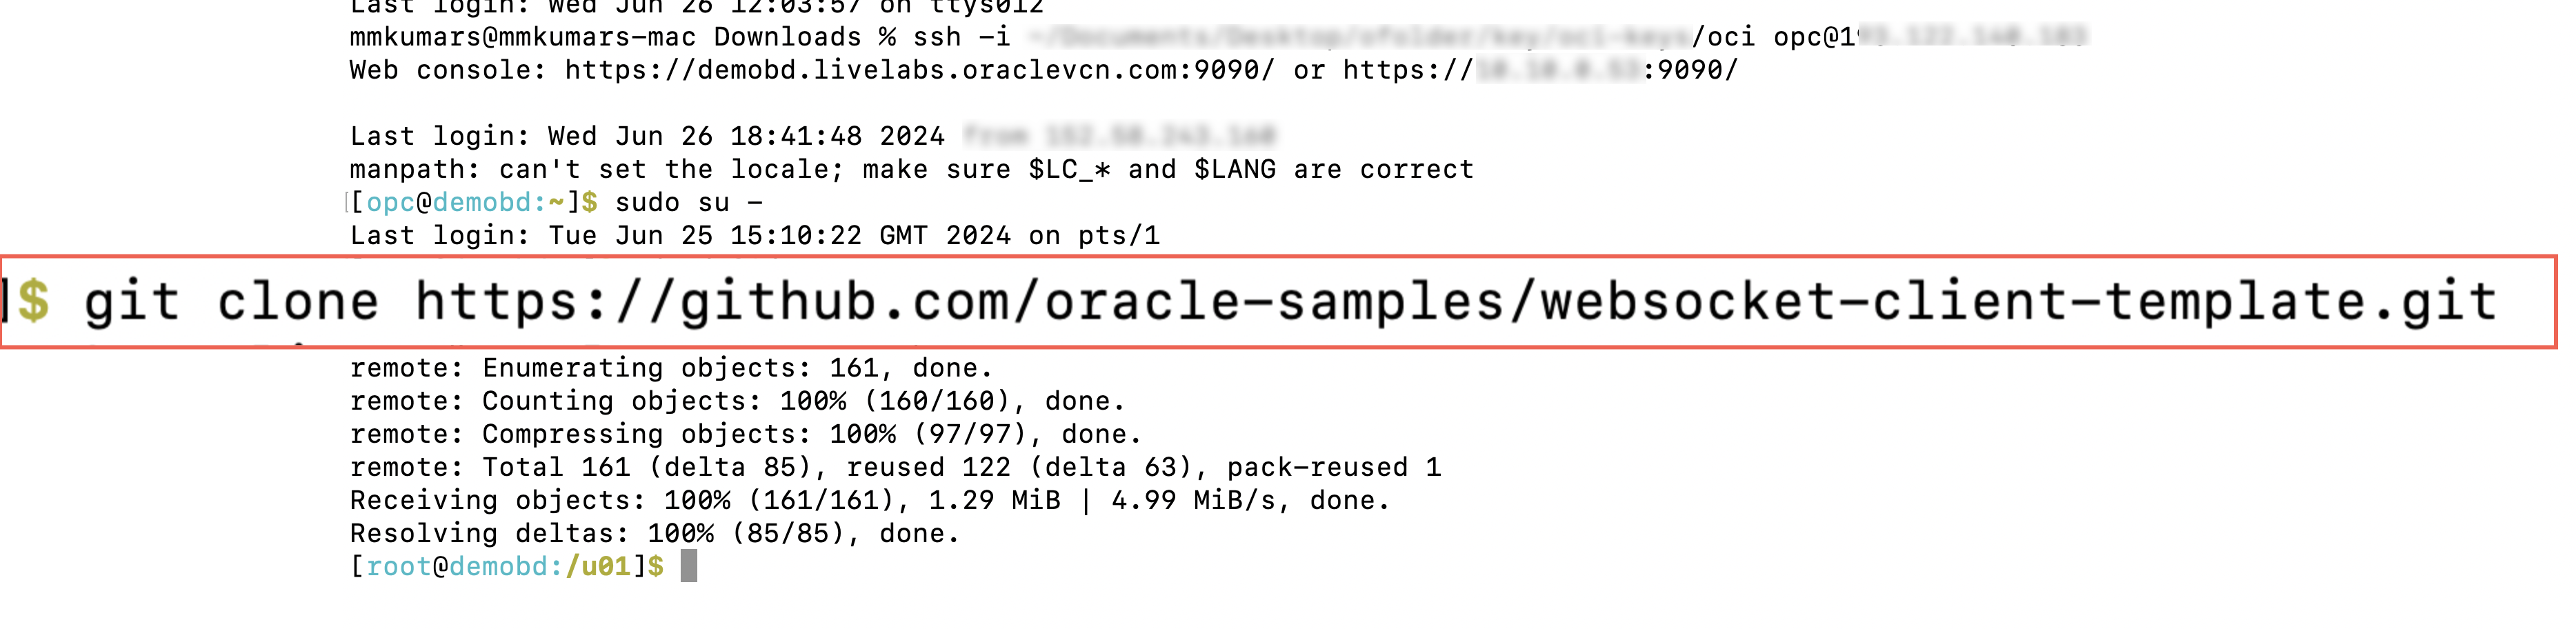
- Clone the websocket-client-template from below the github.
git clone https://github.com/oracle-samples/websocket-client-template.git
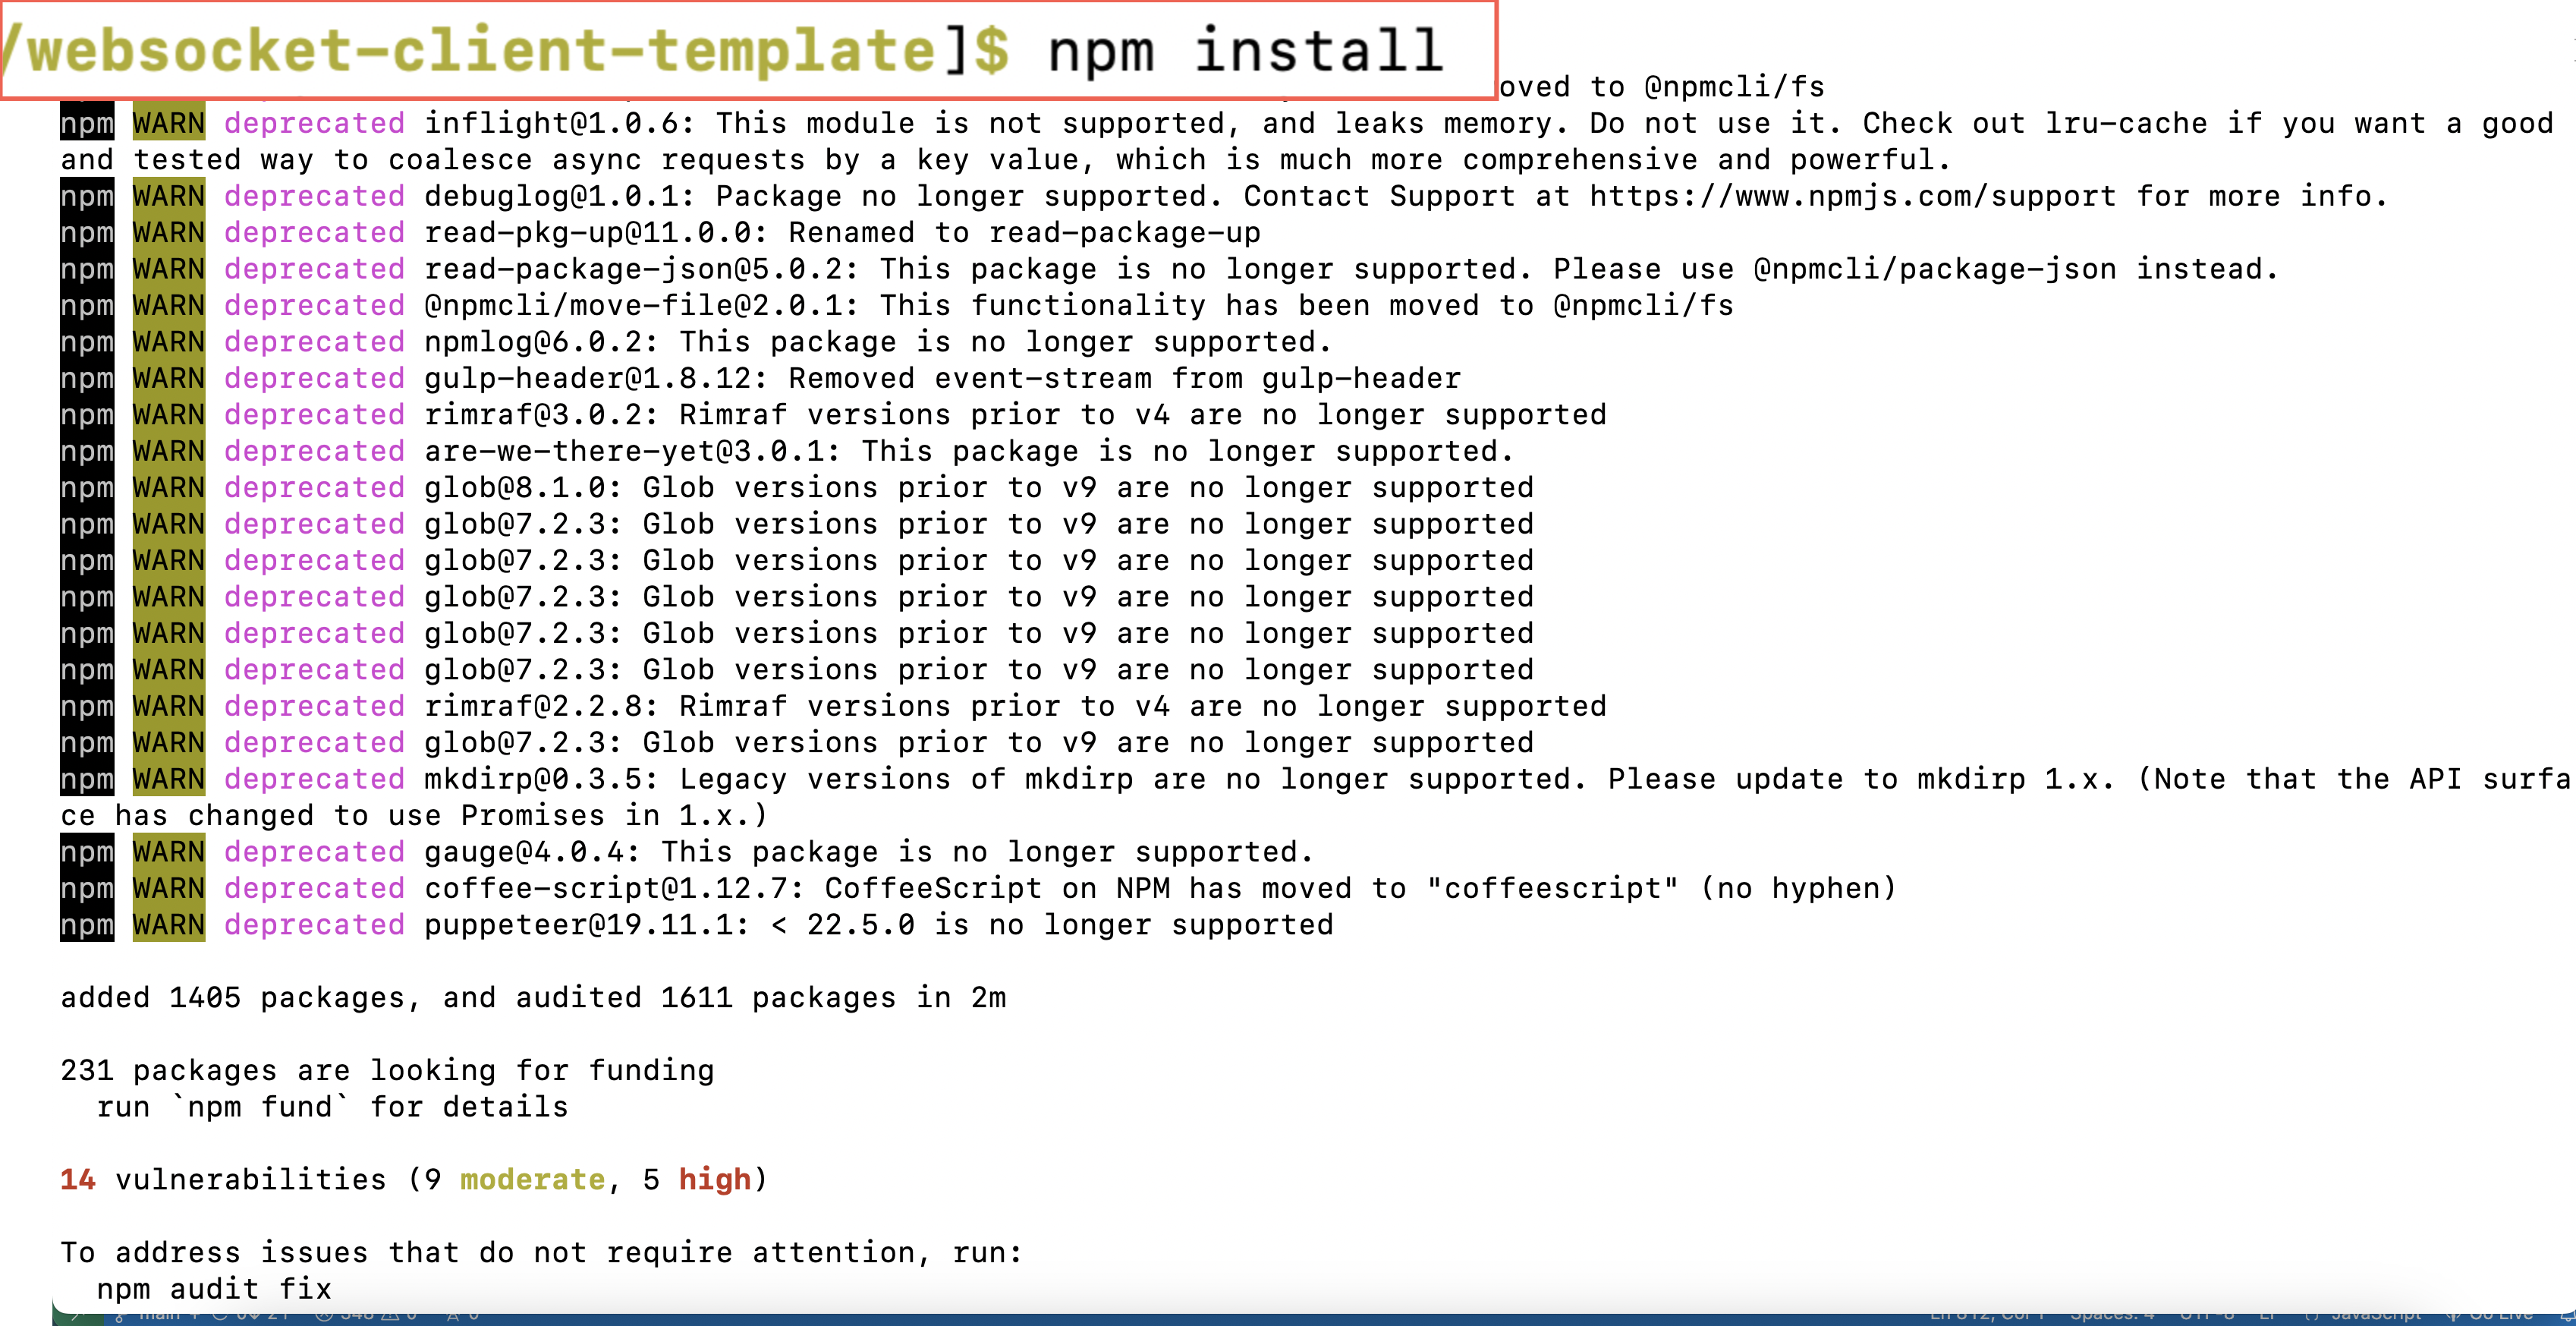
- Install dependencies and the AsyncAPI Generator via npm.
- Create a YAML file by copying the YAML content from the Data Streams page to generate the Node.js client code.
- Run the generation by passing arguments (Server Name and Authorization).
Argument :
-o : output directory Ex:output
-p server : Server Name Ex: XXXXX.deployment.goldengate.YYYY.oci.oraclecloud.com
-p authorization : Authorization type. Ex : basic/digest/certificate
Example :
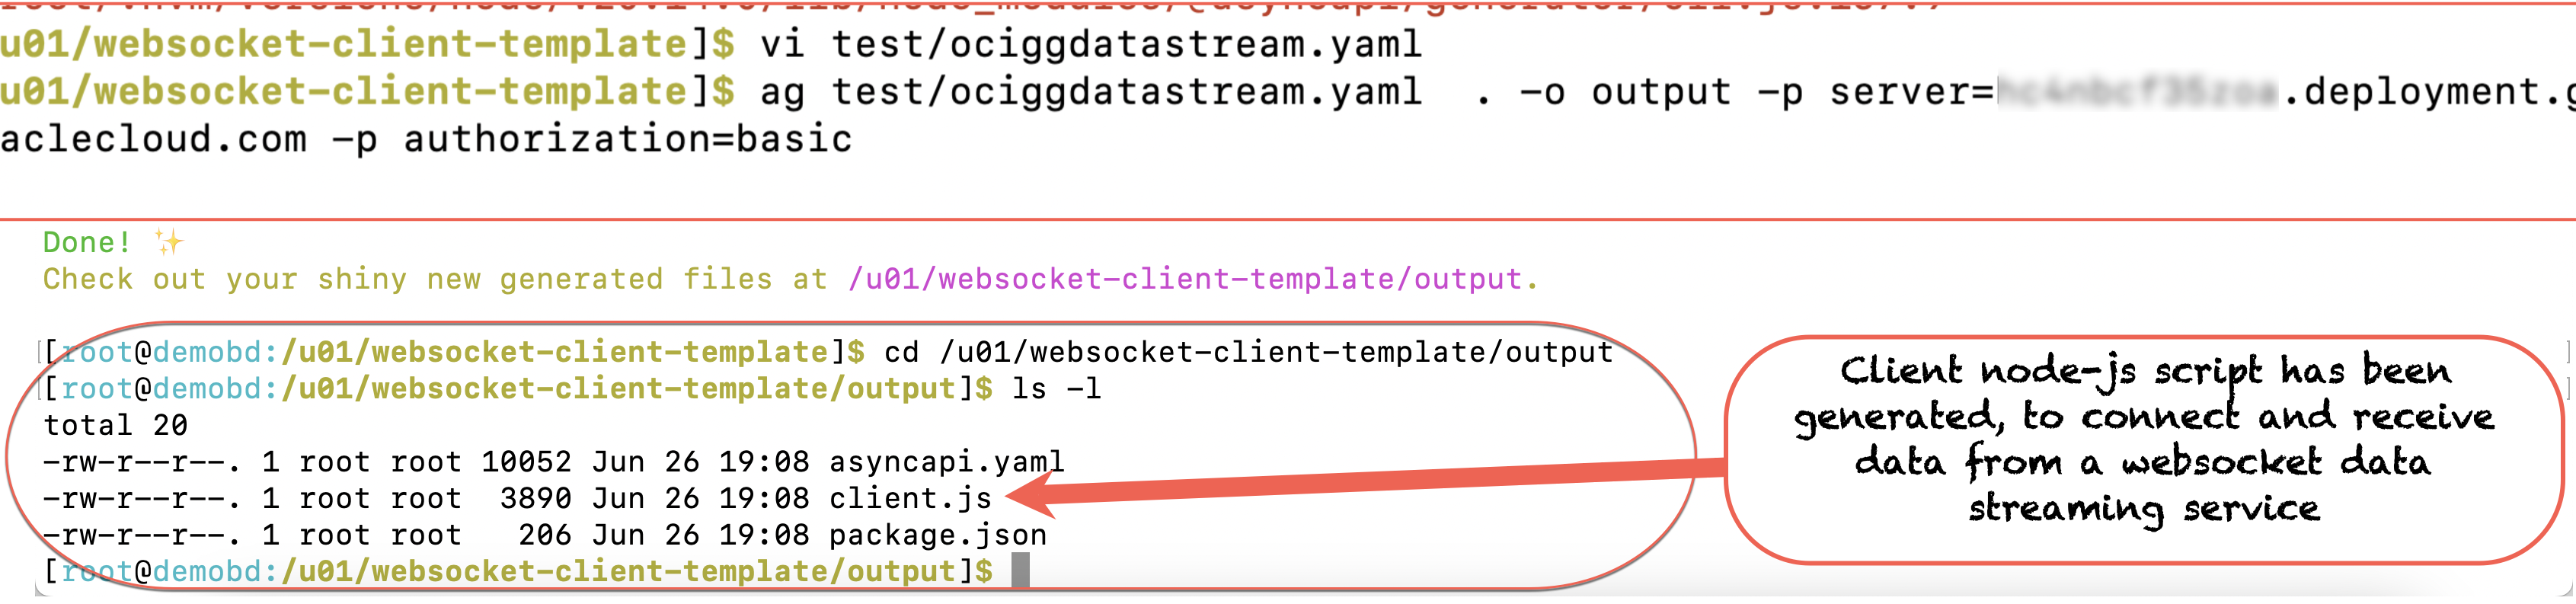
5. Go to generated output folder, and install needed packages for client
cd output

npm install
Note : when using Reverse Proxy, Kindly update below parameters in client.js code.
- Update the Service URL :
serviceURL = ‘ws:// XXXXX.deployment.goldengate.YYYY.oci.oraclecloud.com /services /v2/stream/<data stream name>;
to
serviceURL = ‘wss:// XXXXX.deployment.goldengate.YYYY.oci.oraclecloud.com /services/distsrvr/v2/stream/<data stream name>;
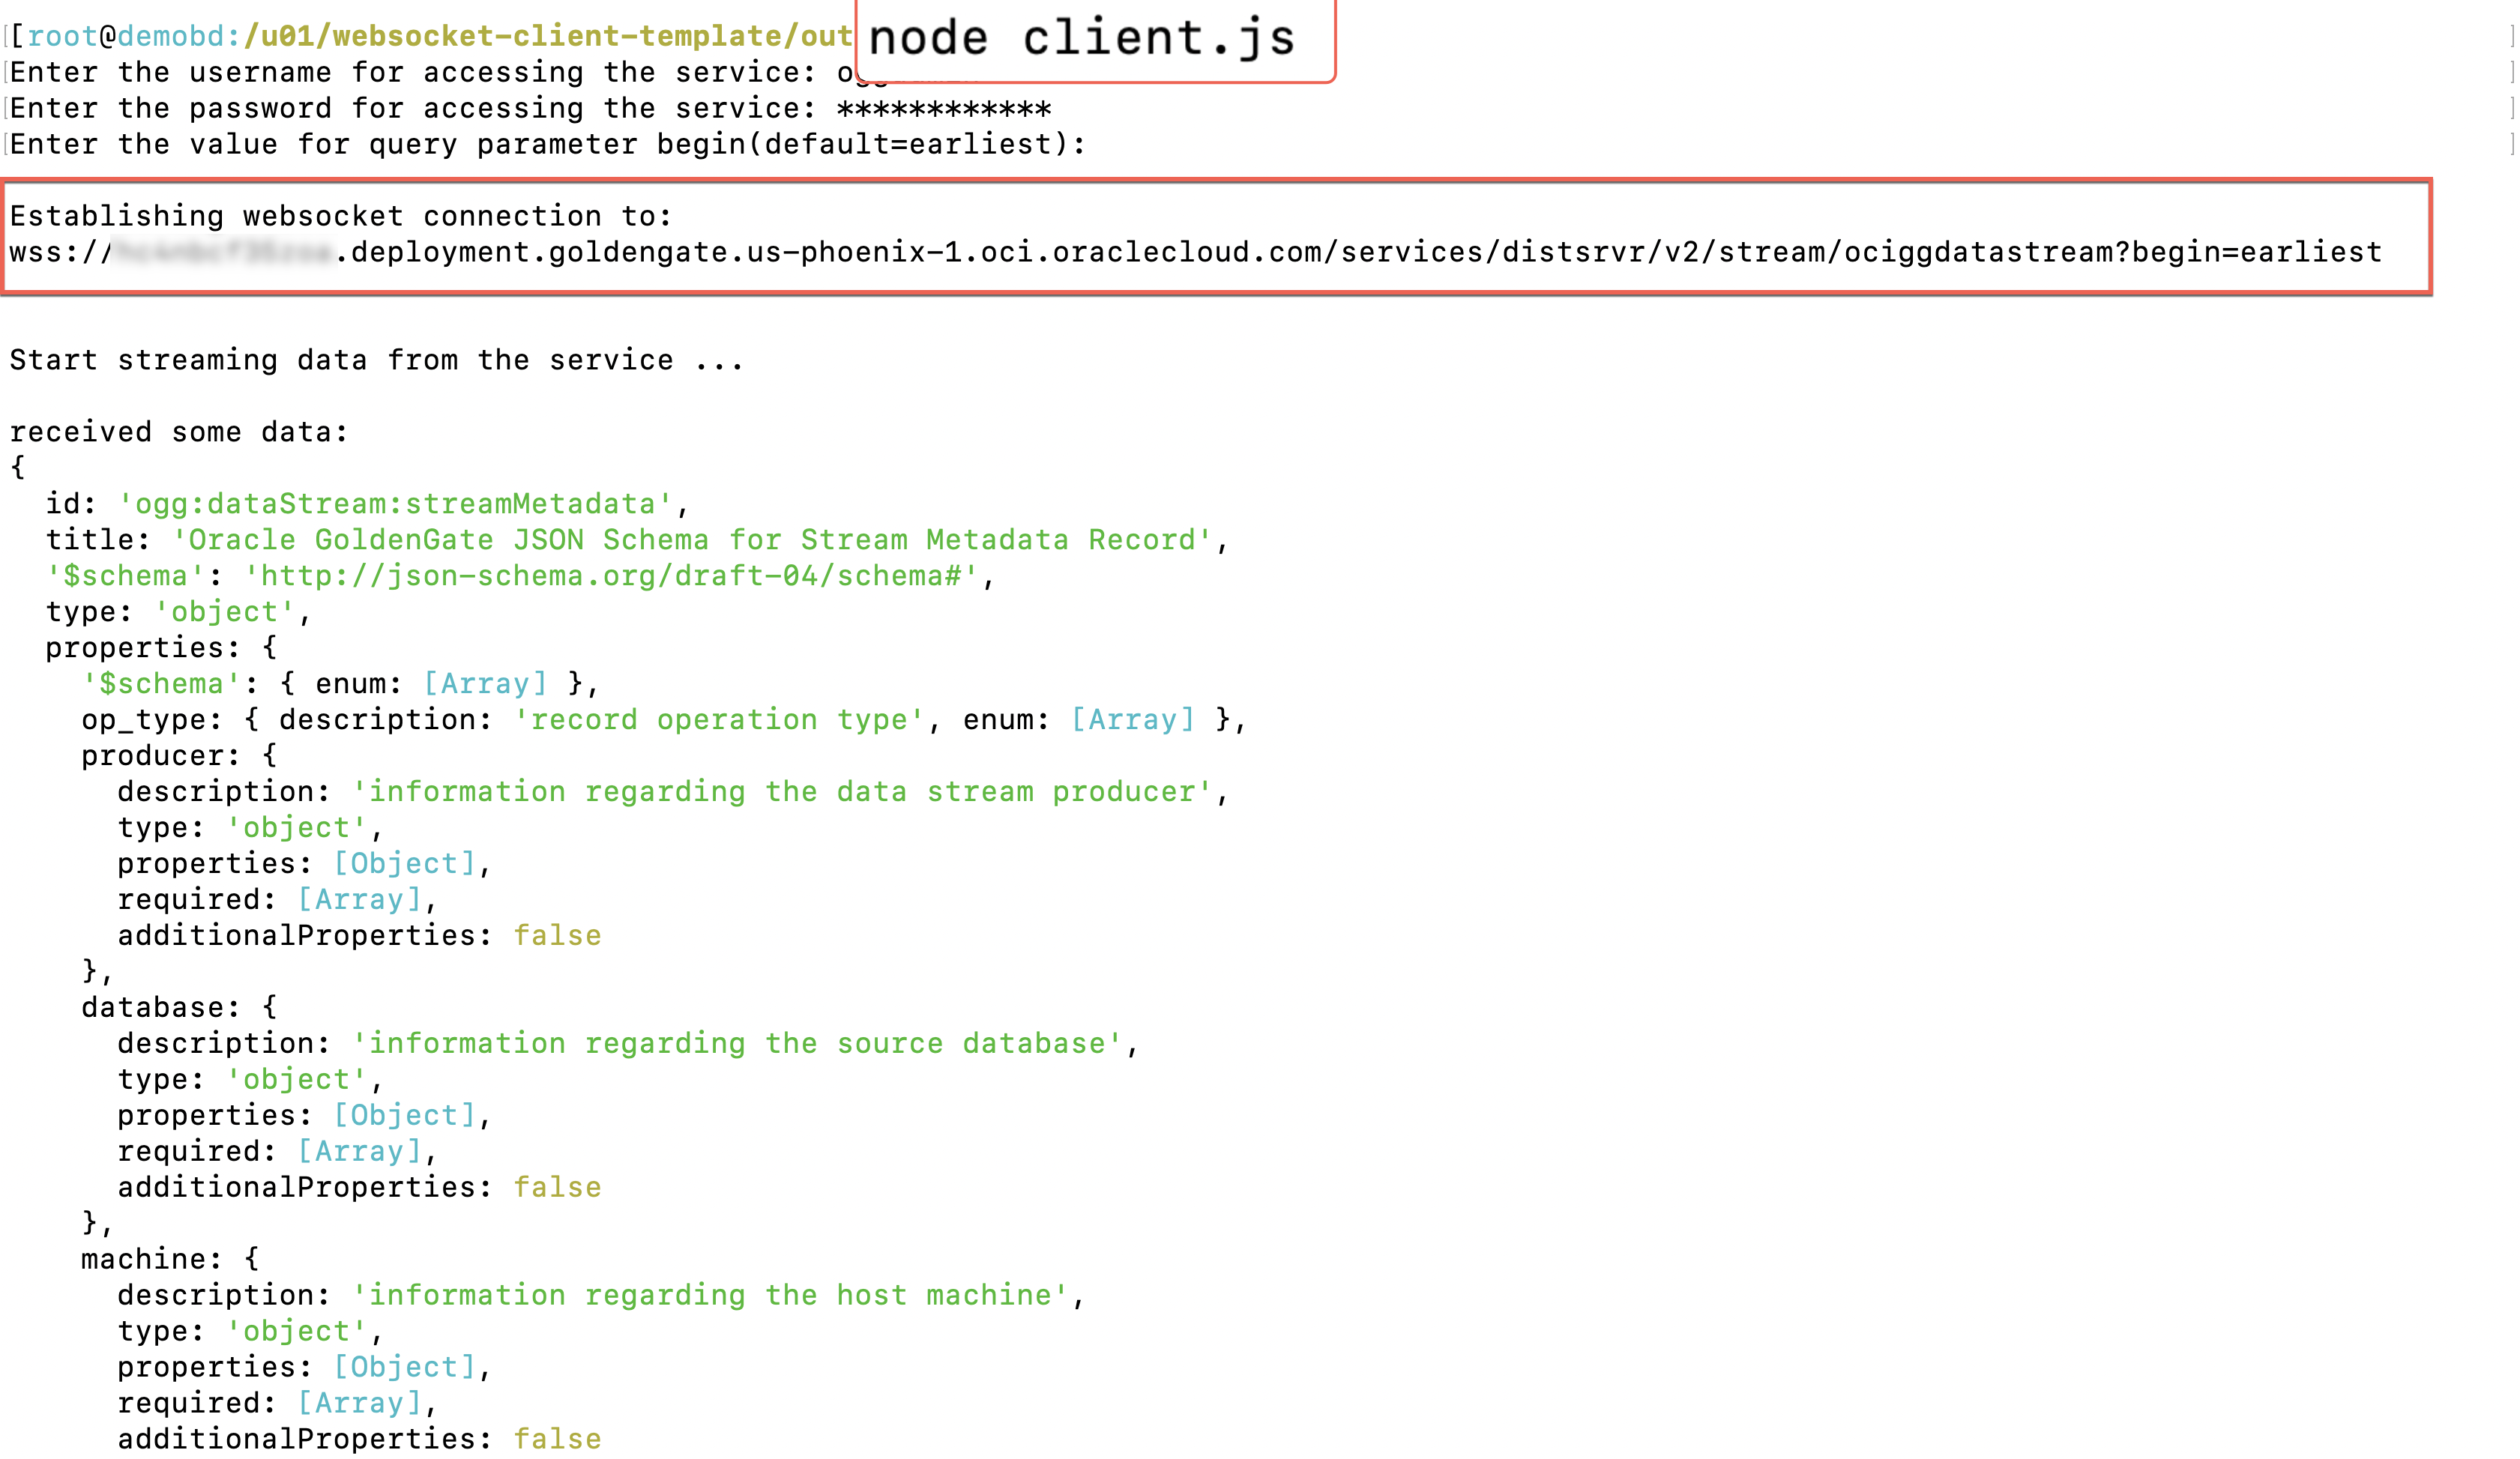
6. Start the Node..js client.
To learn more about Oracle GoldenGate Data Streams, Please refer the listed links :
