GoldenGate Free on AWS
GoldenGate Free is a starter version of Oracle’s best-in-class replication software. With GoldenGate Free, application database administrators (DBAs) can learn basic concepts while creating simple data replication processes in a simplified user interface.
It is the same powerful Oracle GoldenGate that enterprises rely on worldwide, packaged for simple download, ease of use, and a fully-featured experience. The entire application portfolio is delivered in an Oracle Docker container ready to be deployed anywhere – on premises, in OCI, or on other cloud platforms.
Supported connection types :
The following Oracle Database versions are supported:
- Oracle Database 11.2.0.4, 12c, 19c and 21c
Use GoldenGate Free for:
- As a training tool in a learning environment
- As a development, test, or production environments
GoldenGate Free is limited to:
- Oracle Databases, no more than 20 gigabytes (GB) in size.
- Note: For Container Databases (CDBs), this includes the total size of all Pluggable databases (PDBs).
- Patches are provided at Oracle’s discretion in the form of new builds available through the Oracle Container Registry.
- Interaction with other GoldenGate Free instances. You can’t use GoldenGate Free with fully licensed Oracle GoldenGate products or other third-party integration tools.
*Learn more about the limitations of using GoldenGate Free here.
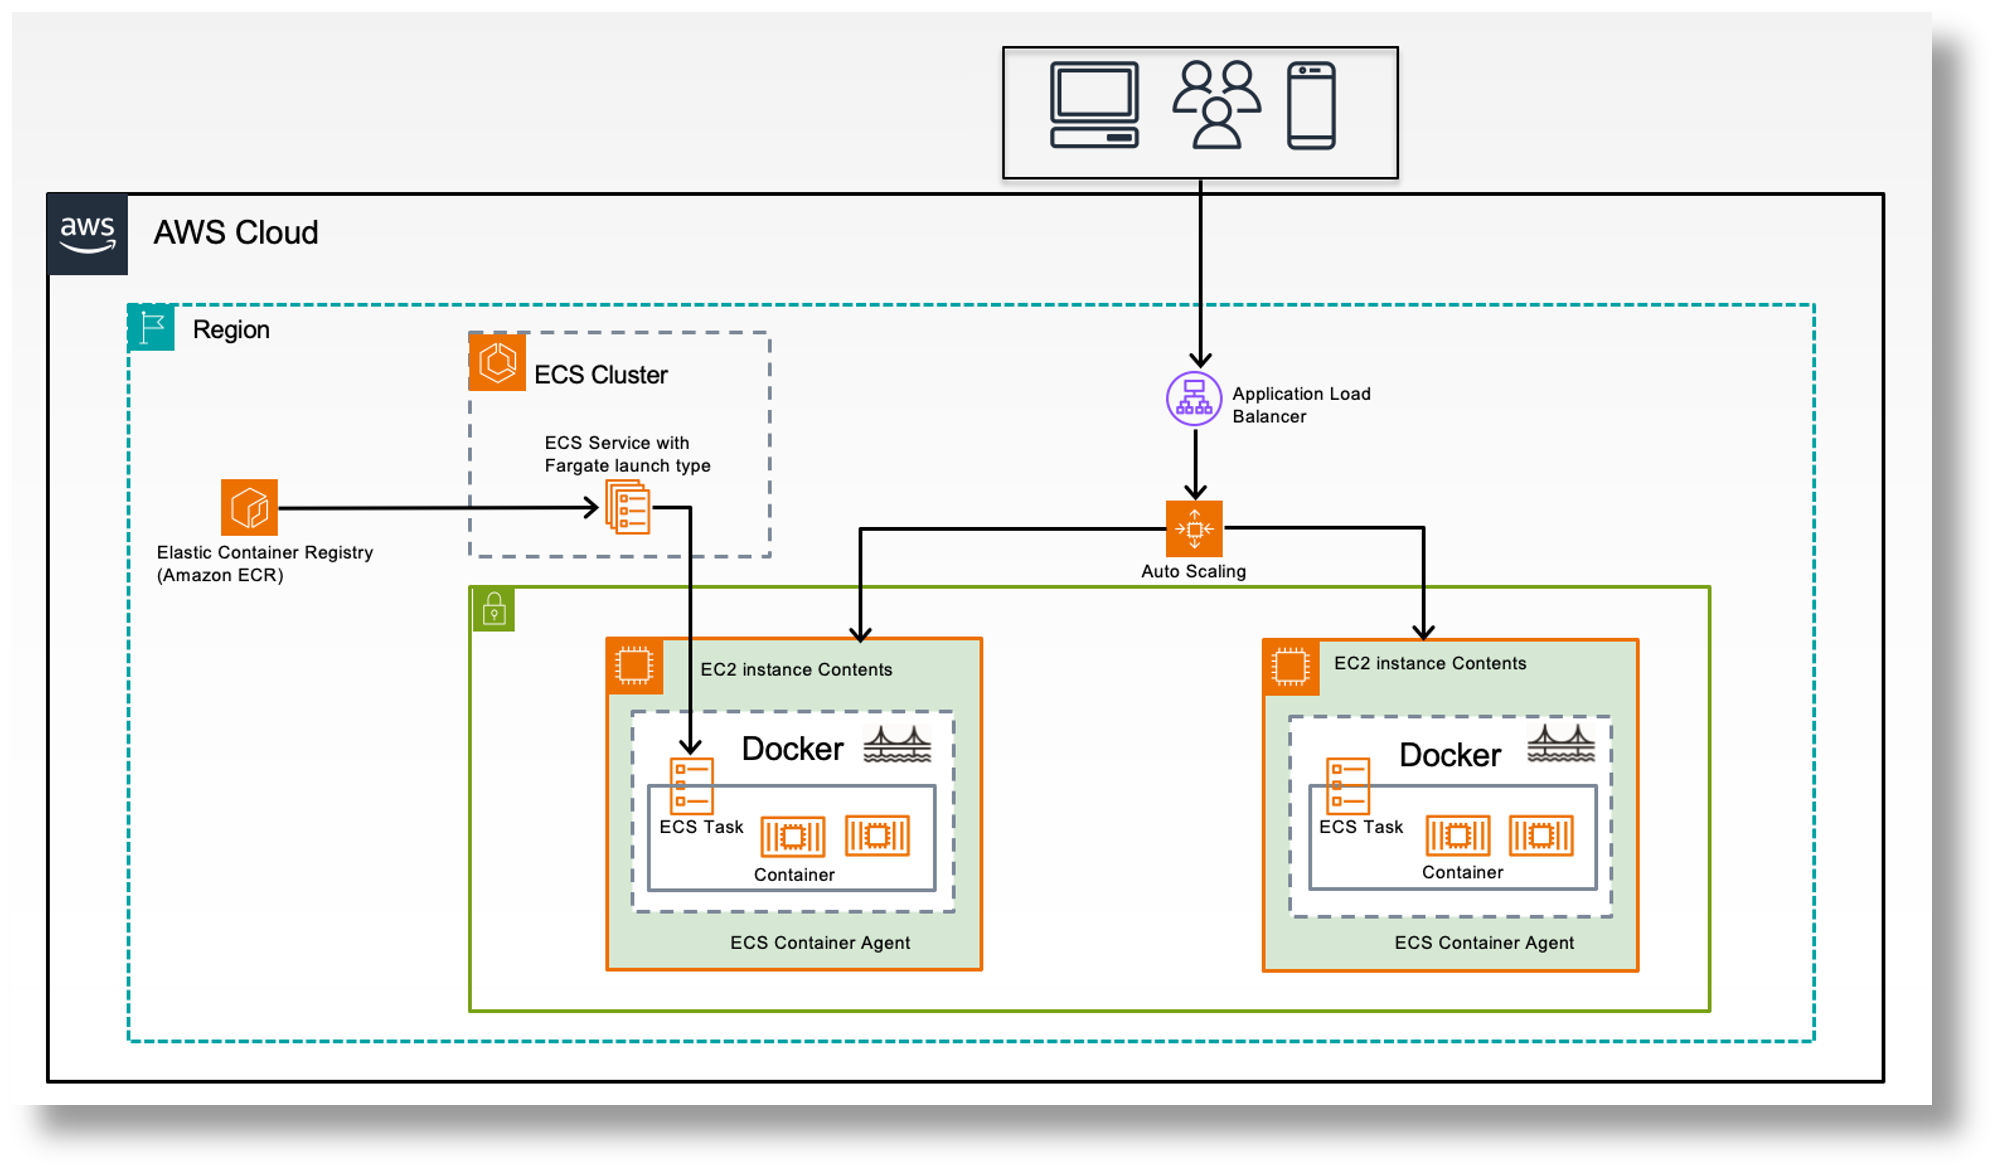
High-Level Architecture Diagram
Download GoldenGate Free Image
Step I: Sign-In to Oracle Container Registry
Sign in using your Oracle account and accept the license agreement before you can pull the GoldenGate Free docker image from the Oracle Container Registry.
https://container-registry.oracle.com/
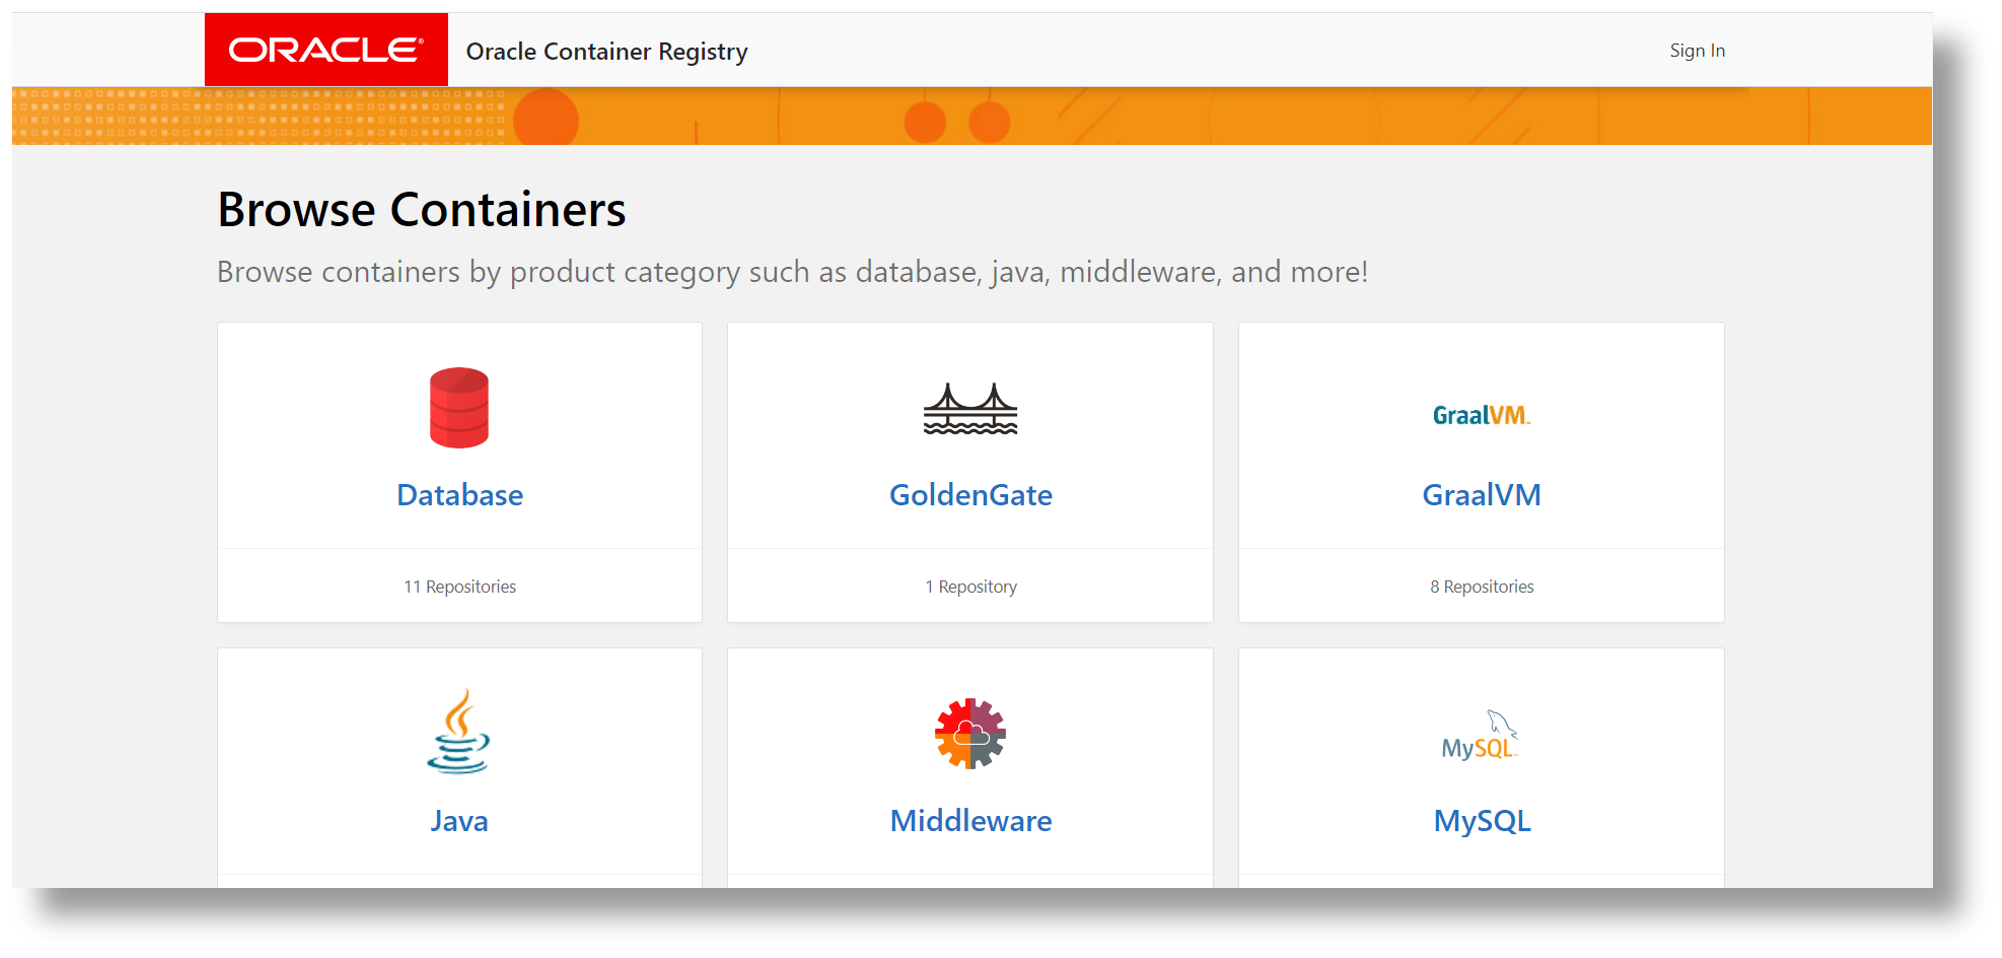
Click on the GoldenGate repository. Then, click on GoldenGate-free Repository.

Step II: Provision Docker CLI on AWS EC2
AWS CloudShell requires install of docker cli , as the docker isn’t accessible by default. Instead setting up Docker CLI on AWS EC2 instance is recommended.
sudo amazon-linux-extras install docker
sudo service docker start
sudo usermod -a -G docker ec2-user
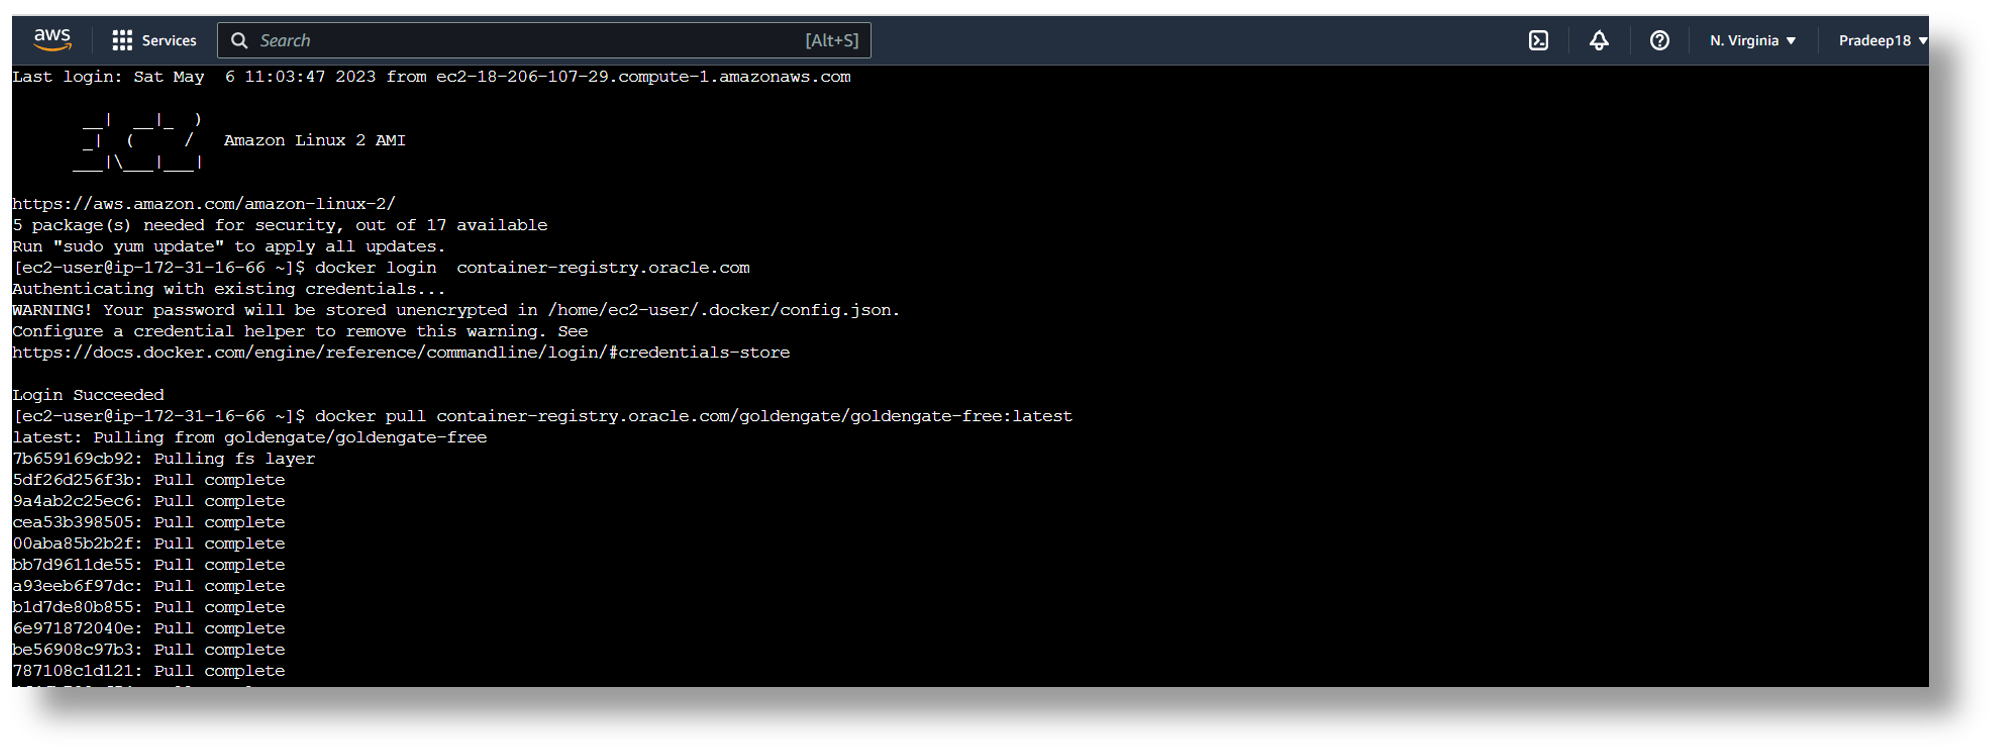
Setup III : Pull GoldenGate free Image from Oracle Container Registry
[ec2-user@ip-~]$ docker login container-registry.oracle.com
[ec2-user@ip~]$ docker pull container-registry.oracle.com/goldengate/goldengate-free:latest
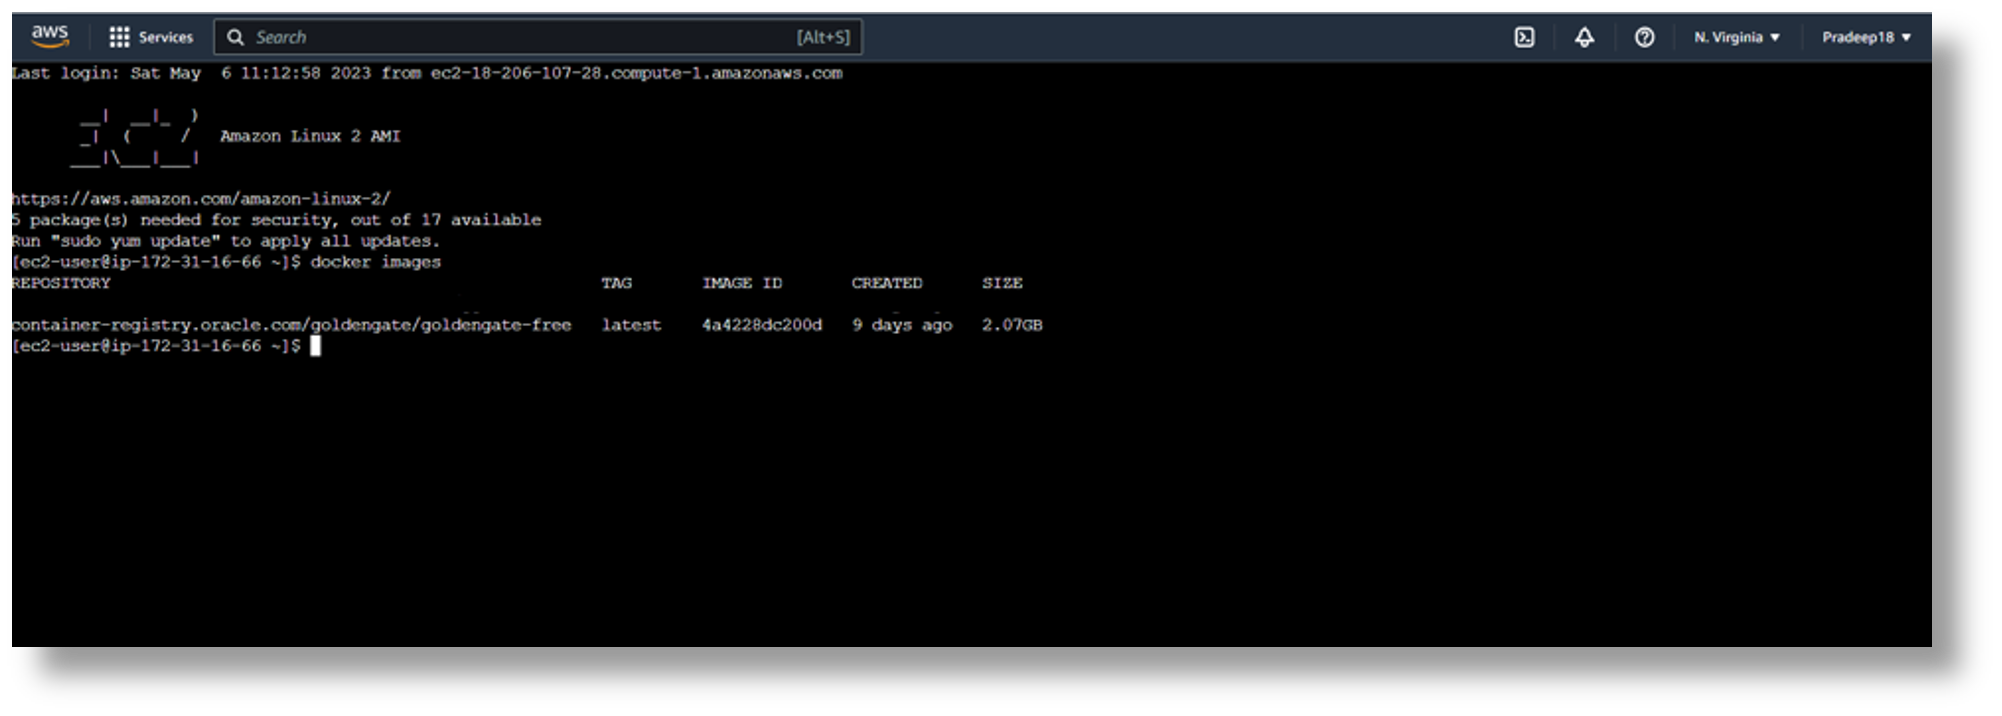
Execute the below command to verify the goldengate-free image
docker images
Optional: Configure the AWS CLI by executing the aws configure command to set credentials used to encrypt the request to the AWS services
Pushing GoldenGate Free Image to Amazon Elastic Container Registry (Amazon ECR)
- Follow the steps in the below link to create a private ECR repository for goldengate-free image
https://docs.aws.amazon.com/AmazonECR/latest/userguide/getting-started-cli.html
- Before pushing the image to ECR, you need to authenticate the docker client installed on EC2 with the ECR and retrieve the authentication token.
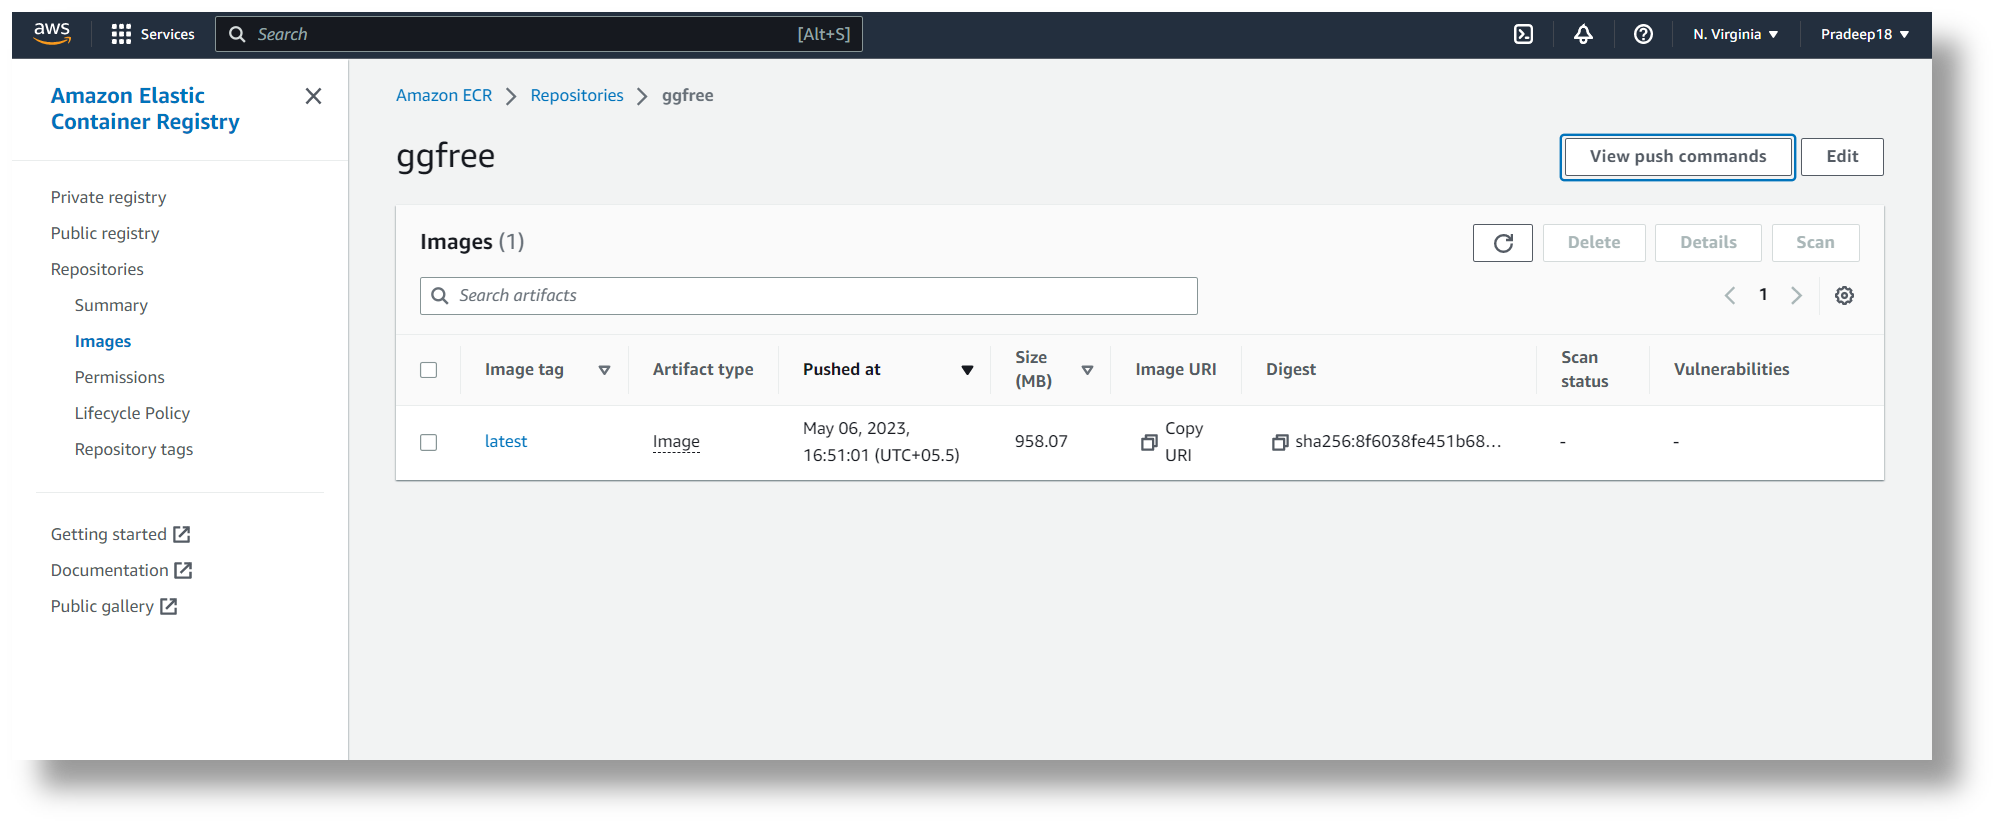
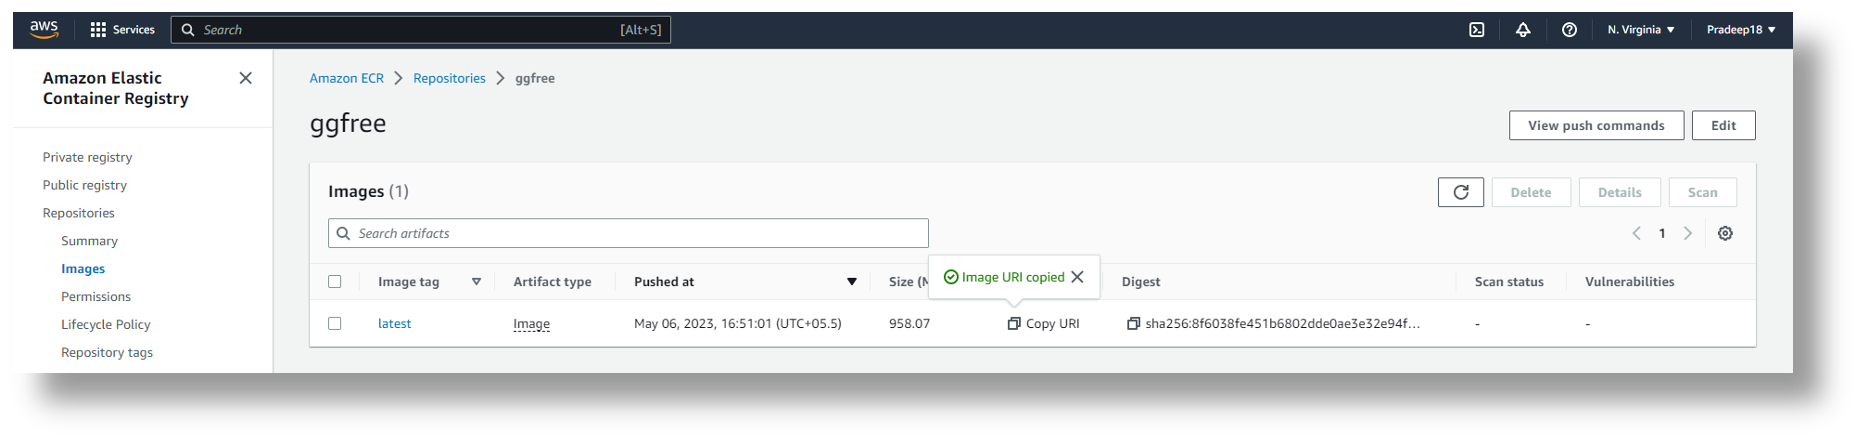
Open the private ECR repository created earlier and click on the Push command-tab on the top-right-hand corner
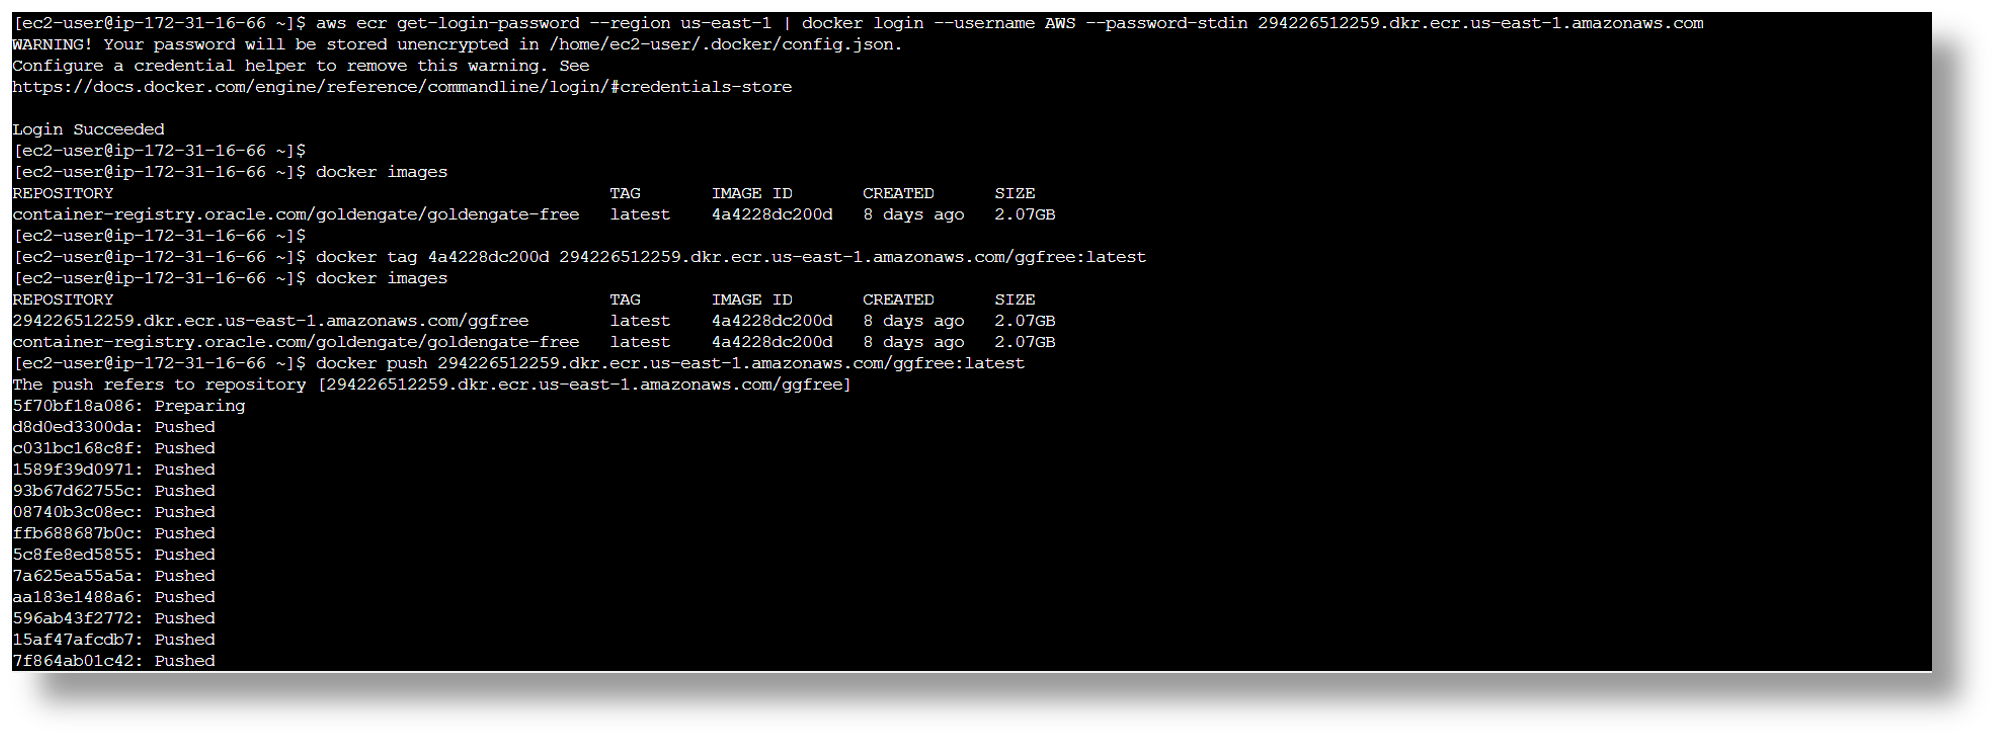
- Execute the first command listed in order to authenticate your docker client with the ECR
- Execute the tag command to tag the goldengate-free image before you push it to the private ECR repository
docker tag 4a4228dc200d aws_account_id.dkr.ecr.region.amazonaws.com/<repository-name>
- Finally, execute the docker push command to push the goldengate-free image to the private ECR repository
docker push aws_account_id.dkr.ecr.region.amazonaws.com/<repository-name>
Configure AWS Fargate (Serverless Compute/Container) and Deploy GoldenGate Free
Prerequisites: Complete the steps listed in the link below related to IAM roles & permissions
https://docs.aws.amazon.com/AmazonECS/latest/userguide/get-set-up-for-amazon-ecs.html
Step I: Create an ECS Cluster
- Sign in to the AWS Management Console and navigate to the Amazon ECS console.
- Choose to Create Cluster option on the console to begin
- Provide a cluster name and choose the VPC and subnets where you want to run your tasks. You can choose the default VPC and Subnets.
- Under Infrastructure, AWS Fargate (serverless) is selected by default.
- Optional: You can enable CloudWatch if you’d like to monitor the performance of the underlying resources such as Memory, CPU, disk, etc.
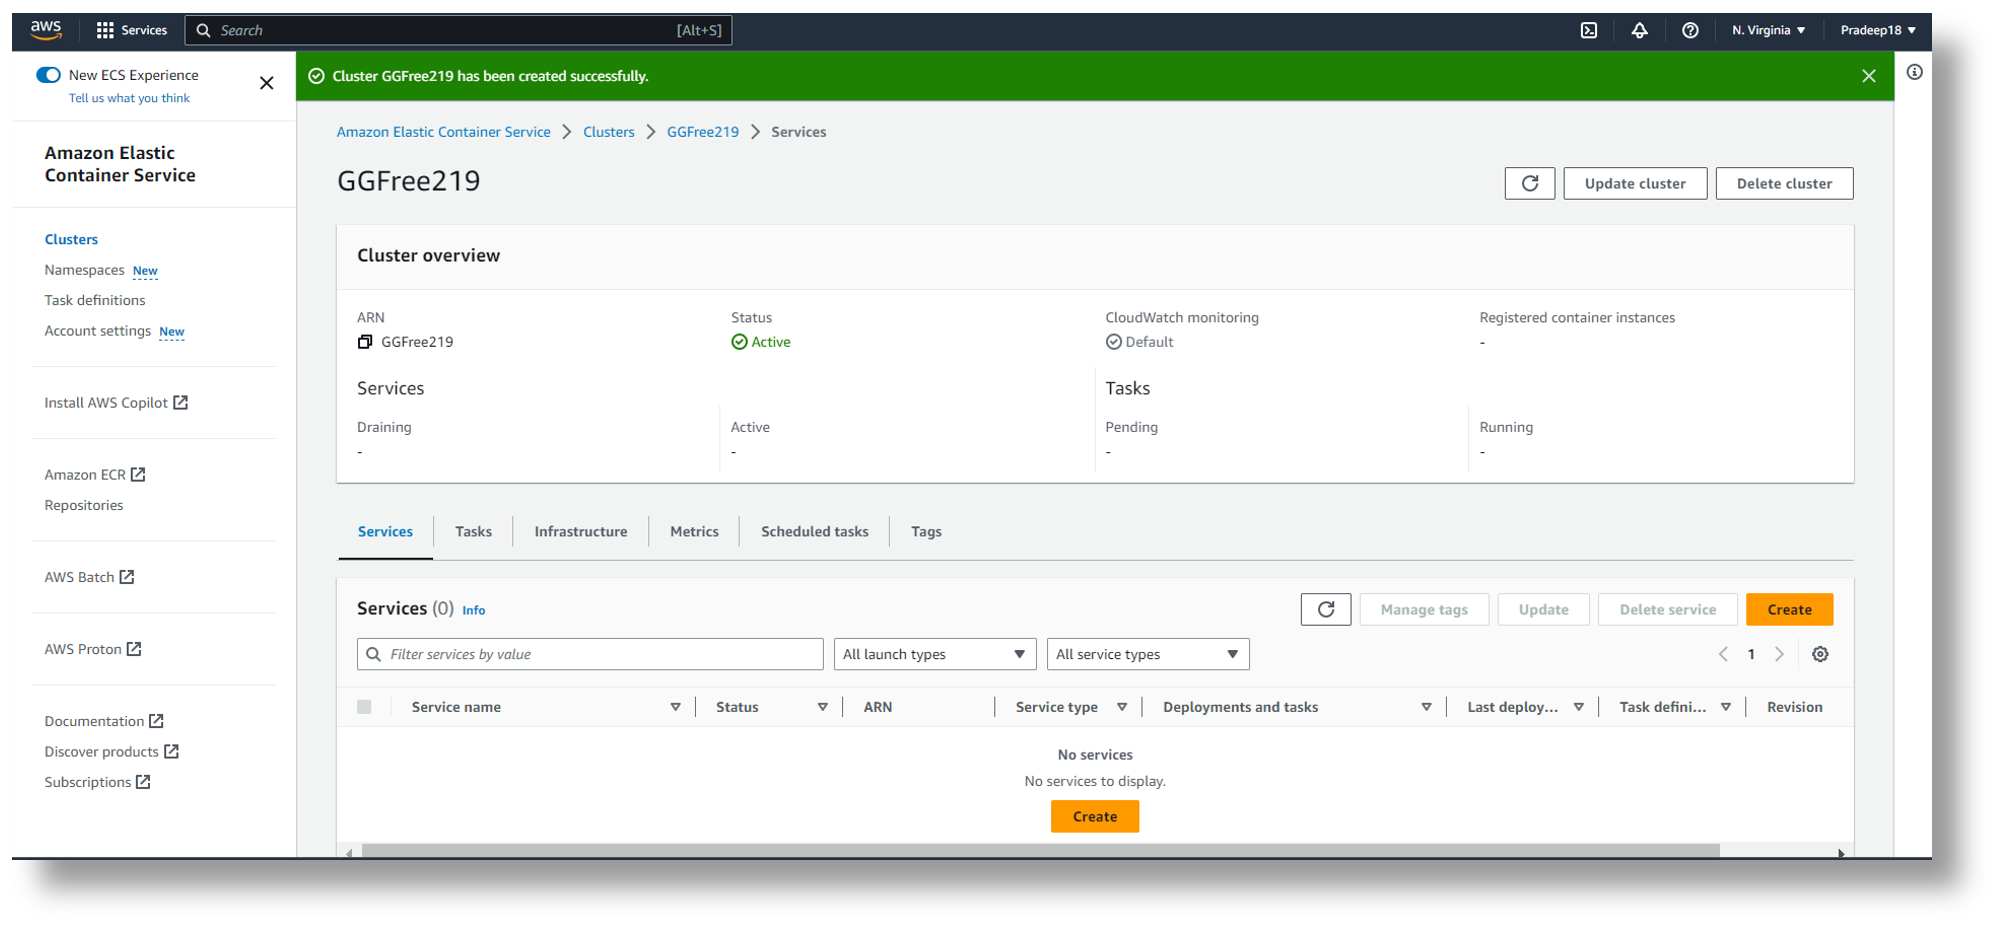
- Click Create to create the Cluster.
https://docs.aws.amazon.com/AmazonECS/latest/userguide/create-cluster-console-v2.html
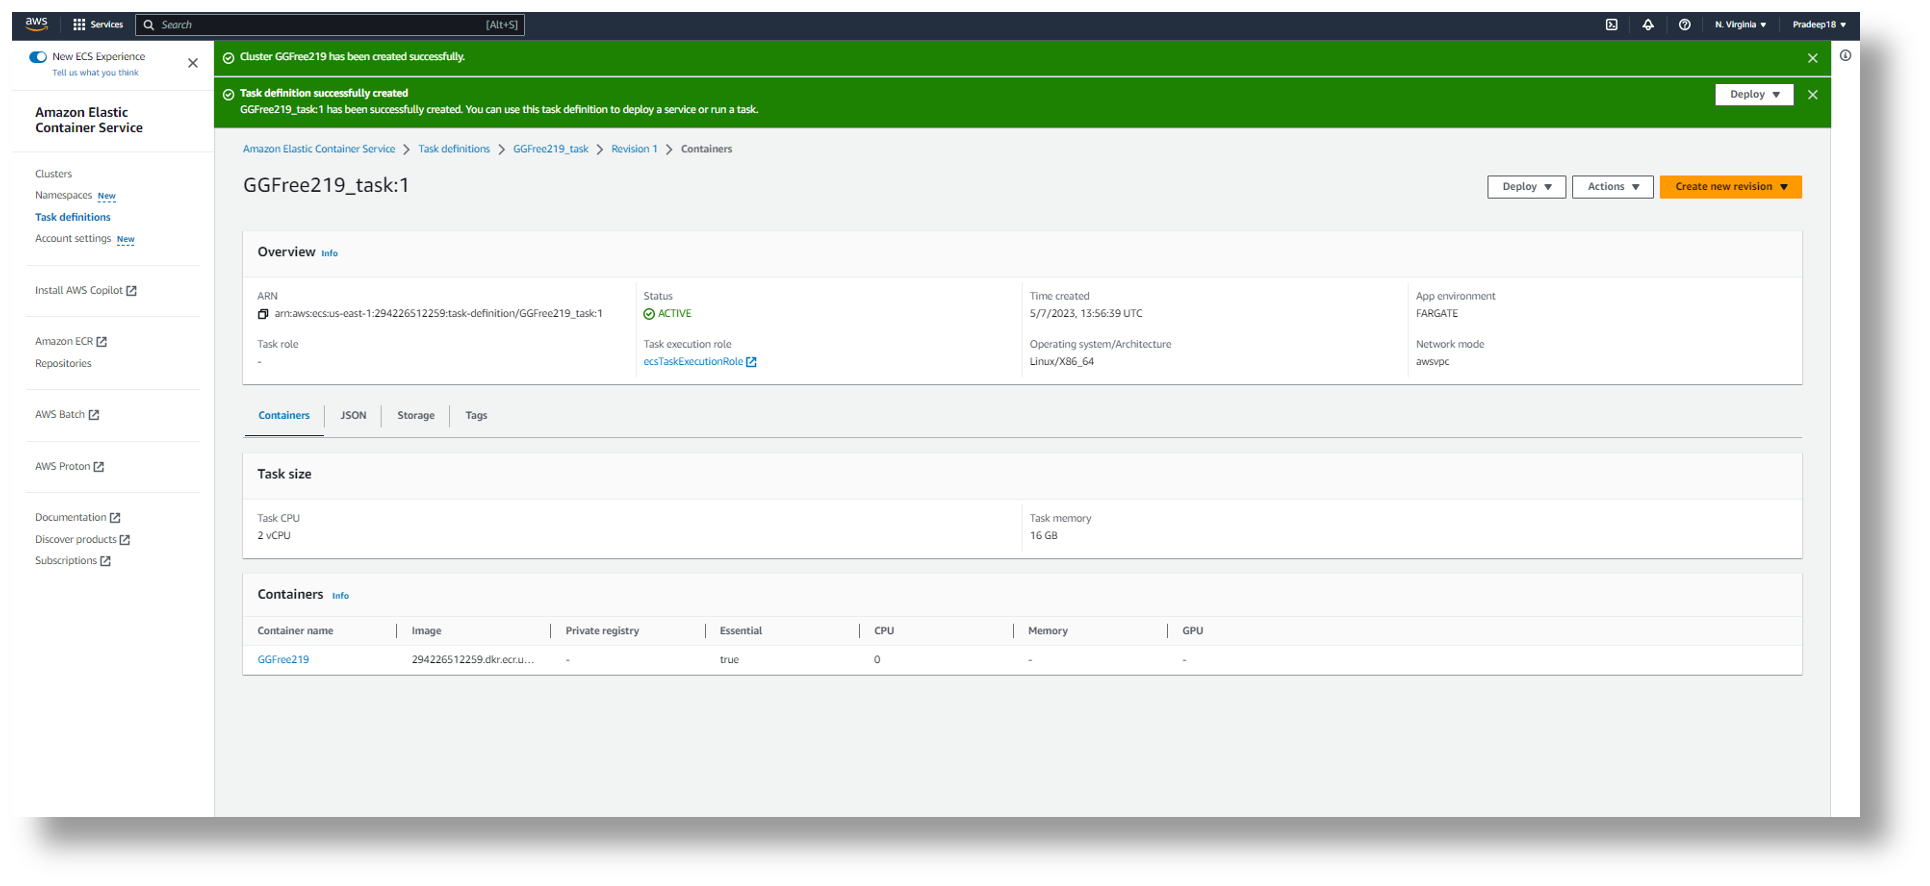
Step II: Create Task Definitions
- Under the left-side menu, traverse to Task Definitions. Then create a new task definition by clicking the “Create new Task Definition” button.
- For Name, enter a name for the goldengate-free container.
- For Image URI, copy the Image URI from the Amazon ECR private repository where the goldengate-free image was pushed in the last section.
- A port mapping allows the container to access ports on the host to send or receive traffic. Under Port mappings, make sure to add both ports 80 and 443 as these are default ports used by goldengate-free for http/https connection.
- Optional: In the Environmental variables section, you can set the environmental variables to be used by the container. Refer to the container Registry link for details.
- You can leave the rest of the options to the default configuration and click Next.
- Under Environment, AWS Fargate (serverless) is selected by default.
- Select the operating system as Linux x86_64.
- Under Task size, you can select the CPU and Memory from the dropdown depending upon your Replication Task or Use case.
For example, two vcpu and 16GB Memory
- Keep the default values for the rest of the configuration. Depending on the replication task or use case, you can increase the storage to the desired value. Then click Next.
- Review the configuration and click Create.
Step III: Create a Service
Amazon ECS service allows configuring, running, and maintaining a specified number of instances of a task definition simultaneously for an Amazon ECS cluster. If one of your tasks fails or stops, the Amazon ECS service scheduler launches another instance of your task definition to replace it.
- Traverse back to the AWS ECS Cluster created previously and click the Create button under the Services tab at the bottom of the screen.

- Under Environment, verify that Fargate is selected by default under Capacity provider.
- In the Deployment Configuration section,
Select “Service” as the Application Type
Under Family, Select the task Definition created in the previous step from the dropdown.
Specify a name in the Service Name field
Leave the rest of the fields with Default values
- You need not make any changes under Sections -Deployment Options and Deployment Failure Detection.
- In Networking Section,
Verify that default VPC and subnets are selected
Also, Public IP is Turned On
- In the Load Balancing Section (** this section is essential even though it is specified as an option)
Select “Application Load Balancer” as the Application type from the dropdown.
Specify a name for the Load Balancer
Select Create New Target Group and Specify a name for the Target Group
Leave the rest of the fields on the page with default values. Then click Create button.
Step IV: Accessing the GoldenGate Free Console
Once the Cluster and service are successfully created, the service status shows up as Active in the Services tab under Cluster details.

Next, Click on the Tasks tab at the bottom of the screen. Verify that the task created is in Running Status.
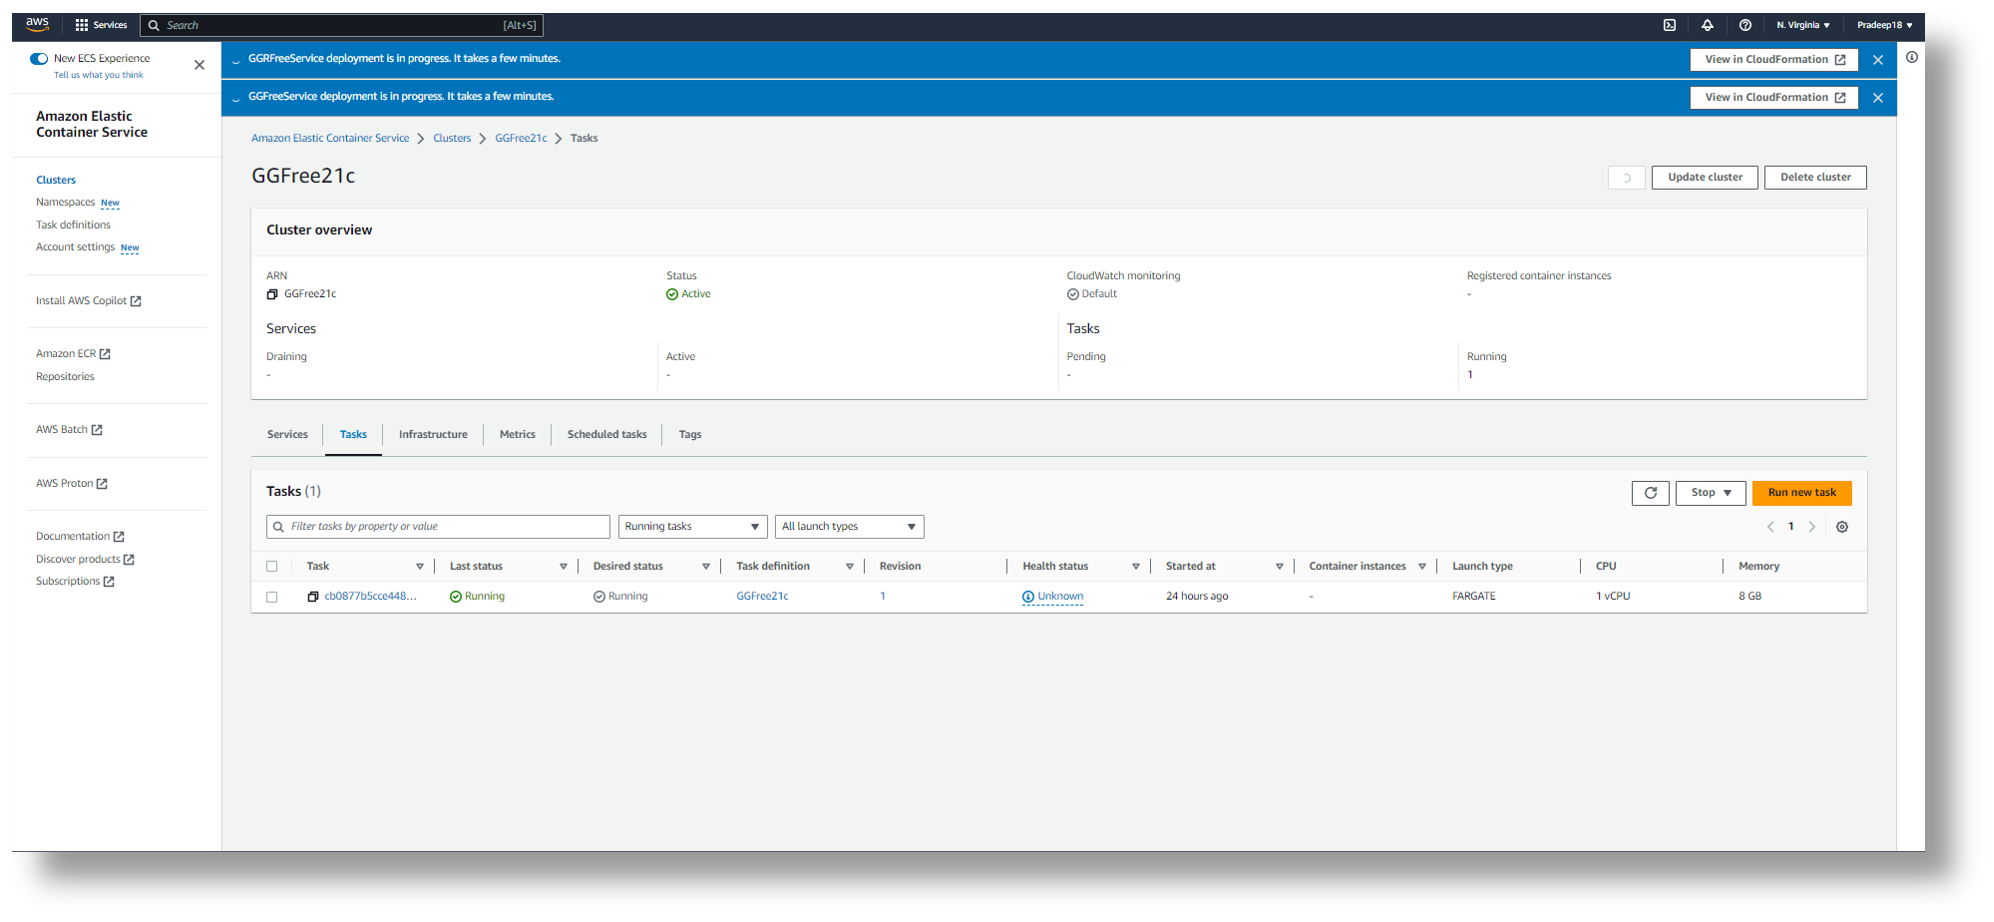
- Click on the Task Name, which automatically opens the container details created by the Fargate service.
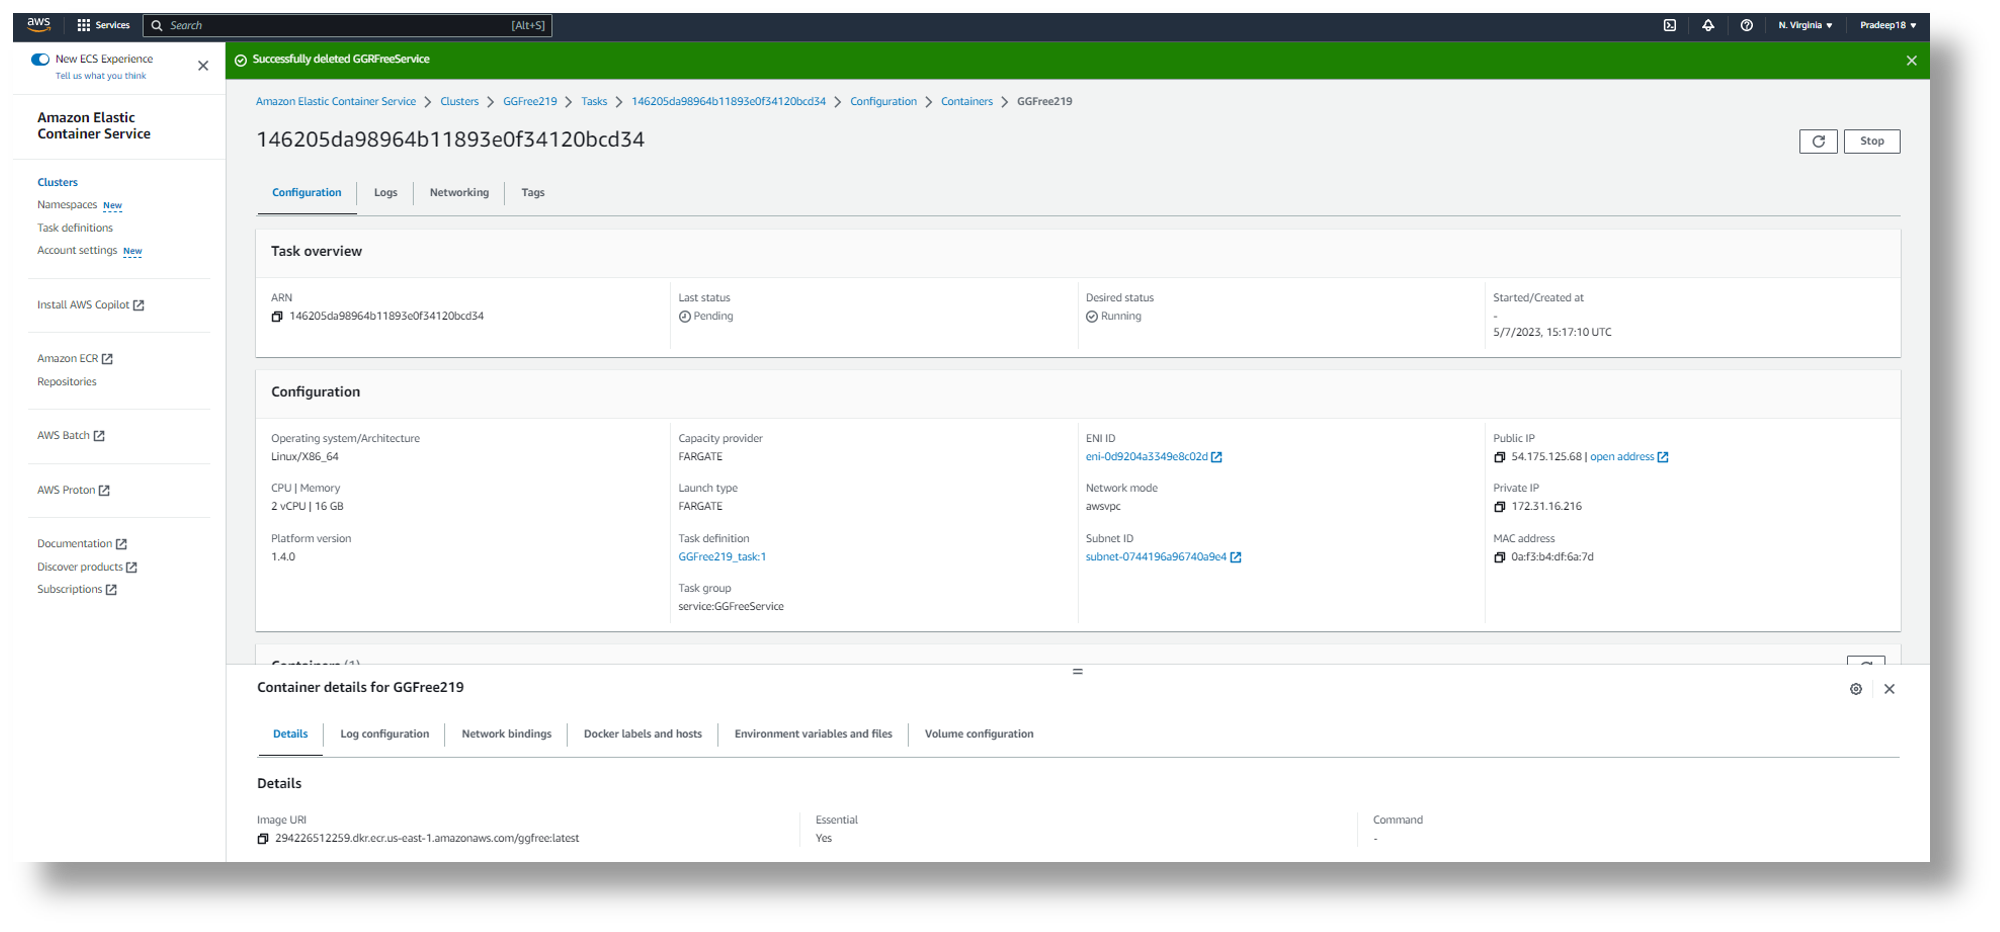
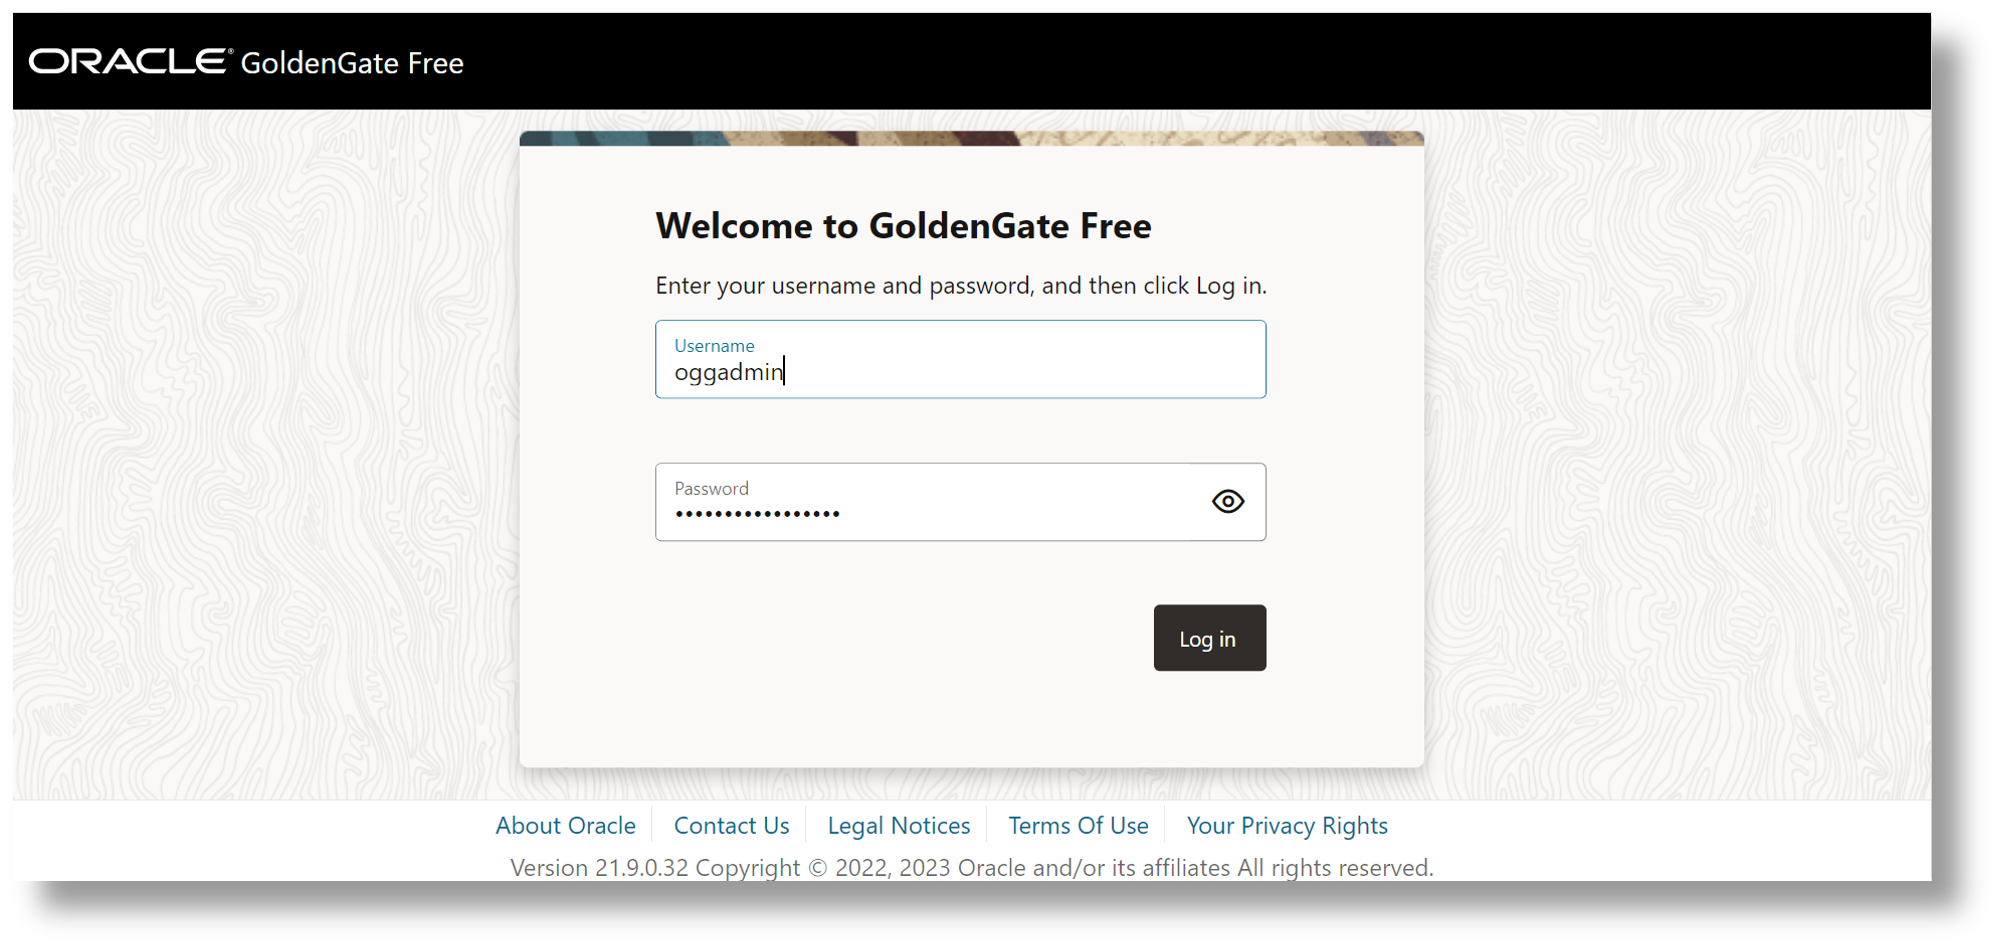
- Click on the “Open address” option listed under public IP to access the goldengate-free console UI
- The Default Username is oggadmin.
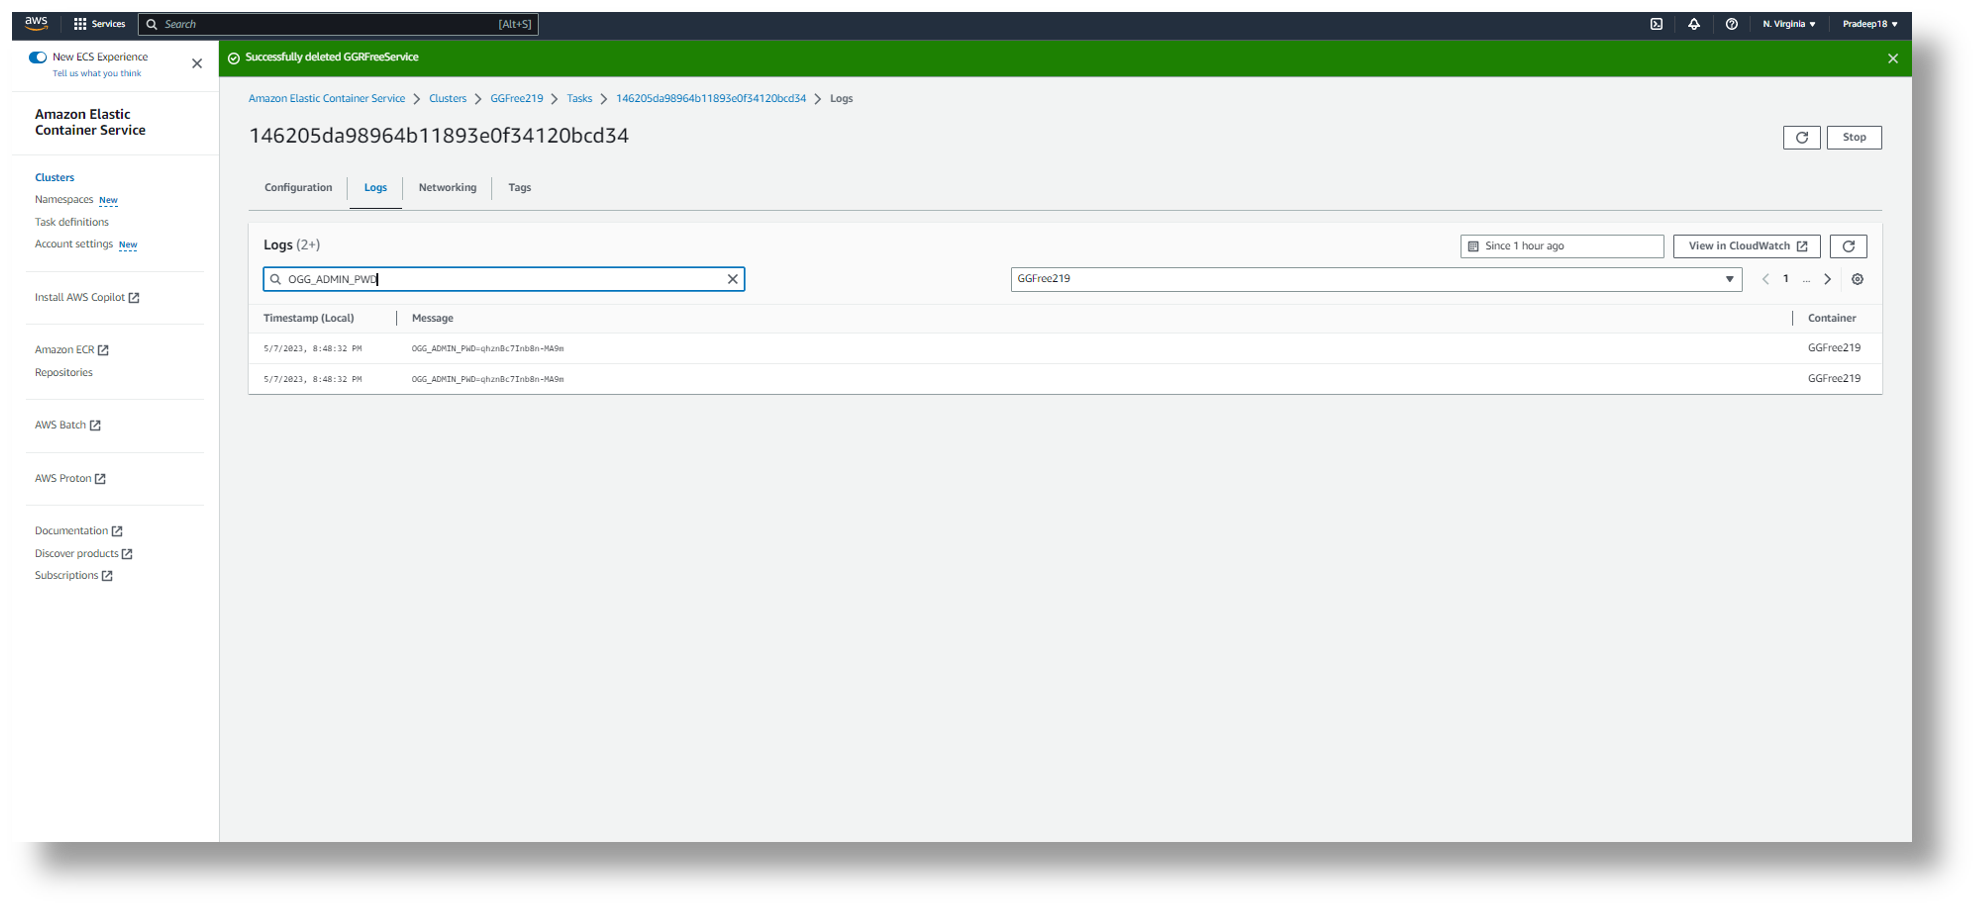
On the first startup of the container, a random password will be generated for the Oracle GoldenGate administrative user if not provided by the OGG_ADMIN_PWD environment variable. You can find this password in the container log:
- You can view your container logs under Container details; click on the Logs tab on the top. Then search for the OGG_ADMIN_PWD keyword in the Search bar to view the default password generated.
In the GoldenGate free console UI, use the above credentials for login.

Once logged in, you can create connections to the Source/Target database and replication Pipeline.