Oracle Cloud Infrastructure (OCI) GoldenGate is a fully managed service providing a real-time data mesh platform, which uses replication to keep data highly available and enable real-time analysis. OCI GoldenGate is based on a Microservices architecture that leverages REST APIs. While we encourage our customers to use GoldenGate Microservices, we still have plenty of customers using its Classic Architecture and want to combine both approaches.
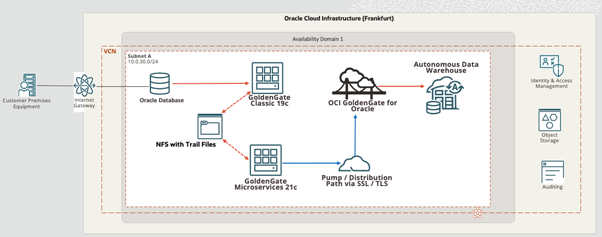
Let’s analyse the following example. We have an existing customer using GoldenGate Classic to capture and replicate data across Oracle databases. They would like to integrate the same data into another database, such as Autonomous Data Warehouse in OCI using OCI GoldenGate. The problem is that a GoldenGate deployment using the Classic architecture cannot directly communicate with a secured GoldenGate deployment using the Microservices architecture, such as an OCI GoldenGate deployment. So how can we overcome this challenge? We can add a new GoldenGate Microservices deployment installation (on-premises or OCI Marketplace) next to the Classic deployment, share the trail files between them, and use the Microservices deployment to send the data to OCI GoldenGate. This approach is only possible if we have a central directory where both GoldenGate instances write and read trail files.
Pre-requisites
- GoldenGate Classic is installed with one Extract and Replicat up and running.
- GoldenGate Microservices is installed.
- OCI GoldenGate deployment for Oracle is created.
Configuration
We are using GoldenGate 21c Microservices to create a distribution path targeting the OCI GG deployment.
Download the OCI GoldenGate certificate
Depending on your browser, we can download the certificate in different manners. In this example, I’m using Firefox:
Connect to the OCI GoldenGate Console.
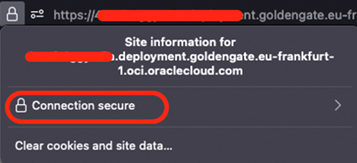
Click on the lock icon and then Connection secure:
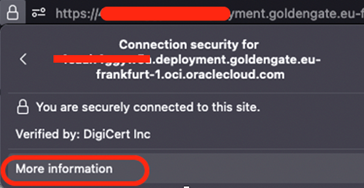
Click on More Information, and a new window will pop up:
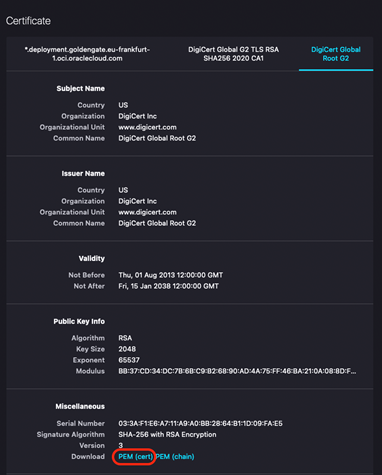
Click DigiCert Global Root G2 and download the PEM (cert) file.
Upload the certificate to the on-premises or Marketplace Oracle GoldenGate Service Manager
- Open the on-premises or Marketplace Oracle GoldenGate Service Manager in a browser window.
- In the navigation menu (hamburger icon), click Certificate Management.
- On the Certificate Management page, click Add CA Certificates (plus icon).
- In the Add CA Certificate dialog, enter a Unique Name.
- For Certificate PEM, copy and paste the contents of the certificate file you downloaded from Chrome, and then click Add.
Create a new Distribution Path user
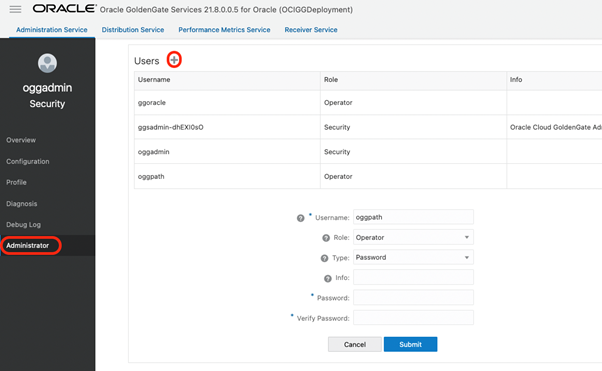
In OCI GoldenGate Console, open the menu and click Administrator. Add a new user by clicking on sign ‘+’. Specify the username, the Operator role, set the Type to Password, and provide your password:
Add a new credential on the source GoldenGate deployment
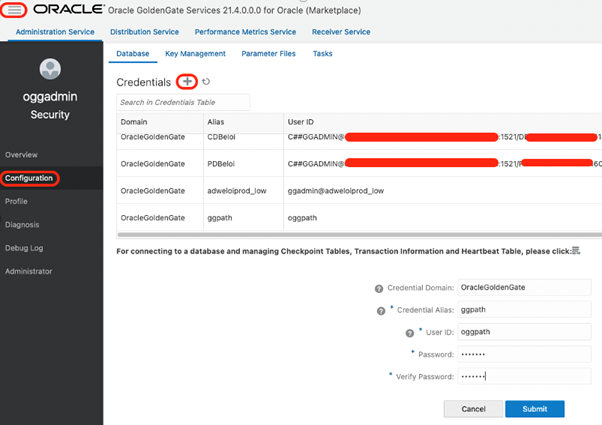
Go to GoldenGate Microservices 21c. Open the menu, click Configuration, add a new Credential with the same username and password you defined for the GoldenGate user:
Create a Distribution Path
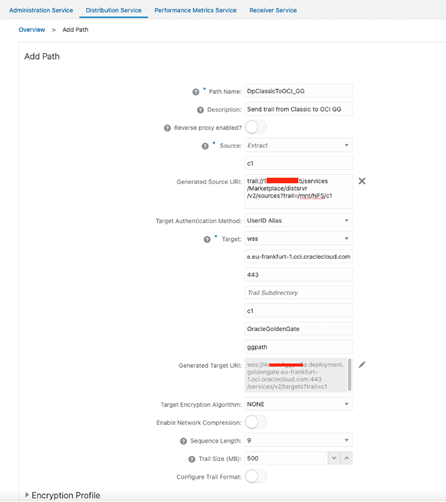
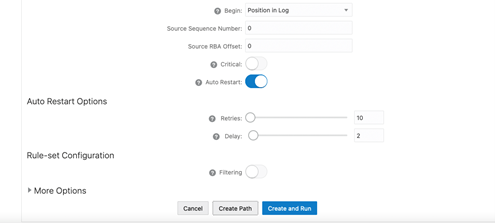
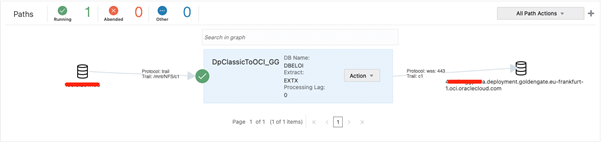
Go to Distribution Service and click Add Path (‘+’ icon). Enter Path Name, Trail Name (same as GoldenGate Classic trail name). Edit the Generated Source URI and add the NFS path where the trail is stored (/mnt/NFS/ below). Specify the OCI GG hostname for Target and port 443. Enter the Trail Name, Domain, and Alias from the credential created in the previous step. Click on Create Path and then start the distribution path:
Create a Replicat
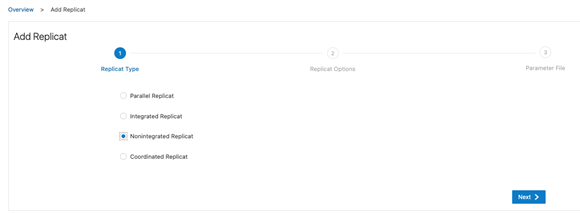
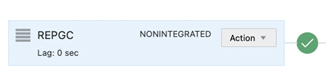
Go to OCI GoldenGate deployment and add a new Replicat. Click Overview and Add Replicat (plus icon) in the Replicats panel. Select NonIntegrated Replicat for Autonomous Databases as a target:
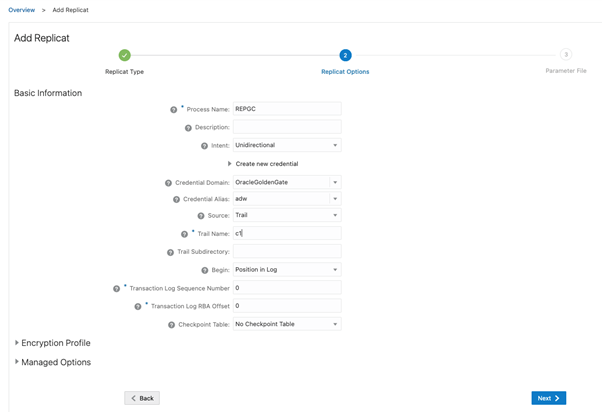
Enter a Process Name, select a Domain and Alias, and specify the Trail Name (the same one you used for the distribution path), it’s highly recommended to use checkpoint table. Click Next.
Specify how the source and target tables will be mapped by the Replicat and click Create and Run.
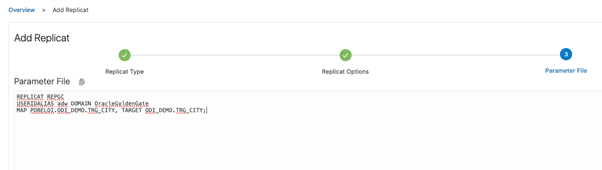
Our Replicat is now up and running in OCI GoldenGate console.
We have seen how we can integrate GoldenGate Classic architecture with OCI GoldenGate using an intermediary Microservices deployment. The example uses GoldenGate Classic running on OCI Compute, but it could also be running on-premises. We hope this blog helps you to integrate data across different GoldenGate services.