“At the third stroke, the time from BT will be [hour] [minute] and [second] seconds.” Almost forgotten, but still in use, is the speaking clock. A speaking clock is a service provided by telephone businesses and other organizations that announces the correct time in intervals of 10 seconds.
If, from time to time, it could say, “My goodness, time goes by really fast today. At the third stroke, the time from BT will be [hour] [minute] and [second] seconds,” the clock would not only be more engaging but also feel more natural, because humans use different phrases when saying things repeatedly.
Unlike a speaking clock that is designed for a short consumer interaction and that does not need to be engaging, chatbots are supposed to have longer interactions with users while assisting them to complete a task on the conversational channel.
Chatbots are not humans and should not pretend they are, but conversations between bots and humans must be designed to be vivid, natural, and appealing to humans. Alternating bot responses is one technique to apply to your chatbots to improve user experience.
Following the hands-on instructions in this article, you will implement alternating bot responses for a skill in Oracle Digital Assistant. For this you will be using resource bundles referenced from the dialog flow and from items in a composite bag entity.
Getting Ready
Below are the prerequisites for following along with the hands-on steps in this article:
Follow these initial hands-on steps to start the service and import and test the bot.
Start Oracle Digital Assistant in a browser by typing https://<your cloud URL>/botsui/ into the URL field.
Click the hamburger icon () at the upper left.
Choose Development and then Skills.
Close the menu by clicking the hamburger icon ().
Click the Import Skill button at the upper right.
Navigate to the downloaded and extracted resources for this article and navigate to the starter folder.
Select the OraMagTravel(1.0).zip starter bot file and click Open.
Click the OraMagTravel tile in the Skills dashboard to open the skill bot.
Note: If you don’t see the imported bot because other bots fill your screen, type Ora into the Filter field above the + New Skill tile.
What you just did: By importing the OraMagTravel(1.0).zip file, you installed the travel bot sample skill. The sample bot does not use natural language processing (NLP) or machine learning (ML), so there is no need to train the skill.
Experience the Boredom of Bots That Are Robotic
Before you implement alternating bot messages, first experience the bot from a user perspective.
Run the sample bot in the embedded conversation tester by clicking the Skill Tester icon () in the left menu.
Type Hi into the Message field and press the Enter key.
Notice the prompt that is displayed for selecting the destination: “Where would you like to go to?”
Type Miami into the Message field and press the Enter key again.
Miami is not a valid answer. Type Lisbon into the Message field and press the Enter key.
Again, this is not a valid choice. However, notice that the prompt for the destination dialog box always displays, “Where would you like to go to?”
Select Paris from the list of destinations.
When prompted for the departure date, type August 20 2019.
When prompted to provide a return date, type never.
Of course, “never” is not a valid date. So the return date prompt appears again. And, as before, it displays, “Please provide a return date.”
Click the Reset button () at the top right.
Close the skill tester by clicking the Close icon (X), located next to the Reset button.
What happened: The travel bot validated your input against a custom entity for destinations and the DATE system entity. When you provided an invalid user input, the dialog box asked for a valid entry using the same message displayed before. In a human conversation, this would not be the case. Also in a human conversation, the response of the person you talk to would not be the same each time you say, “Hi.”
Note:A previous Oracle Magazine article explained how to handle input validation errors gracefully. The focus of this article is on alternating prompts.
Before You Start
Using references to resource bundles is common practice in software development for displaying labels, prompts, and similar messages. Resource bundles not only make it easy for you to maintain strings but they also allow you to build translatable user interfaces.
The starter skill that you imported includes a resource bundle created for English. Before you can start building alternating bot responses, take a look at the strings and their keys.
Click the Resource Bundles icon () in the menu on the left.
In the upper right corner, select Language from the View By list. This lists all keys and their string values in a tabular layout.
Note that several keys have the same name and differ only by a consecutive number.
Also note that the message for each of those keys is related but different.
Create a new key by clicking the + Key button ().
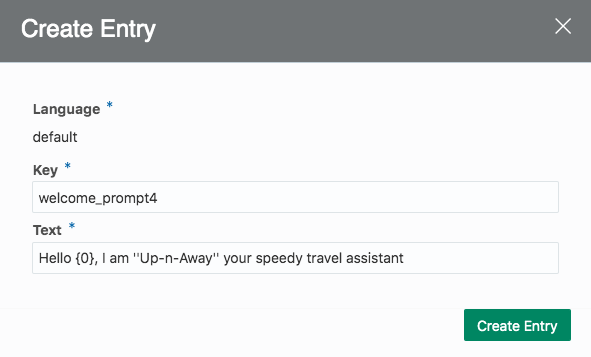
In the Key field, type welcome_prompt4.
In the Text field, type Hello {0}, I am ''Up-n-Away'' your speedy travel assistant (as shown in Figure 1). The “{0}” reference is a parameter that allows bot designers to inject data into the resource bundle message. Note: The string “Up-n-Away” is enclosed by two single quotation marks at its beginning and its end. This will be displayed as ‘Up-n-Away’ at runtime.
Figure 1: Creating a new resource string key and message
Click the Create Entry button.
Notice that not all welcome_prompt keys use parameters in their messages.
Close the Resource Bundles panel by selecting the Flows icon () in the left menu.
What you’ve seen: In this section, you’ve seen part of the solution for implementing alternating bot responses in Oracle Digital Assistant. For each message, label, or prompt to be displayed in a conversation, you create multiple resource bundle entries. The resource bundle keys defined for a dialog flow state differ by a consecutive number. The other part of the solution is the generation of a random number that determines the prompt, label, or message to display at runtime.
Implementing Your First Alternating Bot Message
In this section, you are going to implement an alternating bot message for the welcome message. Ensure that you have the dialog flow builder open by selecting the Flows icon (), as instructed in step 30.
Place the cursor into line 14.
Ensure that the cursor is vertically aligned with the returnDate variable (in line 13). If needed, use blank spaces to align the cursor.
Create a resource bundle variable rb of type resourcebundle. To do this, type rb: "resourcebundle".
Go to line 20 and change the value of the text property from
"Hi ${profile.firstName}, I am 'Up-n-Away', your travel
booking assistant. Let's get your booking rolling."
Note: You can copy the expression from the welcome_prompt.txt file located in the strings folder of the extracted resources for this article.
Click the Validate button in the upper right to ensure that you provided the correct syntax.
Run the sample bot in the embedded conversation tester by clicking the Skill Tester icon () in the left menu.
Type Hi into the Message field and press the Enter key.
Notice the welcome message.
Click the Reset button () in the upper right.
Again, type Hi into the Message field and press the Enter key. This should display a different welcome message.
Close the skill tester by clicking the Close icon (X), located next to the Reset button.
Note: This example uses four possible messages to greet users. There is a possibility that two consecutive runs will display the same message, but the likelihood that alternative messages will be displayed increases with the number of message keys added for a prompt or bot response.
How it works: For the welcome message, there are four keys defined in the message bundle. An Apache FreeMarker expression is used to generate a number between 1 and 4. There is no dynamic way to determine the number of keys defined for a message, so the number of available welcome messages needs to be provided using % 4. To create a random number, the expression uses the current date in milliseconds, which it accesses through the .now reference. The generated number is then appended to the welcome_prompt string to build a valid key contained in the message bundle.
Note: Some of the welcome_prompt keys use a parameter to add the user name to the message. For this you passed ${profile.firstname} as a second argument in the expression. If a message does not support parameters, this second argument is ignored.
Adding Alternating Messages to All Bot Responses
In this section, you are going to replace all other string messages with resource bundle references. For simplicity, the starter skill has three resource bundle keys defined for each message.
Go to line 28 and change the value of the prompt property from
"Where would you like to go to?"
to
${rb('destination_prompt${(.now?long % 3)+1}')}
Note: You can copy the expression from the destination_prompt.txt file located in the strings folder of the extracted resources for this article.
Go to line 45 and change the value of the prompt property from
Note: You can copy the expression from the departureDate_prompt.txt file located in the strings folder of the extracted resources for this article.
Go to line 61 and change the value of the text property to the string below. You can copy the expression from the confirmation_prompt.txt file located in the strings folder of the extracted resources for this article.
Note that this time, the text property value must not be enclosed within double quotation marks (see Figure 2).
Figure 2: Prompt expression not enclosed within double quotation marks.
Note: Figure 2 shows the expression formatted in multiple lines for better viewing. When you copy and paste the expression from confirmation_prompt.txt, it will be in a single line, which is perfectly OK.
To test your configuration, click the Skill Tester icon () in the left menu.
Type Hi into the Message field and press the Enter key.
Select Paris.
When prompted for a departure date, type August 20 2019.
When prompted for a return date, type August 31 2019.
You should see a confirmation message. Click the Reset button () in the upper right and repeat steps 46 to 49. You should see different prompts and a different confirmation message. Note: As mentioned earlier, this example uses three resource bundle entries for each dialog flow state to display prompts and messages. The likelihood that alternative messages will be displayed increases with the number of message options added for a prompt or bot response.
Close the tester by clicking the Close icon (X), located next to the Reset button.
Note: In step 44, the Apache FreeMarker expression is added as a value to the text property without surrounding quotes. The reason for this is that double quotation marks are used in the formatting of the dates: ?string("dd-MMM-yyyy"). Adding surrounding double quotation marks to the expression as a whole would have led to an invalid BotML document.
On Your Own
Did you notice there is no alternating message defined yet for the prompt of the setEndDate dialog flow state in line 53? Well, how about a challenge? Try building the expression yourself considering the following information:
The resource bundle key base name is returnDate_prompt.
There are three key entries defined in the resource bundle.
None of the bundle messages contains a parameter.
The solution is similar to the departure date prompt you added in line 45.
Note: To verify your solution, or to skip this challenge on a lazy day, you can find the correct expression in the returnDate_prompt.txt file located in the strings folder of the extracted resources for this article.
With this addition, you have completed the first part of this hands-on exercise. All skill bot prompts and text responses should now use alternating messages and appear less robotic. You can find a completed solution—OraMagTravel_Completed(1.0).zip—in the completed folder of the extracted downloads for this article.
About Composite Bag Entities
Composite bag entities are like business domain objects and encapsulate multiple entities and variables into a single object. A composite bag entity, for example, could represent an order, an account, a product, and more.
Besides being business oriented, the benefit of composite bag entities is that they resolve themselves at runtime by generating the dialog boxes needed for a user to provide required entity information.
Because composite bag entities generate the bot conversation flow at runtime, you don’t build dialog flow states, which has an impact on how you define prompts. In the next sections, you will learn how to define prompts for composite bag entities and how to define them so they display alternating responses.
Getting Ready
To start working with composite bag entities, first import the composite bag skill.
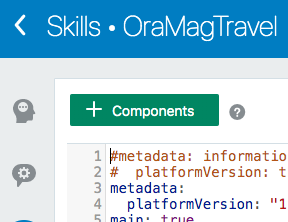
If you are in the OraMagTravel bot, click < (left arrow) in the header (see Figure 3) to exit skill editing.
Figure 3: Left arrow icon in the skill builder header to exit skill editing
Back in the Skills dashboard, click the Import Skill button at the upper right.
Navigate to the downloaded and extracted resources for this article and navigate to the starter folder.
Select the OraMagTravelCompositeBag(1.0).zip starter bot file, and click Open.
Click the OraMagTravelCompositeBag tile in the Skills dashboard to open the skill bot. Note: If you don’t see the imported bot because other bots fill your screen, type Ora into the Filter field above the + New Skill tile.
Using Alternating Messages with Composite Bag Entities
As mentioned earlier, prompts ideally reference resource bundles, so they are easy to maintain and support translations. In this section, you are defining prompts for composite bag entity items and adding the composite bag entity to the dialog flow using the System.ResolveEntities component.
Click the Entities icon () in the left menu.
Select the TravelBooking entity, which is a composite bag entity.
Under Configuration -> Bag Items, select the StartDate item.
Click the Edit icon () on the right to edit the bag item.
In the Edit Bag Item page, scroll to the Prompts section.
Click the + Prompt button ().
Type ${rb.departureDate_prompt1} into the Prompt field.
Press the Tab key twice to navigate out of the edit fields. Navigating out of the edit fields ensures the changes will be saved.
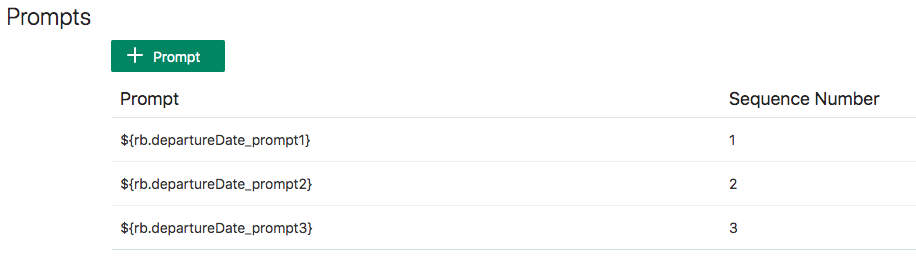
Repeat steps 62 to 64 to create prompts for ${rb.departureDate_prompt2} and ${rb.departureDate_prompt3}. The Prompts section should now look like the image in Figure 4.
Figure 4: Definition of three departure date prompts
When all three prompts have been created, click the Close button at the top right. Note: The sequence numbers that are automatically added to the prompts you create define the order in which the prompts are displayed. You could remove the sequence numbers if you want to display the prompts in a purely random order.
Repeat steps 59 to 66 for the following bag items and the six prompts listed below:
Bag Item
Prompts
TravelDestination
${rb.destination_prompt1}
${rb.destination_prompt2}
${rb.destination_prompt3}
EndDate
${rb.returnDate_prompt1}
${rb.returnDate_prompt2}
${rb.returnDate_prompt3}
Select the Flows icon () in the left menu to switch to the dialog flow builder.
Notice that the variable rb of type resourcebundle has been defined already for you (in line 11). This variable is mandatory for the skill to use resource bundle references, not only in dialog flows but also in composite bag entities.
Also notice the travelBooking variable (in line 10), which, as a type, is set to the name of the composite bag entity (TravelBooking).
To render the composite bag entity in the context of a bot/user interaction, you need to add a System.ResolveEntities component state to the dialog flow. To do this, first click the + Components button at the top of the editor.
In the opened dialog box, select the User Interface category.
Scroll through the list of component templates to find the Resolve entities entry.
Select Resolve entities.
Select Welcome from the Insert After list. This will add the new component state after the existing welcome state in the dialog flow.
Enable the Remove Comments toggle. This removes comments from the generated component state.
Click the Apply button.
In the dialog flow builder, change the resolveEntities state name to selectDestination.
Set the variable property value to "travelBooking".
Note that the size of each indentation is two blank spaces.
What you just did: In this section, you created prompts for the three bag items defined in the TravelBooking composite bag entity. For each item, you defined three prompts that reference resource bundle strings. The resource bundle strings are the same as were used in the first part of this hands-on exercise. To resolve the composite bag entity, you used a component template for the System.ResolveEntities component. To resolve the component to the composite bag entity, you referenced the travelBooking variable, which is of type TravelBooking from the component’s variable property.
Now test the user experience with the composite bag entity.
Open the conversation tester by clicking the Skill Tester icon () in the left menu.
Type Hi into the Message field and press the Enter key on your keyboard.
Notice the prompt requesting the departure date information, which is read from the resource bundle.
To see a different prompt, type Hello into the Message field and press the Enter key.
Next, type August 20 2019 into the Message field and press the Enter key.
Again, to see different messages, type Lisbon when prompted for a destination. Because Lisbon is an invalid value, a prompt appears, this time with a different message.
When prompted again to provide a destination, select Paris.
When prompted for a return date, type August 30 2019 into the Message field and press the Enter key.
Notice the confirmation message.
Close the skill tester by clicking the Close icon (X), located next to the Reset button.
In the dialog flow editor, review the printConfirmation state and notice the variable reference to the composite bag entity being used to pass parameter values to the resource bundle.
Note: By default, the composite bag items use sequences to determine when to show which message. Because of the sequences, the prompts are displayed the same when rerunning the whole conversation. To see alternating prompts, you either need to cause a field to be rerendered, as you did by providing invalid values for a prompt, or you need to remove the sequence numbers.
Both approaches, showing alternating messages in a sequence and showing them in random order, have their use cases. Sequences are good for “escalating” user input failure, because the initial prompt in the sequence can be short while subsequent prompts can provide more information about what the user is expected to provide.
Note: You can find a completed solution—OraMagTravelCompositeBag_Completed(1.0).zip—in the completed folder of the extracted downloads for this article.
Conclusion
In this article, you learned about the two approaches in Oracle Digital Assistant to implementing alternating bot response messages for chatbots to make them appear less robotic. In real bot implementations, you will use both approaches—random messages defined in the dialog flow and messages defined on composite bag entity items—because there are no restrictions on how and when to use composite bag entities within a bot conversation.
Frank Nimphius is a Master Principal Product Manager at Oracle Corporation where he works on Oracle Digital Assistant and Health AI Frank joined Oracle Product Management more than 20 years ago and since then worked on various Oracle products including Oracle Forms, Oracle JDeveloper, Oracle Application Development Framework (ADF) and the Mobile Application Framework (MAF) and Oracle Mobile Hub. In his 20+ years at Oracle Frank enjoyed the many opportunities the job offered and became an author, an in-class and online-video trainer, a presenter at various international conferences, a collateral and training writer, a Java developer, as well as a product marketer and blogger.


 ) in the left menu.
 ) in the upper right.