In our previous blog post, we described how Oracle Container Engine for Kubernetes (OKE) virtual nodes deliver a serverless Kubernetes experience. Running your applications on a Kubernetes cluster with OKE virtual nodes saves you from managing the capacity of the worker node, their maintenance, patching, and repairs. Many customers already realized the benefit of skipping the infrastructure operations and focusing on building, running, and easily scaling their applications.
In this blog post, we detail the three key steps to get started with OKE virtual nodes and provide you with a one-click method to create a Kubernetes cluster with virtual nodes.
Three key steps to get started with OKE virtual nodes
To successfully get started with OKE virtual nodes, you must follow these important steps.
IAM policy for virtual nodes
With OKE virtual nodes, you get a fully managed Kubernetes cluster. Oracle manages all the infrastructure of your Kubernetes clusters for you. The pods of the applications that you deploy in your clusters are connected to your own virtual cloud network (VCN), so you control the access to your applications. To achieve this goal, you must allow OKE service tenancy to connect the pods virtual network interface cards (VNICs) to subnets of your VCN and associate the network security rules defined in your VCN.
Create an IAM policy in the root compartment of your tenancy with the exact policy statement below. The statement must be created as-is in your root compartment – the OCIDs must not be updated.
define tenancy ske as ocid1.tenancy.oc1..aaaaaaaacrvwsphodcje6wfbc3xsixhzcan5zihki6bvc7xkwqds4tqhzbaq
define compartment ske_compartment as ocid1.compartment.oc1..aaaaaaaa2bou6r766wmrh5zt3vhu2rwdya7ahn4dfdtwzowb662cmtdc5fea
endorse any-user to associate compute-container-instances in compartment ske_compartment of tenancy ske with subnets in tenancy where ALL {request.principal.type='virtualnode',request.operation='CreateContainerInstance',request.principal.subnet=2.subnet.id}
endorse any-user to associate compute-container-instances in compartment ske_compartment of tenancy ske with vnics in tenancy where ALL {request.principal.type='virtualnode',request.operation='CreateContainerInstance',request.principal.subnet=2.subnet.id}
endorse any-user to associate compute-container-instances in compartment ske_compartment of tenancy ske with network-security-group in tenancy where ALL {request.principal.type='virtualnode',request.operation='CreateContainerInstance'}
Networking
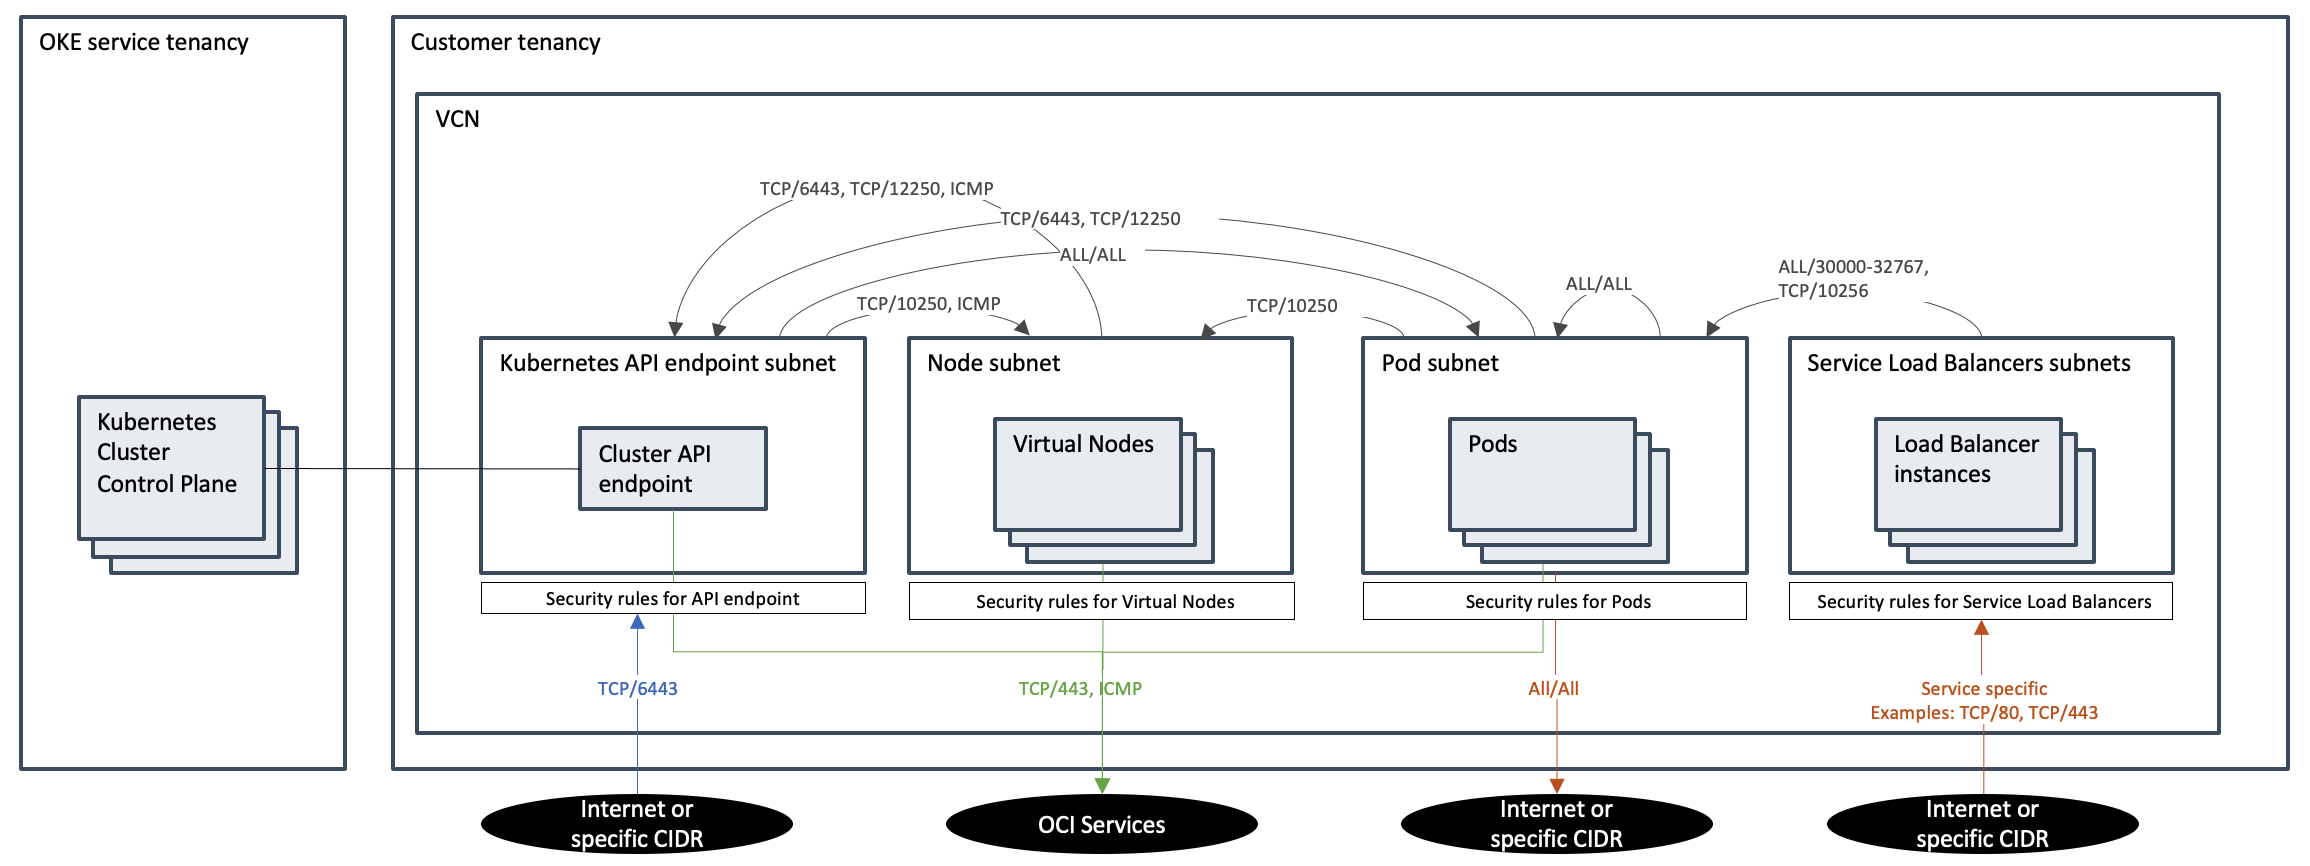
A Kubernetes service of type load balancer exposes your applications outside your cluster. Security rules must be created to allow the network traffic from your end users, through the internet, to the load balancers and from the load balancers to pods. You can create those security rules as part of the security list for the subnets assigned to load balancers and pods or as part of network security groups (NSG) applied at the VNICs of the load balancers and pods. For more details on the network configuration, refer to the OKE documentation. For example, an application with a service exposed through HTTPs requires the following rules:
- TCP/443 Ingress on the load balancer from the internet
- TCP/30000-32767 Egress on the load balancer to pods
- TCP/30000-32767 Ingress on pods from the load balancer
Pod specifications
Running your applications on a Kubernetes cluster with OKE virtual nodes saves you from managing the capacity of the worker node, their maintenance, and repairs. Many customers have already realized the benefit of skipping the infrastructure operations and focusing on building, running, and easily scaling their applications. Our vision is to have all Kubernetes objects and features supported with OKE virtual nodes. However, a few Kubernetes objects and pod specs aren’t yet supported, and the full list is shown in OKE documentation. While we’re working on delivering support for all Kubernetes capabilities, you might have to modify some deployment manifests to fit OKE virtual nodes.
To simplify the deployment of standard software, such as metrics servers, we provide the deployment files in this GitHub repo. You can now deploy the metrics server on OKE virtual nodes using the following command:
kubectl apply -f https://raw.githubusercontent.com/oracle-devrel/oci-oke-virtual-nodes/main/metrics-server/components.yml
Getting started with a single click
The instructions to create a cluster with virtual nodes are documented here. We now have automated all the steps for the creation of a cluster with virtual nodes.
1 – Automated deployment
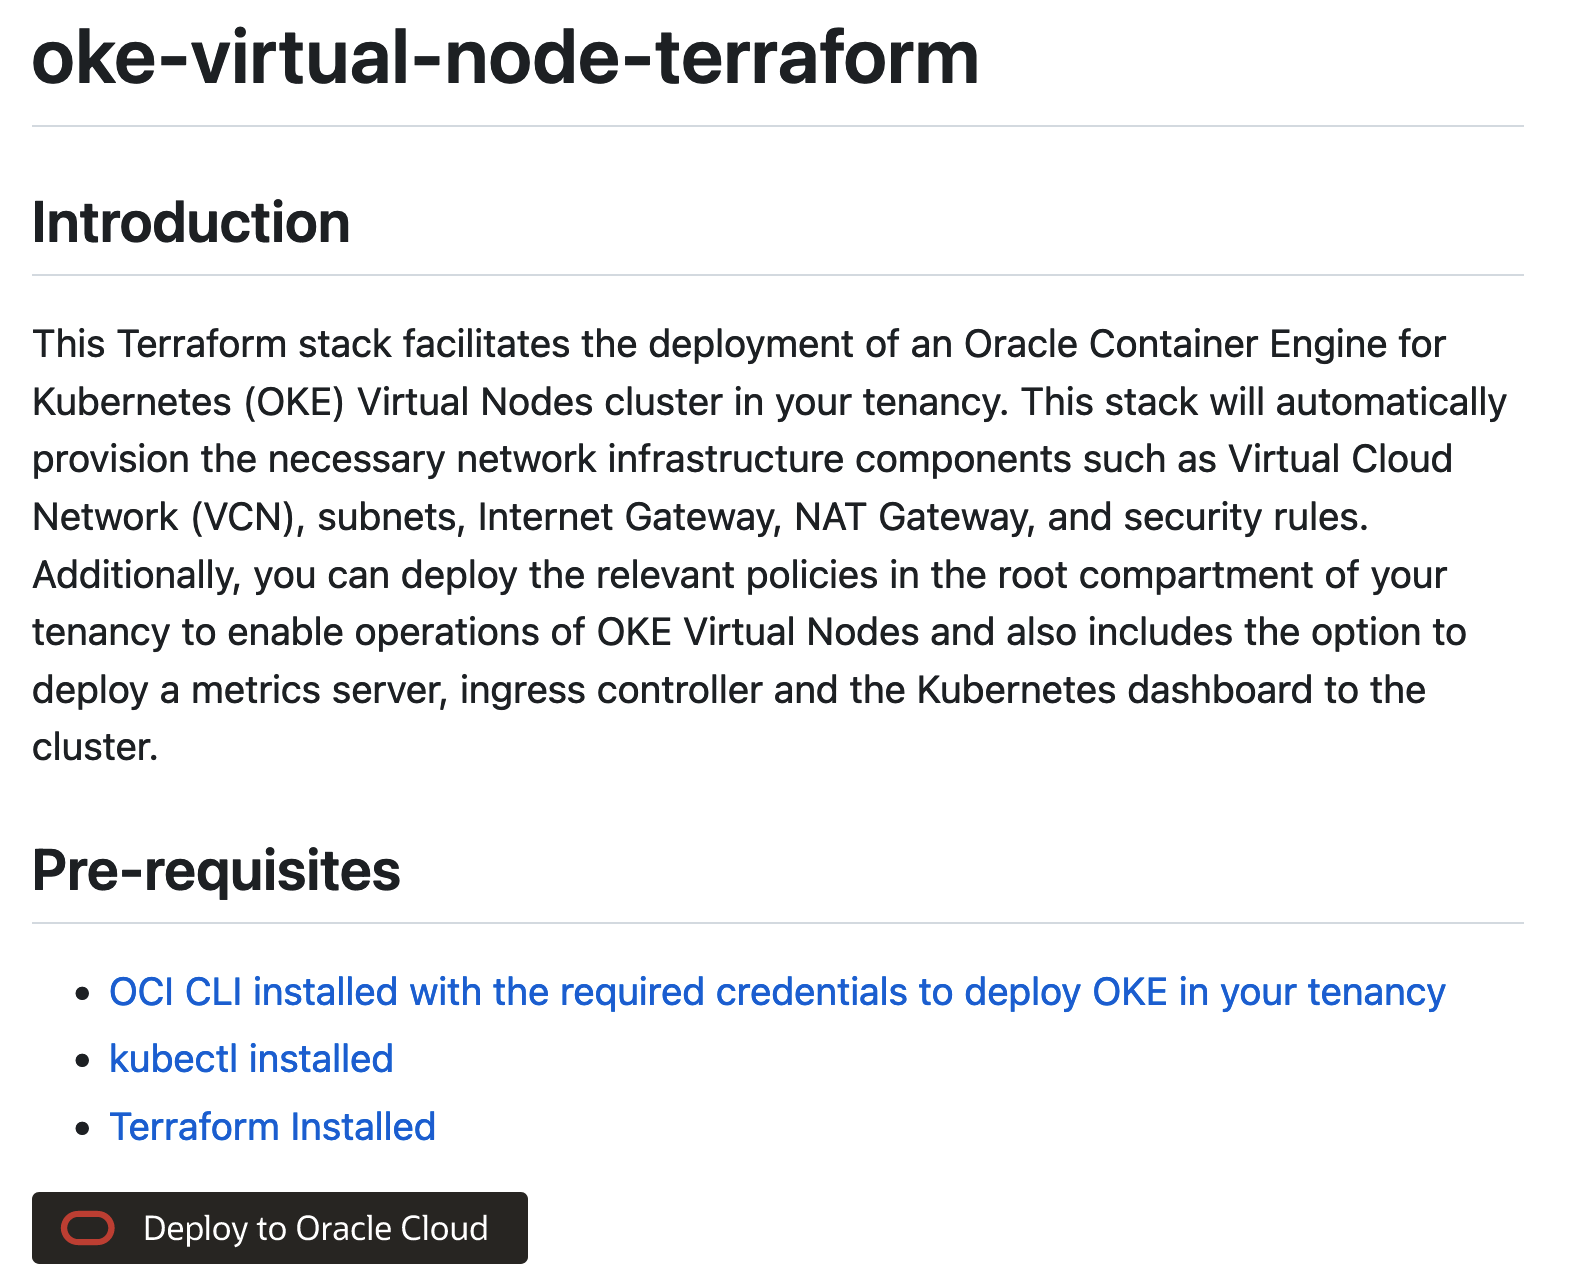
We have developed a Terraform Stack for an OKE Cluster with a virtual nodes pool to automate the deployment process. You can extend this stack using either the Oracle Resource Manager (ORM) or the Terraform CLI. The stack deploys an OKE cluster with a virtual nodes pool that adheres to recommended network topology, security rules, and optimal virtual node placement. It also allows deploying the IAM policies required for virtual nodes operation. With these features, the stack includes complementary components such as an NGINX ingress controller, Kubernetes metric server, and Kubernetes dashboard, enhancing the overall functionality of your OKE environment.
To automate the process, click the “Deploy to Oracle Cloud” button embedded in the readme of the the oke-virtual-node-terraform GitHub repository.

2 – Deploy a simple app
To access your cluster via the kubectl command, the kubeconfig files must be configured on your workstation. Generate the kubeconfig file using the “oci ce cluster create-kubeconfig” command (for more information refer to the OKE documentation). The command is included as the output of Terraform stack discussed previously.
As a first deployment, let’s deploy a simple app, Nginx, with a Kubernetes service type load balancer with the following command:
kubectl apply -f https://raw.githubusercontent.com/oracle-devrel/oci-oke-virtual-nodes/main/nginx-svc/nginx.yaml
Once the pods and service are ready, get the external IP assigned to the service using the “kubectl get svc nginx” command, and load it in your browser. The Nginx welcome page will be displayed.

Best practices with OKE virtual nodes
The following sections give recommended best practices on the optimal use of OKE virtual nodes. We also offer a reference architecture that presents a practical use case scenario for OKE virtual nodes.
Number of virtual nodes
OKE virtual nodes provide an abstraction of Kubernetes worker nodes with virtually no CPU and memory capacity constraints. Virtual nodes can run Kubernetes pods using CPU and memory capacity from the entire OCI region. By contrast, with managed nodes, you assign CPU and memory at the node pool level. Kubernetes pods use those resources only, which requires you to scale the node pool up and down as applications grow and shrink.
The primary reason to have multiple virtual nodes in a node pool isn’t scalability. You can have many pods on each virtual node. The current max limit is 1000 pods per virtual node. The main reason to set the virtual node count to a value greater than one is for high availability. Similar to managed nodes, virtual nodes belong to an OCI availability domain and a fault domain. All pods scheduled on a virtual node live in the same availability domain and fault domain as the virtual node. You can specify the node affinity and anti-affinity in your deployments based on the topology of the OCI region and a topology spread constraint to distribute pods evenly across availability domains or fault domains.
For a virtual node pool, we recommend setting the virtual node count to three and spreading their placement across availability domains in multiavailability domain regions or fault domains in single-availability domain regions. By default, the virtual node count is set to three so that pods are distributed across the three virtual nodes and, therefore, across availability domians or fault domains.
Pod shape
When you create a virtual node pool, you must set the pod shape. The shape determines the processor type that must be used to run pods. The amount of CPU and memory allocated to pods is specified in the pod spec, and is used when you deploy the application or scale it.
Each pod can use up to the memory and CPU limits of the selected pod shape. For example, the Pod.Standard.E4.Flex shape employs the AMD EPYC7J13 processor type, and each pod can use up to 64 OCPU and 1 TB of memory.
CPU and memory request
Specifying the CPU and memory requests as part of Kubernetes pod specs is good practice. With OKE virtual nodes, it becomes crucial because this specification is the only way to ensure that pods get the CPU and memory that you require. To set CPU and memory requests in the pod specs, refer to this deployment example.
Virtual nodes networking
Virtual nodes can only be part of clusters with VCN-native pod networking.
- Each pod gets an IP address from a subnet of the VCN.
- The number of pods available in the cluster is limited by the number of IP addresses in the subnet, so using a subnet range that accommodates the expected number of pods for growth is essential. For example, a virtual node pool with 250 pods running can have a regular /24 pod subnet. However, a virtual node pool with 4000 pods running must have a /20 pod subnet.
- You can define NSGs to restrict traffic that can ingress and egress from the pods.
- VCN flow logs can inspect all network traffic between pods.
Adhering to the principle of least privilege is essential for enhancing overall security and minimizing potential risks and vulnerabilities when authorizing network access to OKE resources. The provided network diagram outlines the precise network access prerequisites for Kubernetes resources within an OKE cluster with virtual nodes. Establishing security rules around these Kubernetes workload types is crucial to ensure a secure network environment.

Workload Identity
Sometimes, a pod needs access to other OCI services, such as retrieving an object from an Object Storage bucket or fetching a secret from OCI Vault. Virtual nodes only allow privileges to be assigned at the pod level, which is preferred as it follows the principle of least privilege. Workload Identity can grant these privileges by linking OCI IAM roles with Kubernetes service accounts assigned to pods.
Learn more
To learn more about OKE virtual nodes and get hands-on experience, see the following resources:
- Access the OKE resource center
- GitHub repo for TF stack
- GitHub repo for standard deployments on OKE virtual nodes
- Oracle Architecture Center
- Reference architecture
- OKE virtual nodes (Documentation)
- Get started with Oracle Cloud Infrastructure today with our Oracle Cloud Free Trial

