The Domain Name System, or DNS, is the first step in site and web application performance. Founded on Dyn’s DNS, the Oracle Cloud Infrastructure DNS service is an integral part of Oracle Cloud Infrastructure’s suite of edge services. It’s available through the Oracle Cloud Infrastructure Console and the API.
Bringing your domain name to Oracle Cloud Infrastructure is a straightforward process. As the preceding image indicates, it can take from three to nine minutes to configure and start using your domain name in Oracle Cloud Infrastructure.
This post describes how to bring a domain name from a third-party provider. We create a zone and the needed records, and then publish it. The DNS record will be mapped to a live web server running on an Oracle Cloud Infrastructure Compute Linux instance.
Create a DNS Zone
-
Sign in to your tenancy in the Oracle Cloud Infrastructure Console.
-
In the Quick Launch section of the home page, click Manage a domain: DNS Zone Management.

The Create Zone dialog box is displayed. Here you enter the domain name that you’re bringing from Dyn or from a third-party provider such as GoDaddy.
-
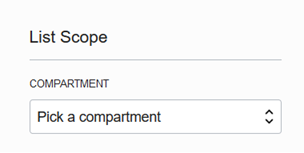
Select a compartment where your DNS zone will reside. If one is preselected, you might need to update it. If so, perform the following actions. If not, skip to the next step.
-
Click cancel in the Create Zone dialog box.
-
On the DNS Zone Management page, click the Compartment list and choose a compartment. Oracle Cloud Infrastructure uses compartments to organize resources.
-
Click Create Zone.
-
-
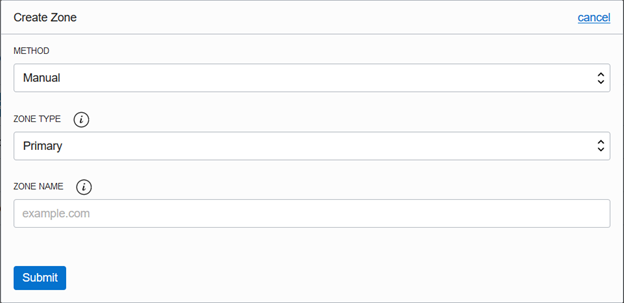
In the Create Zone dialog box, enter the following values:
-
For Method, select Manual. The manual method is the most common method, but you can also import your zone.
-
For Zone Type, select Primary. The other option is Secondary. The primary zone serves as a master zone, and the secondary zone has a read-only copy of the zone that stays synchronized with the primary DNS server.
-
For Zone Name, enter the domain name that you are going to associate with the IP address of your web server. This example uses the domain name castro.cloud.

-
-
Click Submit.
The DNS zone is created.
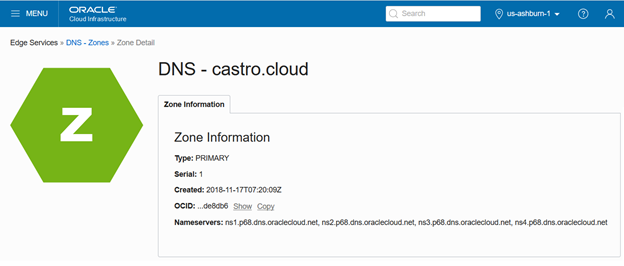
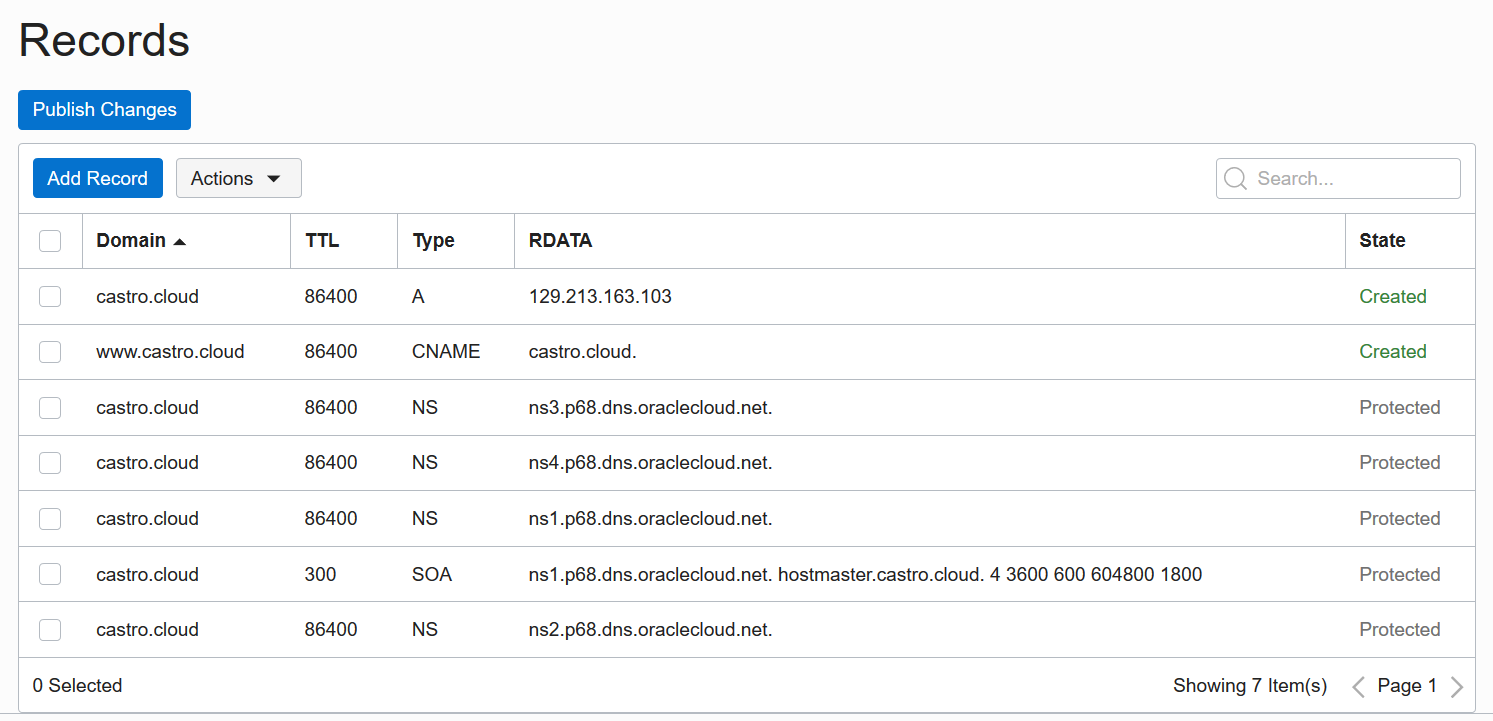
Oracle Cloud Infrastructure created five records; four nameserver (NS) records and one start of authority (SOA) record. The four nameserver records are the records that you will take to the third-party DNS provider from which you’re bringing the DNS (in the next section).
Add the Nameserver Records to the Third-Party DNS Provider
-
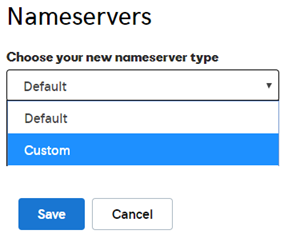
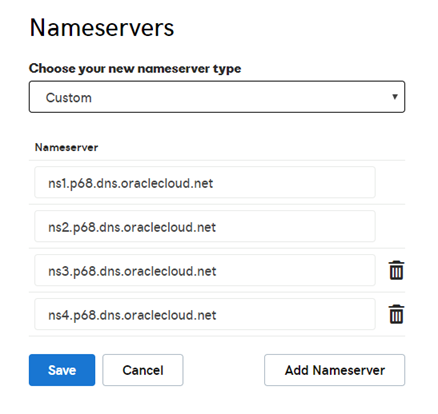
In the third-party DNS provider, change the nameservers type from Default to Custom.
-
Enter the four nameserver records provided by Oracle Cloud Infrastructure, and then click Save.
Add the A and CNAME Records
-
Go back to the zone details page in the Oracle Cloud Infrastructure Console, and click Add Record.
-
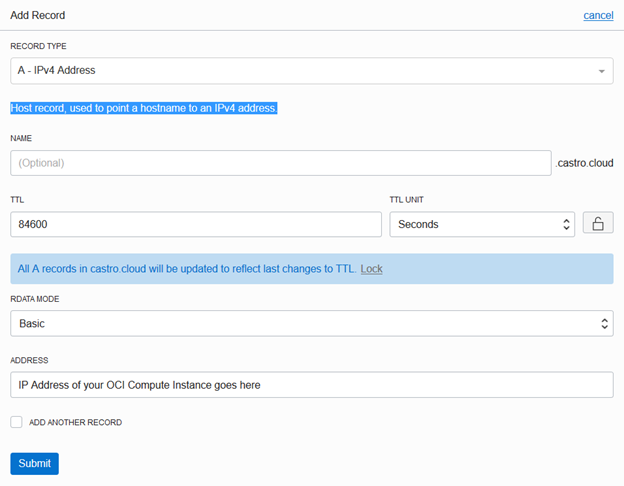
For the record type, select A – IPv4 Address.
-
Retrieve the public IP address of your web server, and enter it in the Address field. Enter values in the TTL and TTL Unit fields.
-
If you want your domain name to be preceded by www (for example, www.castro.cloud), add a CNAME (canonical name) record by selecting the Add Another Record check box.
-
Click Submit.
-
If you are adding a CNAME record, select CNAME – CNAME as the record type and provide the necessary information. Then clear the Add Another Record check box and click Submit again.
Publish Your New DNS Zone
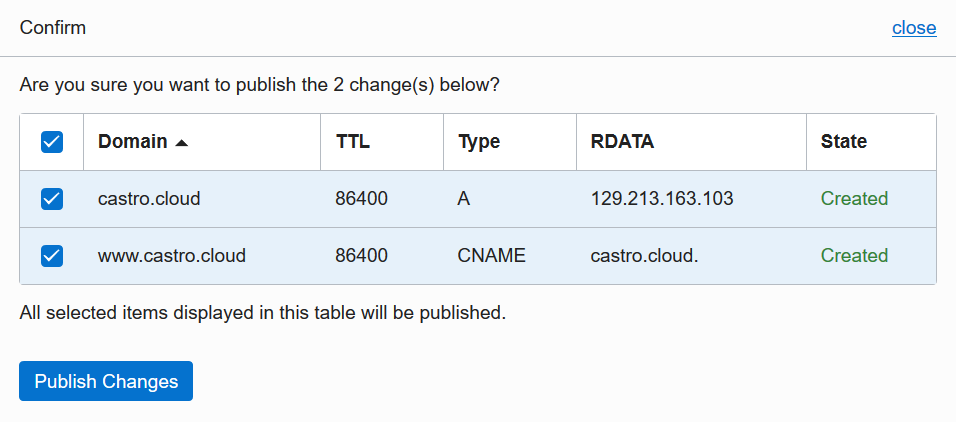
The last step is to publish your new DNS zone by clicking Publish Changes. As soon as you publish, you can access your web server with its new domain name address (in this example, castro.cloud and www.castro.cloud).
To learn more about Oracle Cloud Infrastructure’s DNS Zone Management, see Overview of the DNS Service.
