This post walks through the steps to create and connect to an Oracle Autonomous Database (Free edition) by using the Oracle Cloud Infrastructure CLI and SQL*Plus in Oracle Cloud Infrastructure Cloud Shell. The prerequisites for trying this out yourself are signing up for a Free Tier account (or using a current tenancy) and same basic Linux shell skills.
![]() Cloud Shell is a web browser-based terminal accessible from the Oracle Cloud Console and available to all Oracle Cloud Infrastructure users. It’s free to use (within monthly tenancy limits), and it provides access to a Linux shell with a pre-authenticated CLI and other useful tools for following Oracle Cloud Infrastructure service tutorials and labs. The Cloud Shell appears in the Console as a persistent frame and stays active as you navigate to different parts of the Console.
Cloud Shell is a web browser-based terminal accessible from the Oracle Cloud Console and available to all Oracle Cloud Infrastructure users. It’s free to use (within monthly tenancy limits), and it provides access to a Linux shell with a pre-authenticated CLI and other useful tools for following Oracle Cloud Infrastructure service tutorials and labs. The Cloud Shell appears in the Console as a persistent frame and stays active as you navigate to different parts of the Console.
 Oracle Cloud Infrastructure’s Autonomous Database is a fully managed, preconfigured database environment with two workload types available: Autonomous Transaction Processing and Autonomous Data Warehouse. You don’t need to configure or manage any hardware, or install any software. After provisioning, you can scale the number of CPU cores or the storage capacity of the database at any time without impacting availability or performance.
After you create a free account (if necessary), you follow these steps to create and connect to an Autonomous Database using Cloud Shell. The rest of this post walks through the steps in detail.
- Open Cloud Shell in your tenancy.
- Set some environment variables to simplify the steps and reduce typos.
- Get the Oracle Cloud Identifier (OCID) for the compartment where the Autonomous Database will reside.
- Create the Autonomous Database (in this example, an Autonomous Transaction Processing type and Free).
- Get the OCID for the Autonomous Database.
- Create the directory structure for the wallet files and download the wallet.
- Connect to the Autonomous Database.
You can download all the commands in the following steps from a GitHub repository. And the good news is that the Cloud Shell environment contains Git, too, so you can just clone the repo into your Cloud Shell environment.
I also recommend using tmux so you don’t lose your session. Here is a good cheat sheet.
Step 1: Open Cloud Shell
Sign in to your Oracle Cloud Infrastructure tenancy and click the command prompt icon in Console header.

This creates the Cloud Shell environment, where you run all the commands and connect to the Autonomous Database.

You can also open the Cloud Shell directly by constructing a URL like the following one, where you replace <region> and <tenancy> with your values:
https://console.us-<region>-1.oraclecloud.com/a/<tenancy>?cloudshell=trueStep 2: Clone the Git Repo and Set the Environment Variables
-
Clone the Git repo. Git is preinstalled with Cloud Shell.
andy_tael@cloudshell:oci_cs_adb (us-ashburn-1)$ git clone https://github.com/andytael/oci_cs_adb -
To avoid making changes to the Git repository from Cloud Shell, change the directory to the working directory and remove the remote origin. (But, feel free to create a branch and participate in or improve the repo.)
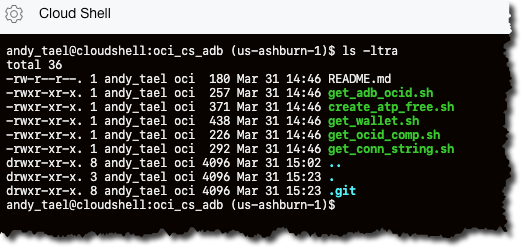
andy_tael@cloudshell:oci_cs_adb (us-ashburn-1)$ cd oci_cs_adb
andy_tael@cloudshell:oci_cs_adb (us-ashburn-1)$ git remote remove origin
You should have the following files in the Git working directory:
- env_vars.sh: Sets the environment variables.
- get_ocid_comp.sh: Gets the OCID for the compartment.
- create_atp_free.sh: Creates an Autonomous Database (Autonomous Transaction Processing).
- get_adb_ocid.sh: Gets the OCID for the created Autonomous Database.
- get_wallet.sh: Gets the wallet for the created Autonomous Database.
- get_conn_string.sh: Ignore this file.
- README.md: Ignore this file, which is part of the GitHub repo.
-
Using vim, edit the env_vars.sh file to set the comp_name and db_name variables. Then, save the file.
andy_tael@cloudshell:oci_cs_adb (us-ashburn-1)$ vi env_vars.sh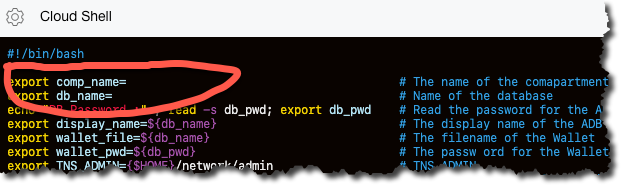
-
Set the environment variables.
andy_tael@cloudshell:oci_cs_adb (us-ashburn-1)$ source env_vars.sh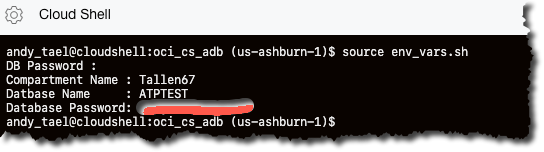
Step 3: Get the OCID for the Compartment
Cloud Shell has the Oracle Cloud Infrastructure CLI preinstalled, and you use the CLI to get data (and create resources). Get the OCID for the department where you will deploy the Autonomous Database.
andy_tael@cloudshell:oci_cs_adb (us-ashburn-1)$ source get_ocid_comp.shThe command should return the OCID of the compartment. If not, verify your environment variables.

Step 4: Create the Autonomous Database
Run the following command to create an Autonomous Database (Autonomous Transaction Processing, or OLTP) in the compartment specified in ocid_comp (in step 3). The name and display name (used in the Console) are specified in the db_name variable. The admin password for the database is specified in the db_pwd variable.
andy_tael@cloudshell:oci_cs_adb (us-ashburn-1)$ source create_atp_free.sh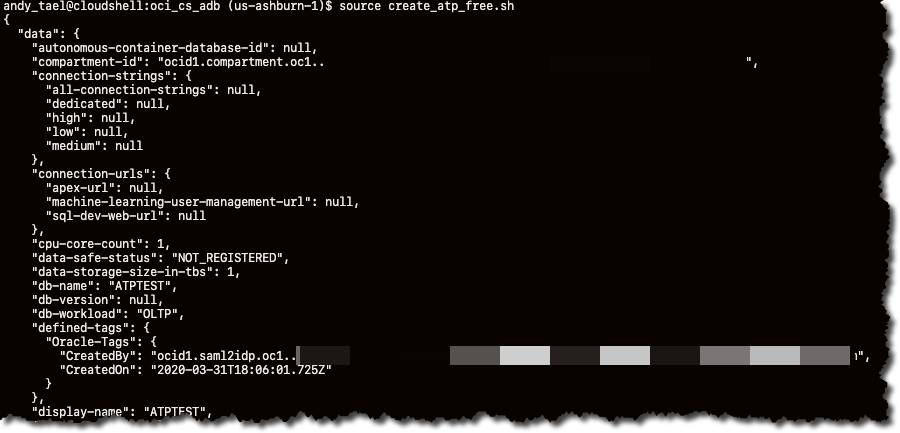
This process might take few minutes. You can check the status of the creation of the Autonomous Database by using the check_atp_status.sh script or the Console.
andy_tael@cloudshell:oci_cs_adb (us-ashburn-1)$ source check_atp_status.sh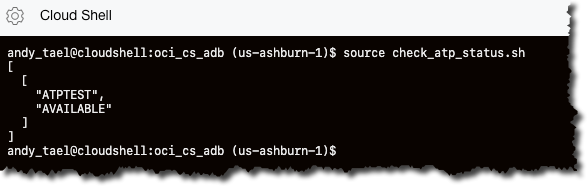
Step 5: Get the OCID for the Autonomous Database
You need the OCID for the Autonomous Database to download the wallet files. Run the following command.
andy_tael@cloudshell:oci_cs_adb (us-ashburn-1)$ source get_adb_ocid.sh
Step 6: Create the Directory Structure for the Wallet Files and Download the Wallet
To connect to the Autonomous Database, you need the wallet file. Run the following command to create the necessary directory structure and unzip the wallet.
andy_tael@cloudshell:oci_cs_adb (us-ashburn-1)$ source get_wallet.sh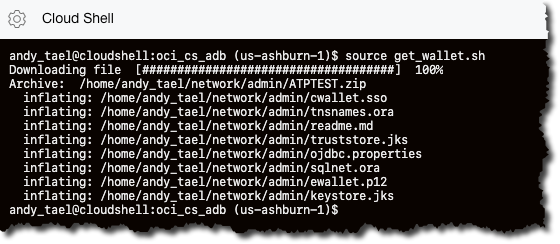
Step 7: Connect to the Autonomous Database
Modify the sqlnet.ora file to reflect where the wallet files are by running the following command. A copy of the original sqlnet.ora file is stored in the $TNS_ADMIN location.
andy_tael@cloudshell:oci_cs_adb (us-ashburn-1)$ source fix_sqlnet.sh
If everything has run properly, you can connect to the Autonomous Database by running the following command from Cloud Shell:
sqlplus admin/${db_pwd}@${conn_string}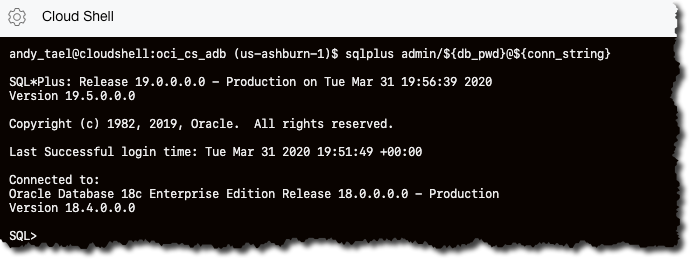
Exit SQL*Plus by using the QUIT command.
Happy testing and coding!
@