Photo by Nick Shandra on Unsplash
Oracle Cloud Infrastructure API Gateway and Auth0
Some time ago, we announced the general availability of the JSON Web Token (JWT( Validator in Oracle Cloud Infrastructure API Gateway. You can control access to APIs you deploy to the API Gateway using JWTs issued by identity providers, such as Oracle Identity Cloud Service, Auth0, or Okta through configuration instead of code. This new policy allows members, such as the application or security architect, to define the configuration of the authorization server to easily allow JWT validation.
A few of our customers have asked if it really is easy to use a provider such as Auth0 for controlling access to their backend application. A common scenario is a customer who has a front-end application which calls an API deployed to API Gateway backed by an Oracle Function, which contains the business logic.
This blog shows how easy it is to use the Oracle Cloud API Gateway, integrating it with Auth0 as identity provider. The following diagram shows how the various parts interact with each other:
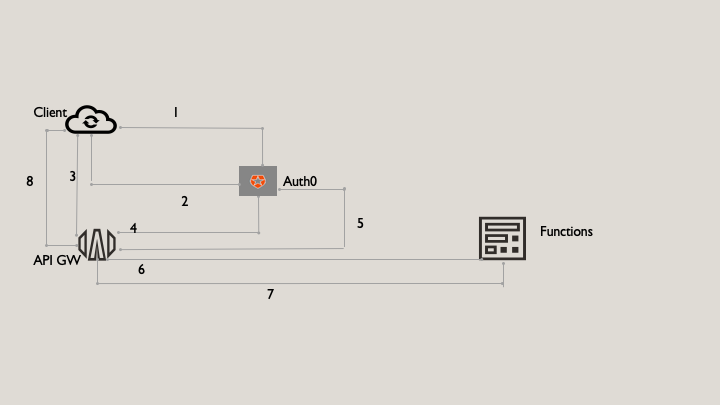
The request is completed through the following steps:
-
The client application makes a request to Auth0 to obtain a JWT-formatted access token, using the client id and client secret from the Auth0 application.
-
The client application receives JWT-formatted access token.
-
Using the access token in the request, the client invokes the API available on API Gateway.
-
The API Gateway pulls the JSON Web Key Set (JWKS) from Auth0 and uses it to validate the token.
-
API Gateway reads claims of the token and makes an AuthZ decision. The API Gateway caches the JWKS and uses it on subsequent calls. Periodically, API Gateway checks for any JWKS refreshes. This model reduces the traffic on the auth server, because each token doesn’t have to be validated against the server with each call. The API Gateway also further caches the auth decision, so if a client makes a call with a token, it makes additional calls within the time-to-live of the token. So, the API Gateway remembers the decision, making it faster.
-
API Gateway runs the function implementing the business logic of the API.
-
The function finishes executing and returns a JSON object representing the HTTP response to API Gateway.
-
API Gateway returns an HTTP response to the requesting application.
Walkthrough
Prerequisites
-
An Oracle Cloud Infrastructure account
-
An Auth0 account
-
An existing Oracle Function that implements the business logic. See Getting Started with Functions.
-
An API Gateway with a deployment and route to your function. For more information, see Creating Your First API Gateway in the Oracle Cloud.
Create an API in Auth0
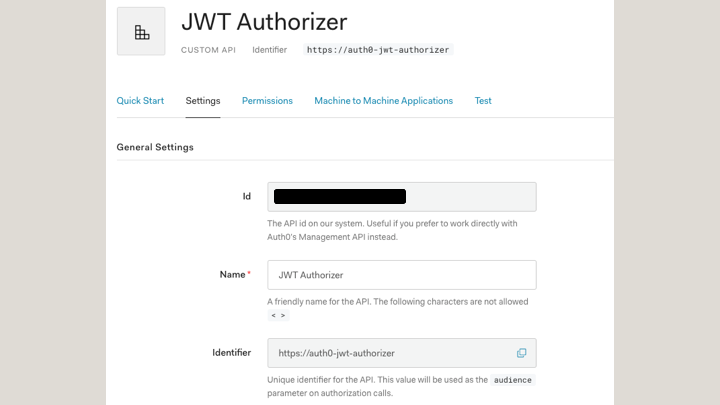
Create a JWT Authorizer in Auth0,
-
Name: JWT Authorizer
-
Identifier: https://auth0-jwt-authorizer
-
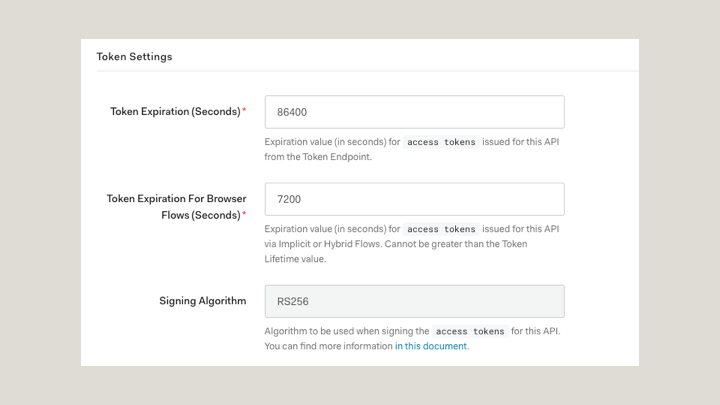
Signing Algorithm: RS256 (default value)
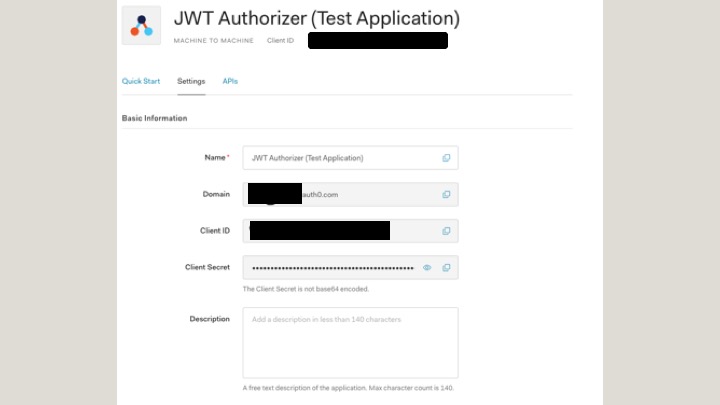
For each API in Auth0, a test application is created by default. In this example, it’s JWT Authorizer (Test Application).
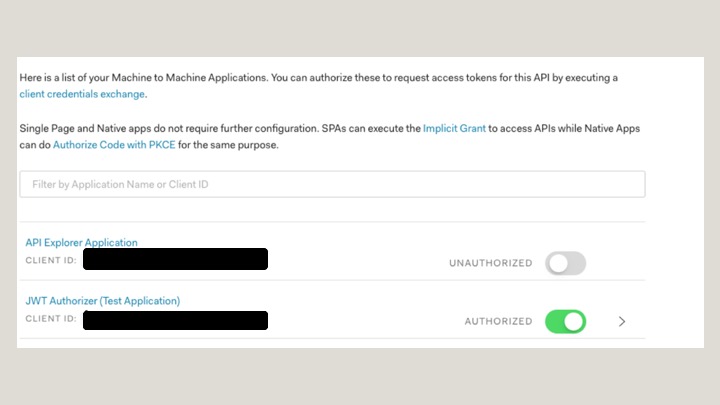
From the application settings, obtain the domain, client ID, and client secret.
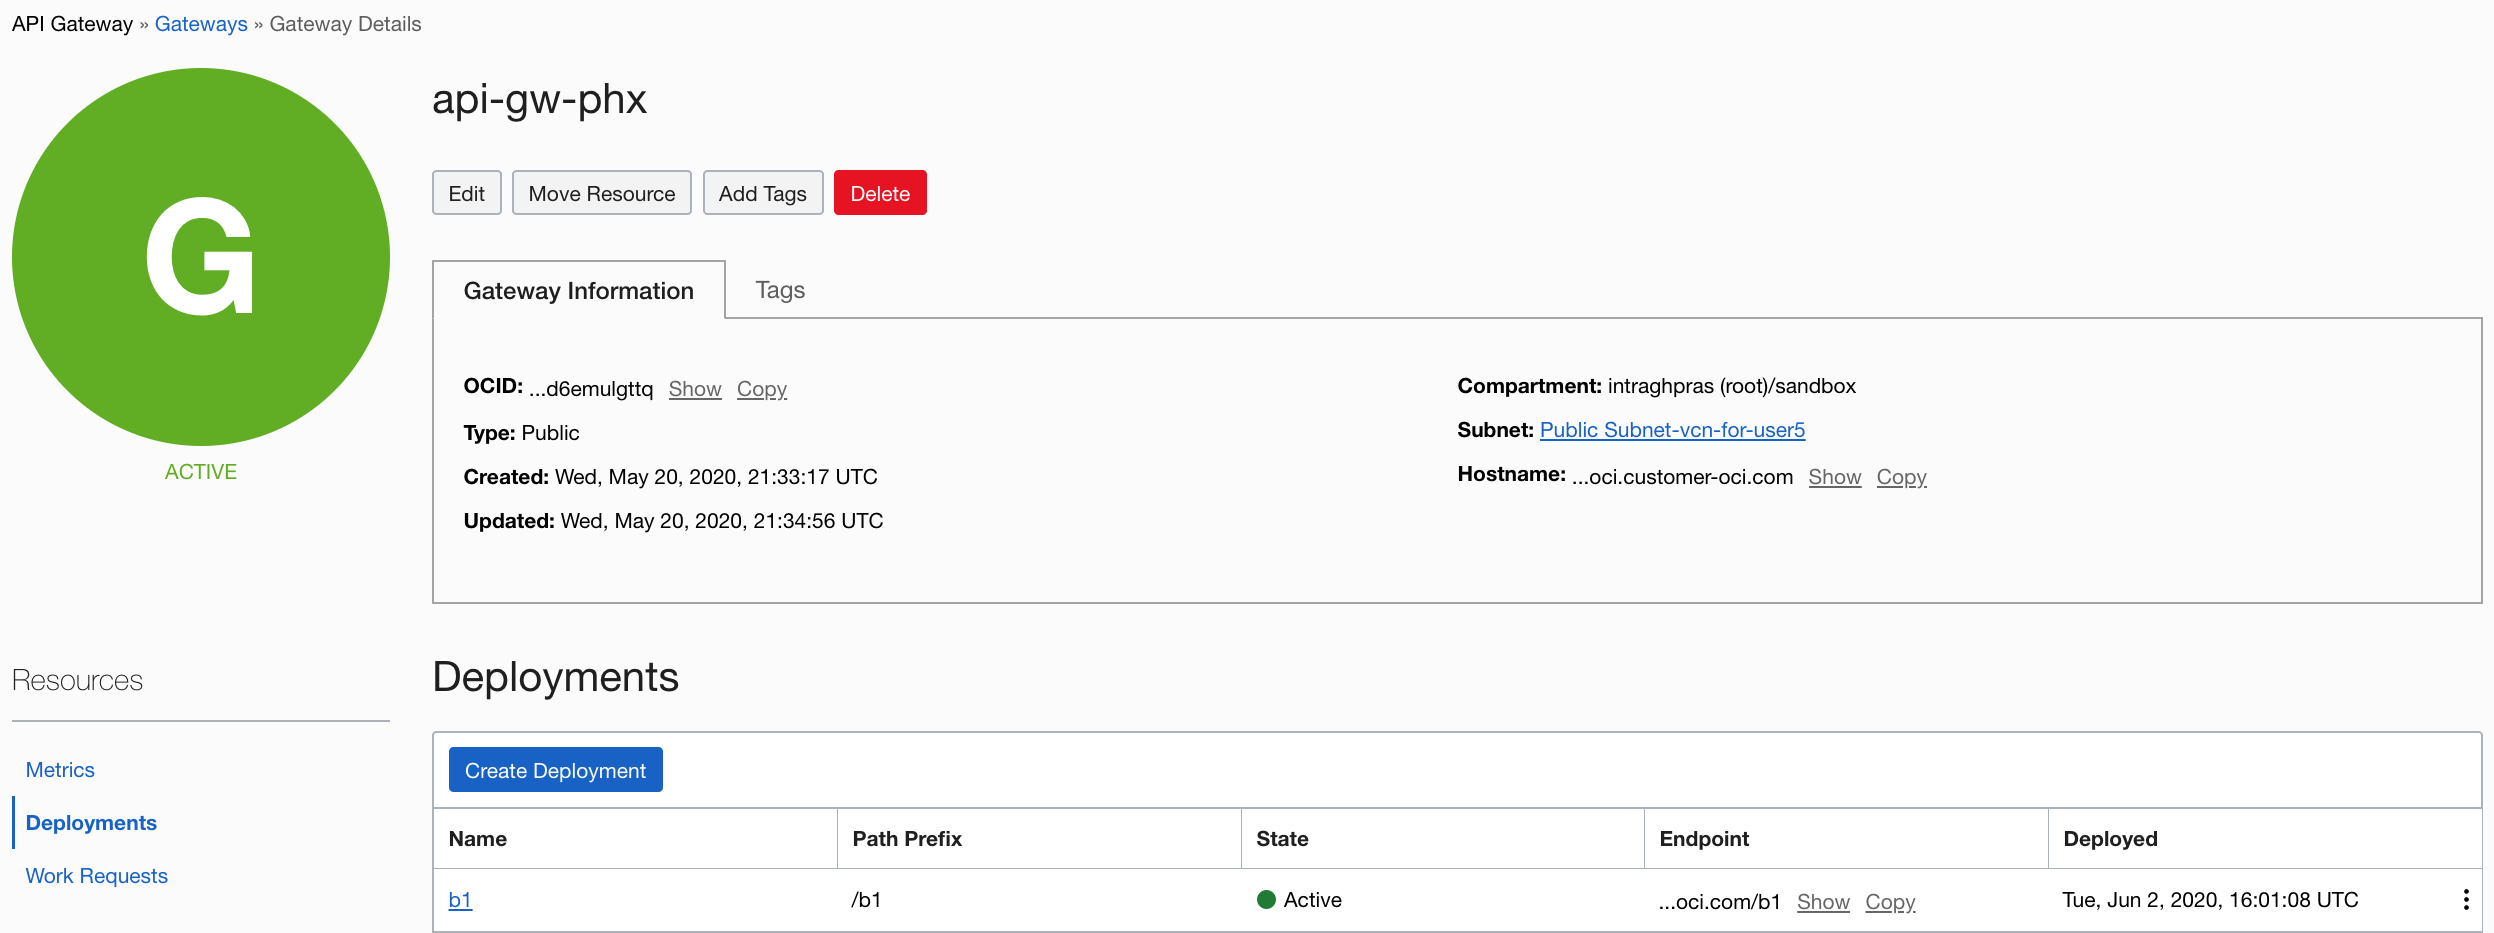
Create OCI API Gateway Deployment in OCI
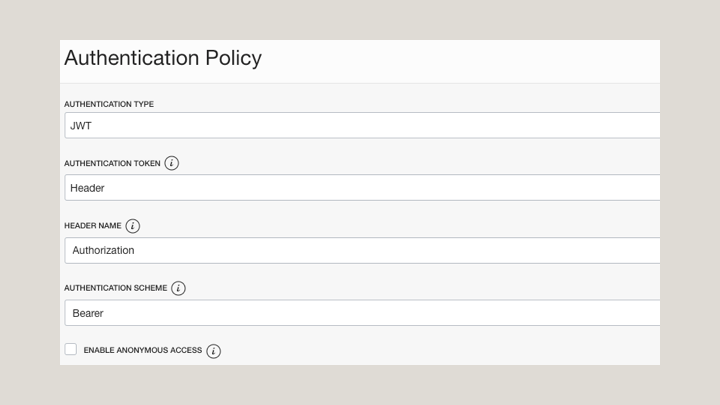
Create an authentication policy in API Gateway
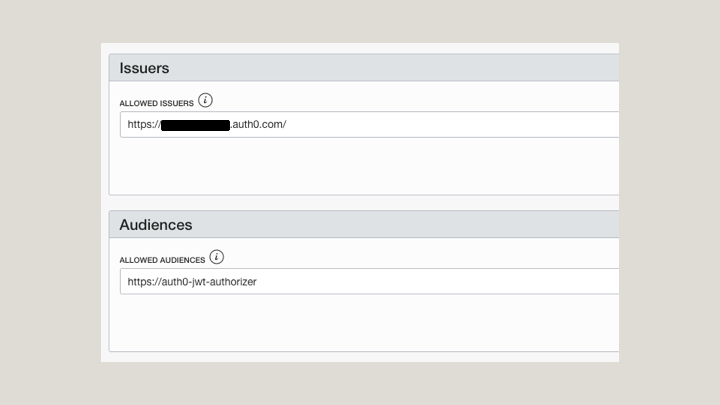
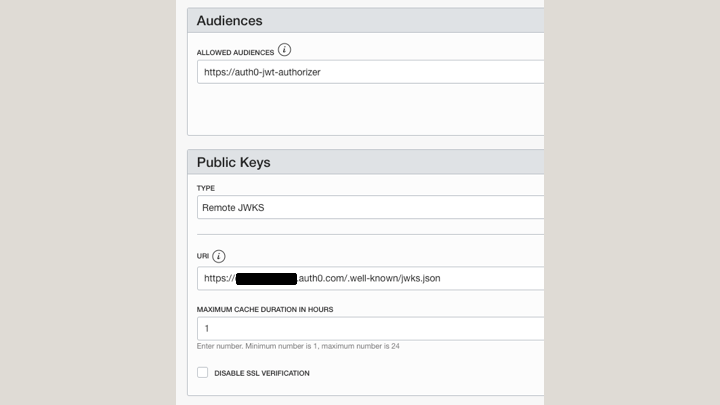
For Allowed Issuers, enter the domain that you obtained from the Auth0 Application. If your domain is “https://dev1234.auth0.com,” enter “https://dev1234.autho.com/”.
For URI, enter the JWKS end point for your application. If your domain is “https://dev1234.auth0.com”, enter “https://dev1234.auth0.com/.well-own/jwks.json”.
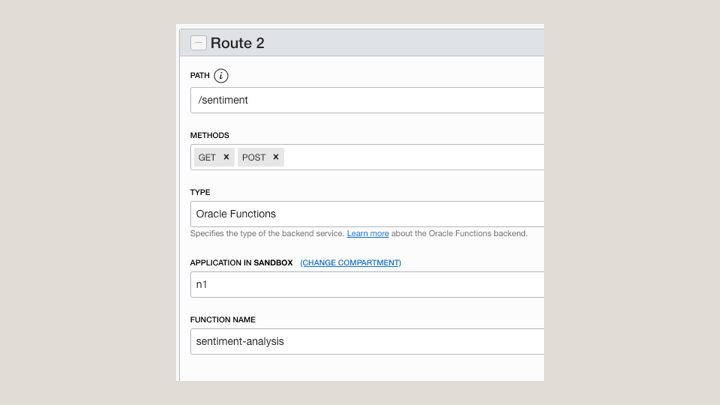
Create a Route to Your Function
Testing
First, get the JWT from Auth0. The following example uses curl. You can also go to the test tab in your Auth0 application to see another example.
curl --request POST --url https://dev-1234.auth0.com/oauth/token --header 'content-type: application/json' --data '{"client_id":"XXXXXXXXXXXXXXXX","client_secret":"XXXXXXXXXXXXXXXXXXXXXXXXXX","audience":"https://auth0-jwt-authorizer","grant_type":"client_credentials"}'
You get a response with the access token in json format.
Then, call the API using this token with an authorization header in your request to obtain authorized access to your API.
curl --request GET --url http://path_to_your_api/ --header 'authorization: Bearer AAAAAAAAAABBBBBBBBBB'
Learn More
This blog showed how to combine the API Gateway with an identity provider, so that you don’t need to worry about rolling your own authentication and authorization solutions. Your primary focus can stay on what’s important: the business logic of your API.
For more information, see the following resources: