Oracle Cloud Infrastructure offers a native firewall service where the customer can create Security Lists with stateful rules for packet inspections using IP addresses as source and destination with TCP and UDP ports. But customers also have the option to install and deploy other third party firewall products to satisfy additional requirements:
To comply with their existing or required InfoSec policy
To leverage existing operational knowledge
To add security features that are not available with Security Lists like IDS/IPS
In this blog we are featuring Check Point as many of our existing customers use Check Point Firewall products on their on-premise and they have enterprise licenses which they can use on Oracle IaaS as part of the “bring your own license” (BYOL) scheme.
The Check Point CloudGuard family of security products can be deployed as virtual appliances to protect enterprise workloads running on cloud infrastructures (IaaS) or software services and applications (SaaS) against generation V cyberattacks. This post describes the general workflow and provides some associated steps for installing the Check Point CloudGuard IaaS virtual appliance on Oracle Cloud Infrastructure. For general guidance, see the How to Deploy a Virtual Firewall Appliance on Oracle Cloud Infrastructure blog post.
Prerequisites
To perform the steps in this post, you must meet the following prerequisites:
Optionally, you can store the image in your Object Storage (for example, in us-ashburn-1).
You are familiar with the following Oracle Cloud Infrastructure terms: availability domain, bucket, compartment, image, instance, key pair, region, shape, tenancy, and VCN. For definitions, see the documentation glossary.
Sizing
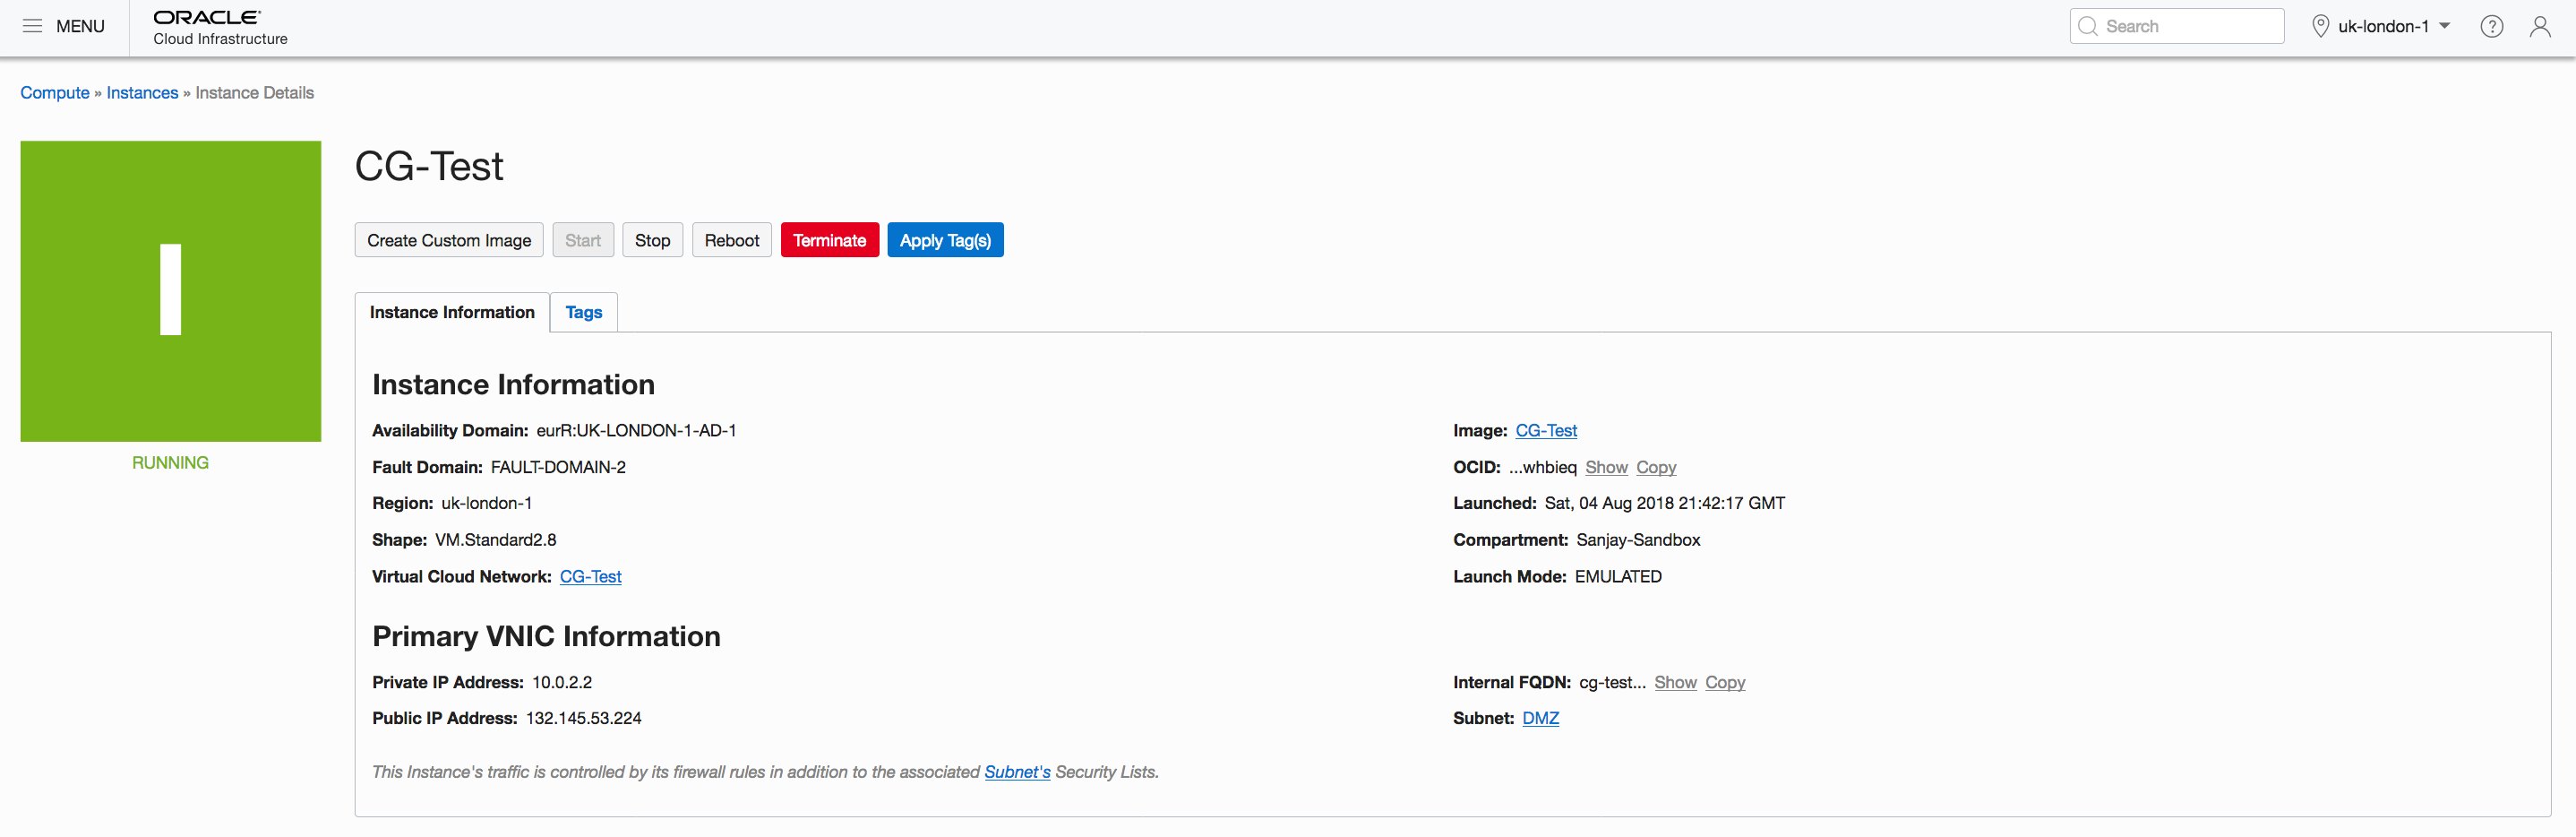
The example in this post uses the VM.Standard2.4 compute shape. For a list of Oracle Compute shapes and pricing information, see the Compute pricing page.
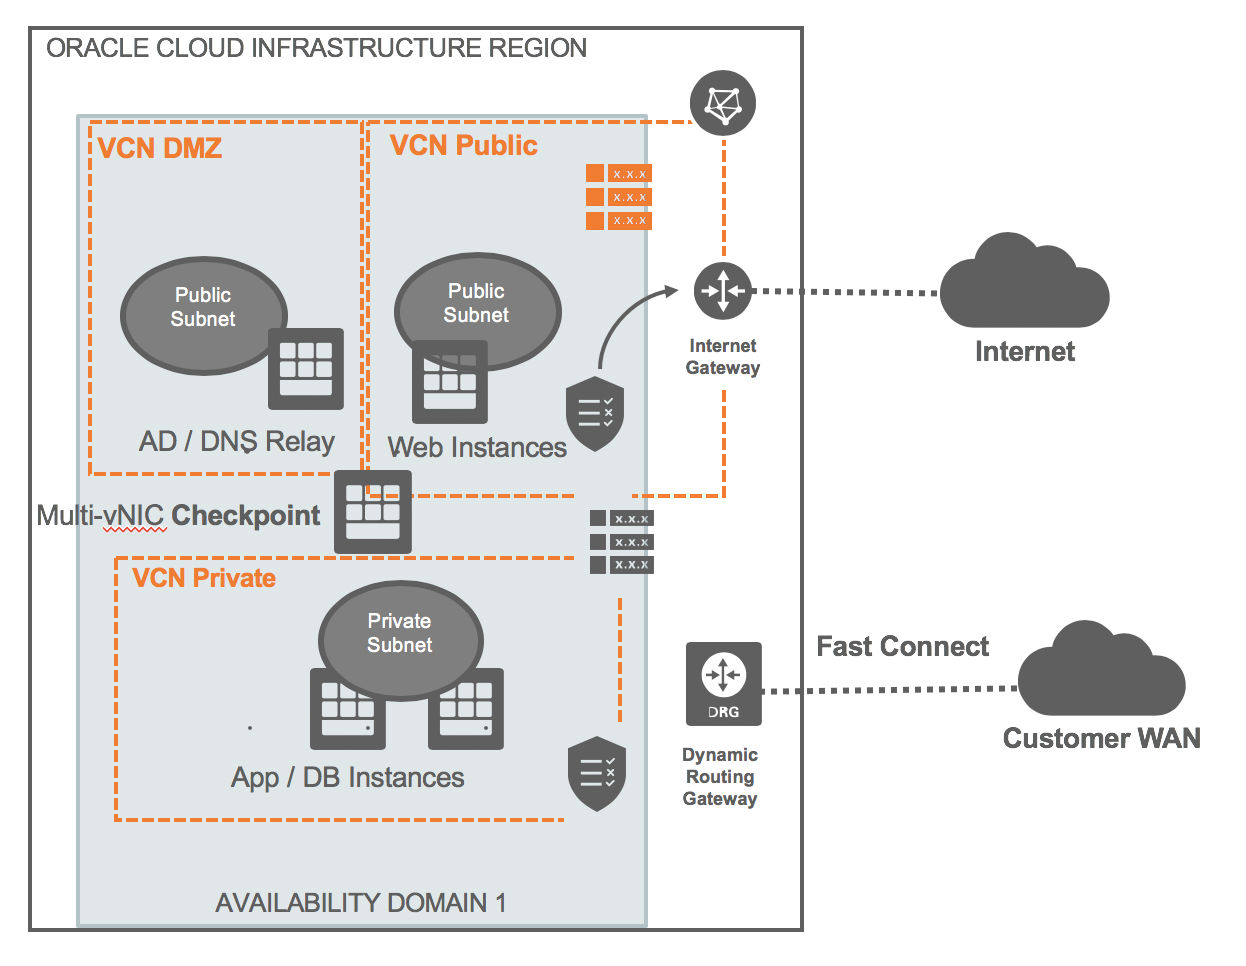
Architecture Diagram
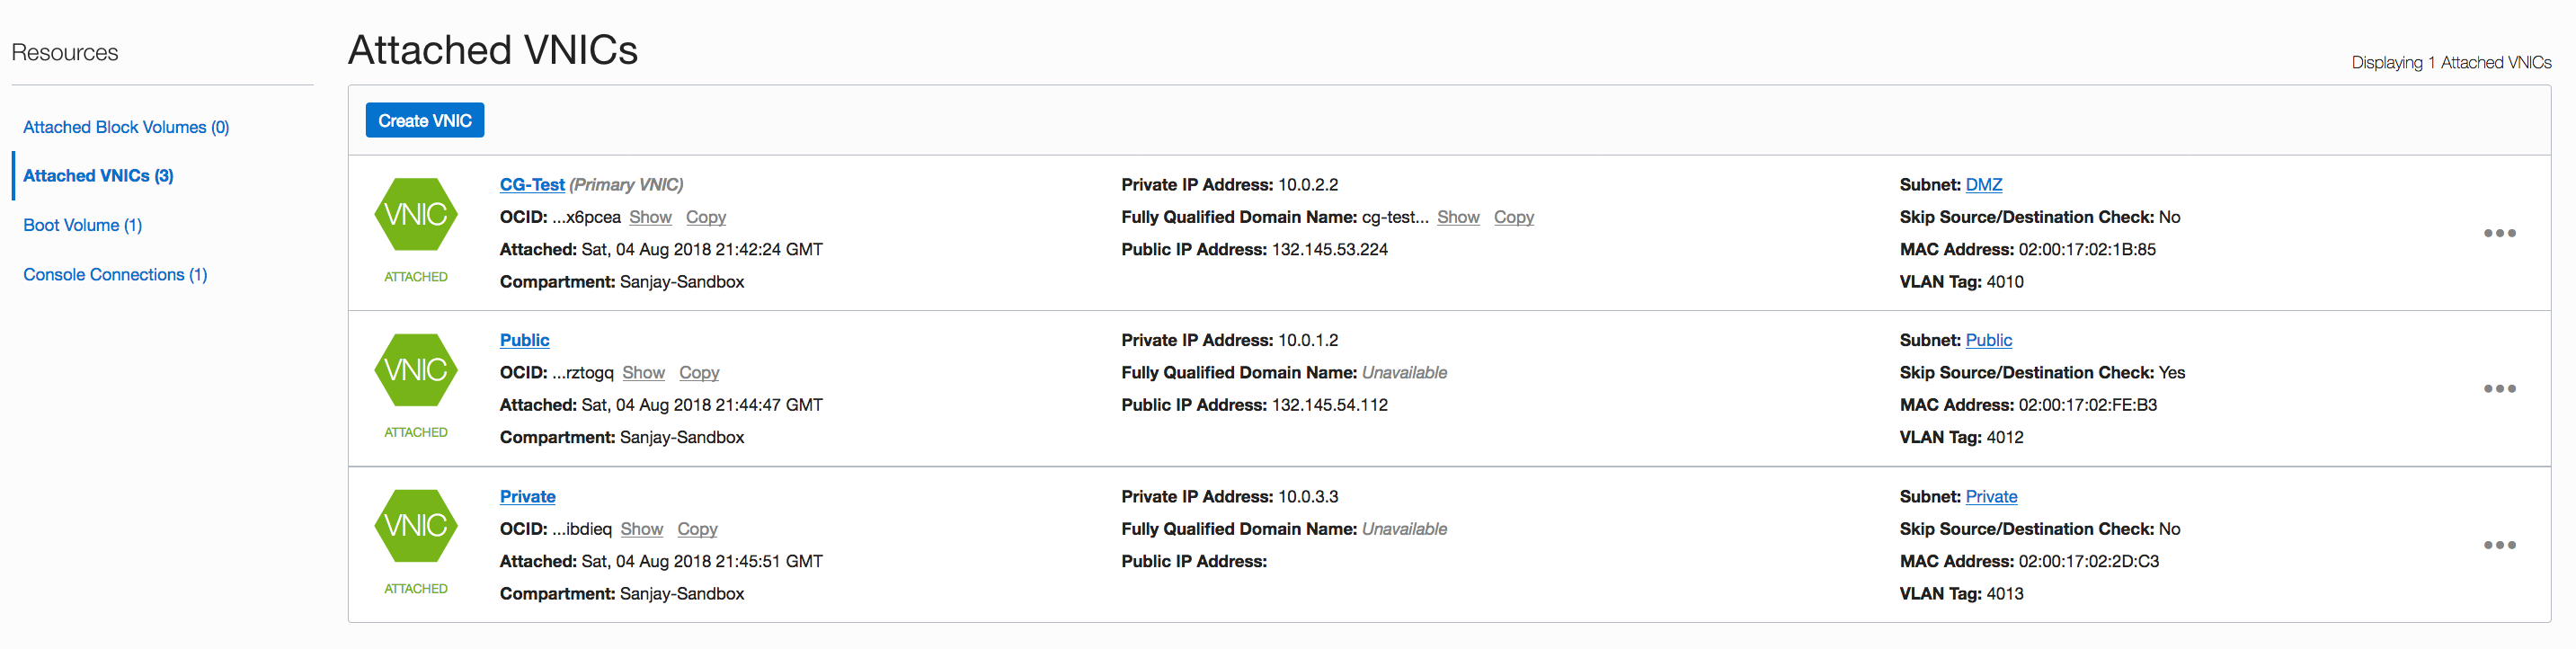
In this example, CloudGuard is deployed in a single gateway configuration, with three VNICs: one for the public internet facing traffic, the second for the DMZ, and the third for internal workloads. The internet and DMZ zones are on public subnets, and the internal zone is on a private subnet.
Interface
The following table lists the interface properties as shown in the architecture diagram:
Zone
VCN
IP Address
VNIC
Internet
Public
VNIC 1
DMZ
Public
VNIC 2
Intranet
Private
VNIC 3
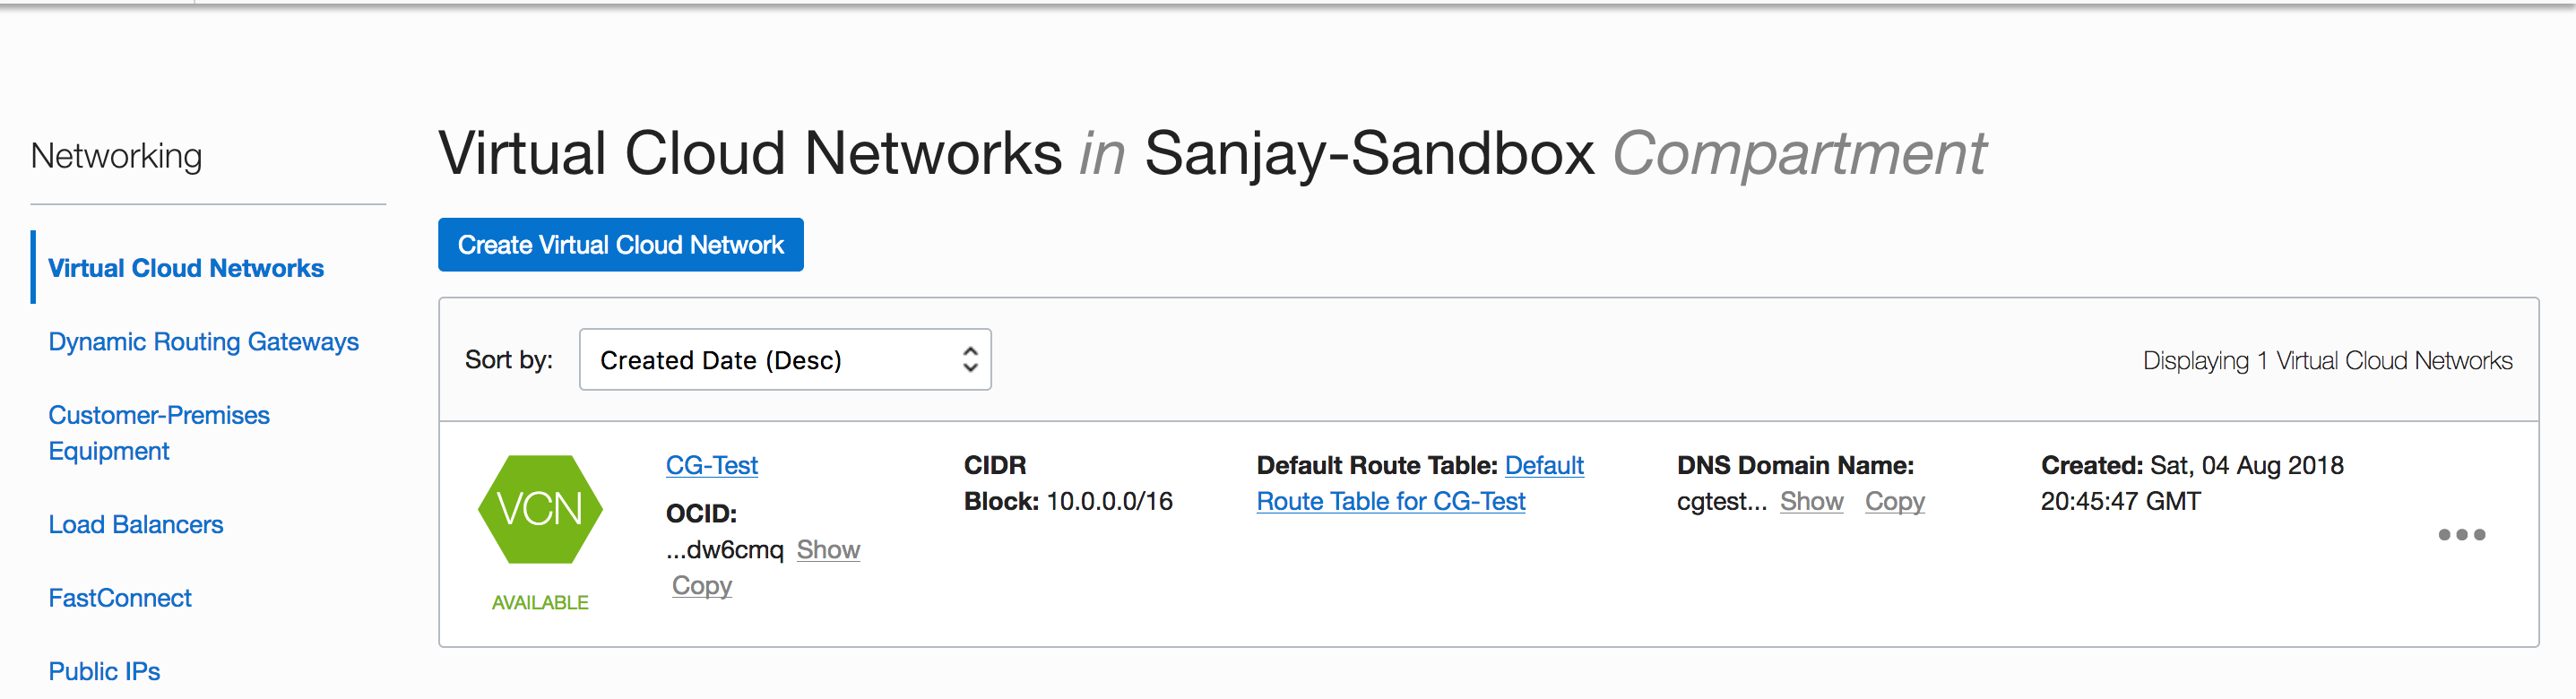
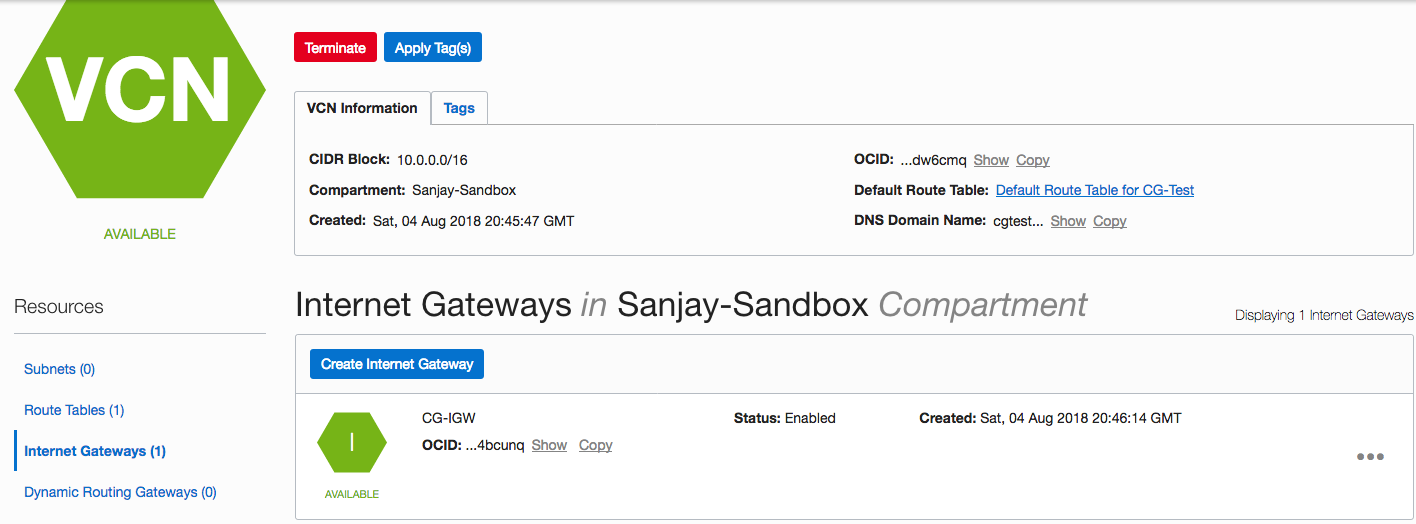
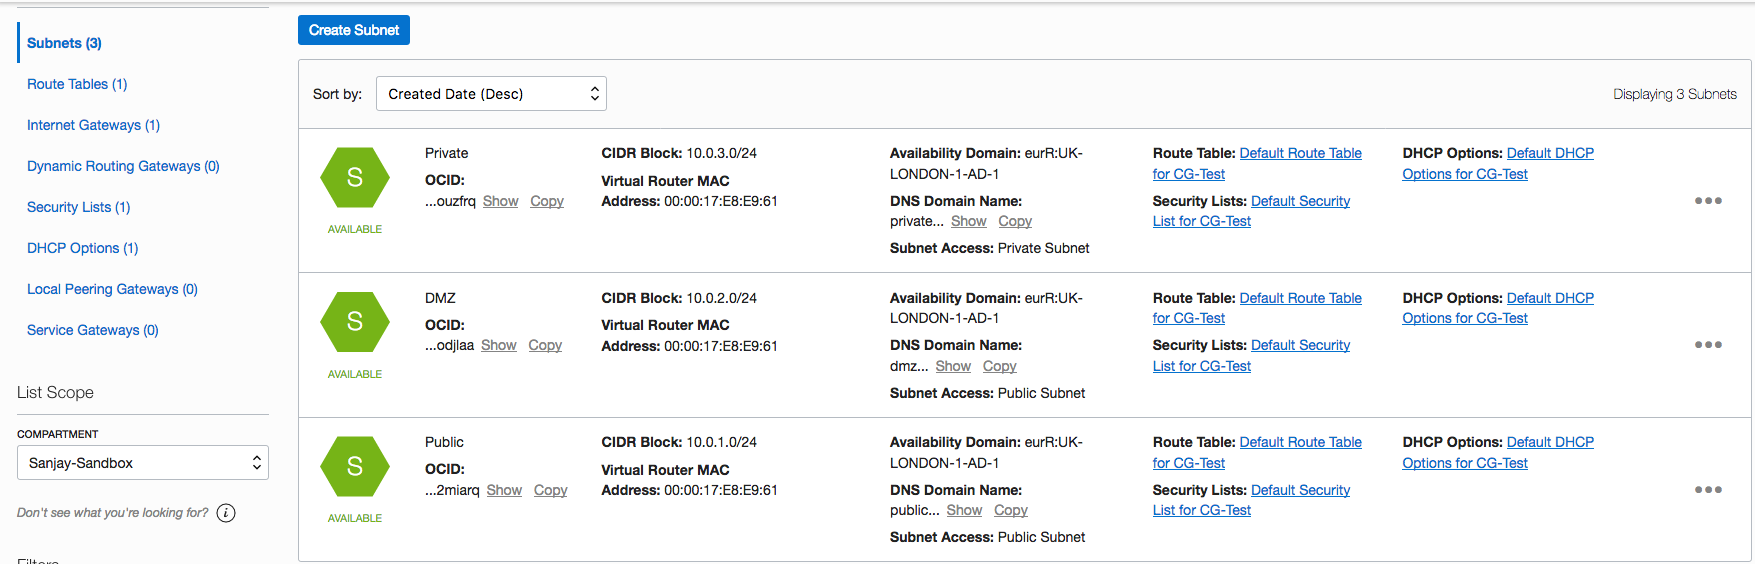
Step 1: Create the VCN
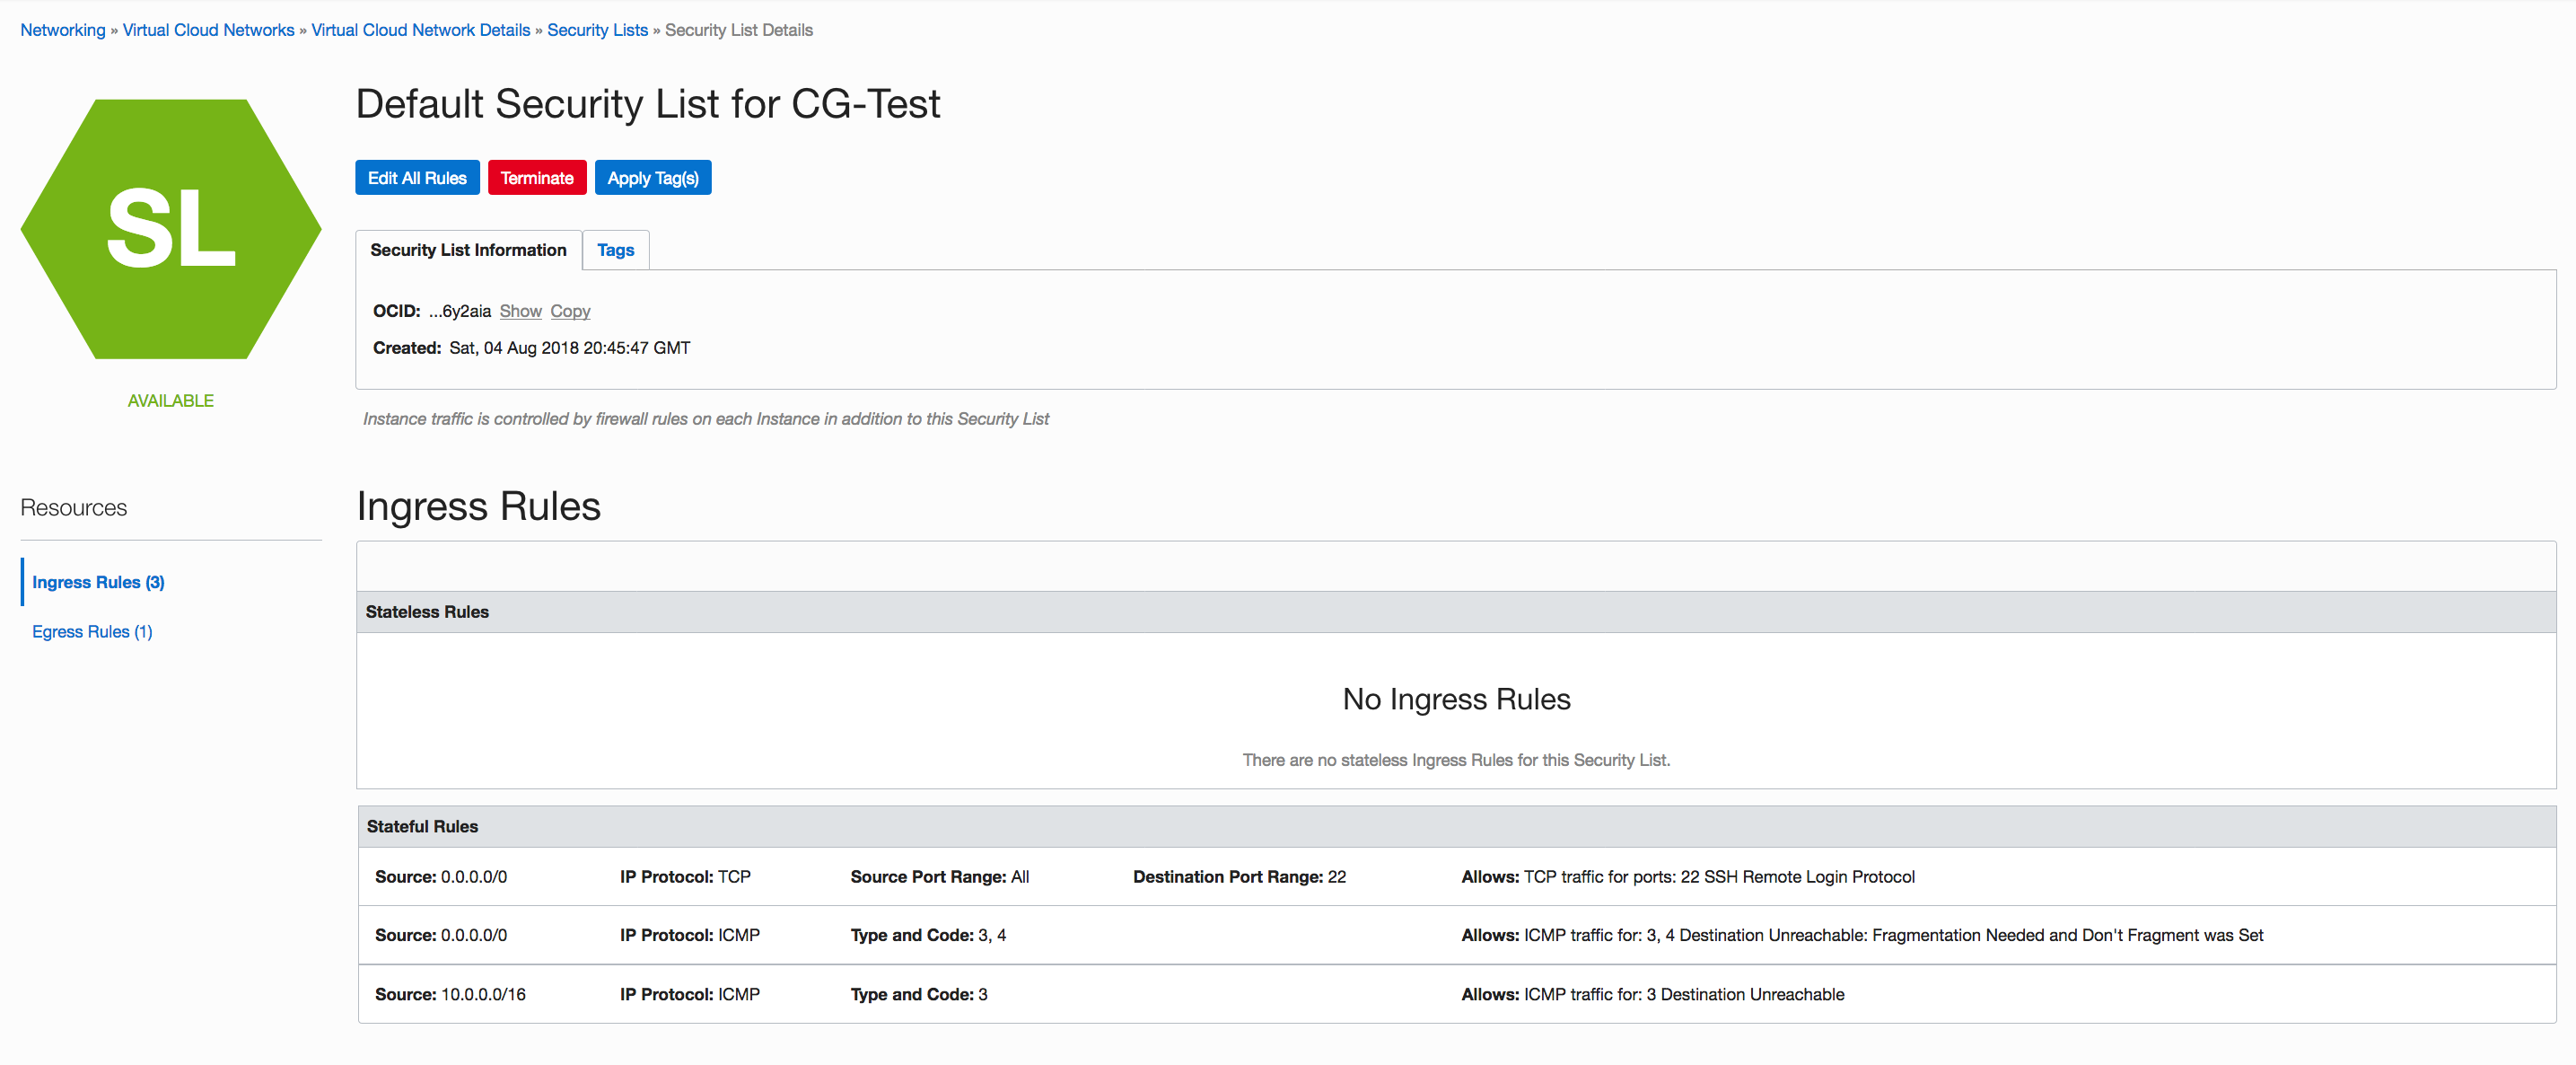
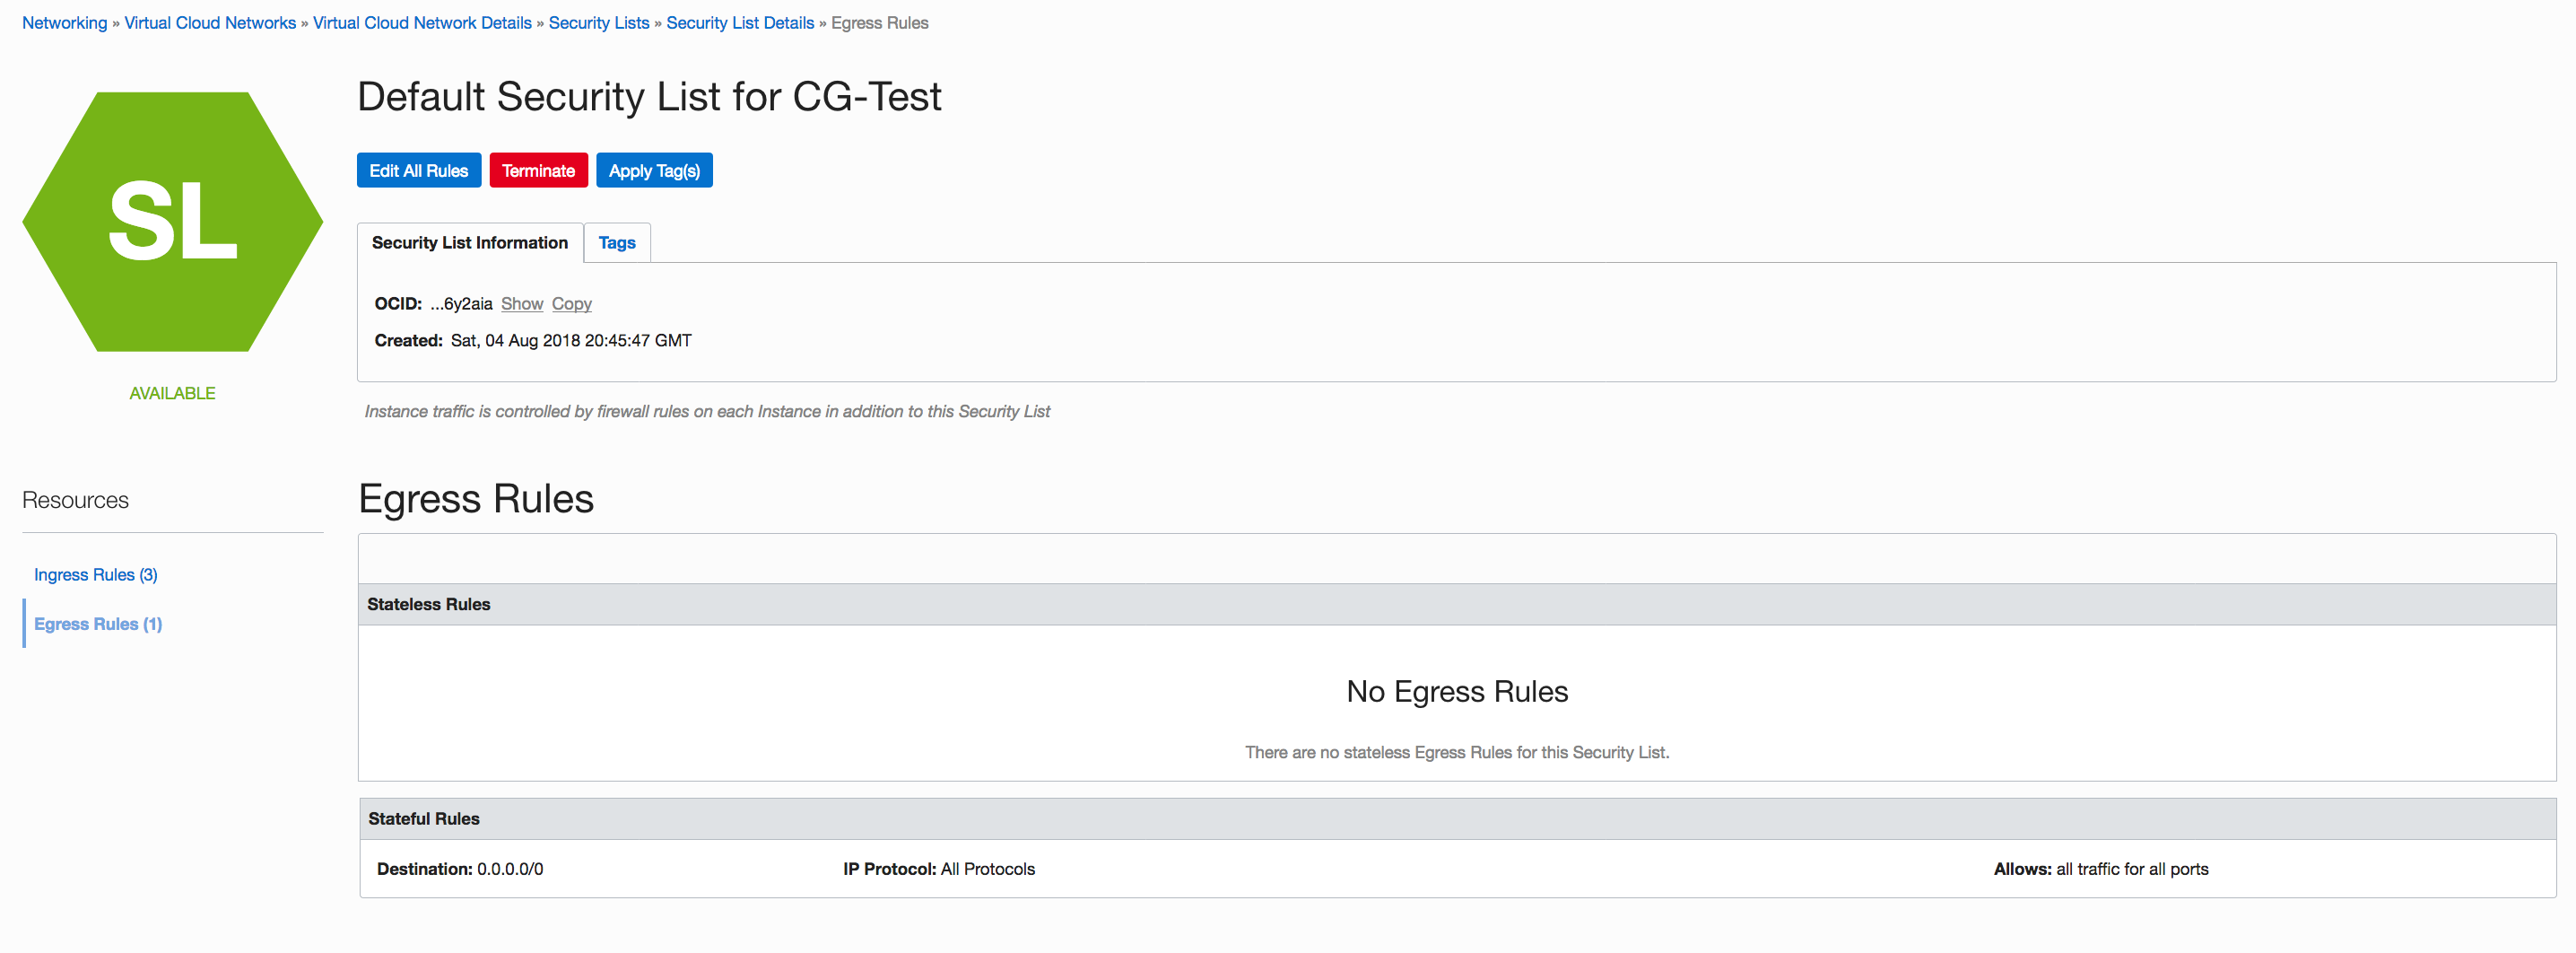
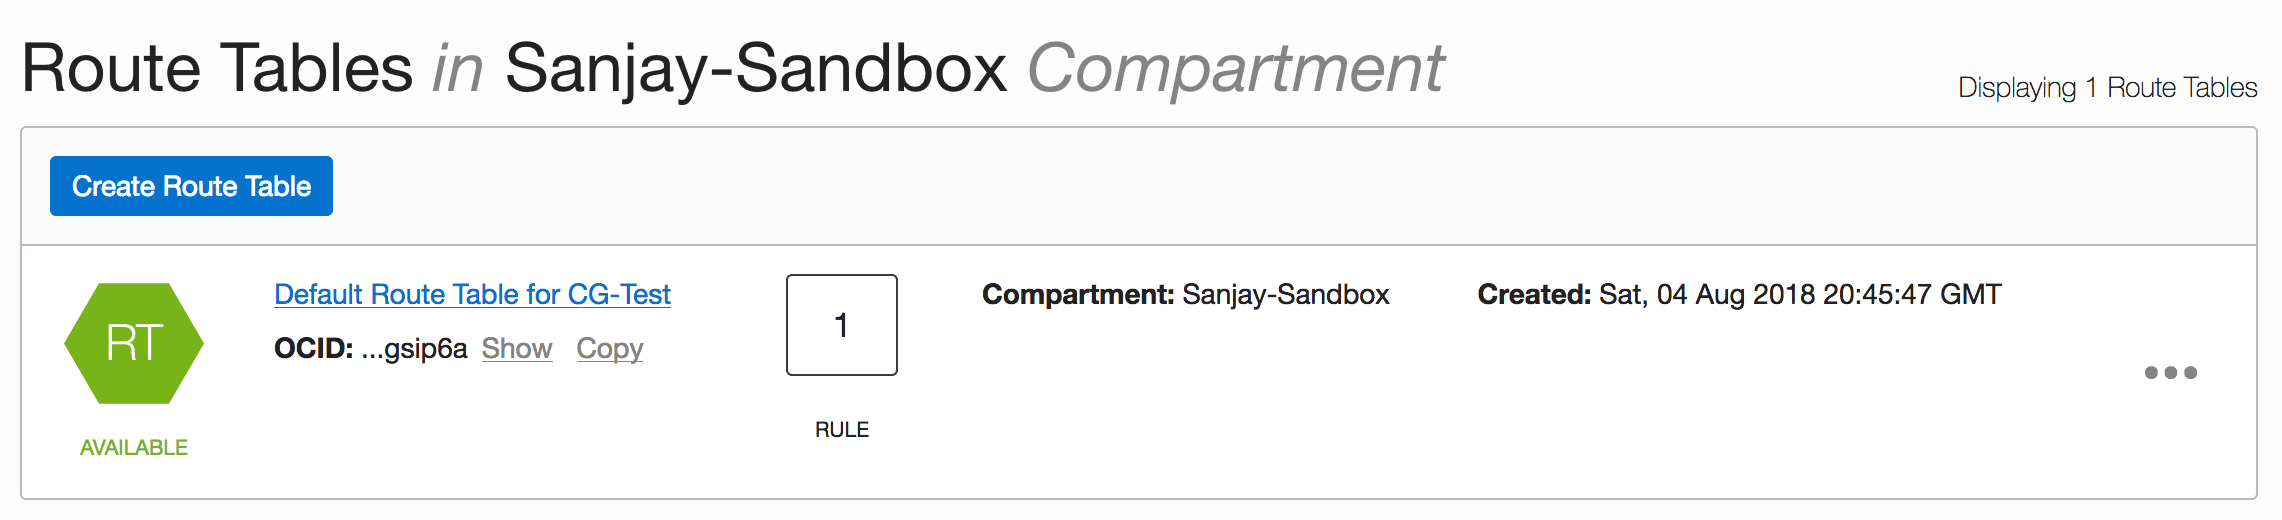
Using the Oracle Cloud Infrastructure Console, create a virtual cloud network (VCN) and its associated resources for the CloudGuard security zones. The following images show examples of the resources in the console.
VCN
Internet Gateway
Subnets
Security Lists with Ingress and Egress Rules
Route Table
Route Rule
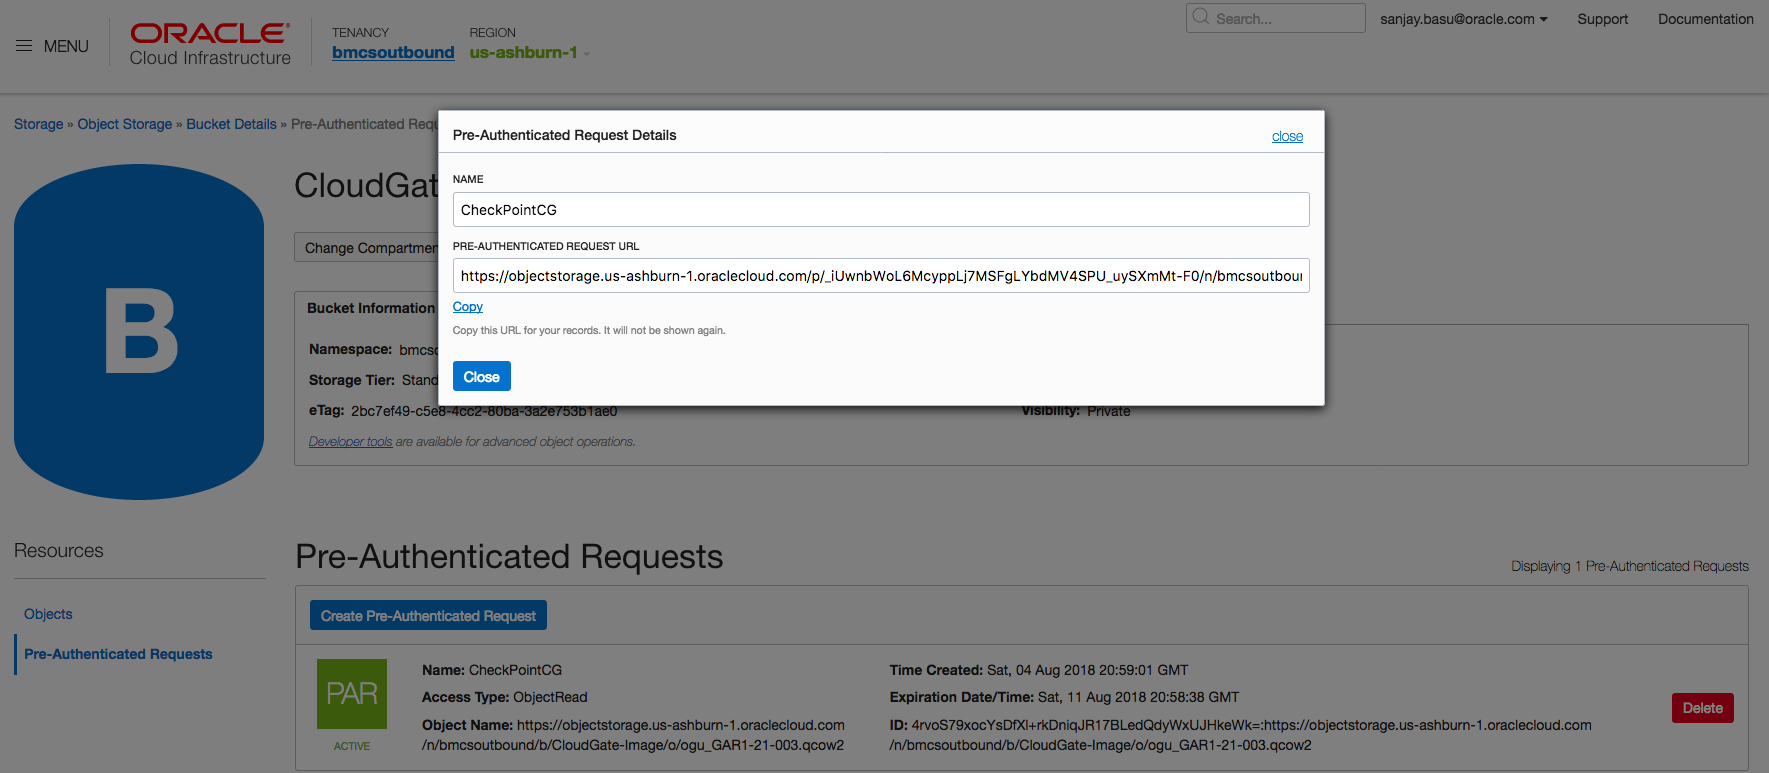
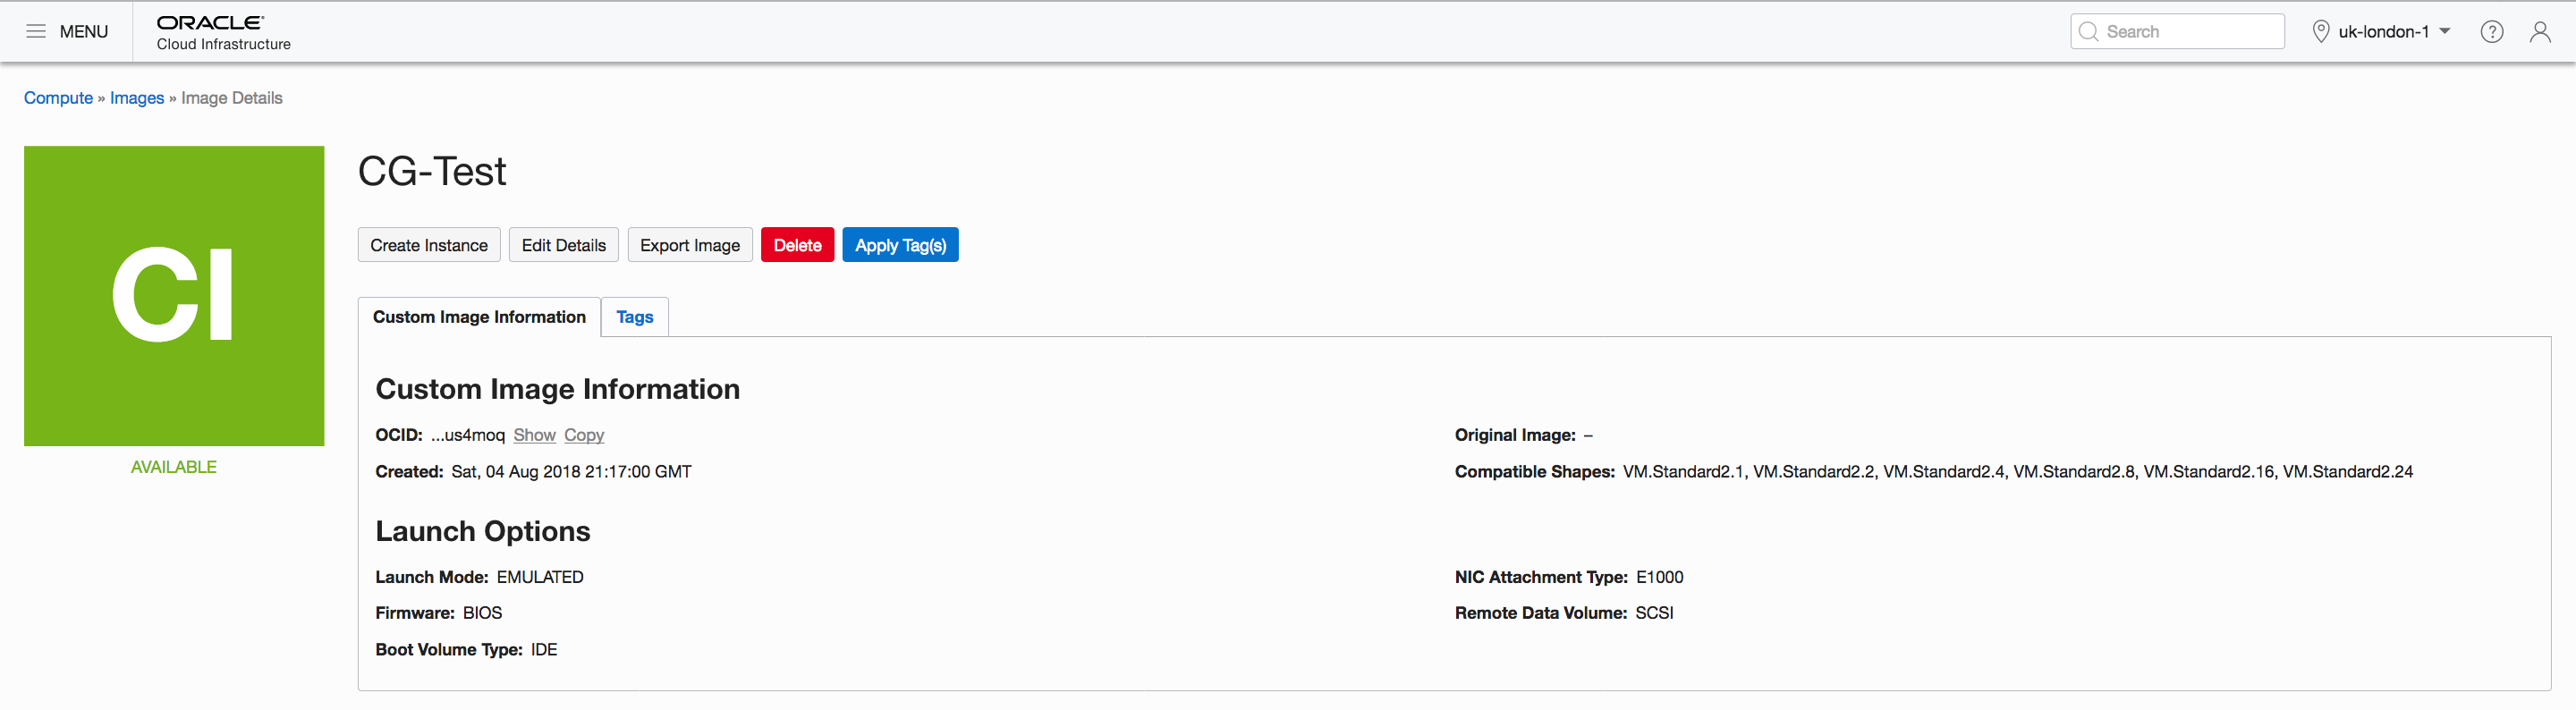
Step 2: Import the CloudGuard Image as a Custom Image
Step 4: Add More VNICs (for the DMZ Security Zone)
You can create additional VNICs when the first instance is running. To complete the additional VNIC configuration, you have to reboot.
Double-click the instance.
In the left-side menu, click Attached VNICs.
Click Create VNIC.
Enter a name.
For Virtual Cloud Network, select the VCN.
For Subnet, select a private subnet.
Select the Skip Source/Destination Check check box.
Click Create VNIC.
Step 5: Create a Serial Console Connection to the Running Instance
Create an serial console connection to the running instance by following the instructions at Instance Console Connections.
Step 6: Configure CloudGuard
Configure the gateway by using the Check Point Gaia Portal or the SmartConsole.
You can manage your Check Point Security Gateway in the following ways:
Standalone configuration: CloudGuard acts as its own Security Management Server and Security Gateway
Centrally managed: Same virtual network or outside the gateway
On premises
From a different cloud or from another Oracle Cloud Infrastructure VCN or region
From a different tenant in Oracle Cloud
Configure the Gateway from the Gaia Portal
Open an SSH client.
Set the user for the administrator. Enter set user admin password.
Set the password.
Enter save config.
Go to the Gaia Portal: https:\\<IP_address> The First Time Configuration Wizard is displayed. Perform the following steps to configure your system. When you get to the Installation Type page, you select the specific deployment of your system.
On the Deployment Options page, select Setup, Install, or Recovery.
On the Management Connection page, configure your system.
On the Internet Connection page, configure the interface to connect to the internet.
On the Device Information page, configure the DNS and proxy settings.
On the Date and Time Settings page, set the time manually, or use the Network Time Protocol (NTP).
On the Installation Type page, configure the system for your needs.
Configure the Gateway from the SmartConsole
Open the SmartConsole and go to the Gateways & Servers view.
Click the new icon and then select Gateway. The Check Point Security Gateway Creation window is displayed.
Select Wizard Mode.
Enter values on the General Properties page.
Initiate secure internal communications.
Click Finish. The Check Point Gateway General Properties window is displayed.
Configure the gateway.
Please refer to CheckPoint CloudGuard documentation for the step-by-step configuration:
In the next blog we will tackle high availability options for CloudGuard on OCI in a multi-VCN configuration. Please stay tuned!
Authors
Sanjay Basu
Senior Director - Gen AI/GPU Cloud Engineering
Sanjay focuses on the advanced services like Generative AI, Machine-Learning, GPU Engineering, Blockchain, Microservices, Industrial IoT, 5G core along with Cloud Security and Compliance. He has double masters in Computer Science and Systems Design. His PhD was in Organizational Behaviour and Applied Neuroscience. Currently, he is pursuing his second PhD in AI. His focus of research is Retentive Networks.