Large enterprises use a wide variety of operating systems. Oracle Cloud Infrastructure supports a variety of operating systems, both new and old, and enables customers to import root volumes from on-premises from multiple sources such as Oracle VM, VMware, KVM, and now VirtualBox.
VirtualBox is a powerful x86 and AMD64/Intel64 virtualization product for enterprises. This blog post and its related video, Importing VirtualBox Virtual Machines to Oracle Cloud Infrastructure, review the steps required to create and then import a VirtualBox SUSE Linux 15 virtual machine (VM). This process also works with existing VMs, which makes “move and improve” migrations to Oracle Cloud Infrastructure much easier.
Create a VirtualBox VM
Start by creating a simple VirtualBox VM. See the video for details. Remember, this process also works for any preexisting VMs.
Prepare a VirtualBox VM for Import
Prepare the VM to boot in the cloud by verifying that the image is ready for import. Images must meet the following requirements:
- Under 300 GiB
- Include a master boot record (MBR)
- Configured to use BIOS (not UEFI)
- A single disk
- A VMDK or QCOW2 file
The example in this post uses a copy of openSUSE Leap installed with just the default settings to show how it works.
You must also ensure that the instance has security settings appropriate for the cloud, such as enabling its firewall and allowing only SSH logins that use private key identifiers. For more information about custom image requirements, see the “Custom Image Requirements” section of Bring Your Own Custom Image for Paravirtualized Mode Virtual Machines.
As required, also perform the following tasks:
- Add a serial console interface to troubleshoot the instance later, if required.
- Add the KVM paravirtualized drivers.
- Configure the primary NIC for DHCP.
Enable the Serial Console
After you confirm the image settings, enable the serial console to troubleshoot the VM later, if required.
-
Edit the /etc/default/grub file to update the following values:
- Remove resume= from the kernel parameters; it slows down boot time significantly.
- Replace GRUB_TERMINAL=”gfxterm” with GRUB_TERMINAL=”console serial” to use the serial console instead of graphics.
- Add GRUB_SERIAL_COMMAND=”serial –unit=0 –speed=115200″ to configure grub’s serial connection.
- Replace GRUB_CMDLINE_LINUX=”” with GRUB_CMDLINE_LINUX=”console=tty0 console=ttyS0,115200″ to add the serial console to the Linux kernel boot parameters.
-
Regenerate initramfs as follows:
grub2-mkconfig -o /boot/grub2/grub.cfg -
To verify, reboot the machine, and then run dmesg and look for the updated kernel parameters.
dmesg | grep console=ttyS0
For more information about these requirements, see the “Enabling Serial Console Access” section in Preparing a Custom Linux Image for Import.
Enable Paravirtualized Device Drivers
Next, add paravirtualized device support by building the virtio drivers into the VM’s initrd.
-
Because this action works only on machines with a Linux kernel of version 3.4 or later, check that the system is running a modern kernel:
uname -a -
Rebuild initrd with the dracut tool, telling it to add the qemu module:
dracut --logfile /var/log/dracut.log --force --add qemu -
Check lsinitrd to verify that the virtio drivers are now present:
lsinitrd | grep virtio
For more information, see the dracut(8) and lsinitrd(1) manuals.
Enable Dynamic Networking
Next, clear any persistent networking configurations so that the VM doesn’t try to keep using the interfaces that had been available in VirtualBox.
To do that, empty the 70-persistent-net.rules file (but keep the file in place) by running:
> /etc/udev/rules.d/70-persistent-net.rulesNote: This change is reset when the VM is restated. If the VM is restarted in VirtualBox before it is imported, you must perform this step again.
For more information, see the udev(7) manual and Predictable Network Interface Names.
Power Off the VM
With all that done, power off the instance by typing:
halt –pNow the VM is fully prepared.
Upload the Image
After you have powered off the VM, start copying the VM disk from your desktop to Object Storage. Your desktop needs to have the Oracle Cloud Infrastructure CLI installed and configured. See the CLI Quickstart if you are doing this for the first time.
Use the OCI CLI to upload the file. The Object Storage web console supports only files up to 2 GiB, so it’s unlikely it would work for your image. But even if the image is small, the CLI uploads much faster.
- In the Oracle VM VirtualBox Manager window, go to the VM index.
- Right click on the instance and select Show in Finder. Note the directory path and file name of the VM disk.
- Open the terminal and upload the file by using the VM’s directory path and file name, your Oracle Cloud Infrastructure tenancy’s namespace, and the Object Storage bucket name:
VM_DIR="/Users/j/VirtualBox VMs/openSUSE-Leap-15.0/"
VM_FILE="opensuse-leap-15.0.vmdk"
NAMESPACE="intjosephholsten"
BUCKET_NAME="images"

cd "${VM_DIR}"
oci os object put -ns "${NAMESPACE}" -bn "${BUCKET_NAME}" --file "${VM_FILE}"
The upload might take some time, depending on the size of the image and available bandwidth.
For more information about uploading objects, see the CLI instructions for uploading an object to a bucket in Managing Objects.
Import the Image
After the upload is complete, log in to the Oracle Cloud Infrastructure Console to import the image.
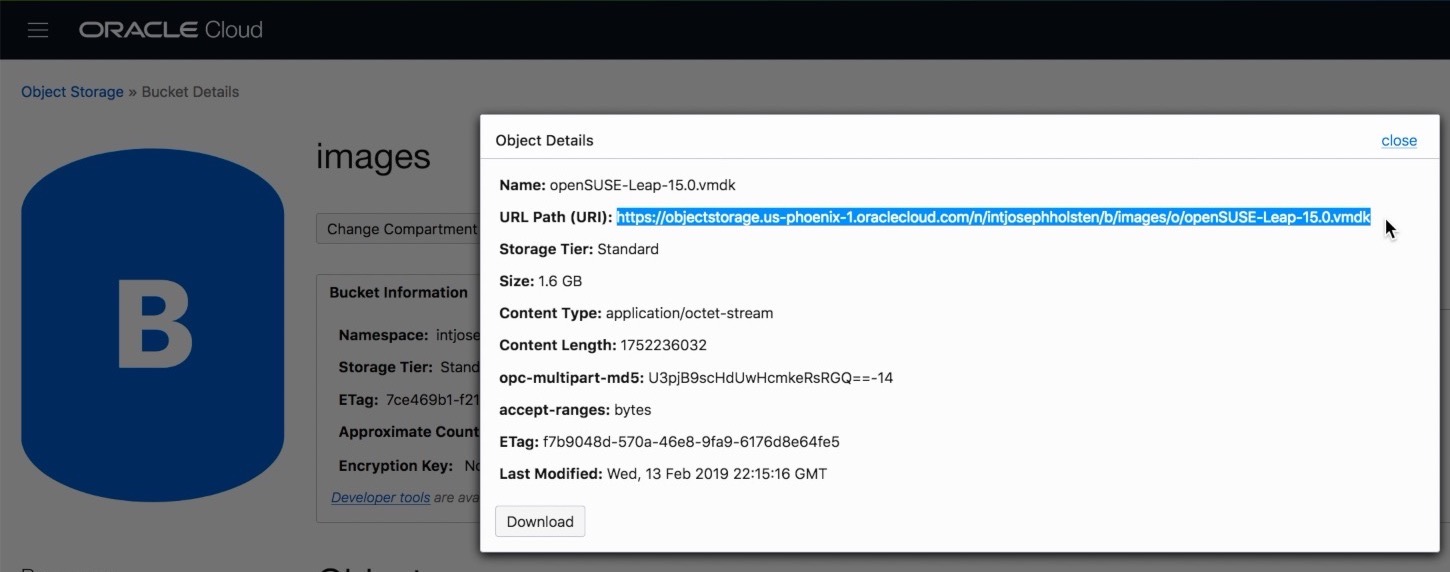
-
Go to the details page of the bucket to which you uploaded the image, and look at the details of the image to find its URL. You will use the URL to import the image.
-
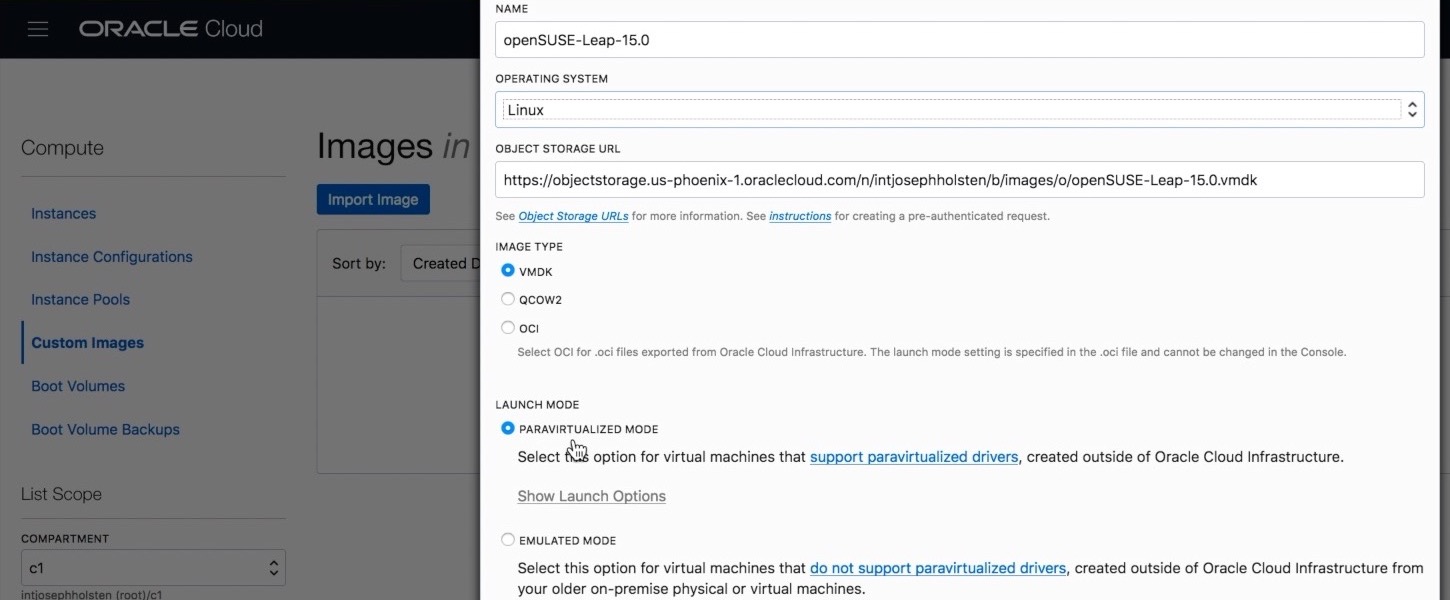
In the navigation menu, select Compute, and then select Custom Images.
-
Click Import Image.
If the system was able to use paravirtualized drivers, select paravirtualized mode to get the best performance.
After the image import process starts, it takes some time to complete.
For more information, see Importing Custom Linux-Based Images.
Access the Instance
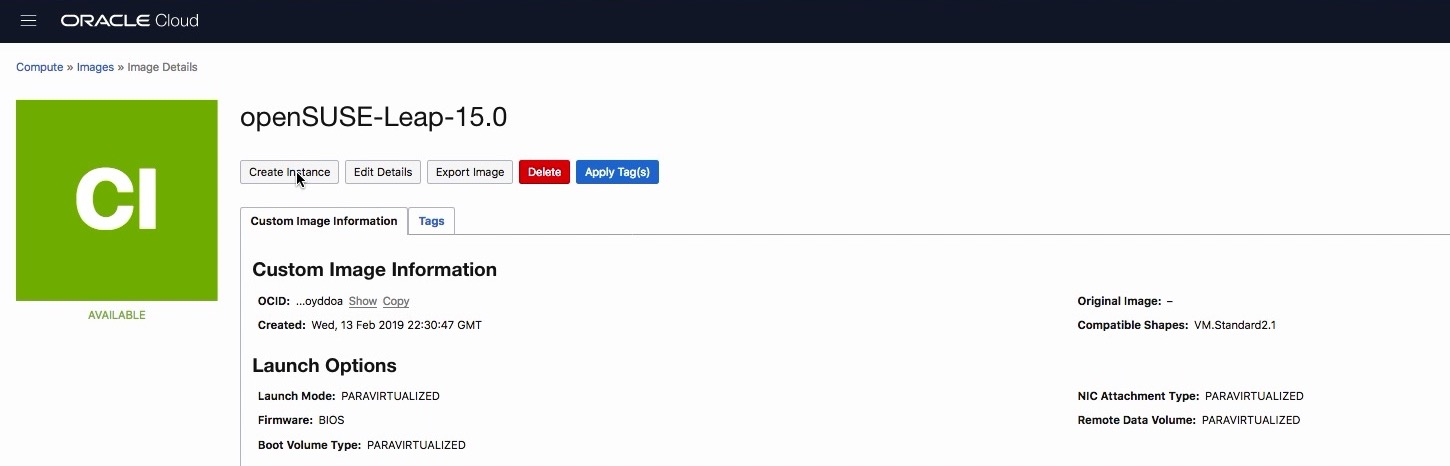
After the image is imported, you can launch a new instance directly from the image details page.
After the instance is running, use SSH to connect to it by using its public IP address and the same login credentials used to access the machine when it was running on VirtualBox.
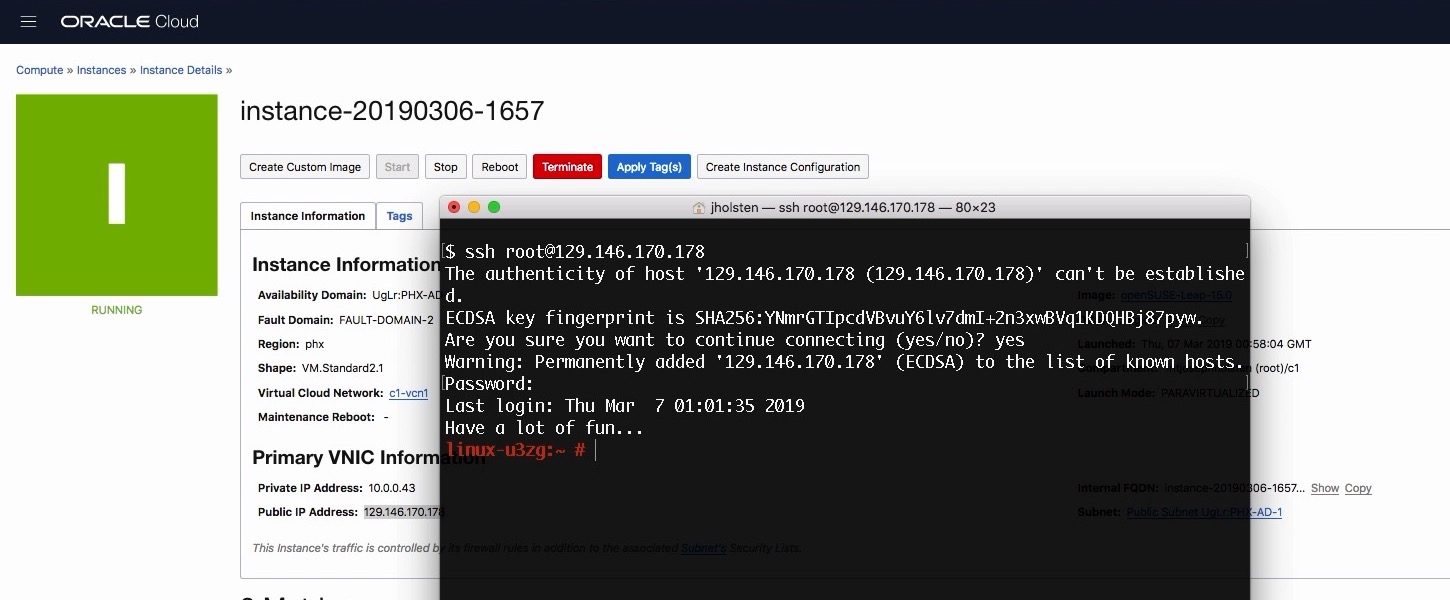
You have successfully imported a VirtualBox VM to Oracle Cloud Infrastructure!
Try it for yourself. If you don’t already have an Oracle Cloud account, go to http://cloud.oracle.com/tryit to sign up for a free trial today.