This post provides detailed instructions on how to deploy Kubeflow on Oracle Cloud Infrastructure Container Engine for Kubernetes.
Container Engine for Kubernetes is a fully managed, scalable, and highly available service that you can use to deploy your containerized applications to the cloud. You can use this service when your development team wants to reliably build, deploy, and manage their cloud native applications. You just specify the compute resources that your applications require, and Container Engine for Kubernetes provisions them on Oracle Cloud Infrastructure automatically.
Kubeflow is an open-source project that makes the deployment and management of machine learning workflows on Kubernetes easy, portable, and scalable. Kubeflow automates the deployment of TensorFlow on Kubernetes. TensorFlow provides a state-of-the-art machine learning framework, and Kubernetes automates the deployment and management of containerized applications.
Step 1: Create a Kubernetes Cluster
Create a Kubernetes cluster with Container Engine for Kubernetes. You can create this cluster manually by using the Oracle Cloud Infrastructure Console or automatically by using Terraform and the SDK.
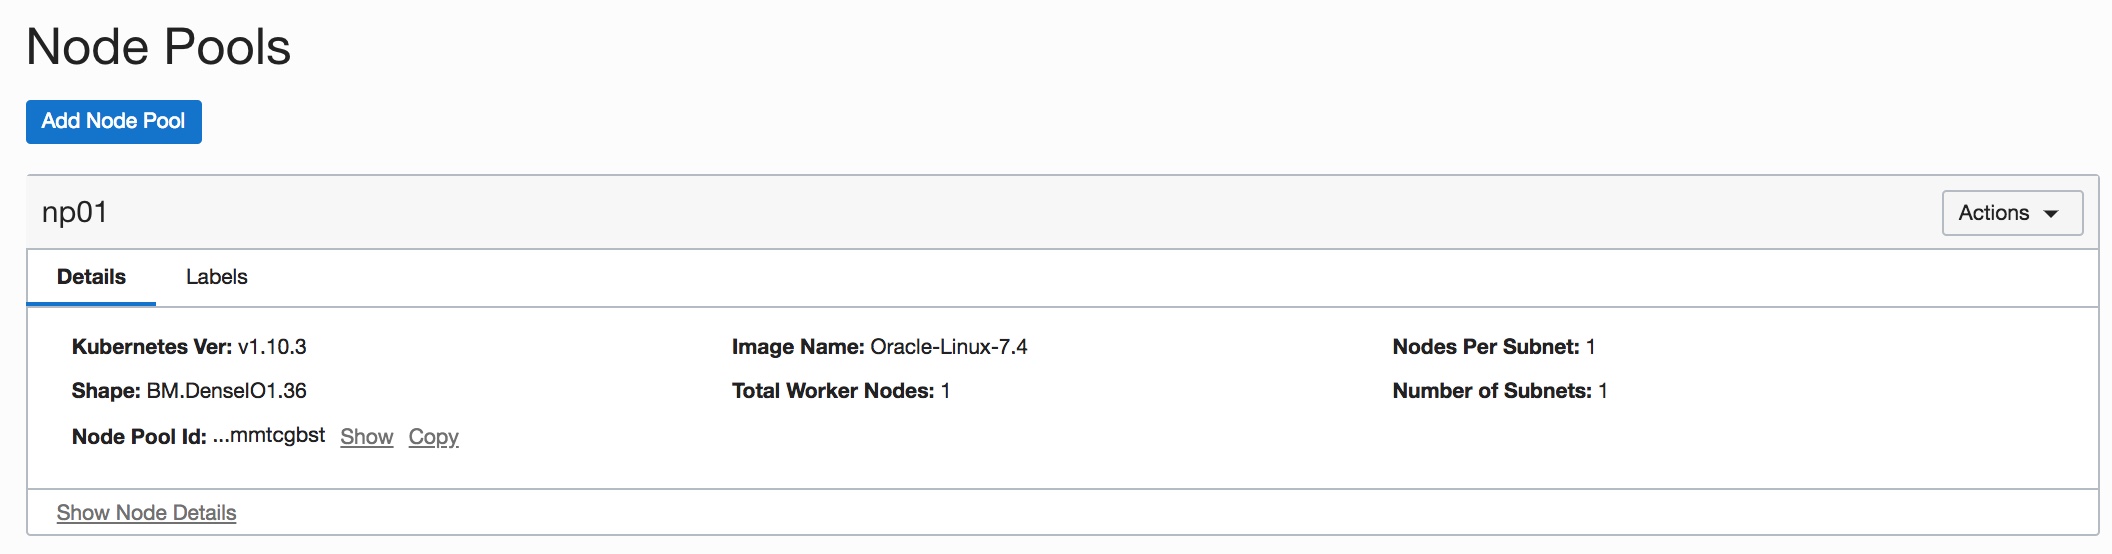
For better performance, we recommend using a bare metal compute shape to create nodes in your node pools. Choose the right compute shape and number of nodes in the node pools, depending on the size of your data-set and on the compute capacity needed for your model training.
As an example, the following node pool was created with the BM.DenseIO1.36 shape which has 36 OCPUs and 512 GB memory.
Container Engine for Kubernetes creates a Kubernetes “kubeconfig” configuration file that you use to access the cluster using kubectl and Kubernetes Dashboard.
Step 2: Download the Kubernetes Configuration File
Download the Kubernetes configuration file of the cluster that you just created. This configuration file is commonly known as a kubeconfig file for the cluster.
At this point, you can use kubectl or the Kubernetes dashboard to access the cluster.
Please note that after your run “kubectl proxy” command, you need to use following URL to access the Kubernetes dashboard.
http://localhost:8001/api/v1/namespaces/kube-system/services/https:kubernetes-dashboard:/proxy/
Step 3: Deploy Kubeflow
After Kubernetes cluster is created, you can deploy Kubeflow. In this blog post, we will deploy Kubeflow with ksonnet. Ksonnet is a framework for writing, sharing and deploying Kubernetes manifests. It helps to simplify Kubernetes deployment. Please check whether ksonnet is installed on your local system. If it is not, install ksonnet before proceeding.
Now you can deploy Kubeflow by using following command, provided in the Kubeflow documentation:
export KUBEFLOW_VERSION=0.2.2
curl https://raw.githubusercontent.com/kubeflow/kubeflow/v${KUBEFLOW_VERSION}/scripts/deploy.sh | bash
Note: The preceding command enables the collection of anonymous user data to help improve Kubeflow. If you don’t want data to be collected, you can explicitly disable it. For instructions, see the Kubeflow Usage Reporting guide.
During the Kubeflow deployment, you might encounter the following error:
"jupyter-role" is forbidden: attempt to grant extra privileges:
To work around this error, you need to grant your own user the required role-based access control (RBAC) role to create or edit other RBAC roles. Then, run the following command:
$kubectl create clusterrolebinding default-admin --clusterrole=cluster-admin --user=ocid.user.oc1..aaaaa....
Step 4: Access Notebook
Now you are ready to access Jupyter Notebook and start to building your ML/AI models with your data sets.
To connect your notebook locally, you can run the following command:
$kubectl get pods --selector="app=tf-hub" --output=template --template="{{with index .items 0}}{{.metadata.name}}{{end}}"
$kubectl port-forward tf-hub-0 8000:8000
Summary
With OCI Container Engine for Kubernetes and Kubeflow, you can easily setup a flexible and scalable machine learning and AI platform for your projects. You can focus more on building and training your models rather than on managing the underlying infrastructure.