They are here! Initially announced at OOW 2019 and described in my post-OOW blog post, the blockchain tables are now generally available as mentioned in the Introducing Oracle Database 21c post announcing availability of the latest release in the Oracle Cloud Database Service Virtual Machine (for RAC and single instance) and Bare Metal Service (single instance). It’s also available in the Autonomous Database Free Tier Service in Ashburn (IAD), Phoenix (PHX), Frankfurt (FRA) and London (LHR) regions. General availability of Oracle Database 21c for on-prem platforms (including Exadata, Linux and Windows) will follow along in 2021, and the Blockchain Tables will also become available in 19c database when 19.10 Release Update (RU) is available in early 2021. So what exactly are the Blockchain Tables and why should you care?
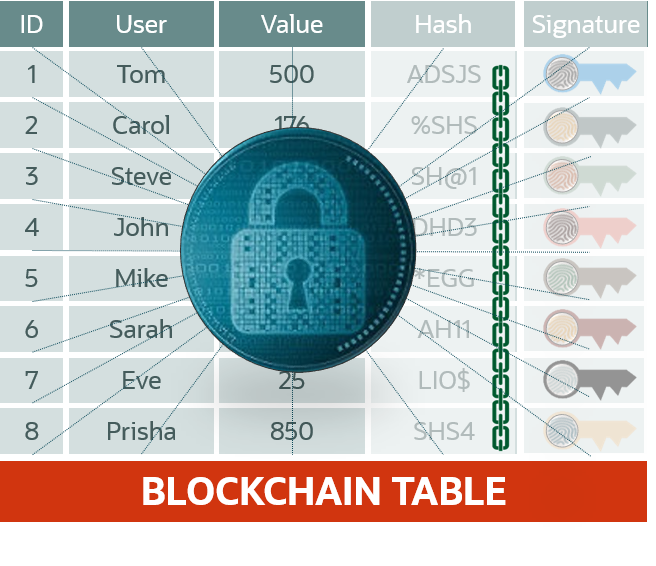 Blockchain table is new specialized table type that provides a highly tamper-resistant persistence option right in Oracle Database. It permits insert-only operations, with no updates and other modifications allowed, and restricts deletions. To further increase tamper-resistance, the rows are chained by storing previous row’s hash in the current row, which enables users to verify any modifications. Users can also optionally sign the contents of the rows with PKI-based signatures leveraging X.509 certs, and signature and data integrity can be verified, thus ensuring non-repudiation.
With blockchain tables users get application-transparent protection from fraud by other users. And by signing and verifying data, they can detect provider fraud (trust but verify). While emerging decentralized applications benefit from Oracle Blockchain Platform’s de-centralized trust model, most applications today have a central authority (bank, escrow company, trading exchange, government office, etc.) and with blockchain tables in Oracle Database we can make these applications more secure without the added complexity of changing to a de-centralized model. This is the reason for Oracle Database-native Blockchain Tables. Examples include financial transaction logs, audit trails, regulatory compliance data, financial records covered by SOX-404 controls, legal hold data, centralized chain of custody or provenance information. We can apply blockchain tables to make these applications more secure and their data tamper-resistant.
For the examples cited above, using blockchain tables is much easier than implementing a blockchain network and de-centralized applications. There’s no new infrastructure needed – the feature is delivered as part of Oracle Database. The use of the tables can be transparent to existing applications, and developers can keep current architecture and programming model, using SQL, PL/SQL, JDBC, and other ways to access the tables. Blockchain Tables can also participate in transactions and queries with other tables.
Common Design Patterns
The first pattern is for applications that need to store changeless data, e.g. readings from IoT devices, compliance data, etc. Create and use blockchain tables to store this data directly.
Second case is when an existing application needs a tamper-resistant audit trail of changes made to the regular database tables. You can add an additional Blockchain table and either update the application to insert a record for each update to current tables or create a triggered stored procedure on the current table to capture and log an update into an audit trail maintained in a blockchain table.
Another scenario is related to de-centralized applications using a distributed blockchain network. In some cases these applications need to store large data volumes, e.g., Electronic Health Records (EHR), images, legal agreements or contracts, etc. Due to the large number of messages exchanged by nodes in a distributed network, MB-sized documents or GB-sized images will create a high network load across many connections. The preferred design pattern is to “anchor” (hash and maintain on-chain with a metadata record) these records on the distributed ledger, but store the actual source data off-chain using, for example, tamper-resistant blockchain tables. The combination of tamper-resistance in the tables and additional security of anchoring records on blockchain network makes it even harder to tamper with any data.
Now that we explained the “why”, let’s talk about the “how”.
Creating and Using Blockchain Tables
Oracle Database 21c provides new and modified DDL for blockchain tables and three PL/SQL packages with useful functions. If you’d like to follow this hands-on, go to Oracle Cloud (Database Cloud Service Virtual Machine or Autonomous Database, which you can get in Always Free tier) to spin up your instance and connect to the database with your favorite database client.
New DDL
CREATE BLOCKCHAIN TABLE is the new DDL provided to define blockchain tables and set some parameters. An example of this would be:
CREATE BLOCKCHAIN TABLE bank_ledger (bank varchar2(128), EOD_deposit NUMBER, …) \
NO DROP UNTIL 31 DAYS IDLE \
NO DELETE LOCKED \
HASHING USING “sha2_512” VERSION “v1“;
Note that in this release the supported data types are NUMBER, VARCHAR2, RAW, JSON, BLOB, CLOB, DATE formats, and other scalar types. Other types, such as LONG, ADTs, TYPE, varray, OBJECTS, ROWID, BFILE, REF, Collections, etc. are not supported.
You will note three additional clauses in the example above:
- NO DROP [UNTIL n DAYS IDLE] is a mandatory clause, which prevents the table from being dropped or imposes an inactivity retention period before the table can be dropped. Minimum value of n is 0, but we recommend using at least 16 for production, which is a long enough period to span over most common holidays when the table may be naturally idle. Use ALTER TABLE clause to change retention period to new value longer than 16 days.
- NO DELETE [LOCKED] or NO DELETE UNTIL n DAYS AFTER INSERT [LOCKED] is a clause that controls deletion policy. Row deletion can be prohibited for a true permanent ledger, or allowed after a retention period of n days, where n has a minimum of 16. If NO DELETE (with or without LOCKED) or NO DELETE UNTIL … LOCKED are used, these settings cannot be modified. If NO DELETE UNTIL … has been specified without LOCKED, you can use ALTER TABLE to increase the current value of n, but it cannot be decreased.
- HASHING USING “sha2_512” VERSION “v1“ is also a mandatory clause specifying that hashing calculations for row chaining use SHA2 algorithm with 512 bit output length. This clause is will be needed in the future for OGG or logical replication to ensure that when this table’s DDL is replicated in a new release, it doesn’t default to a different hashing algorithm or a data format version used in a new release.
When it comes to ALTER TABLE clauses, most are disallowed for the blockchain tables except the ones mentioned above and clauses used when adding constraints.
Blockchain Tables Restrictions
The core principle of data immutability in blockchain is used in the database implementation of the Blockchain tables. When using Blockchain tables users cannot update rows via DML, direct path inserts (INSERT AS SELECT, SQL Loader) or Golden Gate logical replication. In addition, the users cannot do the following:
- Delete rows within a set retention period or ever (depending on the parameters set on the table)Add/Drop/Rename columns
- Drop partitions
- Define before row update triggers
- Convert blockchain table to non-blockchain table (and vice versa)
This helps to protect data in Blockchain tables against basic manipulation and fraud committed by database users, including forgery, rewriting history, etc.
Row Chaining and Signing
When rows are inserted a special chaining process is used with Oracle-managed hidden columns to ensure tamper-resistance. This refers to a blockchain-derived anti-tampering method of storing cryptographic hashes of previous blocks with the current data. Any alteration of the previous data will cause its hash to change and not match the hash stored with the current data. In Oracle blockchain tables, hash for a new row is generated as SHA2-512 computation over a combination of 1) “Row content” of user and hidden columns of the current row (except its user signature columns) AND 2) the hidden hash column of the previous row. For parallelism and higher performance of row insertion for each table we maintain 32 chains, and in RAC configuration, 32 chains per RAC instance. So technically “previous” row refers to a row with sequence number one less than the current row on the specific chain. The SHA2-512 hash computation is over a concatenated array that contains for each column position a meta-data header and column-byte-value and adds as the last array entry the meta-data and column-byte-value of the “previous” row’s hidden hash column.
This helps to protect the data from tampering at a deeper level if someone managed to bypass database protections and modify the row contents. The integrity of the hash chains can be verified using a function in the PL/SQL packages described below. You can further protect the blockchain tables from admin-level tampering by:
- Using encryption and Data Vault
- Periodically copying cryptographic hashes to an external repository outside of DBAs access
In addition to built-in row chaining via cryptographic hashes, PL/SQL packages described below enable users to register their PKI (X.509) certificates and apply user signatures to row content after the row has been inserted. Signing is done after the row has been inserted and the hash added by the database. But first, the signer’s certificate has to be registered in the database. Here’s an example of the full sequence of steps:
-- Add user certificate to database, get as output the Certificate ID
dbms_user_certs.add_certificate(buffer, cert_id);
-- Insert row in to the blockchain table
insert into bank_ledger values ('Chase', 1000);
-- Commit the row. This causes the crypto hash to be computed on row & linked to previous row
commit;
-- Get the bytes to be signed. Returns the output in crypto_hash
dbms_blockchain_table.get_bytes_for_row_signature('EXAMPLE', 'BANK_LEDGER', 'instance_id', 'chain_id', 'sequence_id', 1, row_hash);
-- Application signs the bytes using some trusted library like openssl
openssl dgst -sha256 –sign …
-- Sign the row (and specify the id of the registered public key certificate)
dbms_blockchain_table.sign_row(… 'BANK_LEDGER’…, sequence_no, row_hash, signature, cert_id, dbms_blockchain_table.SIGN_ALGO_RSA_SHA2_256);
This enables non-repudiation property, which protects against users or administrators impersonating others, or claiming that someone else has impersonated them. Of course, maintaining the security of private keys used with openssl command is critical for this to work as is ability to revoke and re-issue certificates if someone’s private key has been compromised.
Blockchain Table PL/SQL Packages
To work with the blockchain tables in PL/SQL we provide three database packages with a range of functions.
DBMS_BLOCKCHAIN_TABLE (see details in Reference doc)
- delete__expired_rows() – deletes rows outside retention window (to be renamed to delete_expired_rows() in a future release)
- verify_rows() – verifies integrity of the chains
- sign_row() – stores user signature for a previously inserted row
- get_bytes_for_row_hash() – returns row content data format to compute rows SHA2-512 hash
- get_bytes_for_row_signature() – returns the row hash that user can sign using their own private key outside of the database
- get_signed_blockchain_digest() – returns digest (metadata about the last row in each chain), signed by schema owner’s private key
- verify_table_blockchain() – verifies rows created between the time periods of two blockchain digests to enable periodic integrity verification of added rows
DBMS_TABLE_DATA (see details in Reference doc)
- get_bytes_for_column() – returns {column-byte-value} for specified column
- get_bytes_for_columns() – returns {column-byte-value}* array for specified columns
- get_bytes_for_row() – returns {column-byte-value}* array for all columns of the row
DBMS_USER_CERTS (see details in Reference doc)
- add_certificate() – inserts cert into “sys.user_certs$” dictionary table, returns a unique GUID
- drop_certificate() – deletes the specified cert, if it exists, from “sys.user_certs$” table
Managing Blockchain Table using Views
Two sets of views are pre-defined to help query and managed metadata information about blockchain tables and user certificates:
- ALL_BLOCKCHAIN_TABLES
- DBA_BLOCKCHAIN_TABLES
- USER_BLOCKCHAIN_TABLES
- CDB_BLOCKCHAIN_TABLES
These views contain the following columns (names simplified, see full names in the documentation): SCHEMA_NAME (all views except USER), TABLE_NAME, ROW_RETENTION, ROW_RETENTION_LOCKED, TABLE_INACTIVITY_RETENTION, HASH_ALGORITHM, CON_ID (CDB view only)
For user certificates, the following views are defined:
- DBA_CERTIFICATES
- USER_CERTIFICATES
- CDB_CERTIFICATES
These views contain the following columns: CERTIFICATE_GUID, USER_NAME, DISTINGUISHED_NAME, CERTIFICATE (BLOB), CON_ID (CDB view only).
Verifying Row and Tables Integrity
Blockchain Tables offer two ways of verifying data immutability and detecting tampering. First of these is simply verifying hashes, and optionally signatures if present and specified in the arguments, for a set of rows between two timestamps using the DBMS_BLOCKCHAIN_TABLE.VERIFY_ROWS procedure.
DECLARE
        verify_rows NUMBER;
        instance_id NUMBER;
BEGIN
        FOR instance_id IN 1 .. 4 LOOP
             DBMS_BLOCKCHAIN_TABLE.VERIFY_ROWS('EXAMPLES','BANK_LEDGER', NULL, NULL, instance_id, NULL, verify_rows);
             DBMS_OUTPUT.PUT_LINE('Number of rows verified in instance Id '|| instance_id || ' = '|| verify_rows);
        END LOOP;
END;
/

Number of rows verified in instance Id 1 = 3
Number of rows verified in instance Id 2 = 12
Number of rows verified in instance Id 3 = 8
Number of rows verified in instance Id 4 = 10

PL/SQL procedure successfully completed.
The second process enables you to maintain the integrity of blockchain tables by continuously verifying that the blockchain table data has not been compromised. It uses a signed digest for the blockchain table generated by using the DBMS_BLOCKCHAIN_TABLE.GET_SIGNED_BLOCKCHAIN_DIGEST procedure. This returns a BLOB that contains the system generated column content only for the top row in each chain signed by the database schema owner’s private key maintained in the database wallets. The signed digests can be generated periodically and should be published or stored outside the database. Then use DBMS_BLOCKCHAIN_TABLE.VERIFY_TABLE_BLOCKCHAIN procedure to verify the integrity of all rows between the times corresponding to the two digests (from the earliest time of the earlier digest to the latest time of the later digest.)
The example of generating the digest is shown below. This example computes the signed digest and generates a signature for the blockchain EXAMPLES.BANK_LEDGER. The signed digest is in binary format and consists of metadata and data of the last rows in each chain. It is stored in signed_bytes. The PL/SQL array version of the signed digest is stored in the output parameter signed_row_array. The GUID of the certificate used to generate the signature is stored in certificate_guid. Note that you must first store the certificate in the database using DBMS_USER_CERTS.ADD_CERTIFICATE procedure.
DECLARE
   signed_bytes             BLOB:=EMPTY_BLOB();
   signed_row_array       SYS.ORABCTAB_ROW_ARRAY_T;
   certificate_guid       RAW(2000);
   signature              RAW(2000);
BEGIN
   signature := DBMS_BLOCKCHAIN_TABLE.GET_SIGNED_BLOCKCHAIN_DIGEST('EXAMPLES',
                   'BANK_LEDGER', signed_bytes, signed_row_array,
                   certificate_guid, dbms_blockchain_table.SIGN_ALGO_RSA_SHA2_512);
   DBMS_OUTPUT.PUT_LINE('Certificate GUID = ' || certificate_guid);
   DBMS_OUTPUT.PUT_LINE('Signature length = ' || UTL_RAW.LENGTH(signature));
   DBMS_OUTPUT.PUT_LINE('Number of chains = ' || signed_row_array.count);
   DBMS_OUTPUT.PUT_LINE('Signature content buffer length = ' || DBMS_LOB.GETLENGTH(signed_bytes));
END;
/

Certificate GUID = AF27H7FE3EEA473GE0783FE56A0AFCEB
Signature length = 256
Number of chains = 10
Signature content buffer length = 1248

PL/SQL procedure successfully completed.
Now with signed_bytes_T1 and signed_bytes_T2BLOBs you can use DBMS_BLOCKCHAIN_TABLE.VERIFY_TABLE_BLOCKCHAIN procedure as shown in the example below.
DECLARE
    signed_bytes_T1          BLOB;
    signed_bytes_T2          BLOB;
    rows_verified          NUMBER;
BEGIN
    DBMS_BLOCKCHAIN_TABLE.VERIFY_TABLE_BLOCKCHAIN(signed_bytes_T2,signed_bytes_T1, rows_verified);
    dbms_output.put_line('Rows verified = ' || rows_verified);
END;
/

Rows verified = 10
PL/SQL procedure successfully completed.
Best Practices
- For each chain in each instance, periodically save the current hash and the corresponding sequence number outside the ledger database to enable verification of chain integrity
- If using Data Guard, use Max Protection mode to avoid loss of ledger records (synchronous redo transport and commit at standby DB before transaction is committed on the primary)
- Users should compute signatures for inserted rows on the hash value generated by the database (from DBMS_BLOCKCHAIN_TABLE.get_bytes_for_row_signature())
- The hash and signature should be saved outside the database for future verification to ensure database is still trustworthy
When To Use Blockchain Tables vs Blockchain Platform
| Oracle Database Blockchain Tables |
Oracle Blockchain Platform |
|
|
| Use cases involve
|
Use cases involve
|
Ready to Try?
To explore the new Native Blockchain Tables feature, make sure you have an Oracle Cloud account and go to cloud.oracle.com to provision Autonomous Database in Always Free tier or a free 30 day trial of database VM on a compute instance. Then connect with your favorite database client and CREATE BLOCKCHAIN TABLE (don’t forget the mandatory clauses!) It’s that easy. If you have any issues or questions, support is provided via regular customer support channels and via public forums.