This blog was originally published on February 8, 2020!
In the last post in this series, I created the APEX application and showed you various options for the UI in the Customers and Orders Forms.
In this blog post, I’m going to focus on over the logic from the Customers Form and then I’ll make some additional enhancements to the application.
Migrating the Business Logic
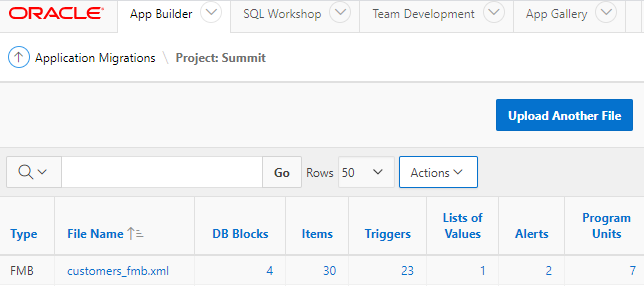
Let’s start by reviewing the following components in the Customers Form to see what actually needs to be migrated (applicable) vs. what was specific to Oracle Forms (not applicable):
- DB Blocks
- Items
- Triggers
- List of Values
- Alerts
- Programs Units
After you review the objects, remember to set them as Complete.
DB Blocks
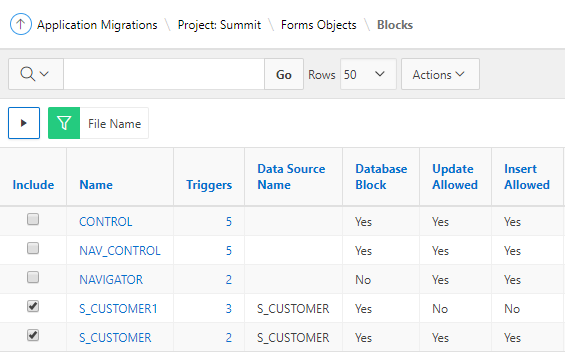
There are five blocks but only two are database blocks.
S_CUSTOMER1 and S_CUSTOMER are using the S_CUSTOMER table. The first block is query-only so it’s not applicable. On the other hand, the second block allows us to insert, update and delete rows and definitely it’s applicable. The region form was created by the wizard in the APEX Application.
CONTROL, NAV_CONTROL and NAVIGATOR blocks were used to control the tree region and prompt the title of the columns, so they aren’t applicable to the APEX Form.
Items
There are 30 items listed distributed by the blocks:
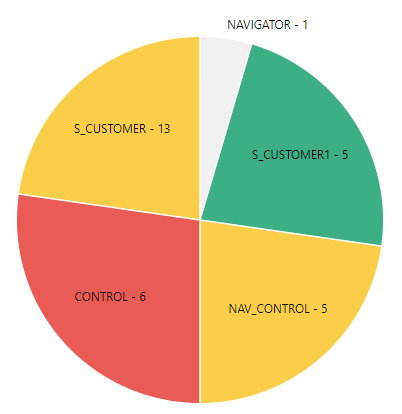
The only applicable block is S_CUSTOMER, which has 12 items corresponding to the columns in the S_CUSTOMER table. Since the form was created by the wizard, those items were included in the form.
Triggers
There are 23 triggers in total but only two triggers associated with the S_CUSTOMER block.
One of these triggers is POST-QUERY, this trigger logic is not applicable since the APEX form automatically creates the Form – Initialization Process. This process initializes form region items. Initialization can either be fetching data from the region source, using the primary key value(s) or simple initialization of the form region items.
The other trigger is WHEN-MOUSE-DOUBLECLICK, used to execute the procedure EDIT_TEXTITEM. This procedure invokes a pop-up window editor for the COMMENTS column. This procedure can be omitted in the APEX Form.
List of Values
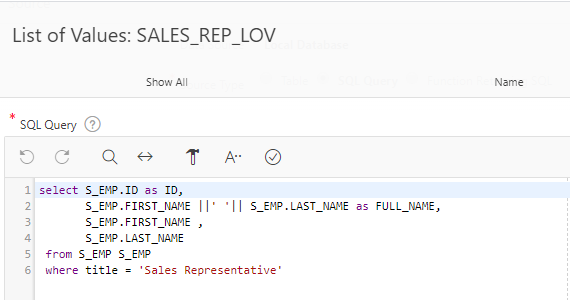
The only list of values created in the original form is SALES_REP_LOV:
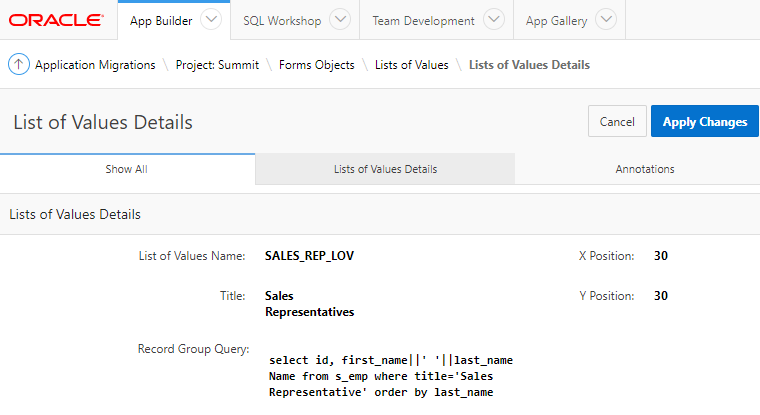
Since the form was created by the wizard, this list of values was also created but the name is different and the query is incorrect. So let’s fix that in the APEX Application:
- Click App Builder and click your application.
- Click Shared Components.
- Click List of Values.
- Click the list of values and update the Name and SQL Query.
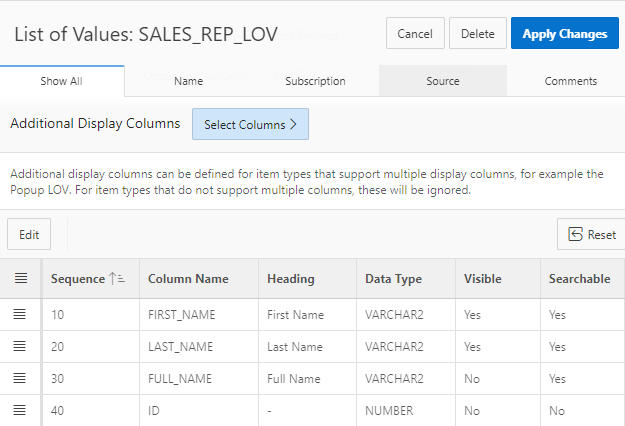
Keep in mind that you can define additional display columns for item types that support multiple display columns.
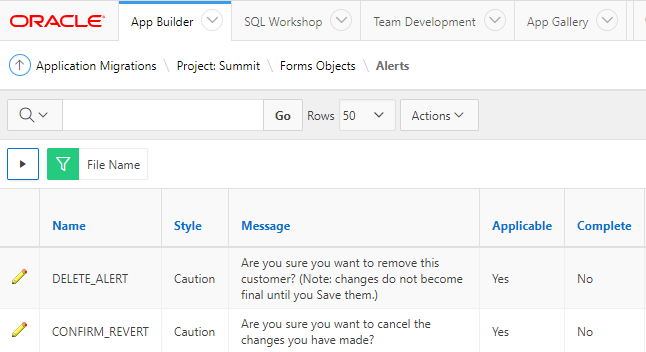
Alerts
There are two alert messages: DELETE_ALERT and CONFIRM_REVERT.
DELETE_ALERT message was automatically created when you create the form using the wizard, but the message is quite different. Follow these steps to create a customized message:
- Click App Builder and click your application.
- Click Shared Components.
- Click Shortcuts.
- Click Create.
- Create Shortcut From Scratch.
- Click Next.
- For Name, enter DELETE_ALERT.
For Type, select Text with JavaScript Escaped Single Quotes.
For Shortcut, enter the original message. - Click Create.
The message is created and now you need to update the shortcut in the APEX Form.
- Go to the Customers Form page.
- In the first pane, click the page name.
- In the third pane, go to Function and Global Variable Declaration.
- Update to var htmldb_delete_message='”DELETE_ALERT”‘;
As to CONFIRM_REVERT, every APEX page has the Warn on Unsaved Changes property that can warn users when they try to navigate away from the page that has unsaved changes. Just make sure to enable this property.
Program Units
There are seven program units, some to control the tree region and some others to control the relation between the S_CUSTOMER1 and S_CUSTOMER blocks. None of them are applicable to the APEX Form.
Summary
The following objects were applicable and included in the APEX Form:
- Created by the Wizard:
- DB Block: S_CUSTOMER.
- Items: 12 columns from the S_CUSTOMER table.
- Created by the Wizard and customized:
- List of Values: SALES_REP_LOV
- Alert: DELETE_ALERT.
Additional Enhancements
Now that the APEX Form contains the business logic from the original form, it’s a good time to enhance the application by making the following changes:
- Configure Credit Rating to use a Static LOV.
- Customize the Customer Form.
- Customize the Faceted Search.
- Customize the Interactive Report.
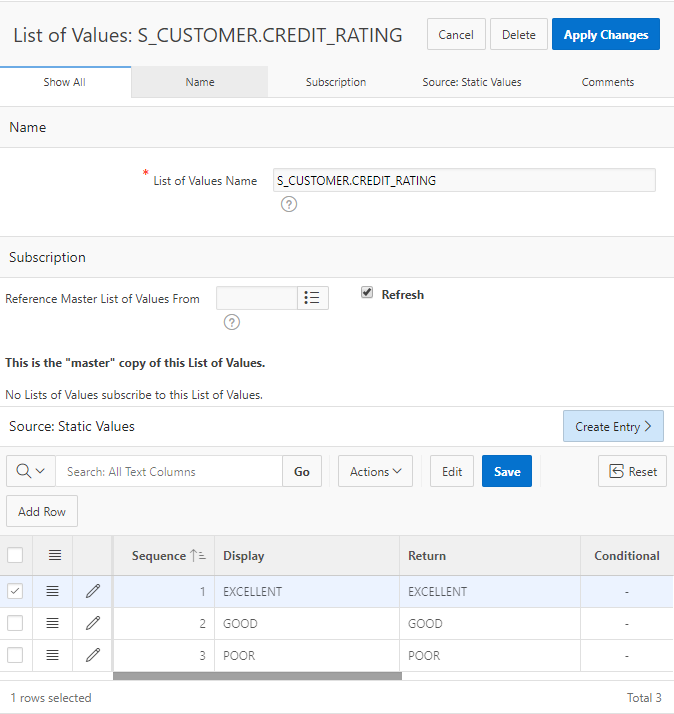
Configure Credit Rating to use a Static LOV
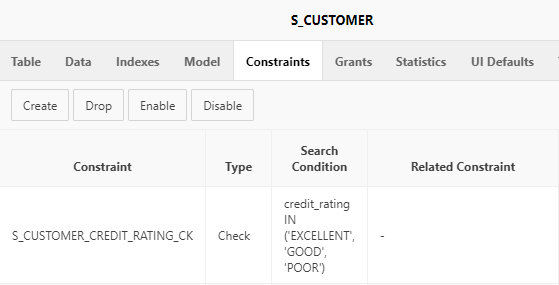
The table S_CUSTOMER has a column named CREDIT_RATING with a check constraint. The column can only contain the following values: EXCELLENT, GOOD, POOR.
It’s important to create a list of values to prevent end-users from entering invalid options.
To create the list of values:
- Click App Builder and click your application.
- Click Shared Components.
- Click List of Values.
- Click Create.
- Create List of Values from Scratch.
- Click Next.
- For Name, enter S_CUSTOMER.CREDIT_RATING.
For Type, select Static. - Click Next.
- Enter Display Values and Return Values.
- Click Create List of Values.
To learn more about creating a List of Values, please read Beginners Guide to List of Values in Oracle APEX by David Peake.
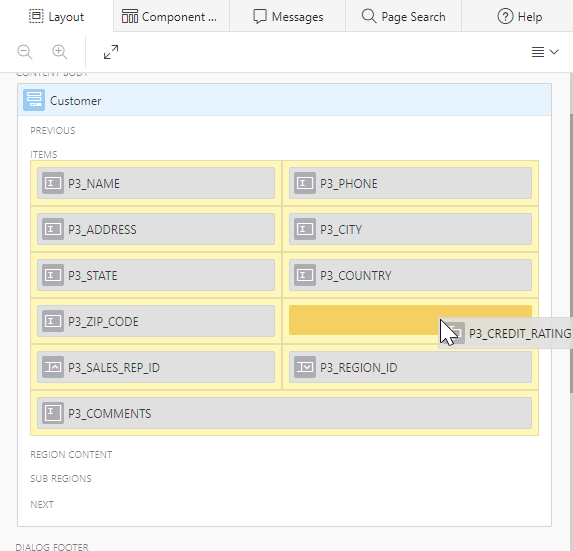
Customize the Customer Form
When you create a form using the wizard, it automatically creates an item for each column in the table. Depending on the column type, it creates a Text Field, Textarea, Date Picker or Number Field item.
Once the page is created, you can go to the page and make the changes you need. Select a different type of element, edit the label and more.
Plus, you can organize items by dragging and drop them.
To use the list of values previously created,
- Click App Builder and click your application.
- Go to the form page.
- In the first pane, go to PX_CREDIT_RATING.
- In the third pane, change the type to Radio Group.
- In the Settings section, for the number of columns enter 3.
- In the List of Values section, for type select Shared Component.
For List of values, select S_CUSTOMER.CREDIT_RATING.
For Display Extra Values, set Off.
For Display Null Value, set Off. - Click Save.
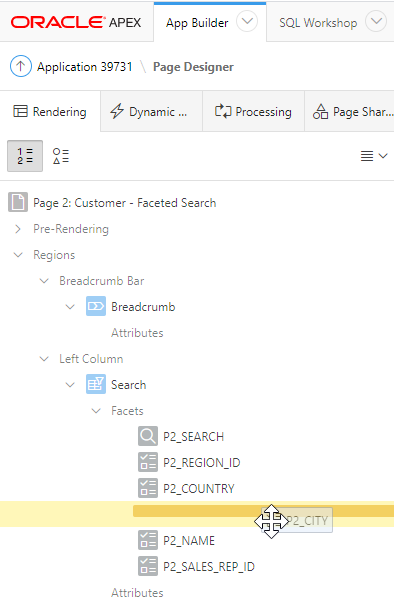
Customize the Faceted Search
You can define which facets are going to be used to filter the data, some are defined automatically, but you can create or delete them as needed. Also, you can drag and drop facets to change their display order.
- Click App Builder and click your application.
- Go to the Faceted Search Page.
- Look for Search Region and organize the facets in the following order:
- PX_REGION_ID
- PX_COUNTRY
- PX_CITY
- PX_NAME
- PX_SALES_REP_ID
- Click Save.
To learn more about Faceted Search, please read APEX 19.2 – Faceted Search by Carsten Czarski.
Customize the Interactive Report
Define how end-users are going to read the report. Explore all the options by clicking the Actions button when you run the Interactive Report.
Keep in mind that you can run the Report as a:
- Developer: To define and save primary or alternative reports.
- End-user: To define and save private reports.
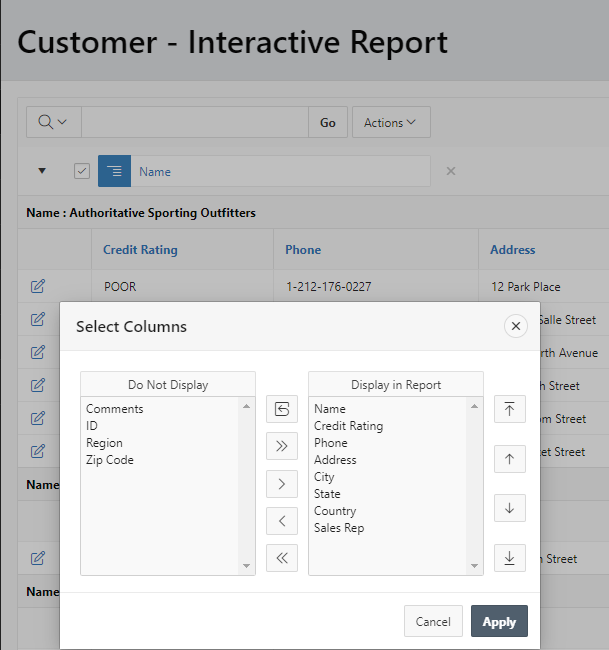
To define the primary report:
- Run the application as a developer.
- Go to the Interactive Report Page.
- Click Actions.
- Click Columns.
- Remove the columns Comments, ID, Region, Zip Code from “Display in Report” region. There are two ways to do it:
- Go to the column to remove and double click on the column.
- Click the column and remove it by clicking the icon Remove (<).
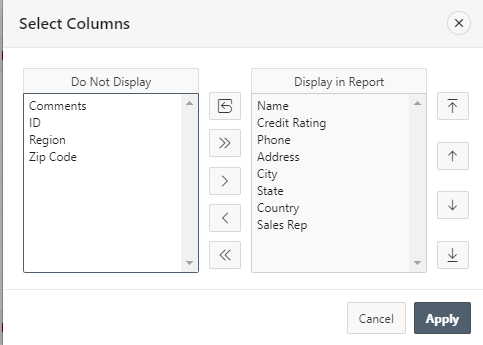
- In “Display in Report” region, select the column Credit Rating and click the icon Up (↑) to move it up to the second place.
- Click Apply.
- Click Actions.
- Click Format, Control Break.
- For Column, select the column Name.
- Click Apply.
To save the primary report:
- Click Actions.
- Click Report, Save Report.
- For Save, select As Default Report Settings.
- For Default Report Type, select Primary.
- Click Apply.
In the following video, you can see in detail all the customizations made in the Customers Form:
In this blog post, I showed you how to migrate the business logic from the original form to the APEX Application, but also how to enhance it by adding some customizations to the options created by the wizard.
Note: Please remember that the value “X” in “PX_ITEM” depends on the APEX page you’re working on.
