This blog was originally published on March 30, 2020!
Oracle APEX has proven many times that it is a great low-code platform for developers.
In this blog article, I will walk you through creating an Email Campain App with APEX with a little bit of code.
Data First
We know that Oracle APEX is a data-first application development framework. Let’s start with the data model for our customers that we need to target for the Email Campaign.
Each customer will have few attributes such as Country they are from, Marital Status, Gender, Email and for sure the Name.
I love to use Quick SQL to model my data. The tool is part of Oracle APEX and can be found under SQL Workshop > Utilities submenu.
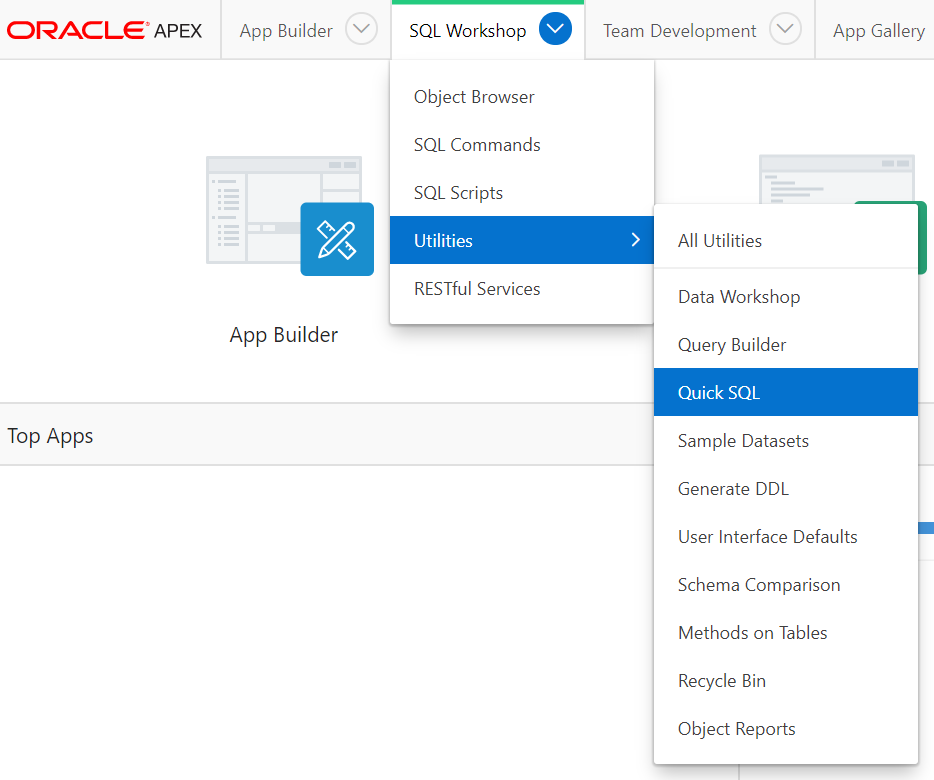
I will not discuss the details of Quick SQL in this article. But you can have a look at Proof-of-Concept Lab under apex.oracle.com/hols for more details.
The following is the Quick SQL code that we will use to create the database objects required with 100 rows sample data.
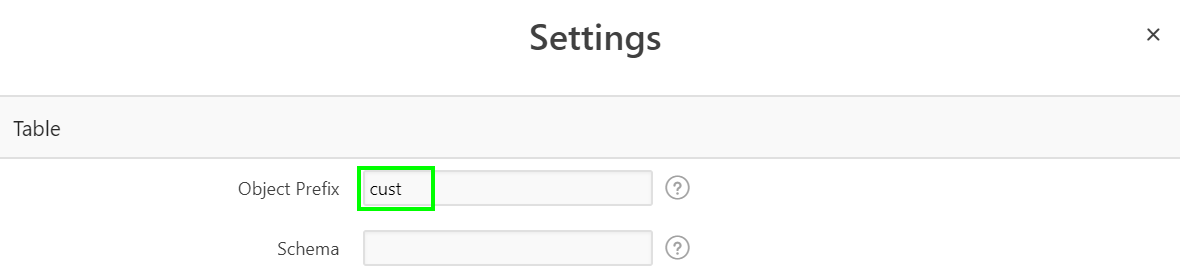
I have selected two settings for the Quick SQL that were meeting my requirements. The first setting is to have a prefix for the database objects created. The Object Prefix that I have selected is “cust”.
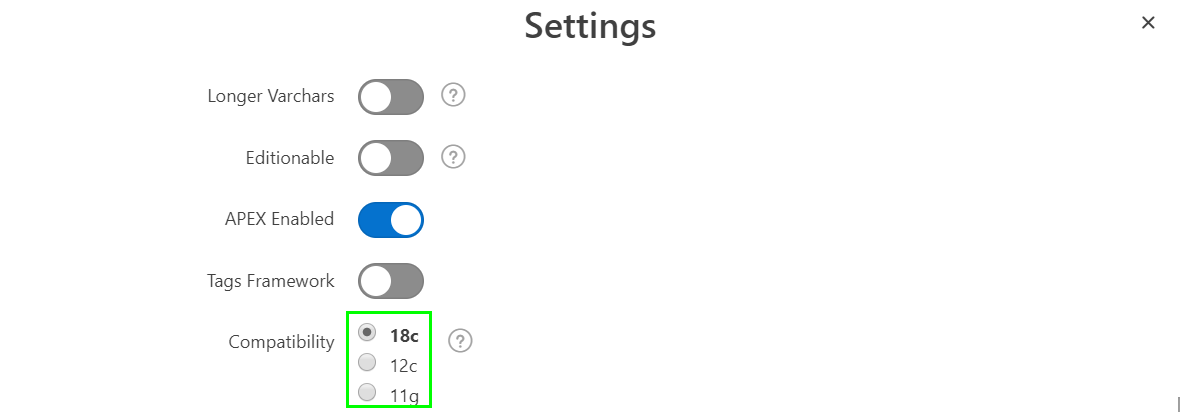
The other setting is to have the code generated for Oracle Database 18c since this is the version I have on my machine. This is done using the Compatability attribute.
Save the generated SQL statements and run the code. If everything went fine, you should get 103 Statements Processed successfully.

Creating an Empty App
From the App Builder create a new application. In the wizard, you can assign the following name “Email Campaign”. I have selected the Red Theme and selected the envelope icon for the app.
I have also included all the features from the create application wizard. If we run our application you will get a nice good looking page.
Our application is ready now to add more components to it. The home page has no regions so far.
The Report Page
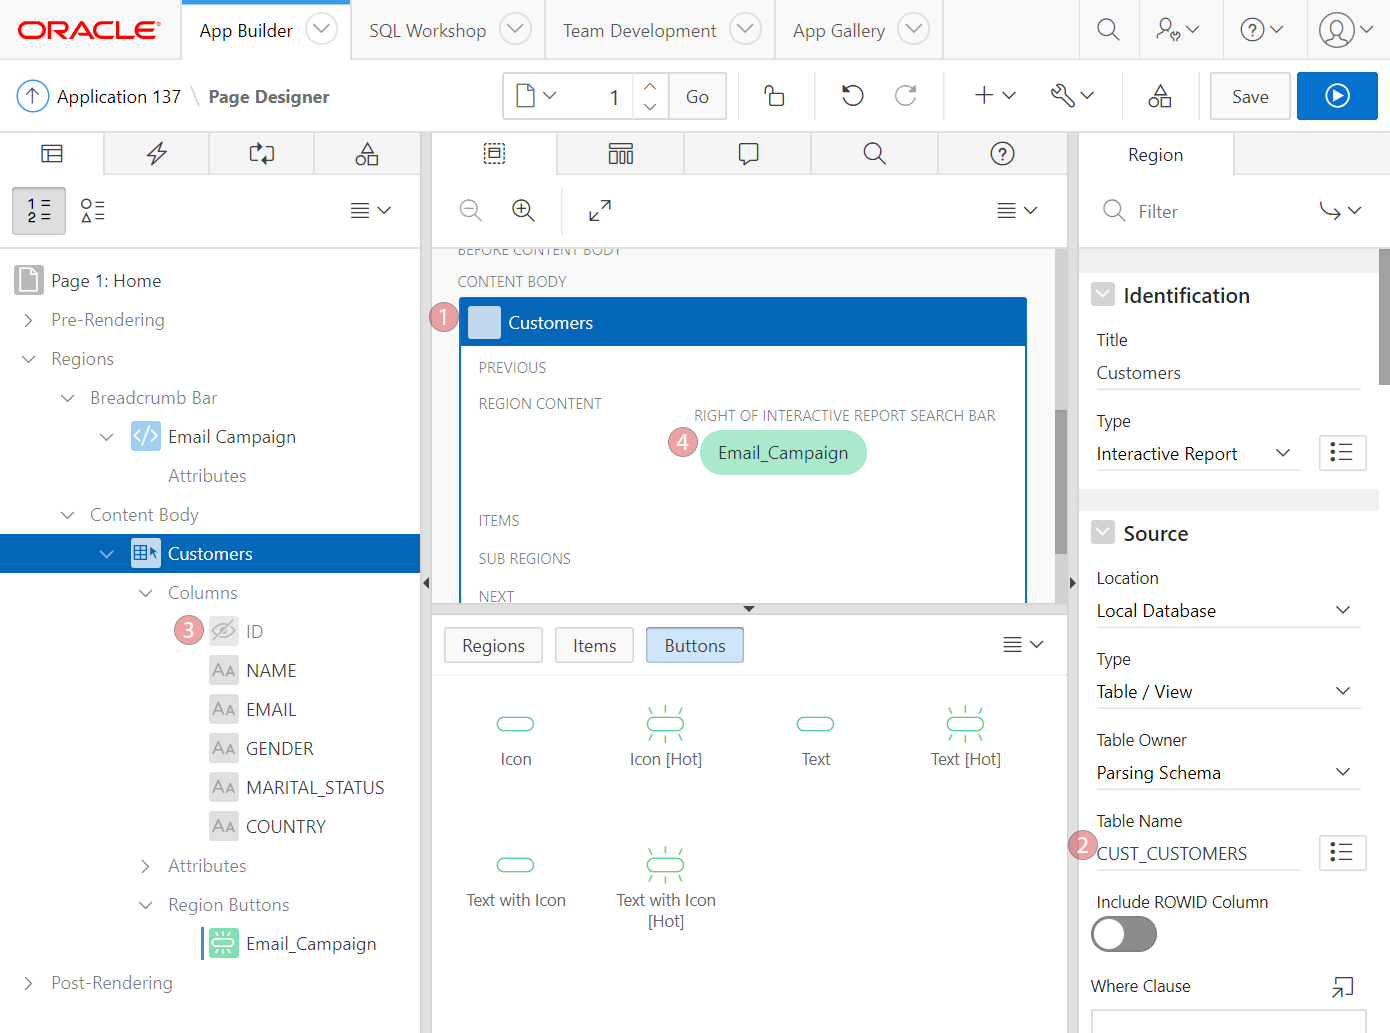
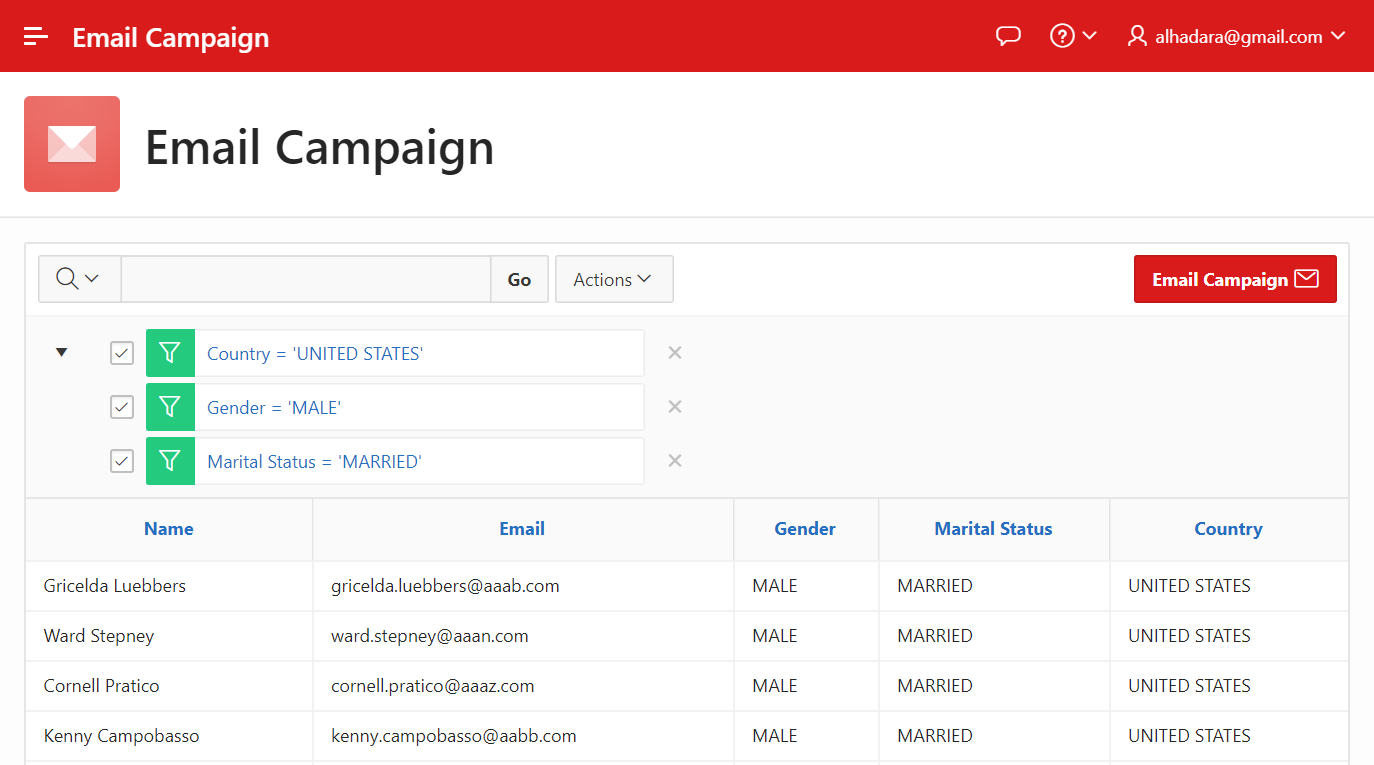
Let’s create an Interactive Report region following the sequence in the screenshot:
- Create an Interactive Report and set its Static ID property to CUSTOMERS
- Select CUST_CUSTOMERS as the data source for the IR
- Hide the ID column by changing its type to hidden
- Insert a button in the RIGHT OF INTERACTIVE REPORT position
If you run the application now you can see the interactive report with our customers’ s data and the Email Campaign button which does not do much yet.
You can use the Interactive Report to filter and navigate through the data. One great feature of the Interactive Report is the flexible abilities to filter our data.
This flexibility will be used to select a group of customers that we want to target for our campaign. Let’s say for instance that based on our previous analysis we found that Married Males from United Stated are found to be good candidates for the new year sale campaign in our Dubai branch.
It will be nice to loop through the filtered data only and target them for the Email Campaign. But first, let’s create an Email Template.
The Email Template
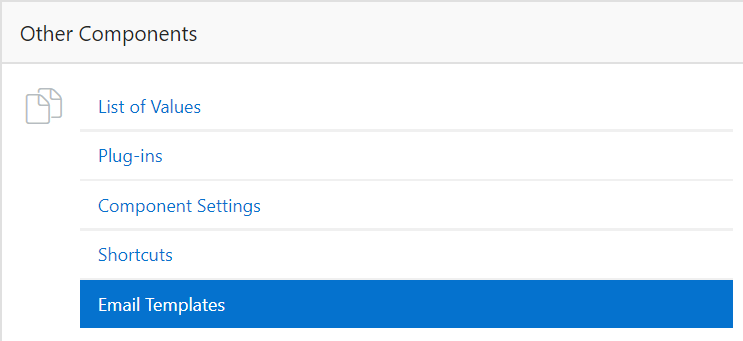
The email template is the foundation of any email campaign application. In Oracle APEX this can be managed under Other Components of the Shared Components section. You can find details about Managing Email Templates in the official documentation.
You can have multiple Email Templates. Each one will have it is own unique Static Identifier so it can be called from your application.
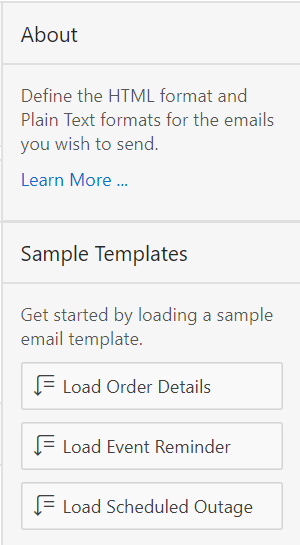
Oracle APEX comes pre-loaded with sample templates that the developer can select from. You can pick any template and modify it to suit your data model.
It offers a good start if you have not HTML template ready.
Let’s have the following details entered for our newly created template:
Template Name: new year 2020 promotion dubai branch
Static Identifier (will be generated automatically): NEW_YEAR_2020_PROMOTION_DUBAI_BRANCH
Email Subject: New Year Promotion in Dubai Branch
Then we can populate the HTML snippets for our template. We will use substitution strings such as #CUSTOMER# to pass the values to the template from our application’s interface.
Note that all substitution strings are escaped by default. Unless we ask it not to. For example #ITEMS!RAW# in the Body template will allow the data to pass as is since we need that in the next steps. While #ITEMS!STRIPHTML# will be stripped from all HTML code which needed in the Plain Text Format. For more information read the official documentation.
Header:
Body:
Footer:
Plain Text Format:
This email is to remind you of an upcoming event you are associated with.
Sale Starts: #START_DATE#
Sale Ends: #END_DATE#
Location: #LOCATION#
Notes: #NOTES#
Items: #ITEMS!STRIPHTML#
View additional details at: #MY_APPLICATION_LINK#
Fields for the Email Campain
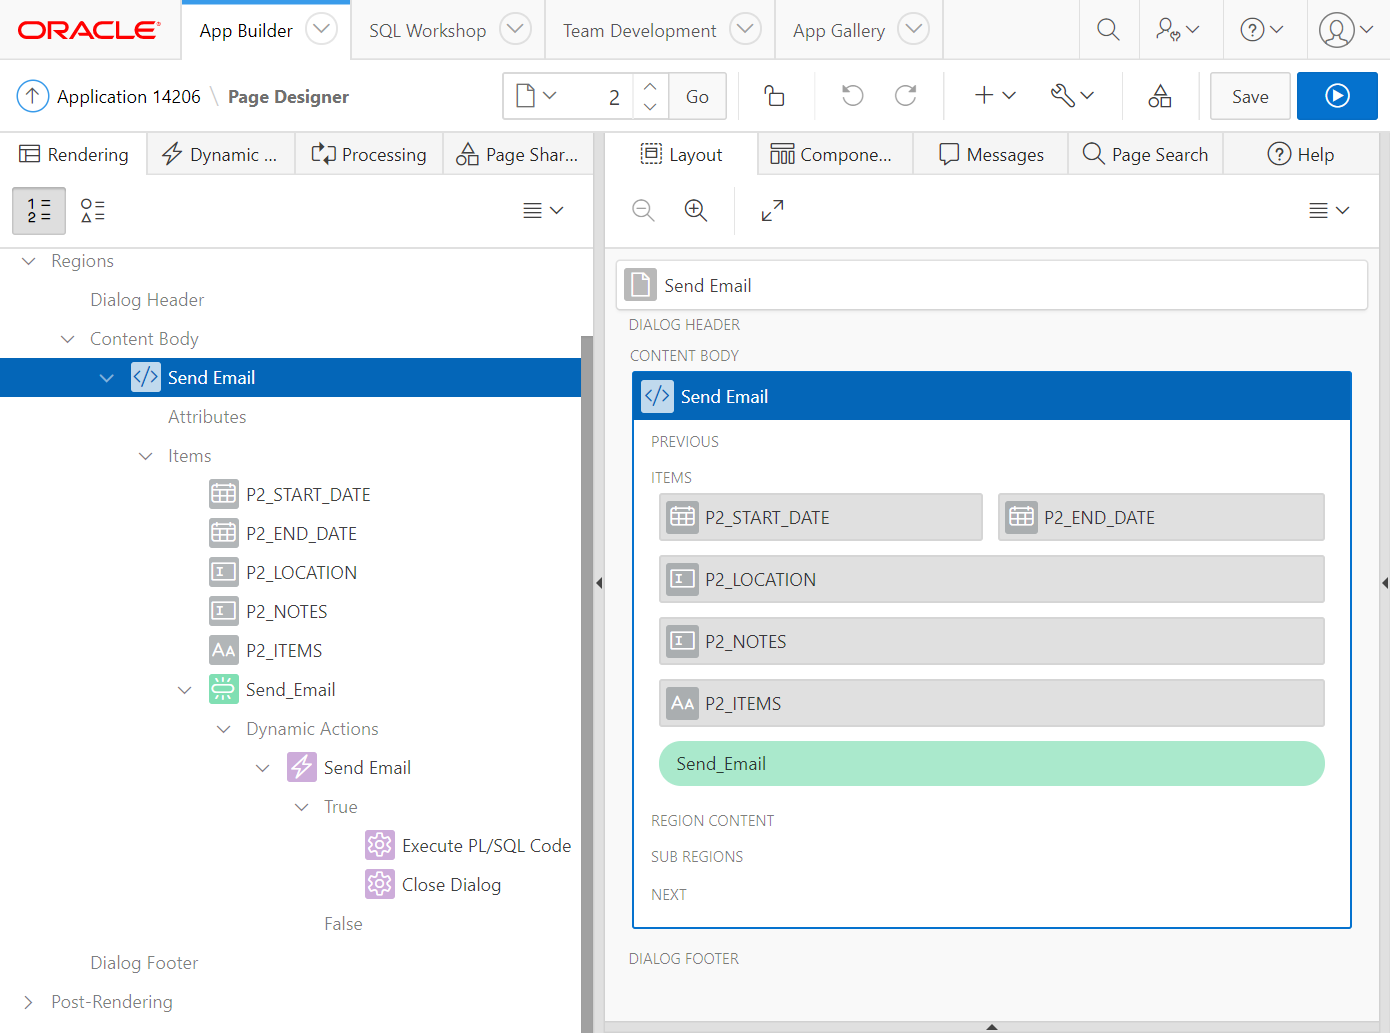
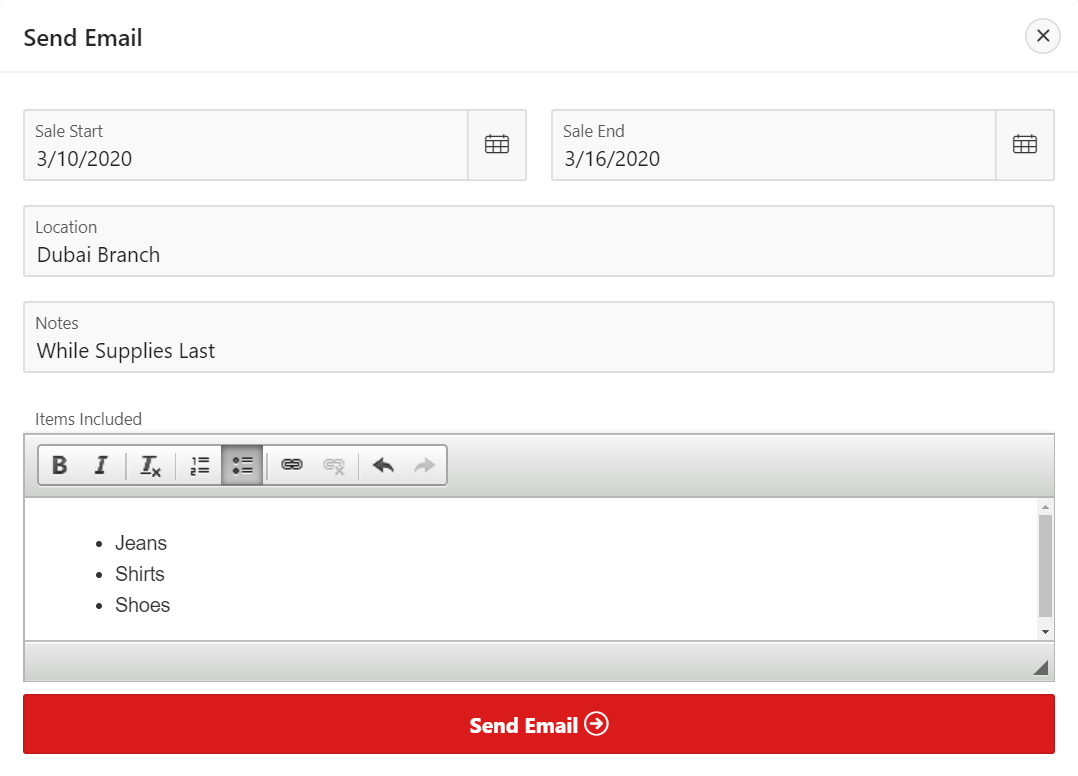
Now that we have created our Email Template, let’s create a second page of the type Modal to host the items of the Email Campain. We need to have the following items:
- P2_START_DATE as Date Picker. This will have the date of the Sale’s Start
- P2_END_DATE as Date Picker. This will have the date of the Sale’s End
- P2_LOCATION as Text Field. This will have the location of the branch which has Sale
- P2_NOTES as Text Field. This will have any extra Notes to mention to the customers. (e.g. the items are limited)
- P2_ITEMS as Rich Text Editor. This will have the items included in the Sale. It will be passed as HTML
- Send_Email as a Button which will have a Dynamic Action attached to it (Right Click on the button > Create Dynamic Action).
- The Dynamic Action will call PLSQL code (which we will discussed in the next section) that will loop through the filtered Interactive Report in Page 1 and send Emails using the Email Template we have created earlier to each customer in the filtered report.
- Then another Dynamic Action will be used to Close the Dialog
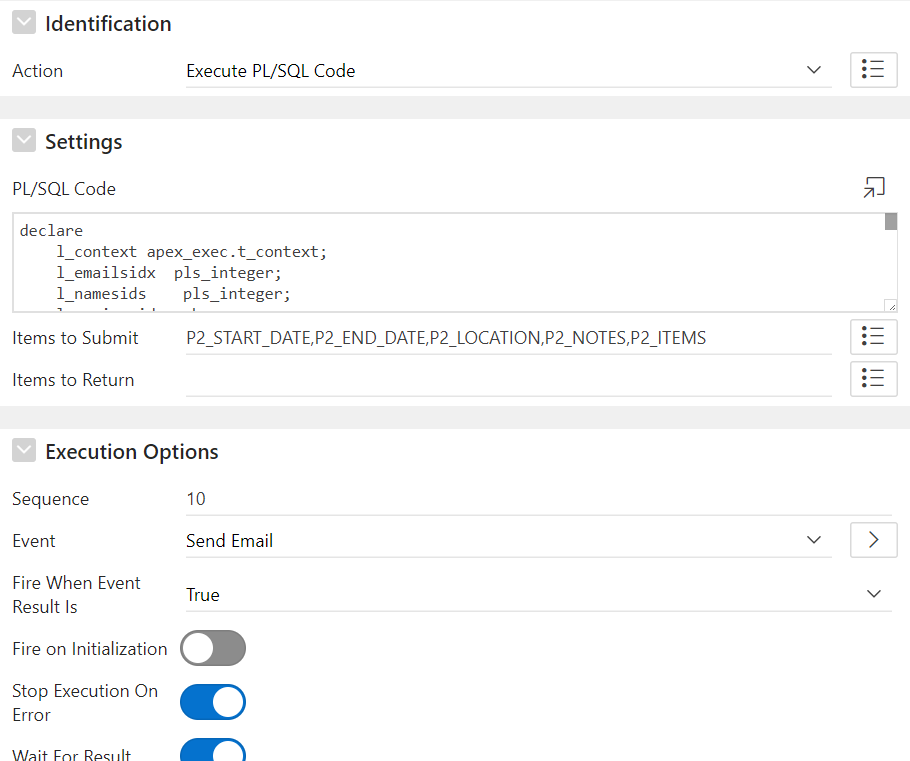
Using OPEN_QUERY_CONTEXT in the PL/SQL Dynamic Action
Carsten Czarski has written a great article on how to extend the current Faceted Search and add a chart that will get refreshed base on the query of the classic report of the Faceted Search. He uses the newly introduced APEX_REGION.OPEN_QUERY_CONTEXT to get the query behind the classic report. We will use the same API to get the query for the Interactive Report and loop through the records.
We will use the below PL/SQL code in the dynamic action in the previous section. Note how we are calling the template’s Static Identifier “NEW_YEAR_2020_PROMOTION_DUBAI_BRANCH”. The “NAME” and “EMAIL” columns’ values will be fetched from the context using apex_exec.get_varchar2 method.
Finally, we need to make sure that we submit the items on Page 2 in the PL/SQL Dynamic Action so we can reference them in the code.
Final Touches
As final touches, we will point the “Email Campaign Button” that we created in Page 1 to redirect to Page 2.
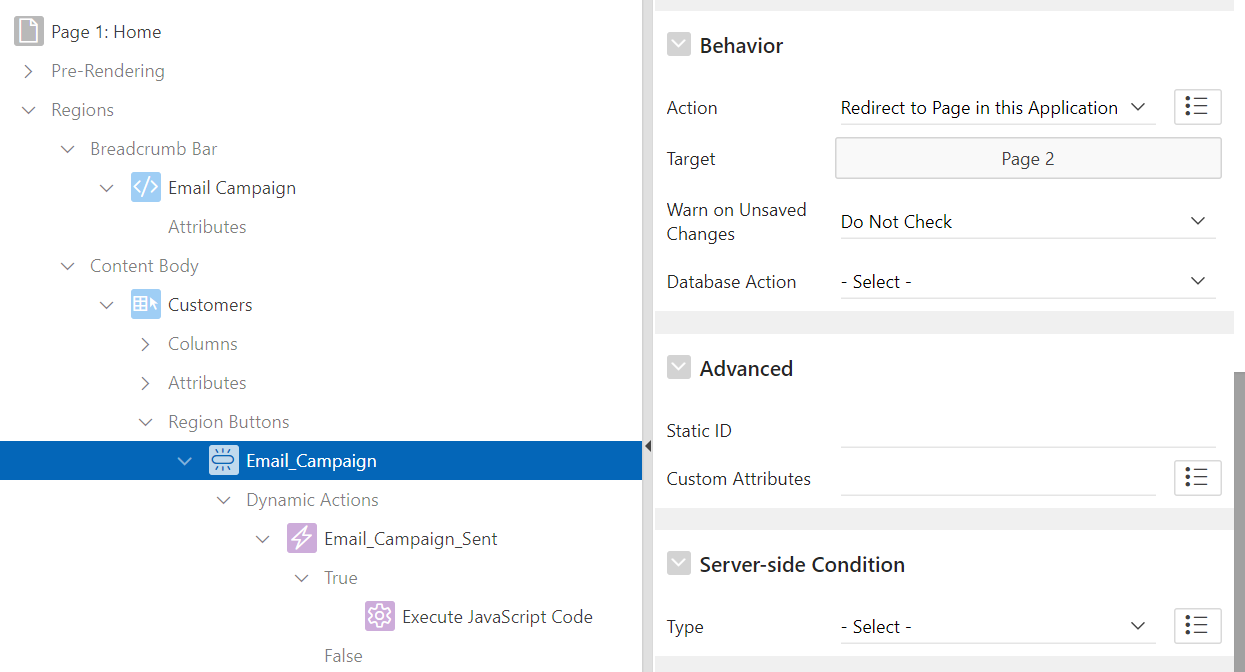
We can also create a Dynamic Action of the type “Execute JavaScript Code” to show the success message.
Now let’s try to send an Email Campaign.
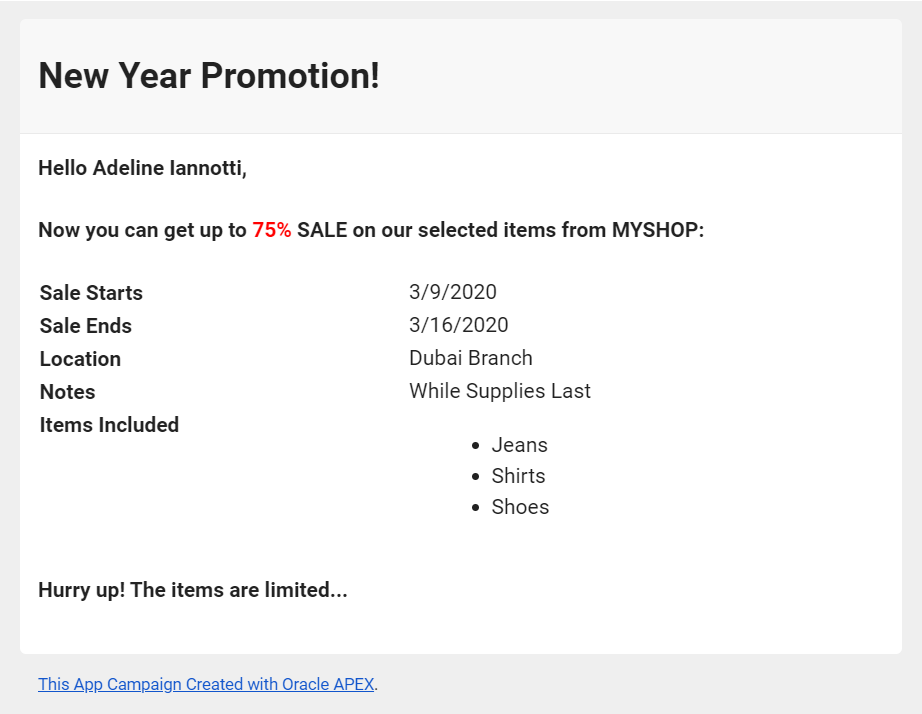
Now our customers will receive something similar to this:
Enhancements and Assumptions
The above application assumes that your environment is configured and ready to send emails.
The following are some enhancements you can do:
- Add a field to automate sending the Email Campaign at a certain date and time through a database job.
- Provide better error handling in case the emails failed to be sent.
- Tweek the Email Template to show your Company’s logo and colors.
Happy APEXing!