This blog post was originally published on November 12, 2020.
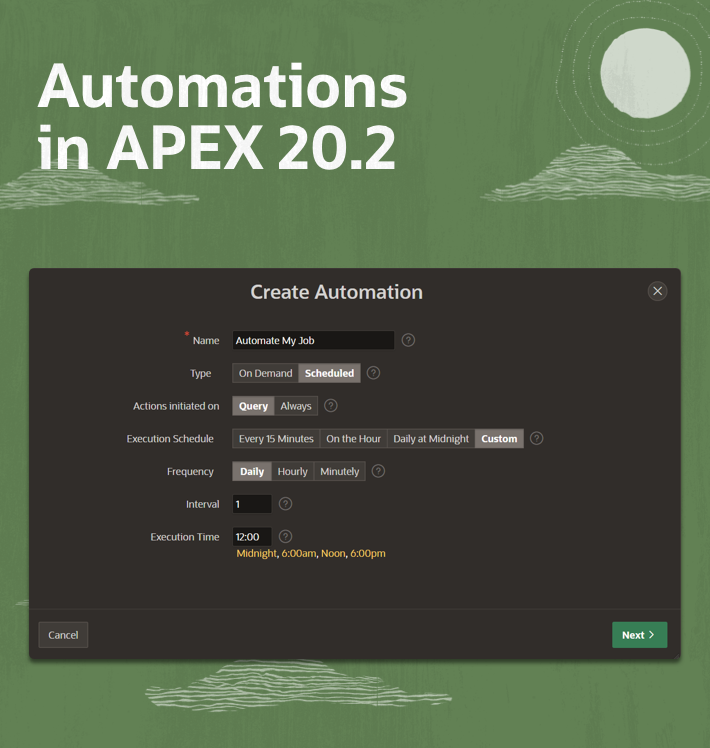
Oracle APEX Automations are a sequential set of PL/SQL actions, triggered by query results. They are used to monitor data and then perform the appropriate action (examples are auto-approving specific requests and sending email alerts). An automation can be triggered on Schedule or on Demand, by invoking the APEX_AUTOMATION package. Query results can be derived from:
Table or View, SQL Query or a PL/SQL function returning a SQL Query.
Local Database or REST Enabled SQL
REST Data Source (aka Web Source Modules)
Prerequisites
To explore Automations further in this blog, I’m going to utilize the EMP / DEPT Sample Dataset. So, first, install the Sample Dataset using the followings:
Navigate to SQL Workshop and click Utilities
Click Sample Datasets
Install EMP / DEPT
Click Next
Click Install Dataset
Please note for this action to work, you need to configure the email server in APEX to be able to send emails. If you are using apex.oracle.com, this is already set and pre-configured for you.
Automate your Process
Inspired by the tweets from my colleague Patrick Wolf, I have created a test case for a common business process. A new employee is joining a department in your organization and you would like automating notifying his/her manager to take the necessary actions. The automation will run on a daily basis looking for employees that their hiredate will be tomorrow and send an email to their manager.
To achieve that we will need to build a few things.
First, we will utilize the Email Template functionality in Oracle APEX. The template will host the message structure. Variables will be substituted and replaced with new Employee Name, Hire Date, and Department. The email will be sent to the manager of the employee.
Secondly, we need a query that will fetch those new employees. The query should consider the employee details coming from the EMP and DEPT tables. Using joins, we can get the Employee Manager that will be used in the “To” section of the email.
Finally, the Automation will be created to execute the query, check for rows returned, and if any found, to execute an Action of sending an email reminder to the manager of the new employee.
We will set the Automation’s Schedule to run on a daily basis.
The Email Template
Let’s create an email template by following these steps:
 <b>Hi #MANAGER#, </b> <br>
 <br>
 <b>You have got a new hire. </b> <br>
 <br>
 <table width="100%">
   <tr>
     <th align="left">Hire Date </th>
     <td>#HIREDATE# </td>
   </tr>
   <tr>
     <th align="left">Name </th>
     <td>#EMPLOYEE# </td>
   </tr>
   <tr>
     <th align="left" valign="top">Department </th>
     <td>#DEPARTMENT# </td>
   </tr>
 </table>
 <br>
 <b>Please proceed with induction process... </b> <br>
 <br>
Plain Text Format Content
Hi #MANAGER#,
You have got a new hire.

Hire Date: #HIREDATE#
Name: #EMPLOYEE#
Department: #DEPARTMENT#

Please proceed with induction process...
Automation Query
The query we will use to fetch our information is as follows:
select  e.empno,
        e.ename,
        m.ename as mgr_name,
        d.dname as department,
        e.hiredate
    from emp e  inner join emp m on m.empno = e.mgr
                inner join dept d on d.deptno = e.deptno
where e.hiredate = trunc(sysdate + 1);
The above SQL code will allow us to get the details for the employees where their hiredate is about to start tomorrow. Notice how we are self-joining the emp table to get the manager details of the employee.
If you run the query on the newly installed dataset, you will find that it returns no rows. That is to be expected. None of the employee records have a hiredate set for tomorrow’s date. Let’s change that fact and update the record for employee number to have a hiredate to tomorrow’s date (as of the writing of this post, tomorrow’s date is 12 of November 2020).
To do so, simply follow these steps:
Navigate to SQL Workshop
Click Object Browser
Search for EMP table
Click the Data tab
Click on edit icon for the employee record with empno = 7698
Change the hiredate value to be 11/12/2020 (or next day’s date based on your current date)
Hit Apply Changes
Now navigate to SQL Workshop then click on SQL Commands and run the above query. You will find that there is a record returned.
Building the Automation
We are ready now to build the Automation. We have the triggering element which is the new employees query result that will start their work tomorrow. And we have the Email Template that we will use as an Action as a result of the trigger.
Let’s start building our Automation with the following steps:
Navigate to Shared Components
Click on Automations
Click Create button
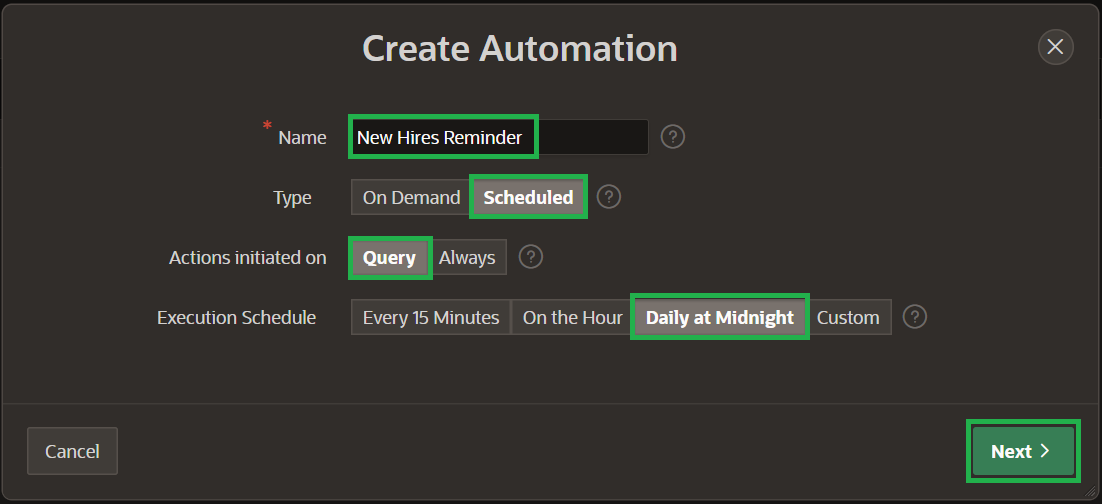
Fill the values as shown
Name: New Hires Reminder
Type: Scheduled
Actions initiated on: Query
Execution Schedule: Daily at MidnightNote that the Automation can run On Demand as well, by calling APEX_AUTOMATION package execute procedure. The Actions of the Automation can be initiated either on results from a Query or Always. In our case we will set it to Query to monitor the new employees’ hire date. Although we have selected Daily at Midnight schedule in our case, selecting Custom reveals more choices for your schedule if you needed to.
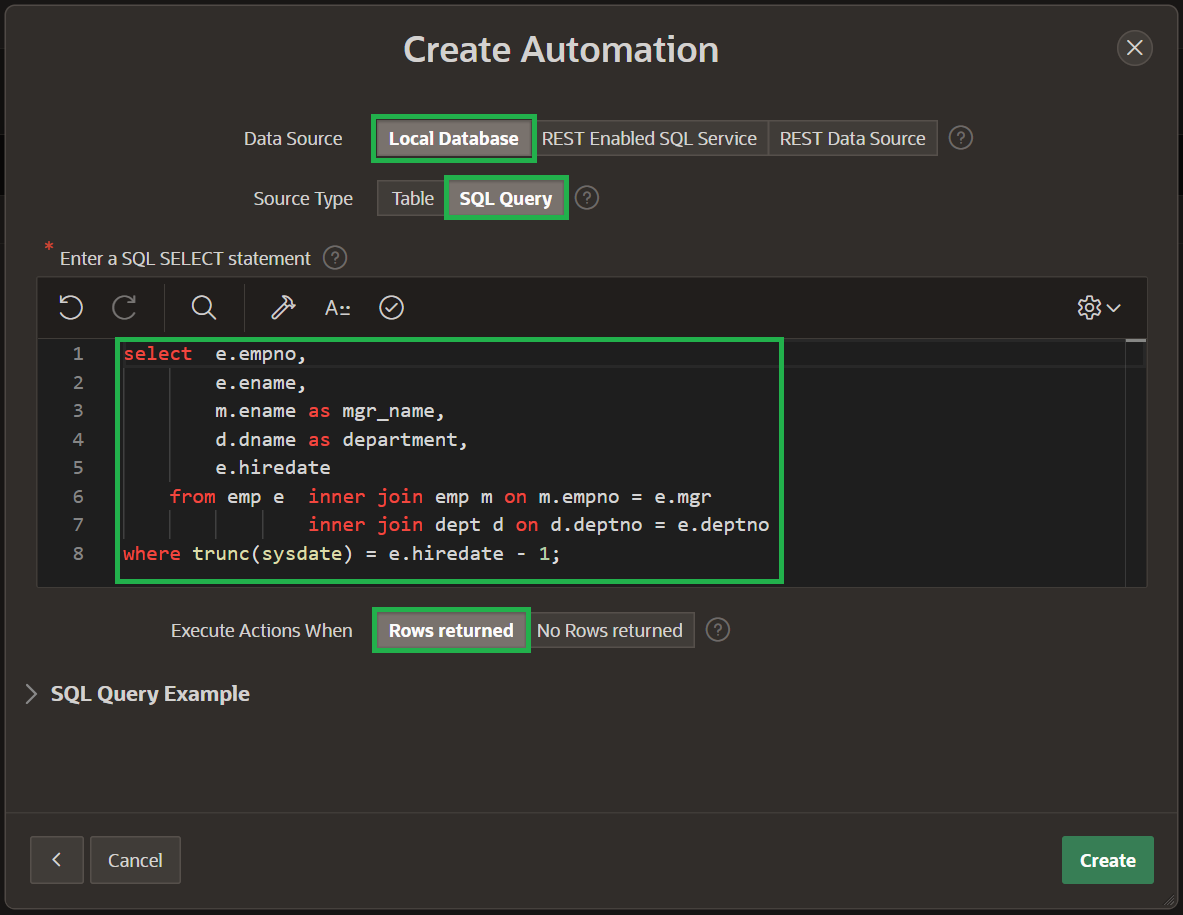
Click Next and fill the values as following:
Data Source: Local Database
Source Type: SQL Query
Enter the SQL query used above
Make sure to select Rows returned for Execute Actions When attribute
Finally, click Create button
The Automation has been created in the disabled mode, as no Actions have been defined yet.
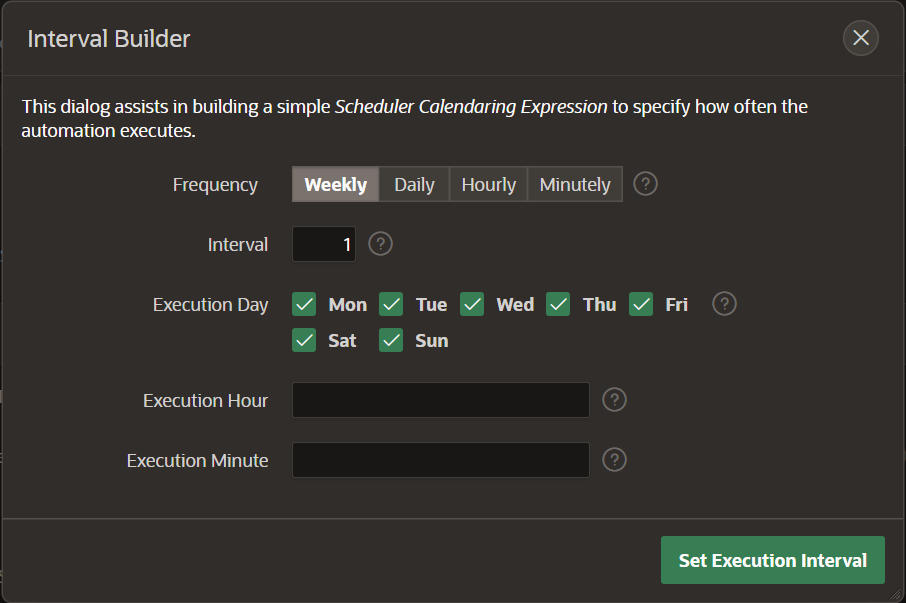
Note that you can click on the small gear icon to change the schedule of the automation. You can set a highly flexible schedule based on Weekly, Daily, Hourly, or even Minutely options with the ability to set the interval for any of those choices.
We will not change the schedule and we will simply keep the daily midnight schedule.
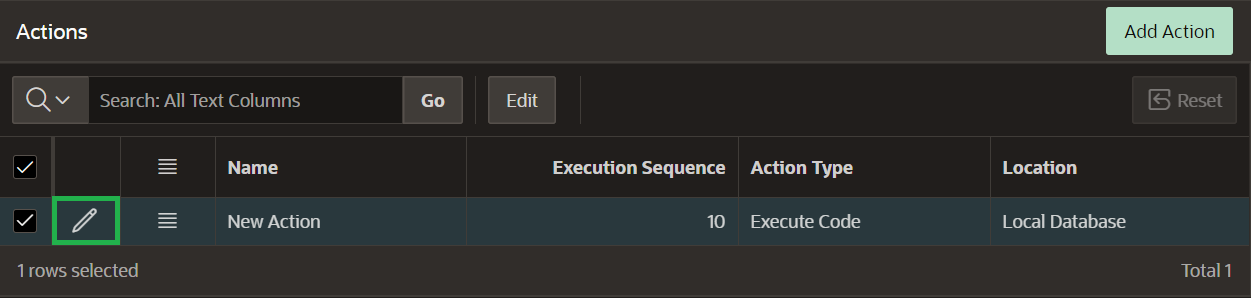
Let’s add an Action and Enable the Automation. To do so you can modify the empty Action created for us by default.
Click on the Edit Icon next to New Action under the Actions section as shown below.
In real-life example, the p_to parameter will be set to something similar to MGR_NAME || ‘@somewhere.com’, So that is it sent to the Manager of the employee. But in our case, and to be able to test the Automation’s Action you can put your own email instead.
The apex_mail.send API will be used to send an email to notify about the new hire. The API will use the NEW_HIRES_REMINDER Email Template created earlier.
Check whether your PL/SQL action code is valid by clicking the code editor’s Validate icon
Click on the Apply Changes button to save the Action.
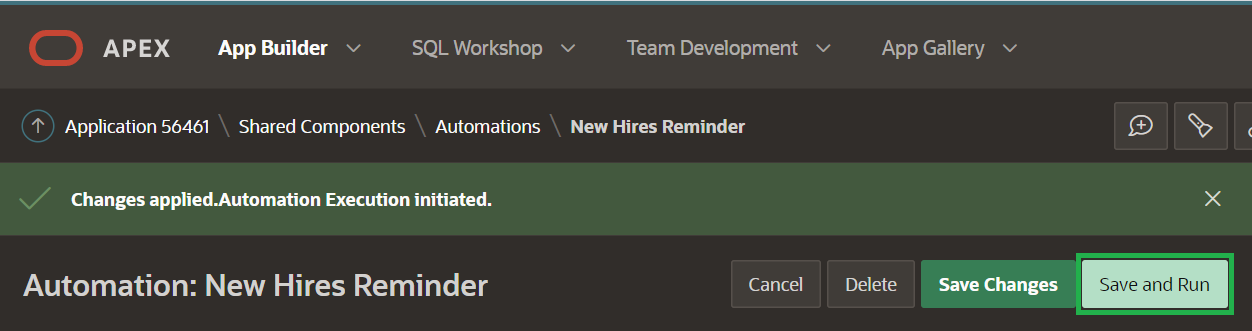
Click on Save and Run button to save the Automation and Initiate the first run.
You will notice a message indicating that the changes have been applied and the Automation Execution has been initiated.
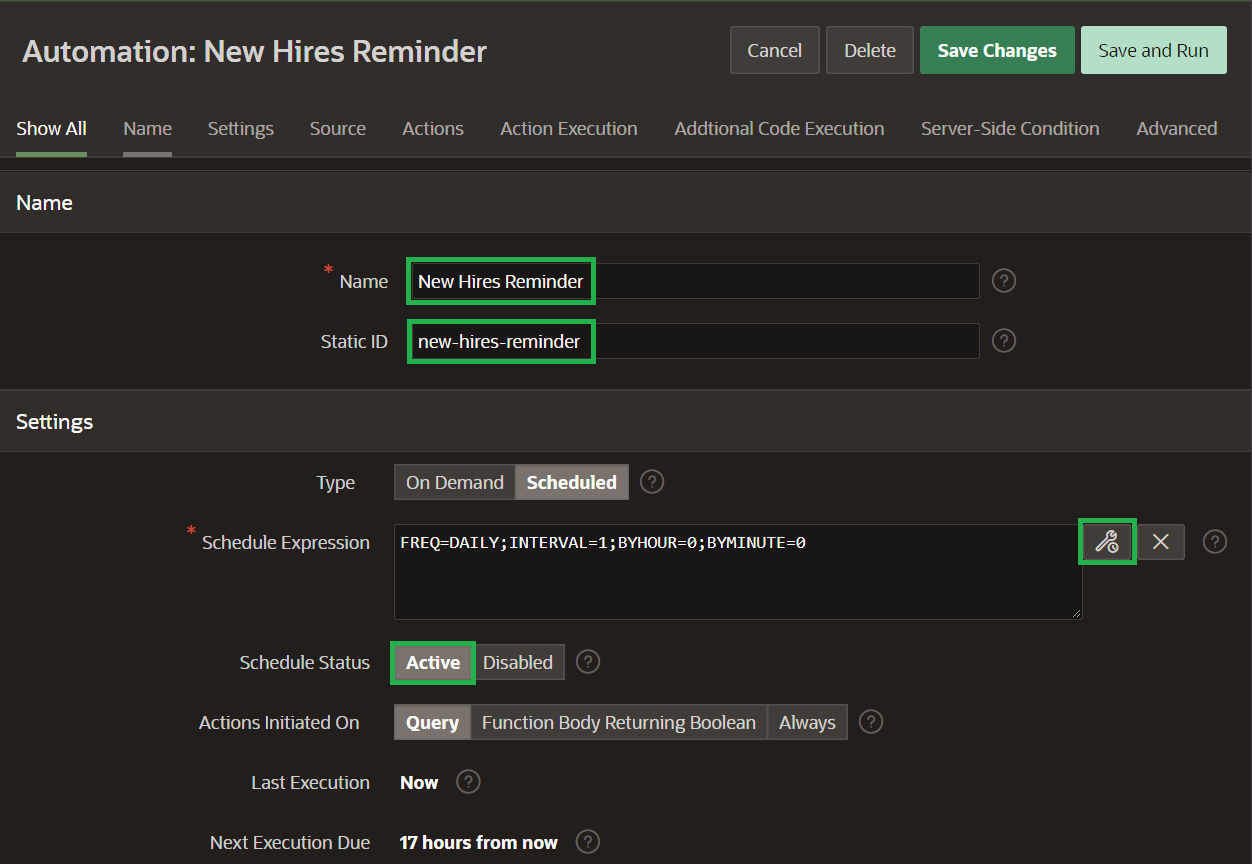
Finally, to activate the Automation’s schedule navigate to Settings of the Automation and set the Schedule Status to Active, and click Save Changes.
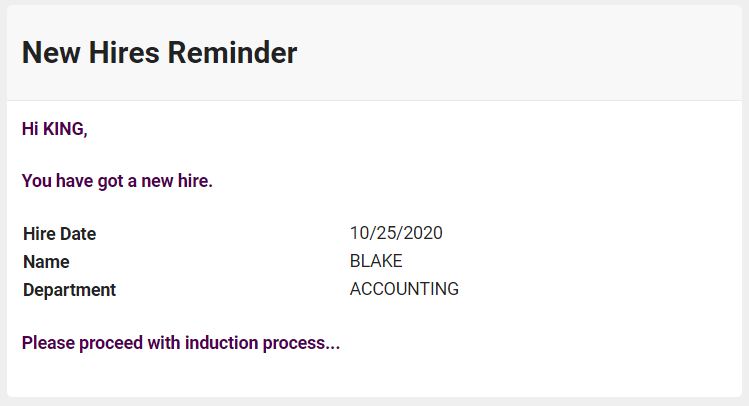
If everything goes well, you should be able to receive an email similar to the following:
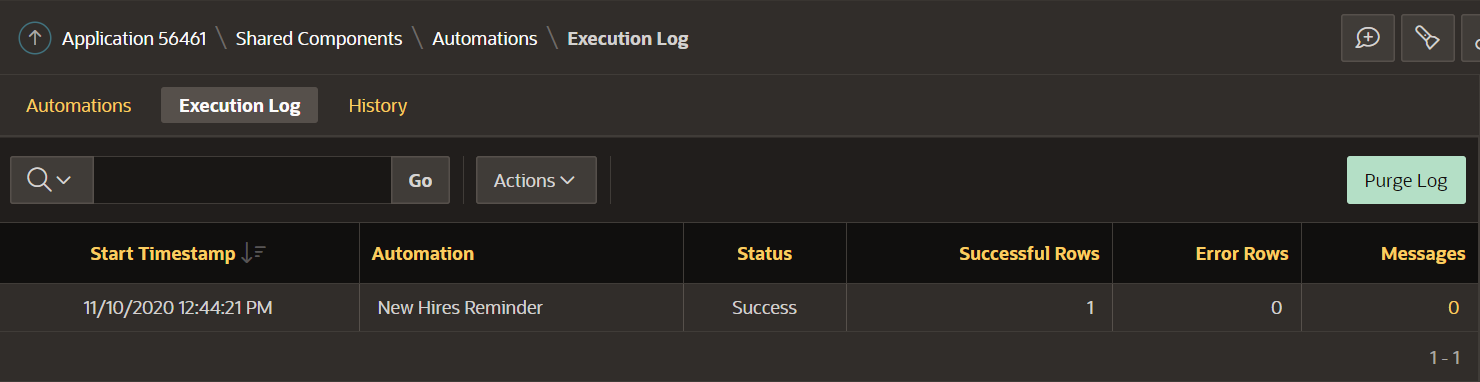
The Automation will run now on daily basis checking for employees’ hire dates and notifying their managers. You can always view the log of the Automation in the Execution Log tab. Application Express purges log information by default every 14 days.
Conclusion
It is true that you can do most of the above using DBMS_SCHEDULER. We have done that many times before. But, the Automations feature provides a simplified and enhanced experience to automate your process. It makes it much easier to schedule repeating tasks without digging deep into DBMS_SCHEDULER package or the need to have privileges to that package.
Combine Automations with other Oracle APEX APIs to unlock unlimited possibilities.
Happy APEXing!
Authors
Salim Hlayel
Senior Product Manager
Salim Hlayel is a Senior Product Manager for Oracle Application Express. He is responsible to extend the growth of Oracle Application Express in the United Arab Emirates and the Middle East. Salim holds a master's degree in Computer Science, majoring in Software Engineering from the University of Malaya, Malaysia. He has joined Oracle Abu Dhabi in September 2019.