Oracle Fusion Analytics is a family of prebuilt, cloud-native analytics applications for Oracle Fusion Cloud Applications that provide ready-to-use insights to help improve decision-making.
This article outlines the steps for loading datasets to Oracle Object Storage Service (Object Storage Service) and ingesting the data into Fusion Analytics, which include:
Note: Only XLSX and CSV formats are supported for the datasets. Each dataset must have a corresponding metadata file with a predefined structure. In the example in this article, there are 3 dataset files named Items.xlsx, Stores.xlsx, and Sales.xlsx.
A. Create an Object Storage Service bucket and dataset folders
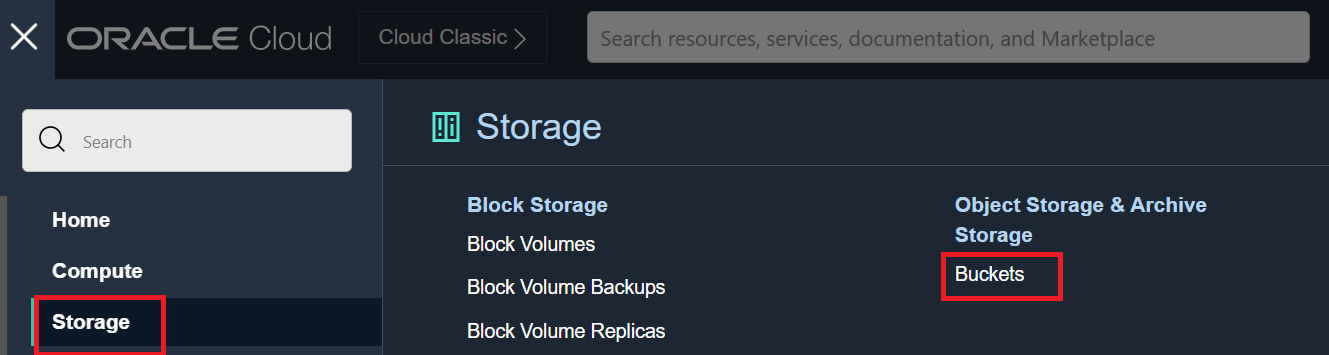
Log in to the Oracle Cloud Infrastructure (OCI) console. Click Storage, then Buckets.
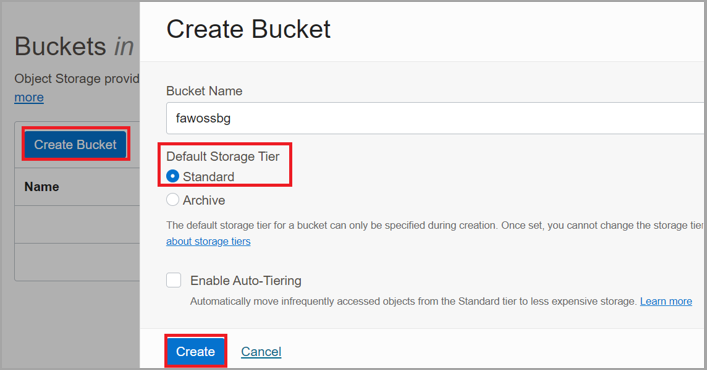
Click Create Bucket.
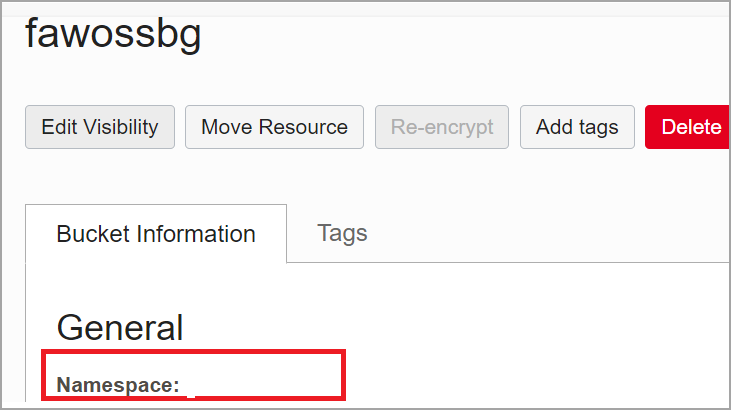
Find the bucket namespace in Bucket Information, then General.
Build the URL using the bucket name and the namespace in the format shown below. Save the URL in a text editor for a later step. URL format: https://objectstorage.region.oraclecloud.com/n/<bucketnamespace>/b/<bucketname>
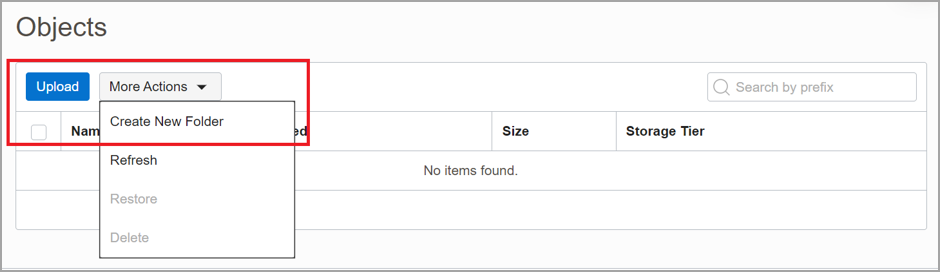
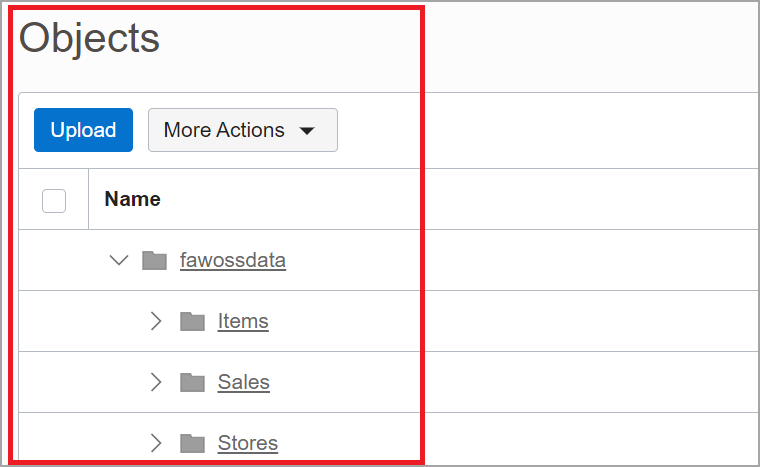
Click More Actions and then Create New Folder to create a parent folder within the new bucket. The parent folder holds subfolders for each dataset.
Note: Make a note of the folder name for a later step. The parent folder would be specified as the “Remote Host Extract Files Directory” in Step E. Make sure there is Delete permission on the folder. Without delete permission, metadata will not be extracted.
This example includes three data files – Items.xlsx, Stores.xlsx, and Sales.xlsx. Use the same names as the datasets for the subfolders – Items, Stores, and Sales. Ensure that the final structure is similar to the following figure.
B. Create metadata for each dataset
Create metadata files for all the datasets, including the parent folder.
Create a local file named META_DATASTORES.csv (parent folder metadata) with the following columns:
DATA_STORE_NAME – A column that holds the name of the dataset. In this example, the dataset files are Sales, Stores, and Items.
DATA_STORE_LABEL – A column that holds the dataset description (optional).
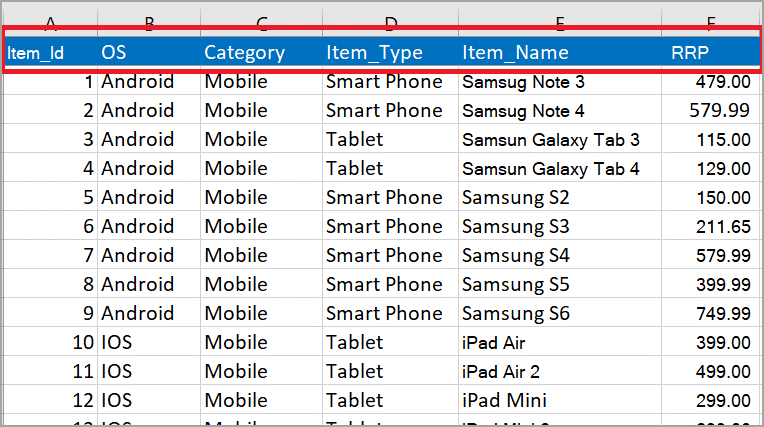
3. Each subfolder needs a metadata file corresponding to the dataset and the actual dataset file. Name the metadata file META_DATASTORES_name of the dataset_COLS.csv. The Items dataset in this example has the following data.
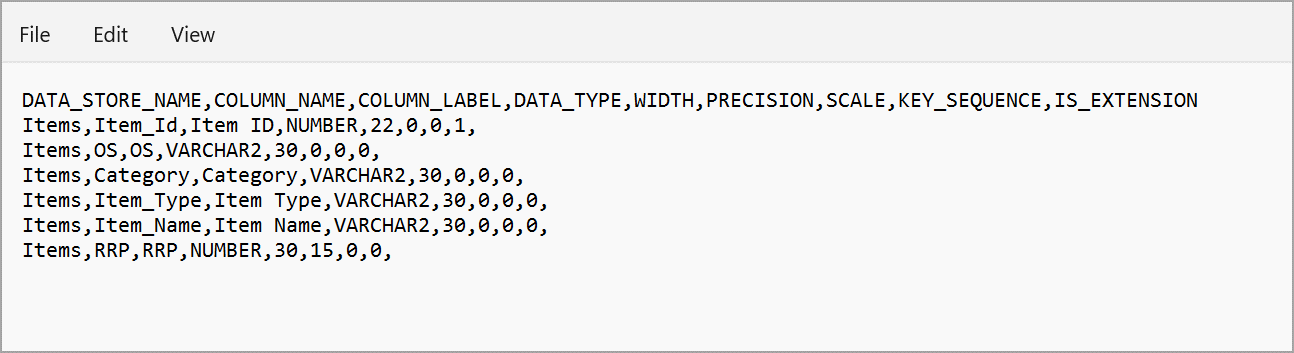
4. Create a local metadata file named META_DATASTORES_Items_COLS.csv with the following column names, then upload the file to the Object Storage Service bucket:
DATA_STORE – Name of the dataset.
COLUMN_NAME – Column name in the dataset.
COLUMN_LABEL – Description of the column (optional).
DATA_TYPE – Data type of the column.
WIDTH – String length (mandatory for VARCHAR2 only).
PRECISION – Applicable to NUMBER data type. Make sure to set the precision for decimal values; the default value is 18 (optional).
SCALE – Applicable to NUMBER datatype (optional).
KEY_SEQUENCE – Identifies the primary key. In this case, Item_Id is the primary key.
Note: Repeat the subfolder metadata step for each dataset.
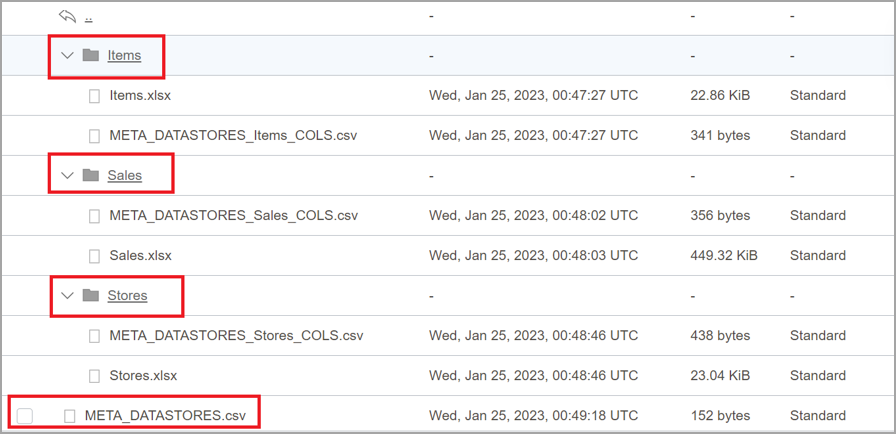
5. Upload the datasets and metadata files to the Object Storage Service Bucket.
6. Ensure that the final structure is similar to the following figure.
C. Obtain the fingerprint of the API key of the user
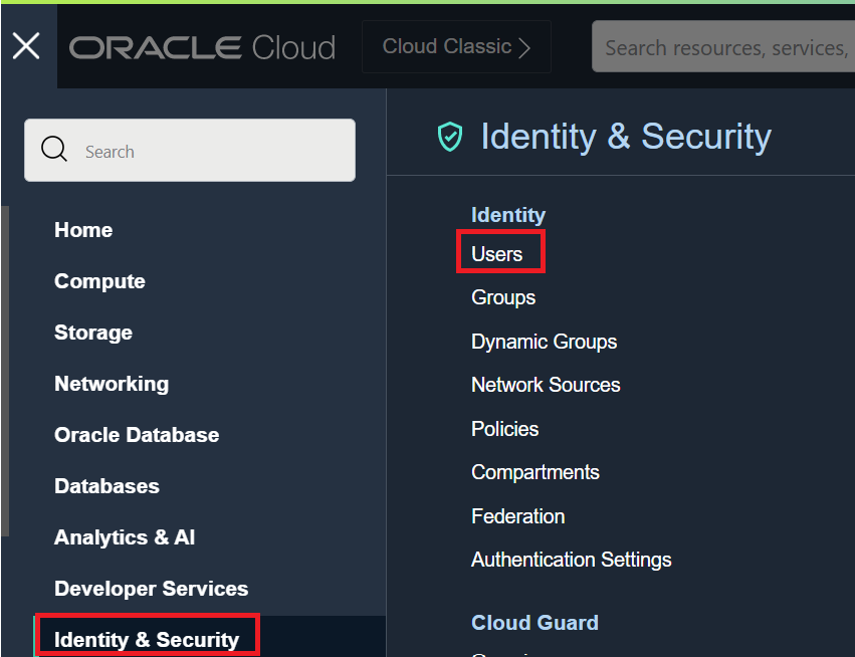
Click Identity & Security and then Users. Identify the user with access to the bucket created in Step (1) of the Create Object Storage Service bucket and the dataset folders section.
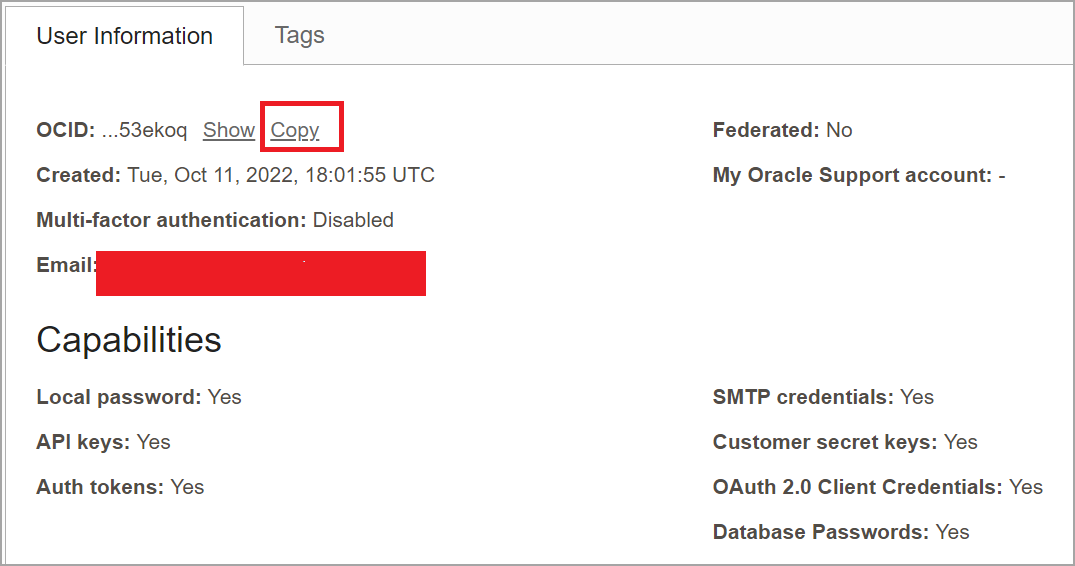
Click Copy. Paste the OCID of the user to a text editor for later use.
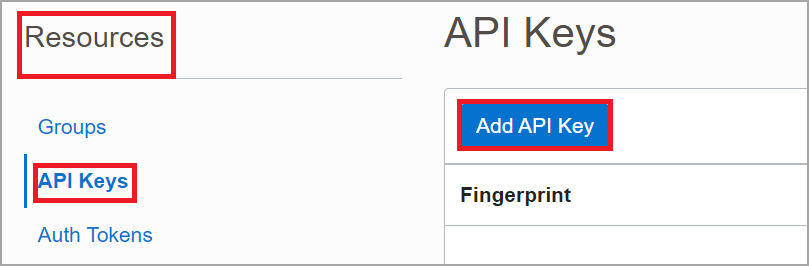
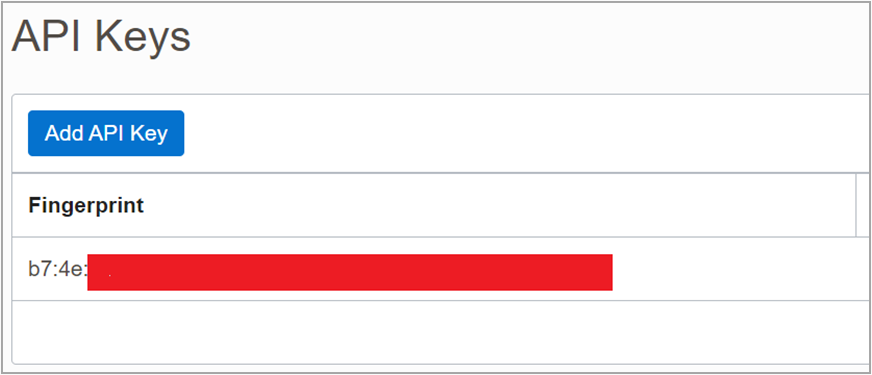
Click Resources, API Keys, and then Add API Key.
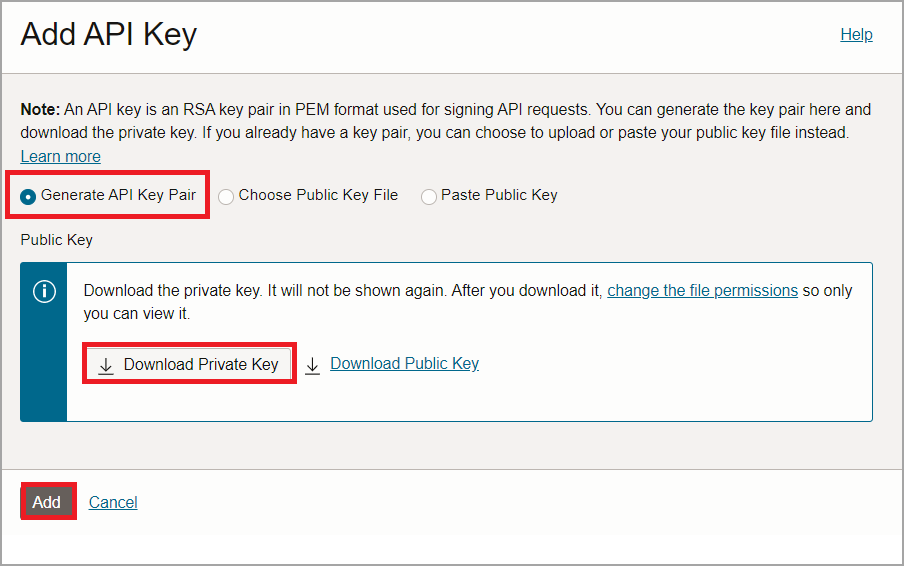
Ensure Generate API Key Pair is selected. Click Download Private Key and then Add. This generates the private key and the fingerprint.
Open the downloaded private key using a text editor.
Copy the contents of the private key to a text editor for later use. Be sure to copy —–BEGIN PRIVATE KEY—– and —–END PRIVATE KEY—–
Copy the fingerprint of the user under API Keys to a text editor for later use.
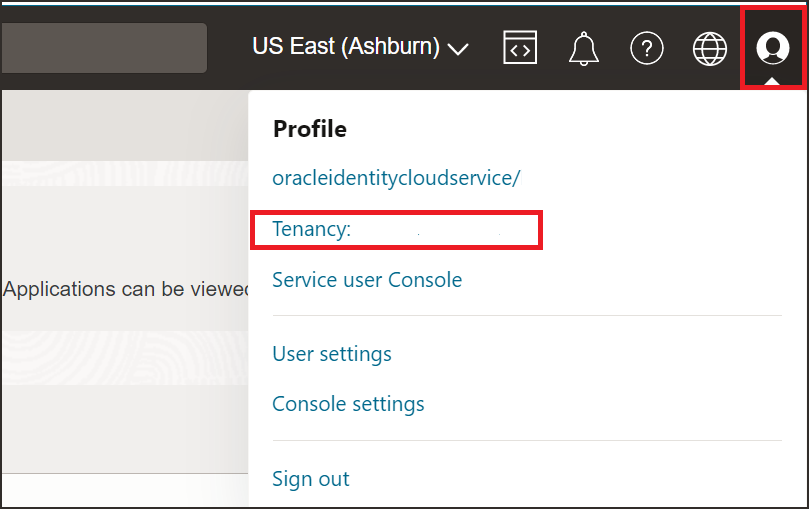
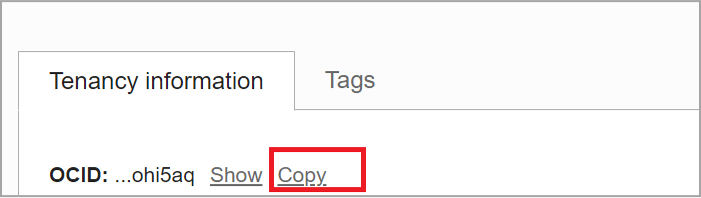
Click Profile, Tenancy and Tenancy Information to obtain the tenancy ID.
Click Copy to copy the Tenancy OCID and save it to a text editor.
D. Enable the Object Storage Service connector in Fusion Analytics
Log in to Fusion Analytics as a user with a Service Administrator role.
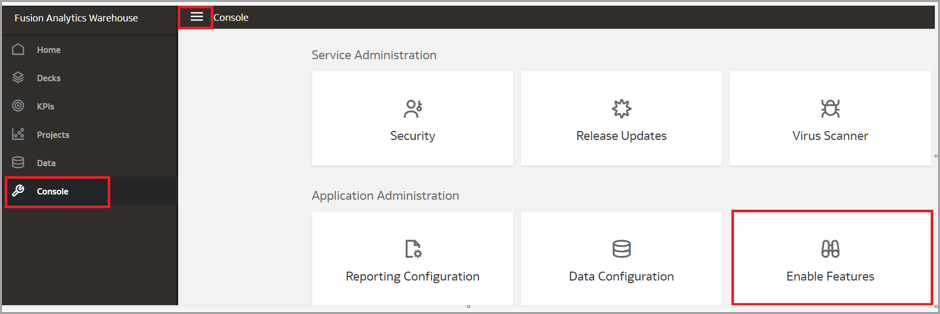
Click Console and Enable Features.
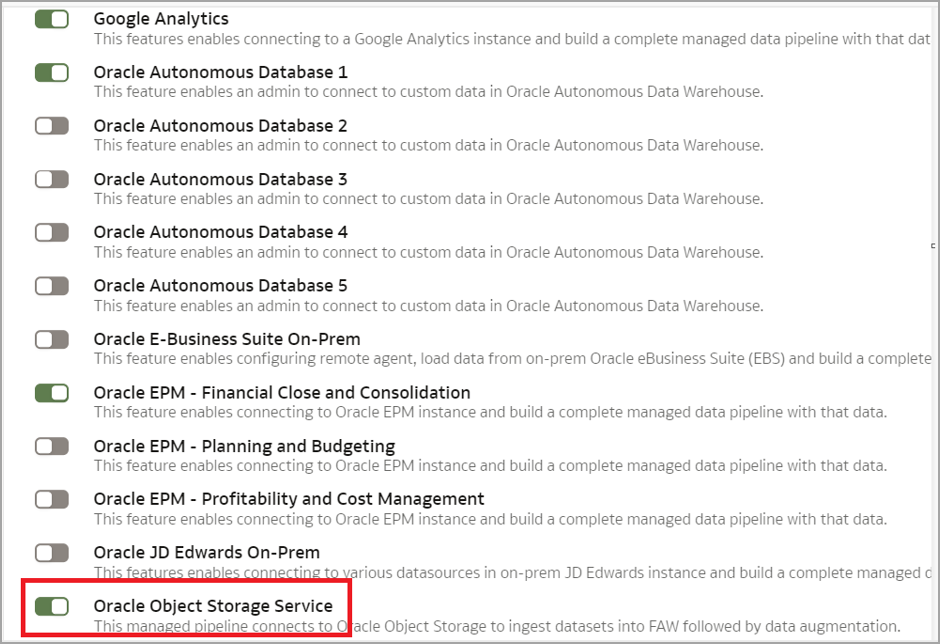
Enable Oracle Object Storage Service.
E. Create an Object Storage Service connection within Fusion Analytics
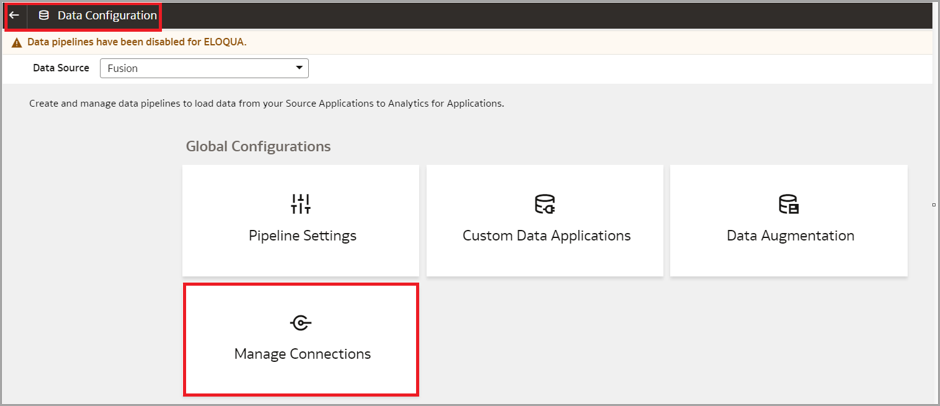
Click Console, Data Configuration, and then Manage Connections.
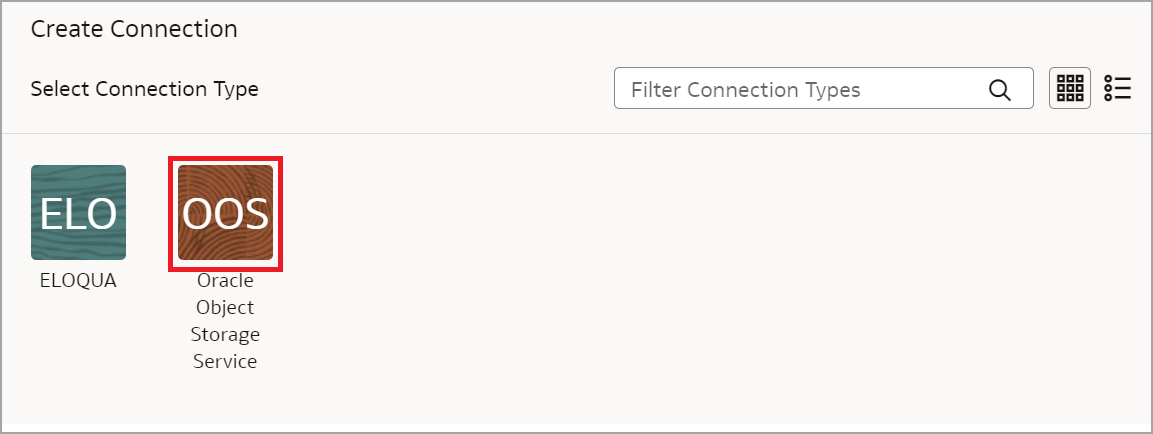
Select Oracle Object Storage Service as the connection type.
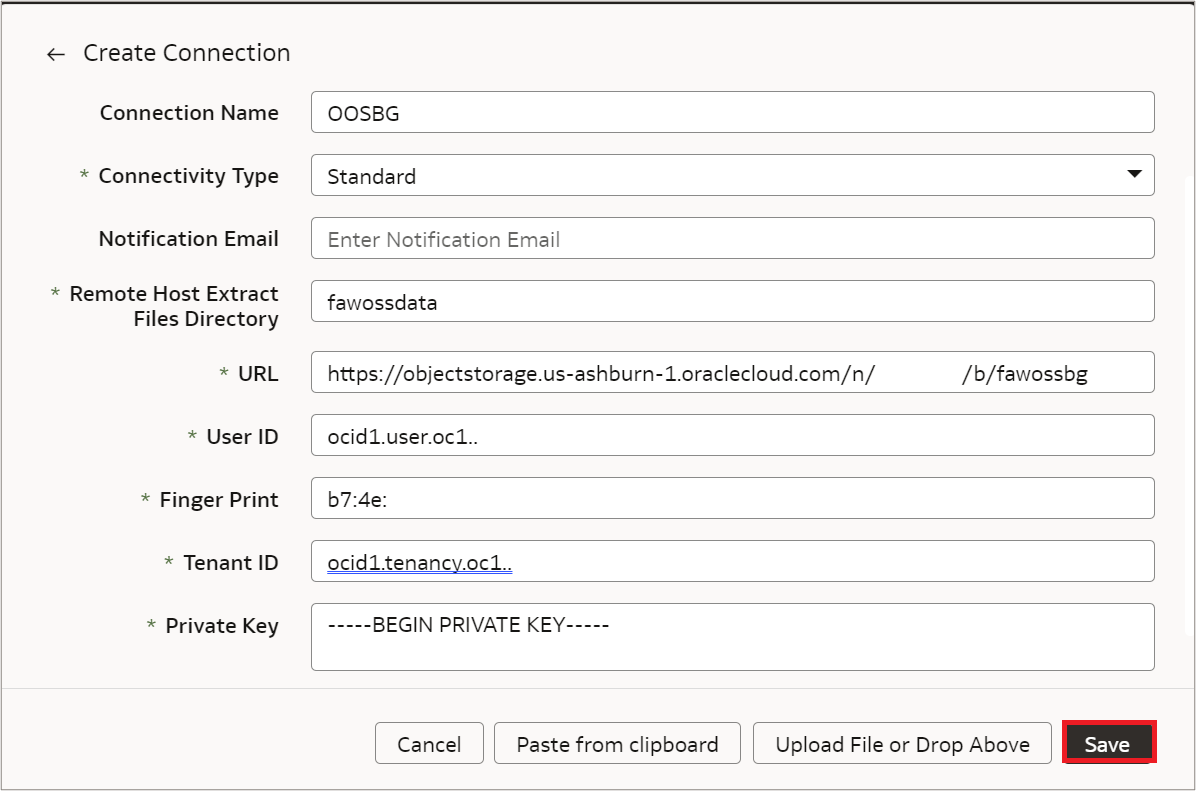
Private Key – Contents of the private key. Ensure it includes BEGIN and END sections.
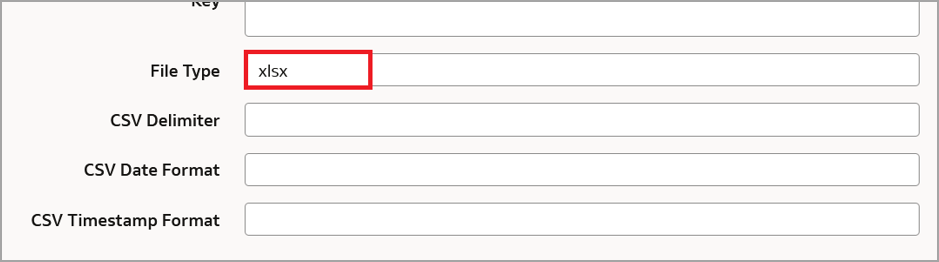
This example uses .xlsx datasets, therefore the File Type is specified as xlsx.
Note: File Type can be either XLSX or CSV. Don’t specify the file type as CSV for XLSX files. Make sure to specify the CSV delimiter, CSV Date Format, and CSV Timestamp Format for the CSV File Type.
Click Save.
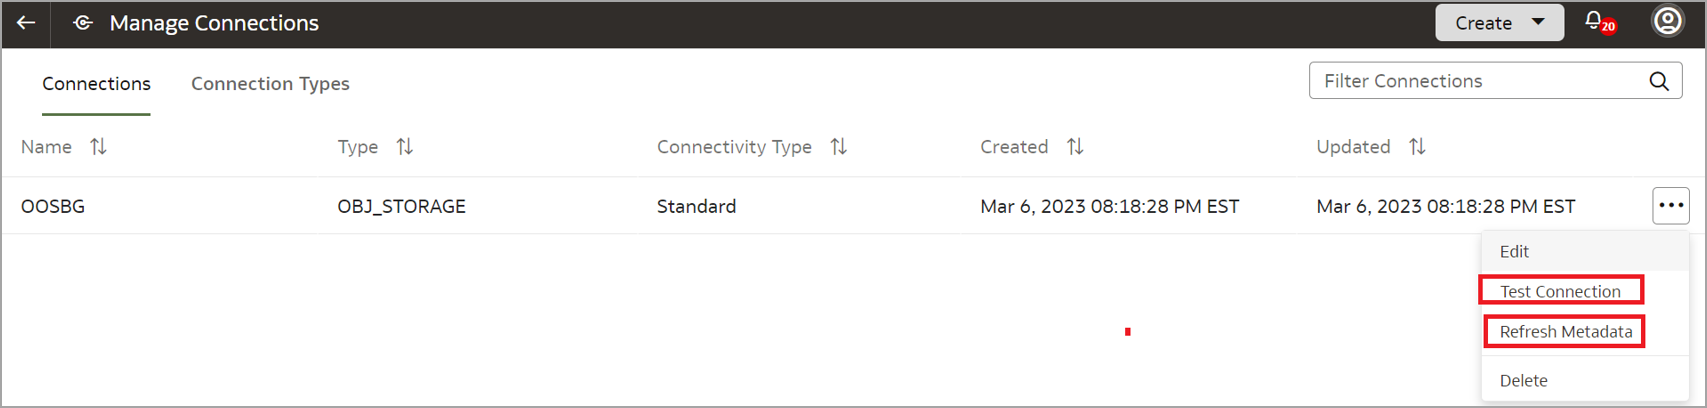
Click the ellipsis button next to the newly created Object Storage Service connection and click Test Connection followed by Refresh Metadata.
Note: Data augmentation won’t work until you refresh the metadata. This ensures that the datasets are available during data augmentation.
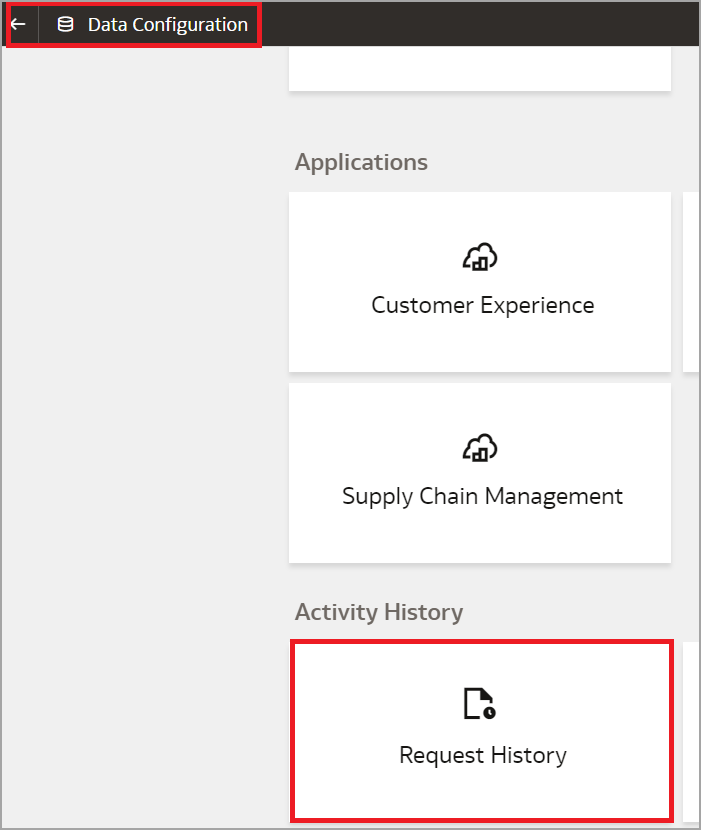
For Connection and Refresh Metadata statuses, click Navigator, Data Configuration, Activity History, and Request History.
F. Load the data into Fusion Analytics using data augmentation
Load the dimension tables first and then the fact table. In this procedure, you load one dimension table and one fact table. Repeat these steps for each dimension table.
To load the Items Dimension table:
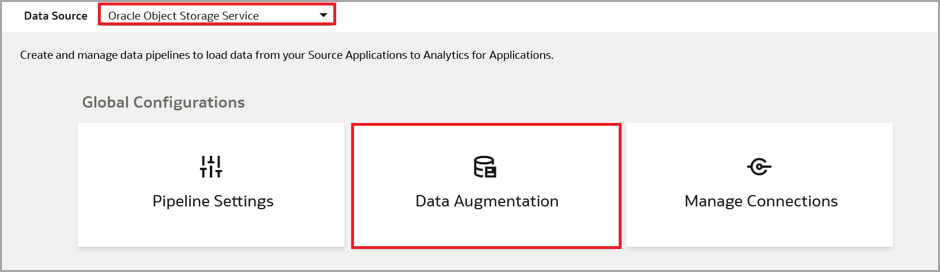
Select “Oracle Object Storage Service” as the Data Source. Navigate to Console, then Data Configuration, and then Data Augmentation
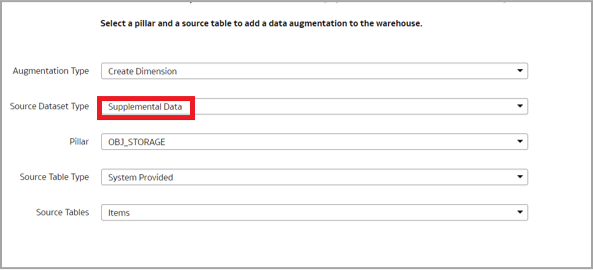
Click Create to create the data augmentation:
Augmentation Type – Create Dimension
Source Data Type – Supplemental Data.
Pillar – OBJ_STORAGE.
Source Table Type – System Provided.
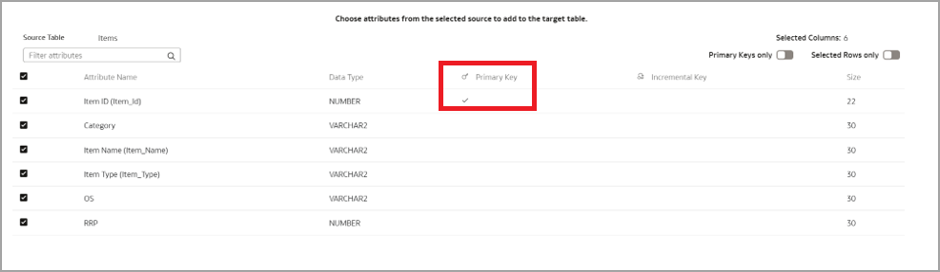
Select the primary key and the attributes.
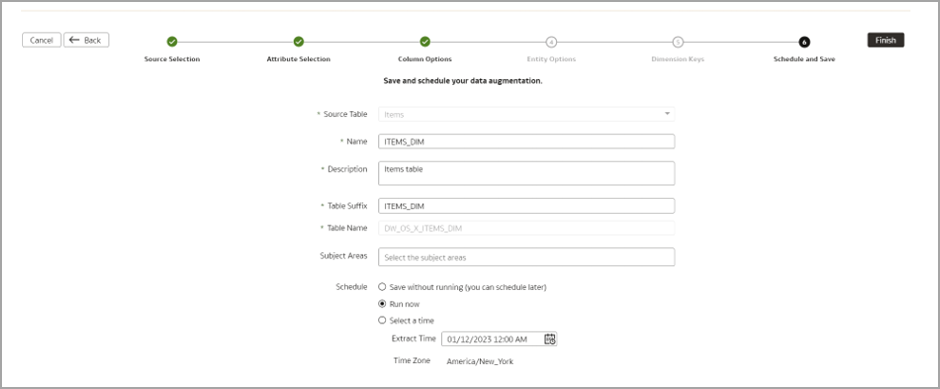
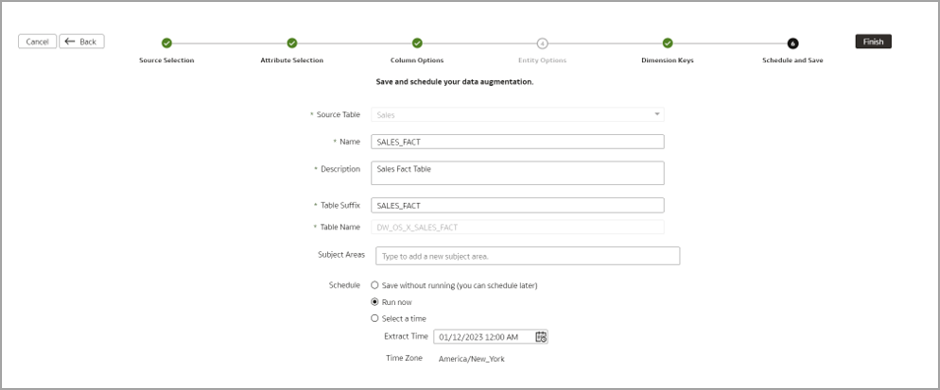
Enter Name, Description, and Table Suffix. Leave the Subject Area field blank. Click Finish.
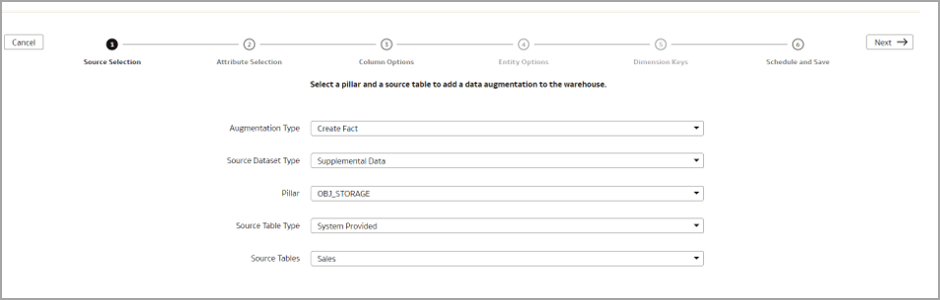
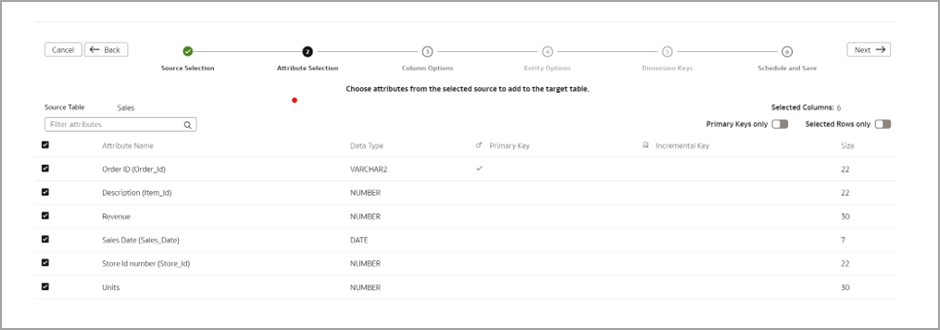
To load the Sales Fact table:
Create data augmentation for the Sales Fact table.
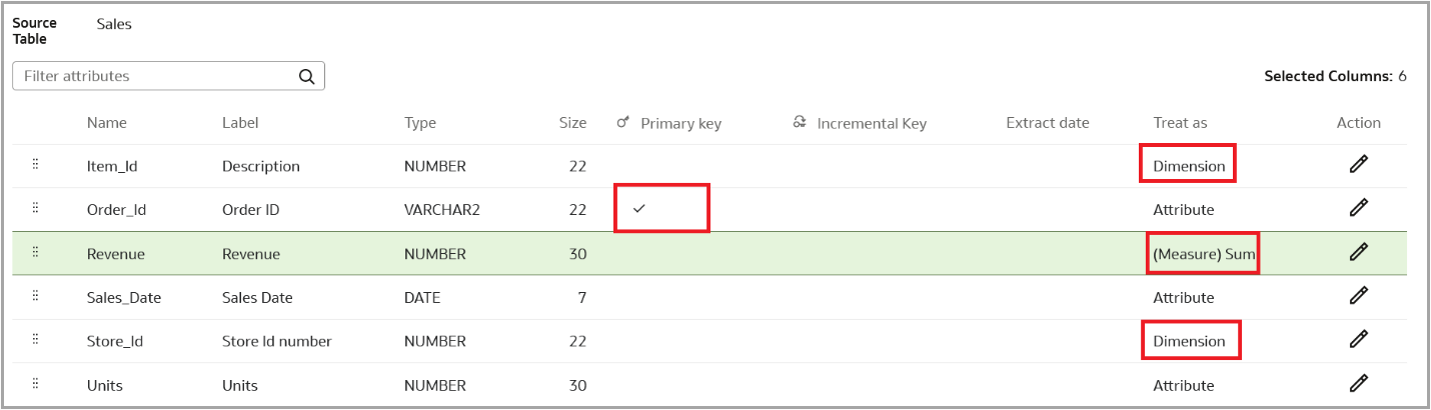
Select the primary key and the attributes.
Select “Treat as” as Dimensions for foreign key columns.
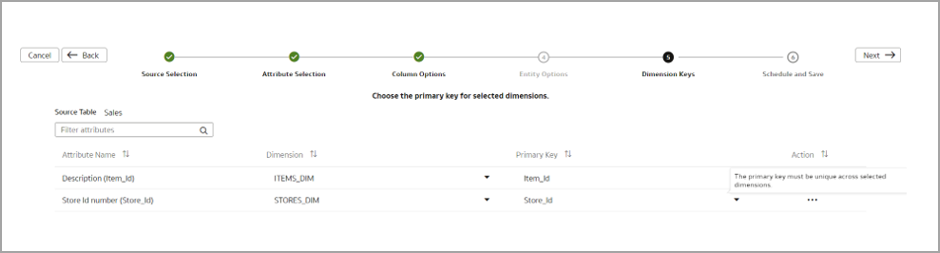
Specify the required joins.
Click Finish.
Once the data augmentation is complete, use OAX_USER to connect to the Oracle Autonomous Data Warehouse (ADW) that Fusion Analytics and verify the data in DW_OS_X_ITEMS_DIM and DW_OS_X_SALES_FACT (table names used in this example). Refer to How to Connect to ADW for guidance.
A seasoned analytics leader with over 25 years of experience, Krithika has been deeply engaged with Fusion Data Intelligence (FDI) since its inception.She brings a strong and consistent track record of driving impact across engineering, product innovation, operations optimization, service excellence, and organizational development. Known for her ability to translate complex technical capabilities into meaningful business outcomes, she has played a key role in shaping strategy while staying closely connected to execution.
In addition to her leadership work, she is an active writer and blogger, sharing practical insights and perspectives drawn from real-world experience. Her thought leadership reflects a deep commitment to bridging technology with customer value, and to enabling organizations to succeed in an increasingly data-driven world.