Role-based filters work by creating filters on application roles in Oracle Analytics Cloud (OAC). You can use either predefined application roles or you can ask your administrator to create user-defined roles that might be required for more complex use cases.
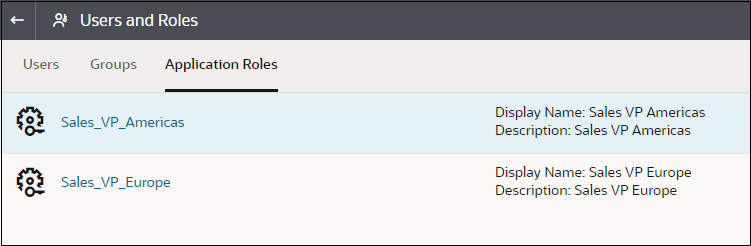
For the first example, you can use two user-defined application roles created in the Console. The first one is for Sales VPs for the Americas and users for that role should see only sales figures for the Americas sales region. The second application role is for Sales VP’s for Europe and, as you likely guessed, you need to create a filter for this role so that users that belong to this role see only sales figures for the European region.
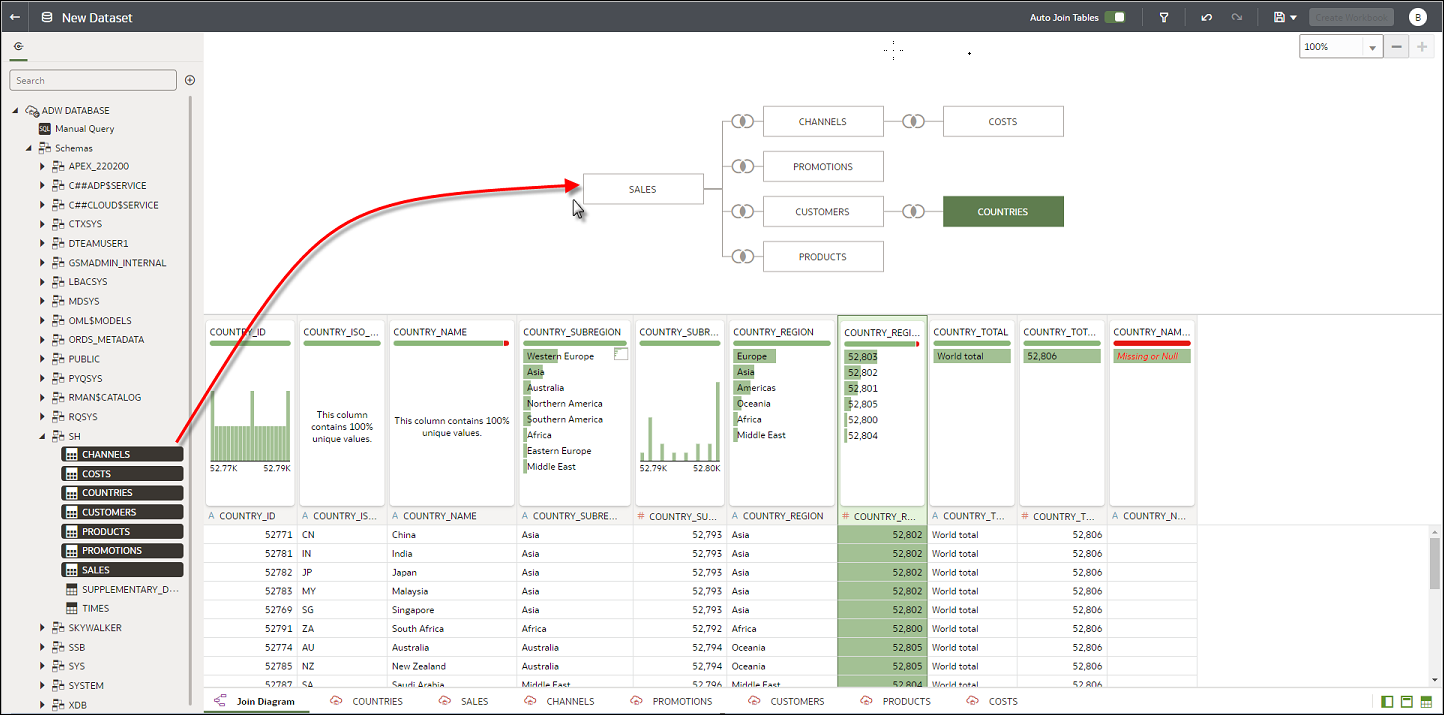
So let’s get started. First, we create a dataset in the Dataset editor by joining several tables from Oracle Autonomous Data Warehouse (ADW), which includes sales information. After the tables are joined, we review the quality of the data using the Data Quality Insights and perform any transformation or enrichments as needed. Once we complete the data preparation steps, the joined tables are saved as a single dataset and shared with workbook authors to build workbooks and dashboards, and the workbooks and dashboards are shared with consumers that have read-only access to the datasets, workbooks, and dashboards.
Before we allow users access to this dataset however, we add the expression filters for each of the application roles described earlier. These role-based filters limit the data that consumers of this dataset can see based on their specific roles. To create our first role-based filter, we click the Role Based Filter icon on the top right of the Dataset editor and select Sales VP for the Americas role from the drop-down list. We then click the plus button to create one or more expression-based filters for this application role. We create an expression filter using the Countries table in the dataset, which contains the COUNTRY_REGION to use to filter the data seen by the consumers of this dataset based on their roles. Because users of this role should see only sales figures for the Americas, we give the filter a name and enter a simple expression filter of COUNTRY_REGION = ‘Americas’.
Note: The filters can be simple or as complex as required. After validating the filter, we click the Apply button to add the filter.
Adding a second role and filter is just as easy. To enter the filter for the users belonging to the Europe Sales VP’s role, we click the plus icon to the right of the first role and select the Sales VP’s for Europe role from the drop-down list. We click the plus button to add the expression filter for this role. We can name the filter “Western Europe VP Role” and in the Expression editor, enter Country_Region = ‘Europe’. We validate and click Apply to add this second role. And that’s all we have to do.
Now we can save this dataset and share it with the appropriate users. The way that role-based filters work is that we can share the dataset with any authenticated users in the system; but when they create workbooks from the dataset containing our role-based filters, only users belonging to one of the two roles can see any data. Based on their perspective roles, they see only data based on the filters we just created. Therefore, for this example, we grant all authenticated users read-only access to the data.
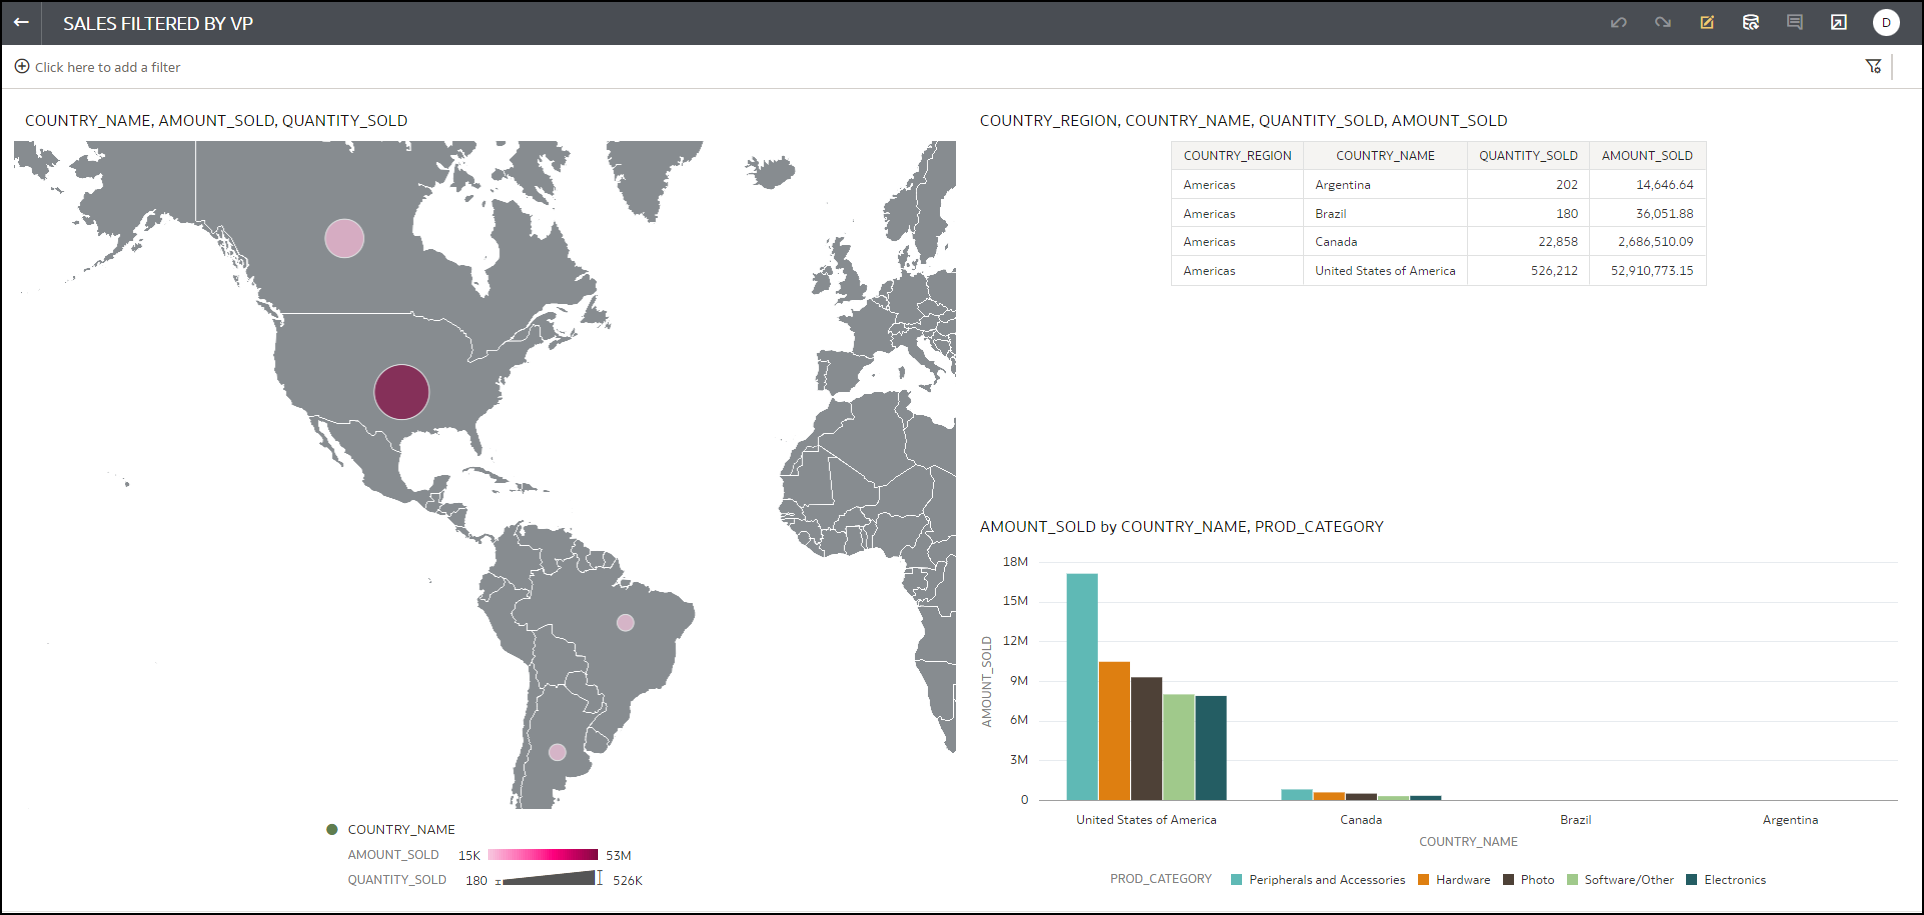
Let’s test it out. Let’s sign in as a user that belongs to the Sales VP Americas application role and create a workbook from this dataset. We pick a few dimensions and some facts and notice that the visualizations show only data from countries in the Americas.
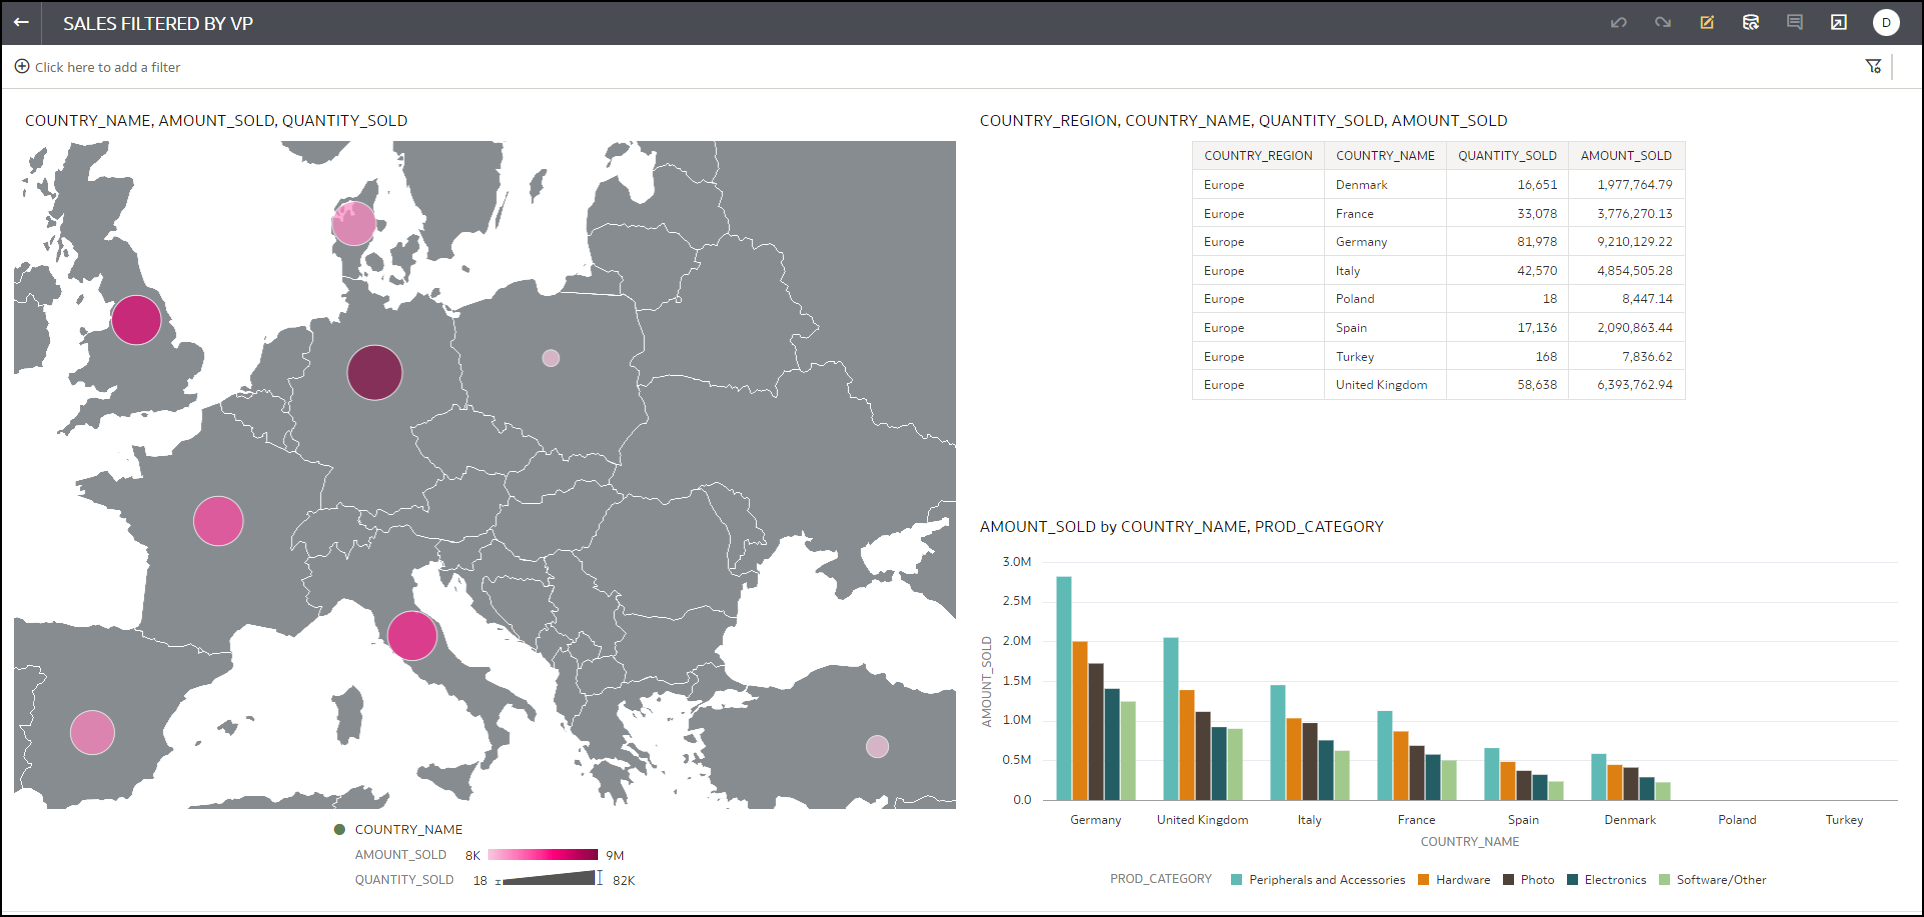
If we sign in as a user that belongs to the Sales VP’s for Europe application role and use the same dataset to create a similar workbook, notice that this user sees only data for the European sales region.
Note: If a user that doesn’t belong to either of the two roles creates a workbook or opens an existing workbook with role-based filters enabled, that user won’t see any data, because they won’t meet the criteria for the filters, which is to be assigned one of the two roles specified.
Logical operation of role-based filters
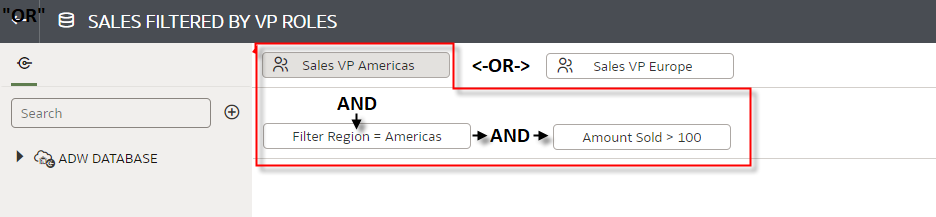
For logical operation of role-based filters, the user must first satisfy participation in the role and then satisfy all of the expression filter criteria. In the following example, the user must be assigned the Sales VPs for Americas role and then the data is filtered for this user to see only rows where the Country_Region is “Americas” and where the Amount_Sold is greater than 100. If an OR operator is required within a role, it must be done within the same expression filter.
Complex expressions
In the previous example, we used a straightforward expression for each of the role-based filters. However, the expression filters can also be more complex and can reference multiple tables participating in the dataset if the use case requires it. The following are some examples of more complex filters and explanations of how they might work. The expressions support any combination of operators such as comparison, logical, and mathematical operators.
Comparison operators
Let’s say that in the previous example, our sales VPs for the Americas also need to see sales values in the Oceania region. In this case, we can use an IN clause and enter the appropriate regions that can be seen by this particular role.
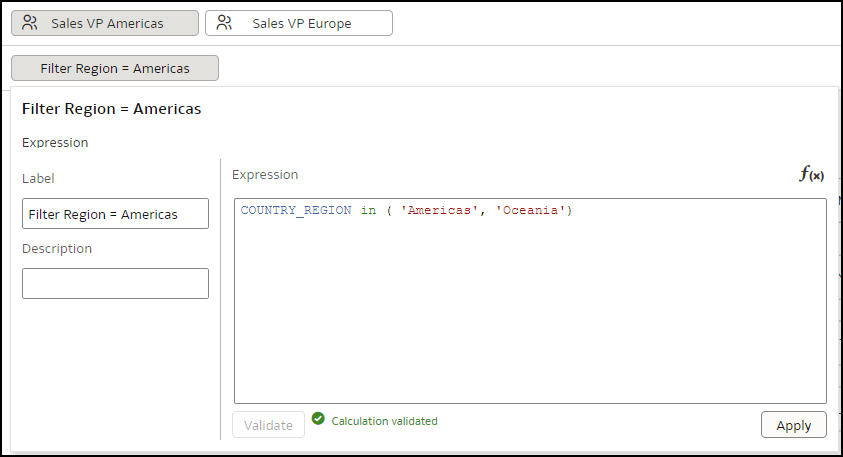
The OR operator
It’s important to reemphasize that if the role-based filter requires that criteria A or criteria B be satisfied, that must be done within the same expression, because two expressions are combined with an AND operator. An example using the roles explained earlier can be if the Sales VP for the Americas needs to see any sales figures from the Americas country_region or customers in American Samoa. The expression would be as follows:

Using the USER() variable
Finally, there’s another powerful feature of role-based filters that allows the use of the USER() variable. Specifying this variable allows you to use a single role-based filter that’s enforced based on the authenticated user consuming the data. This type of filter requires an extra table in your dataset that must include the user names and one or more columns to be used for the filter.
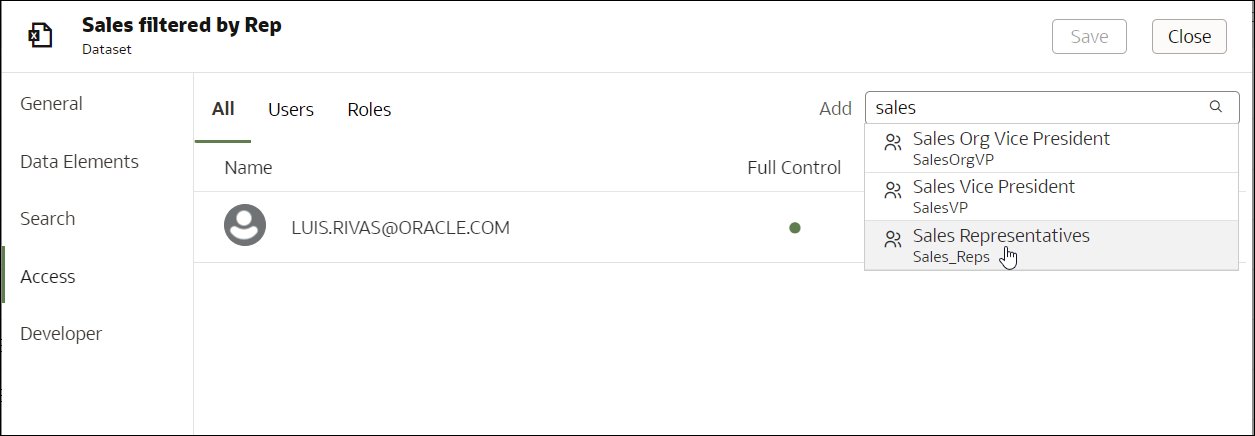
The following example includes a single role of Sales Representatives. We can leverage a table that holds sales information by the user name of each sales representative. And in the expression filter, we specify an expression that filters the information based on the logged-on user name to the name of the sales representative and filter the data for each representative to see only their sales information.
We can now share this dataset with everyone in the Sales Representatives role. In the previous example, we shared the dataset with all authenticated users, but we can also reduce the number of users who can see the dataset by sharing only with the appropriate groups.
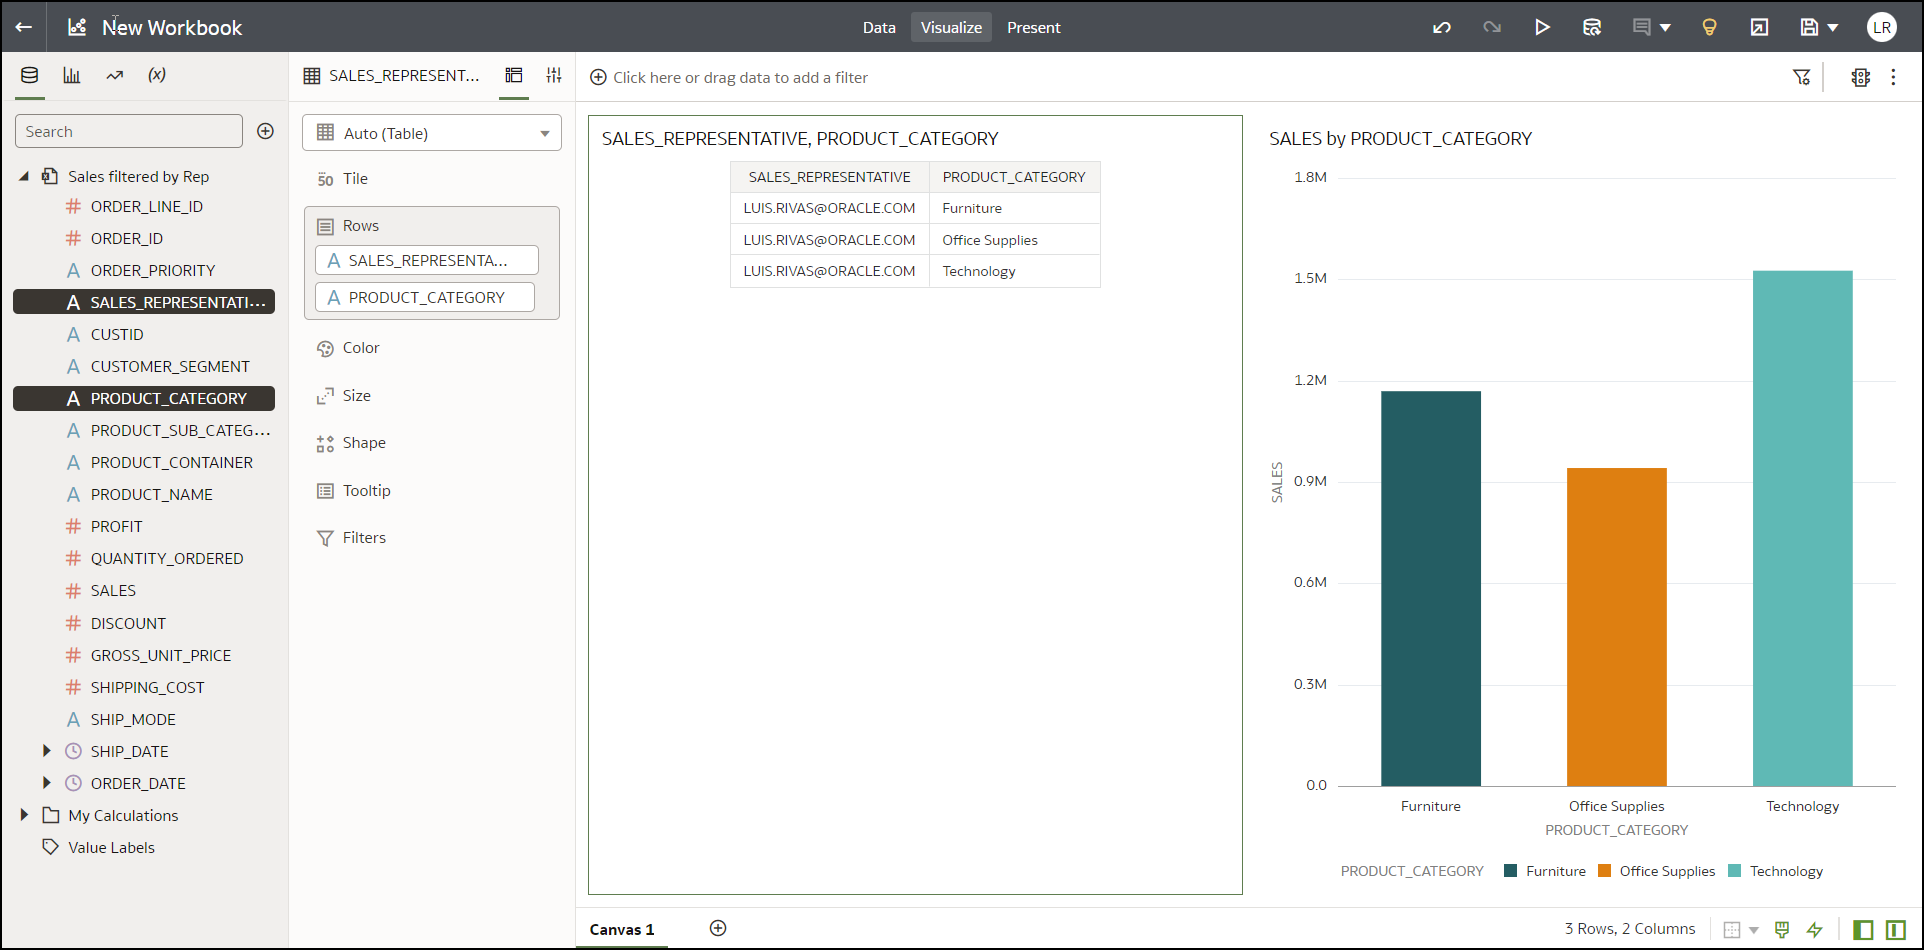
At this point, all users belonging to the Sales Representatives application role have read access to the dataset. Because I’m one of the sales representatives, I can create a workbook. Notice that I can see only my sales data, because my USER() variable matches the Sales Representative filter for my role.
Call to action
We hope that you found this information useful and that you’ll experiment with creating datasets with role-based filters. As you’ve learned from this example, role-based filters are easy to use, and you can create them with predefined or user-defined application roles. You can also use very simple or complex expressions. And make sure to stay tuned for additional blogs with more tips and tricks! See the documentation for additional information.