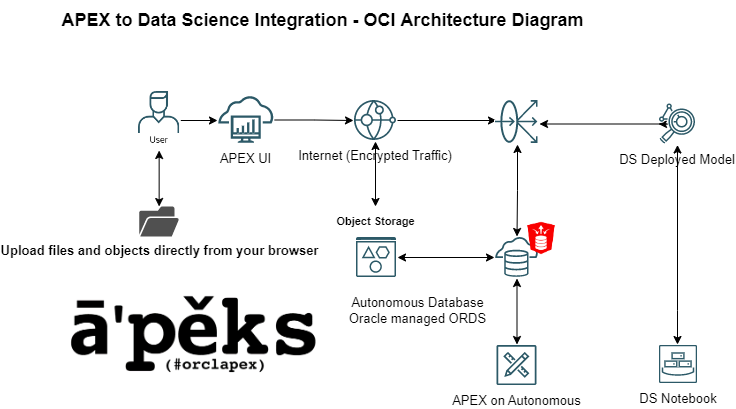
Customers often ask us how to integrate APEX and Oracle Cloud Infrastructure (OCI) Data Science. This blog provides an example use case, in which we use and deploy a pretrained Yolov5 model using OCI Data Science and then invoke the deployed Yolov5 model to visualize the results using APEX. Yolov5 is a well-known open source vision framework, from which we apply object detection. The blog and associated detailed steps consist of two main services: OCI Data Science and APEX.
Using OCI Data Science to run object detection
In the OCI Data Science section, we describe how to run object detection using a Yolov5 prebuilt model. This process enables you to automatically detect objects like cars, persons, animals, and many more categories out of the box. You can also use your own Yolov5 weights to detect custom objects.
Using the Yolov5 framework, we create our own custom conda environment needed for model inferencing, storing the model in the model catalog, and deploying the model. All steps are done within the notebook. Besides automatically provisioning the required infrastructure and load balancing, the model deployment also creates a REST API. You can find the notebook on GitHub.
Using APEX to apply trained Data Science models
In the APEX section, we look at using our freshly created Data Science model. We consume OCI deployed Data Science API endpoints through APEX with the ability to define parameters that are passed back to the Data Science service.
Completing this chapter requires some prework. Otherwise, we’d end up with a very lengthy article! If you’re not familiar with uploading files to OCI Object Storage through APEX, follow the steps on Uploading files to OCI Object Storage via APEX.
Overview of OCI Data Science and APEX architecture
You need the following prerequisites:
-
A notebook session provisioned in Oracle Data Science
-
All policies for the model catalog and model deployment in place
-
An autonomous database (Autonomous Transaction Processing or Autonomous Data Warehouse) provisioned with APEX
-
The ability and policies to create and use an Object Storage bucket
-
An OCI API key
Process steps
1. Create an Object Storage bucket.
In the Oracle Cloud Console, go to Object Storage and create a new bucket. Note your bucket name and the namespace. In the following example, the bucket name is “demo_blog”. You use this bucket to store your published custom conda environment and store images for the deployed model to pick up.

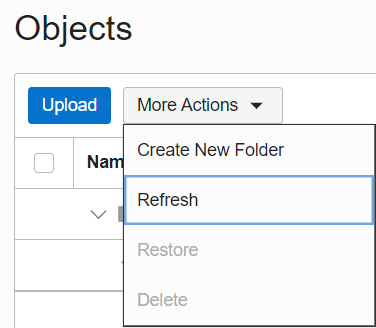
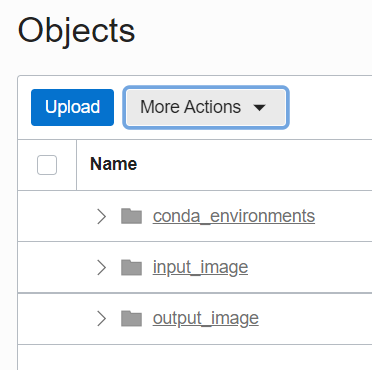
In the newly created bucket, create two sub-buckets by clicking More Actions. Next, click Create New Folder. Name one sub-bucket “input_image” and the other sub-bucket “output_image.”
2. Start a notebook session in OCI Data Science.
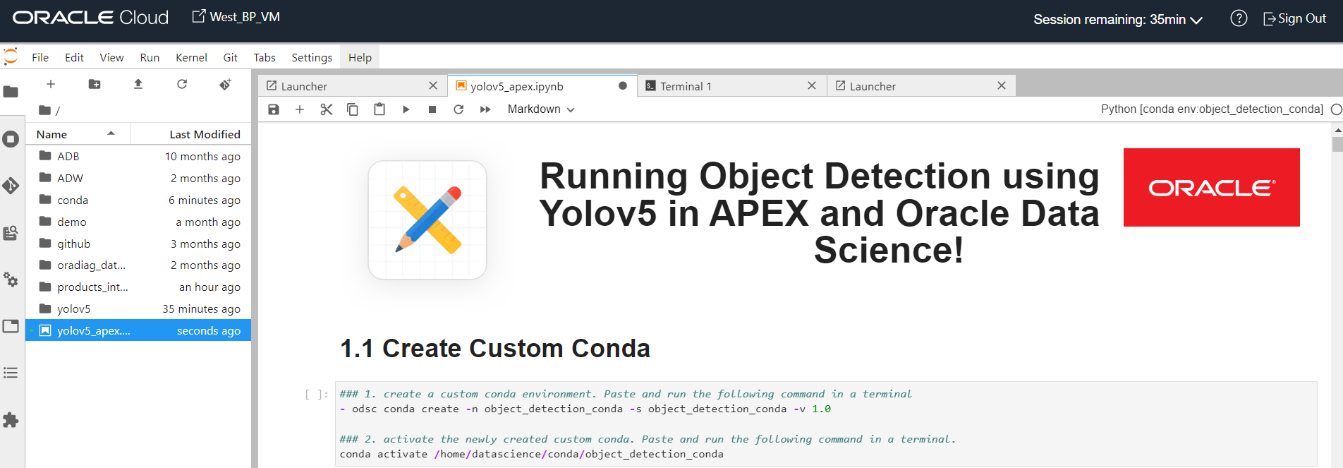
Open a notebook session in OCI Data Science and upload the notebook. You can download the notebook from GitHub. Drag and drop or upload the notebook into the home directory (“/home/datascience”). Open the notebook named “yolov5_apex.ipynb.”
Within the OCI Data Science notebook session, we first create a custom conda environment. For more information on how to create a custom conda environment, see How to create a new conda environment in OCI Data Science. Open a terminal and run the following command:
odsc conda create -n object_detection_conda -s object_detection_conda -v 1.0
When your new custom conda has successfully been installed, run the following command to activate the custom conda environment:
conda activate /home/datascience/conda/object_detection_apex_conda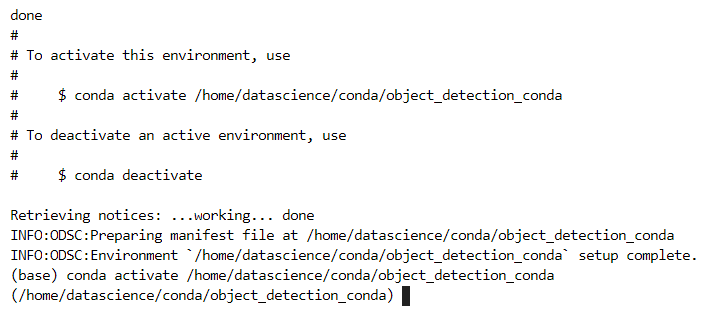
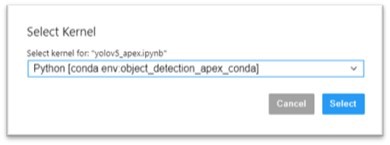
Open the “yolov5_apex.ipynb” notebook and switch kernels to your newly created custom conda “object_detection_apex_conda.” You can change the kernel in the top-right corner of the notebook session.
Before you follow the steps in the notebook, review the following notes:
-
Change your kernel to “object_detection_apex_conda” before running the following cells.
-
The notebook assumes that you’re working in the home directory (/home/datascience).
-
The notebook uses a specific bucket name and namespace. Replace your bucket name and namespace each time you see “YOUR_BUCKET_NAME” and “YOUR_NAMESPACE.”
-
The images used are in .jpg format.
Custom conda
-
Create the custom conda.
-
Clone the Yolov5 GitHub repo and perform installation.
-
Clone the Yolov5 github and install dependencies.
-
Other installations
-
Test the Yolov5 on a sample image.
-
-
Publish the conda to OCI Object Storage.
-
Create the model artifacts and save to the model catalog.
-
Create the model artifacts.
-
Copy the Yolov5 library into the model artifacts.
-
Check all model artifacts.
-
Save model artifacts to the model catalog.
-
-
Create Model Deployment and test REST API
-
Model deployment configuration
-
Create the model deployment.
-
Test the deployed model using the REST API.
-
Building out the APEX application
Now that you can upload files, let’s supplement our application with a Data Science model. As a bonus, we display the results of our machine learning (ML) model directly in APEX. We start by creating our web credentials. If you completed the prework, you can skip to the REST Data Source creation section.
Authentication
-
Under App Builder, navigate to Workspace Utilities and select Web Credentials.
-
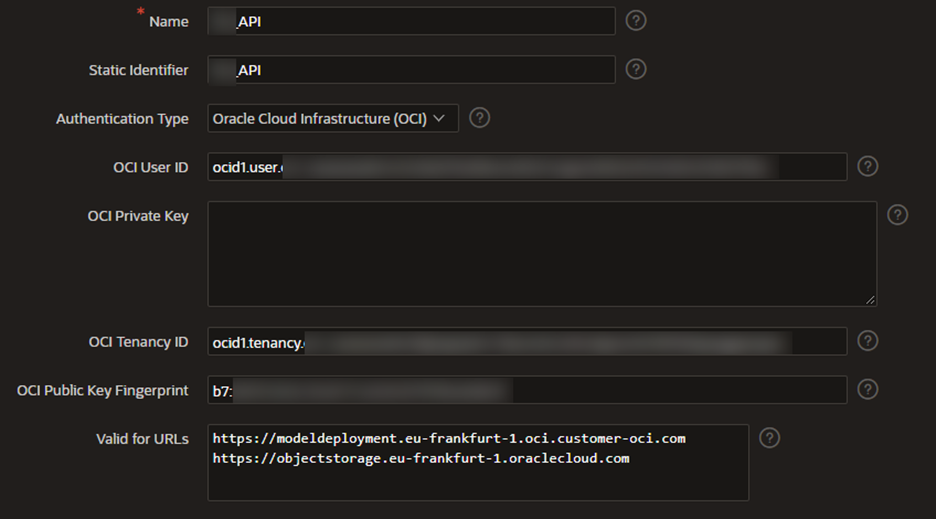
Create an OCI credential using the details obtained from the OCI API Key and save.
We use the static identifier later to create the API request to the Data Science environment and Object Storage, so keep that somewhere safe.Whenever you make a change, the OCI private key must be added again. Ensure that you include the Object Storage and Data Science Model URLs within the “Valid for URLs” section.
Creating the REST data source
-
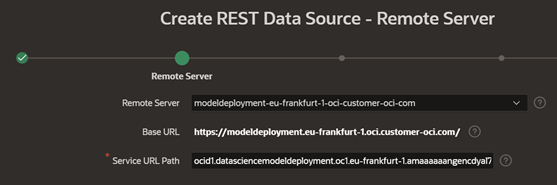
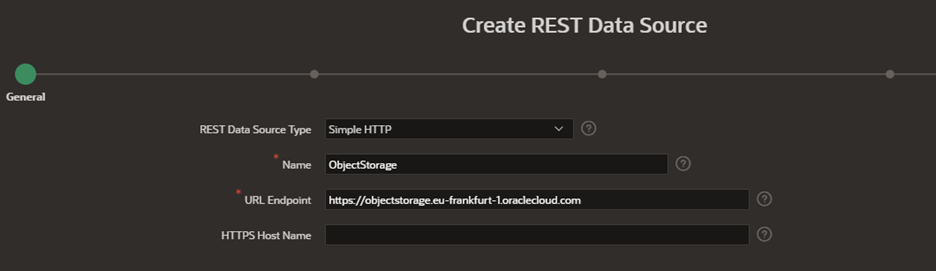
Under Application, navigate to Shared Components, select REST Data Sources and create a REST data source from scratch. Indicate the name and the URL endpoint of your Data Science endpoint.
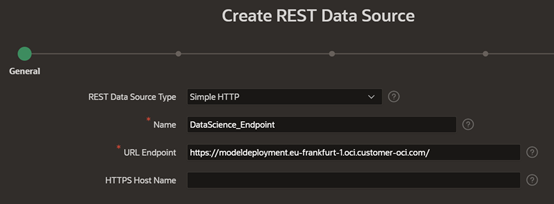
-
Indicate the deployment model path that comes after the ..oci-customer-oci.com/ within the service URL path.
-
Select “No Pagination” as the pagination type.
-
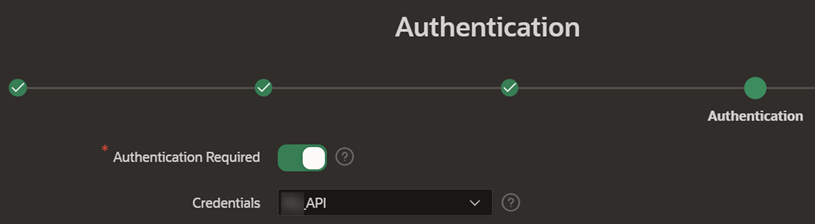
Select “Authentication Required” and choose the previously created web credentials.
-
Select advanced and configure the following parameters:
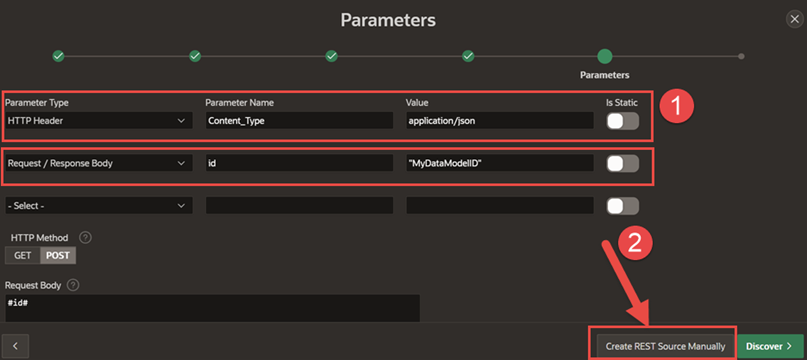
-
Click Create REST Source Manually.
-
Open the created REST data source.
-
Remove the other operations highlighted in red by clicking the pencil icon and selecting Delete.
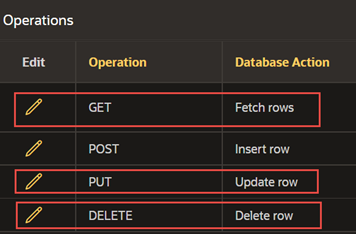
-
Adjust the POST operation to Fetch Rows and add the #id# parameter to the “Request Body Template.”

-
Apply the changes.
Now we can start using this REST data source in our application and click the required parameters.
Data Science: Consuming the APIs
-
Create a blank page.
-
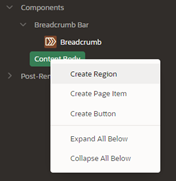
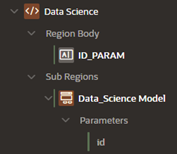
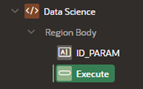
Create a region.
-
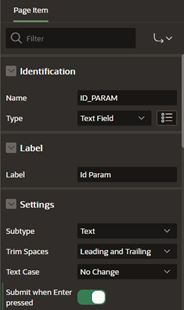
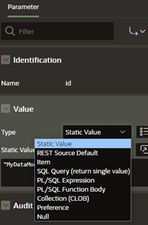
Create a page item to hold our ID parameter.
-
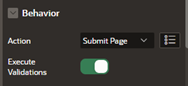
Configure the page item to submit when clicking Enter.
-
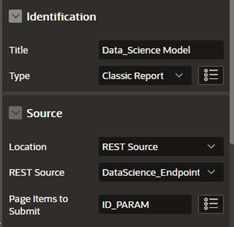
Create a subregion with the type “Classic Report.”
-
Choose “REST Source” as the source and select the created rest data source.
-
Select ID_PARAM as the page item to be submitted.
-
Now, you can map ID_PARAM to the ID parameter within the REST data source by indicating the item type and selecting the page item. You can also reference the parameter from within a static value using “&ID_PARAM.”
-
Now we’re ready to save and run our screen. After passing the parameter and clicking Enter, the data model runs.
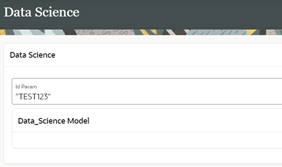
You can also choose to create a button configured with the action “Submit Page.” It submits the value and runs the Data Science model.
We can now run the Data Science model. But how do we preview the output?
Listing Object Storage files
-
Create a REST data source and point it to Object Storage. You can find the APIs for all the regions in Object Storage Service API.
-
Click Next and complete the service URL Path. The service URL path follows the pattern, /n/namespace/b/:bucket_name/o. Then click Next.

-
Select “No pagination” and click Next.
-
Turn on “Authentication Required” using the previously created credentials and click Advanced.
-
Configure a URL pattern variable parameter, passing the bucket_name variable and its value.
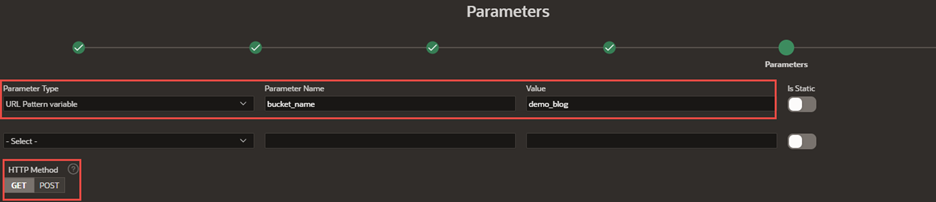
-
Click Discover to see a list of your files within the bucket.
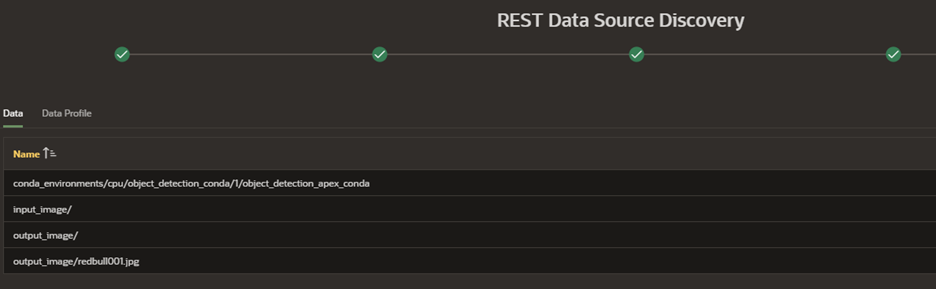
-
Finally, click Create REST Data Source.
Object Storage image preview
-
Create a blank page.
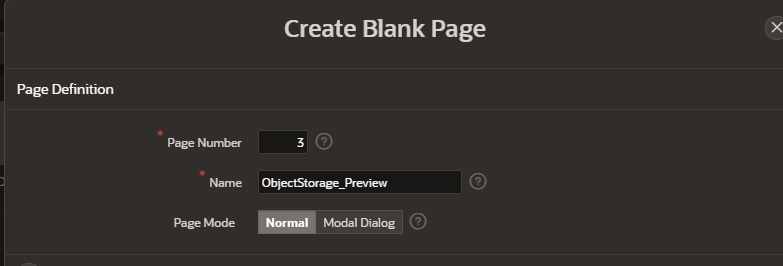
-
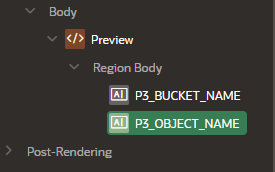
Create a region and two page items to hold our Object Storage parameters.
-
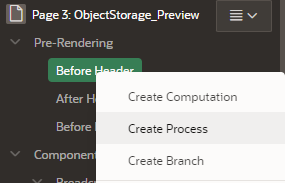
Now, create a process.
-
Add the PL/SQL code for the process and adjust the following variables:
-
Object Storage object name: “P3_OBJECT_NAME”
-
Web credential static ID: “Your_Static_Credential_ID”
-
Object Storage namespace and BucketName.
declare
l_request_url    varchar2(32767);
l_content_type varchar2(32767);
l_content_length varchar2(32767);
l_response         blob;
download_failed_exception exception;

begin
l_request_url := 'https://objectstorage.eu-frankfurt-1.oraclecloud.com/n/NAMESPACE/b/BucketName/o/'||apex_util.url_encode(:P3_OBJECT_NAME);
l_response := apex_web_service.make_rest_request_b(
                                                         p_url     => l_request_url,
                                                          p_http_method => 'GET',
                                                          p_credential_static_id   => 'Your_Static_Credential_ID');
if apex_web_service.g_status_code != 200 then
              raise download_failed_exception;
end if;

for i in 1..apex_web_service.g_headers.count loop
if apex_web_service.g_headers(i).name = 'Content-Length' then
l_content_length := apex_web_service.g_headers(i).value;
end if;
if apex_web_service.g_headers(i).name = 'Content-Type' then
l_content_type := apex_web_service.g_headers(i).value;
end if;
end loop;
sys.htp.init;
if l_content_type is not null then
sys.owa_util.mime_header(trim(l_content_type),false);
end if;
sys.htp.p('Content-length: '||l_content_length);
sys.htp.p('Content-Disposition: attachment; filename="'||:P3_OBJECT_NAME||'"');
sys.htp.p('Cache-Control: max-age=3600');
sys.owa_util.http_header_close;
sys.wpg_docload.download_file(l_response);
apex_application.stop_apex_engine;
exception
when others then
raise_application_error(-20001,'An error was encountered - '||SQLCODE||' - ERROR- '||SQLERRM);
end download_file;
-
-
Now, go back to the page where you want to display the file.
-
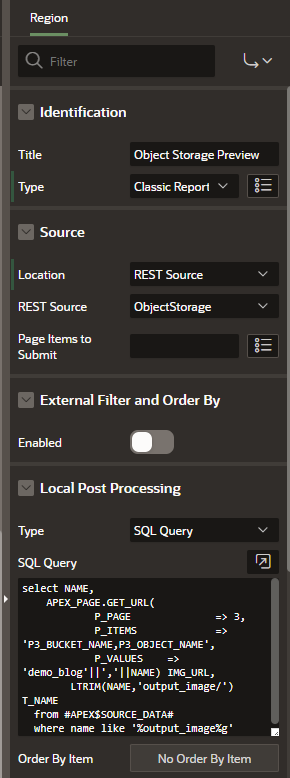
Create a new region of type “Classic Report” and configure the source as a REST Source, indicating the ObjectStorage REST data source that we created. Configure the local post processing as SQL Query with the following code:
select NAME,
    APEX_PAGE.GET_URL(
                  P_PAGE                         => 3,
                  P_ITEMS                       => 'P3_BUCKET_NAME,P3_OBJECT_NAME',
                  P_VALUES      => ‘My_Bucket’||','||NAME) IMG_URL,
        LTRIM(NAME,'output_image/') T_NAME
  from #APEX$SOURCE_DATA#
  where name like '%output_image%g'
Next, we apply some more filtering to select a specific folder ‘output_image’ within the bucket.
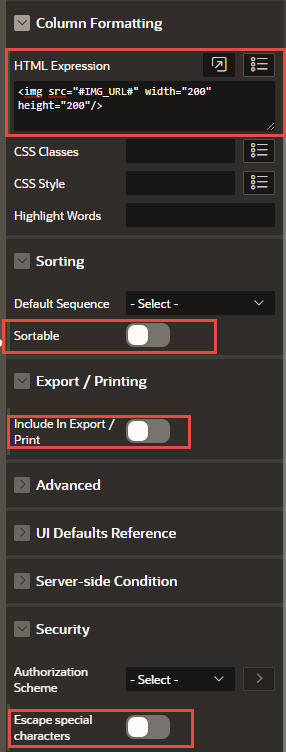
Now to display the image correctly, we need to adjust the column parameters for the IMG_URL.
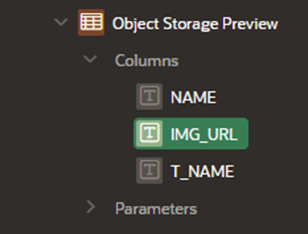
In the column formatting paste, the following HTML expression, you can adjust the width and the height of the image to your needs:
<img src="#IMG_URL#" width="200" height="200"/>Disable the following options:
-
Sortable (No)
-
Escape special characters (No)
-
Include in Export / Print (No)

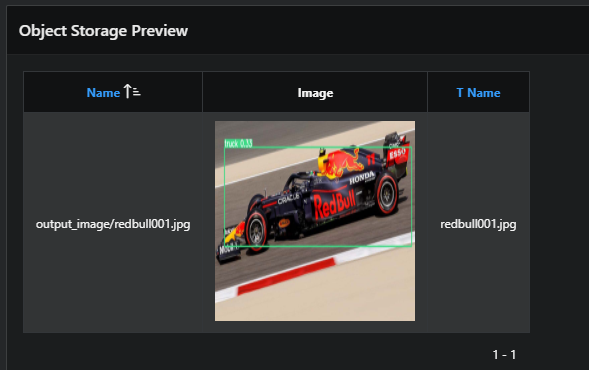
Results
With all the steps completed, you can now upload an image to OCI Object Storage, process it using Data Science and display the analyzed image within one APEX application page, as you can see in the following video!
That’s all for this guide! You can use this approach to create more advanced scenarios with Data Science and other OCI services integrated together with the help of APEX. Thanks for reading and stay tuned for more content!
Want to experiment further? Try an Oracle Cloud free trial! A 30-day trial with US$300 in free credits gives you access to Oracle Cloud Infrastructure Data Science service.
Want to learn more? See the following resources:
-
Read the Data Science documentation.
-
Configure your OCI tenancy with these setup instructions and start using OCI Data Science.
-
Star and clone our new GitHub repo! We included notebook tutorials and code samples.
-
Subscribe to our Twitter feed.
-
Try one of our LiveLabs. Search for “data science.”
-
Join the AI and Data Science public Slack channel.
-
Contact us directly for preview access to new features.